How to Use Raspberry Pi LCD Capacitive Touch Screen 7 inch 1024*600 HDMI Display Touch Screen: Examples, Pinouts, and Specs
Introduction
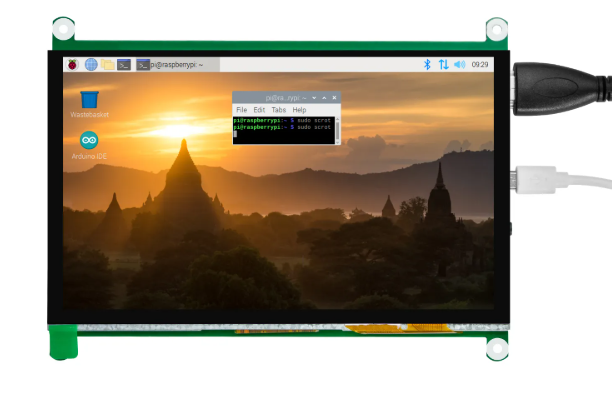
The 7-inch capacitive touch screen display is a versatile and high-resolution display designed specifically for use with the Raspberry Pi. With a resolution of 1024x600, this display provides clear and vibrant visuals, making it ideal for a variety of applications. The touch screen functionality adds an interactive element, allowing users to control their Raspberry Pi projects directly from the screen.
Explore Projects Built with Raspberry Pi LCD Capacitive Touch Screen 7 inch 1024*600 HDMI Display Touch Screen

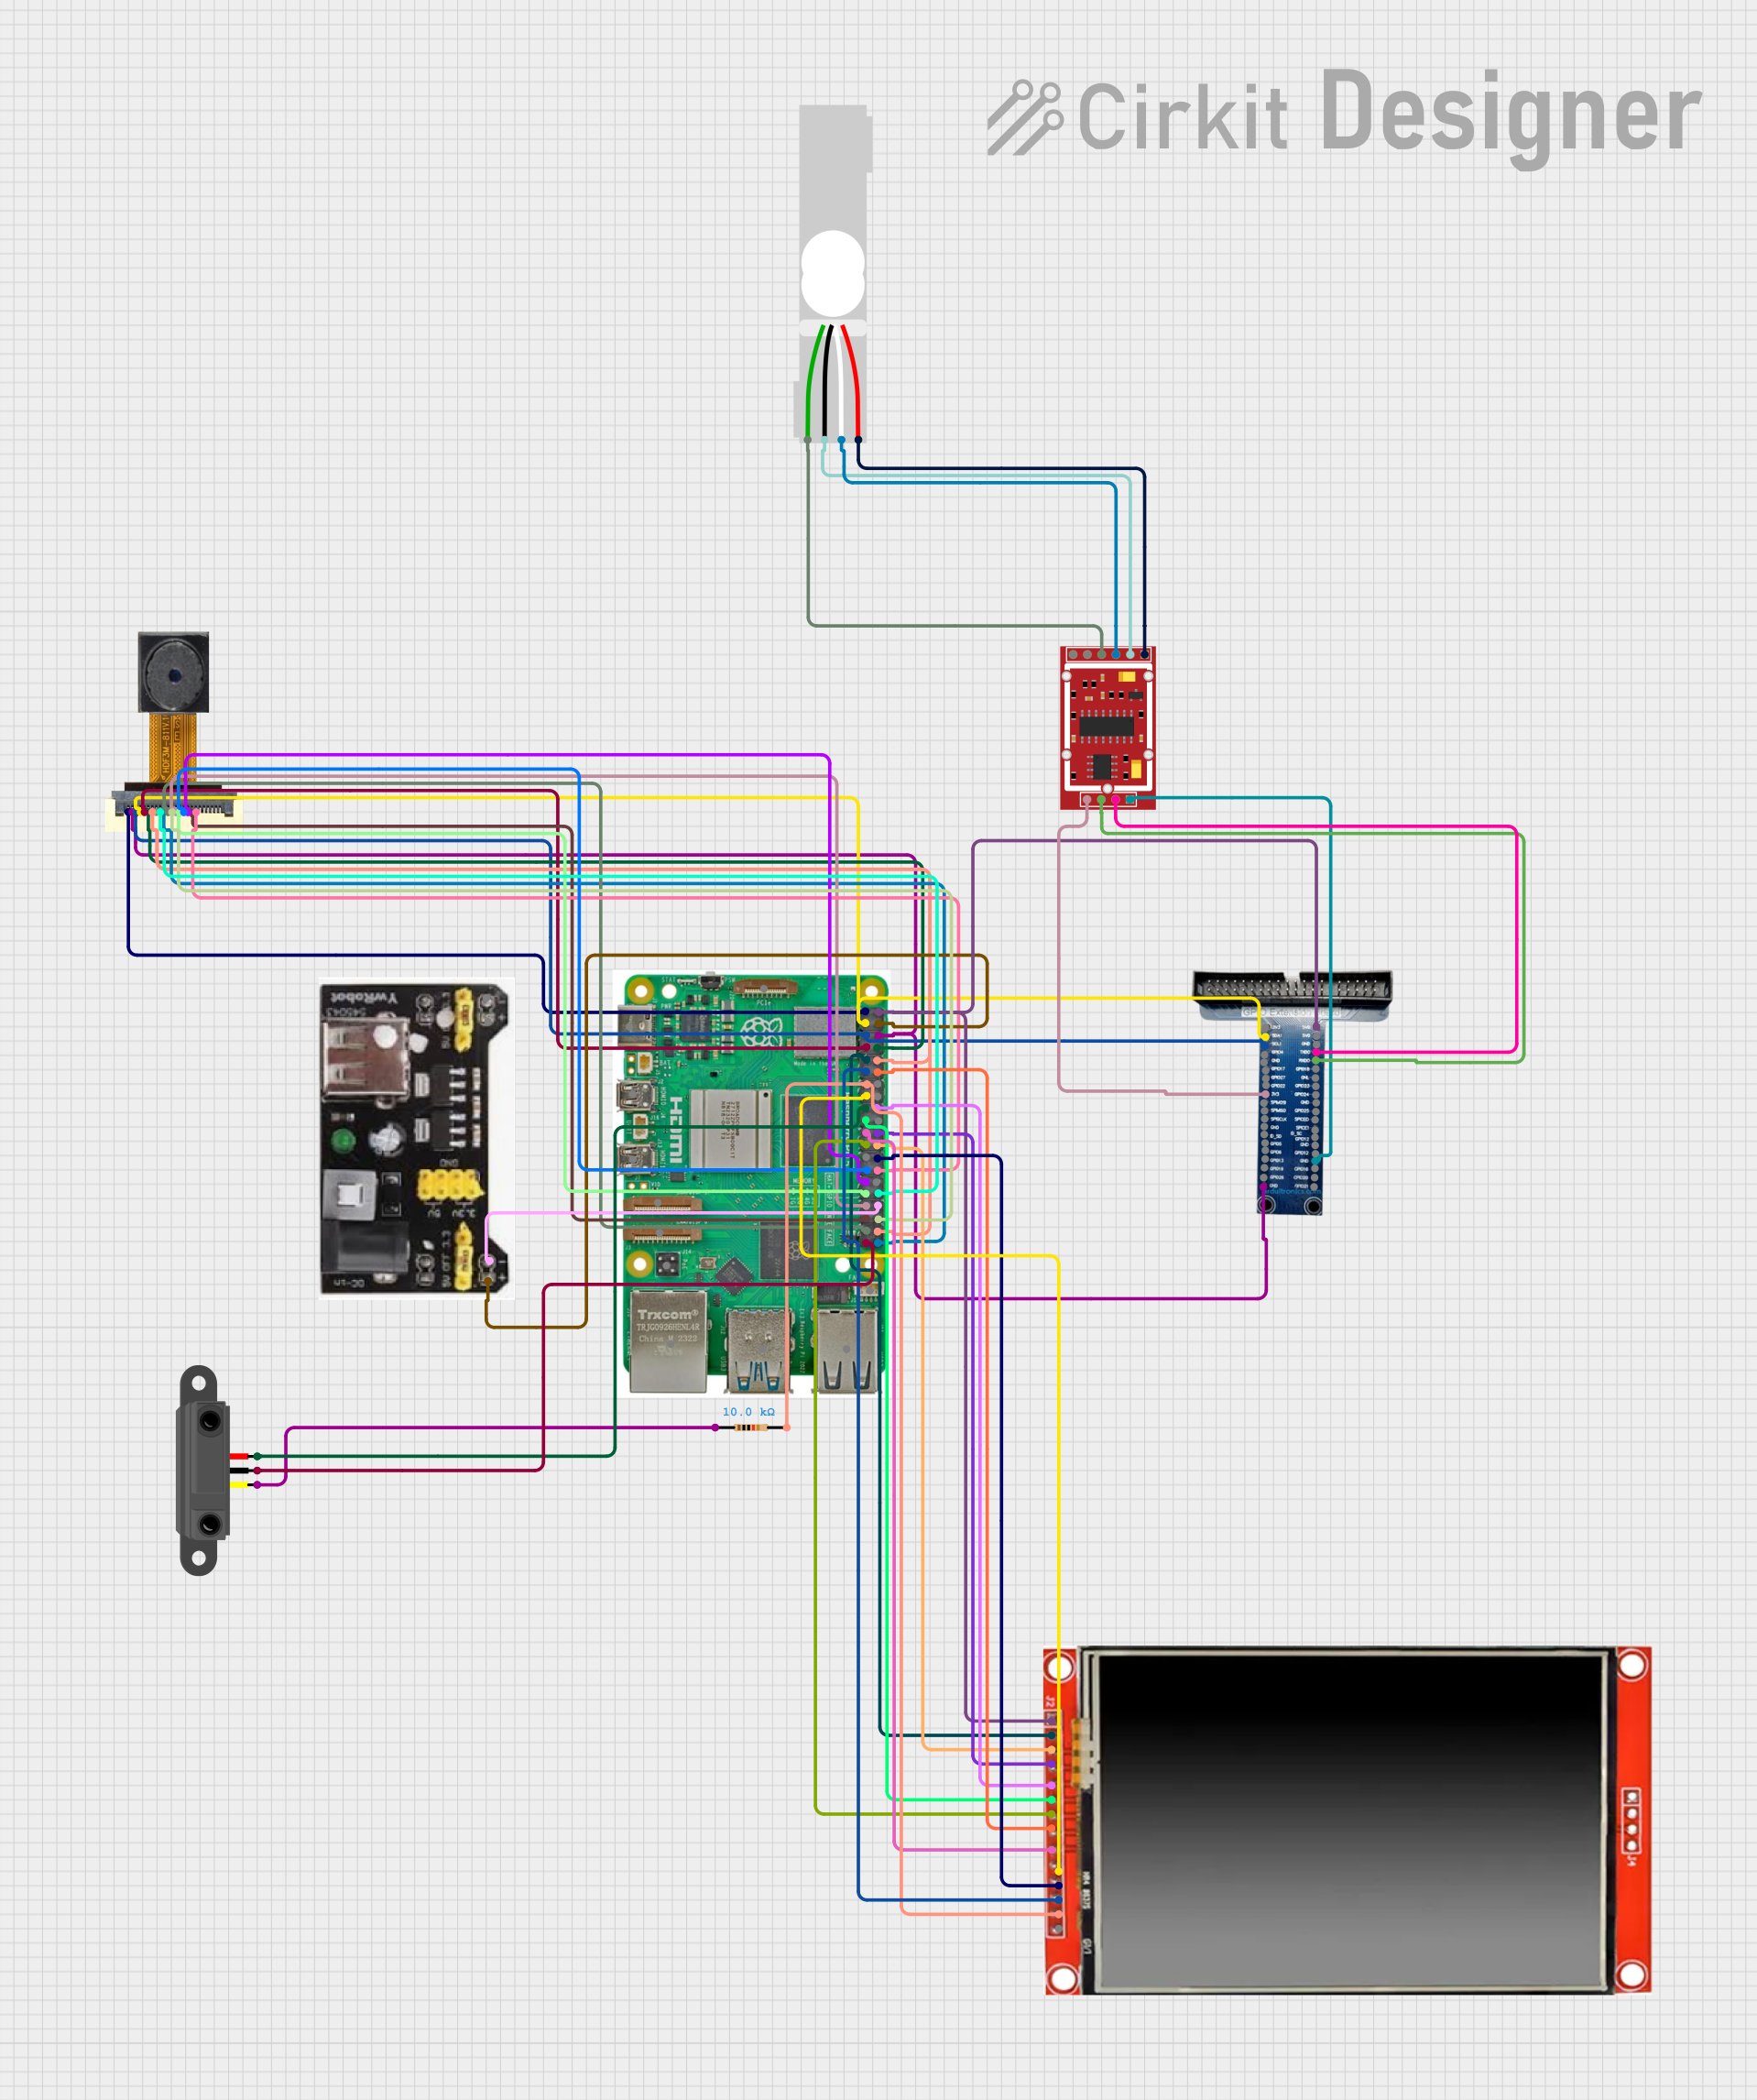

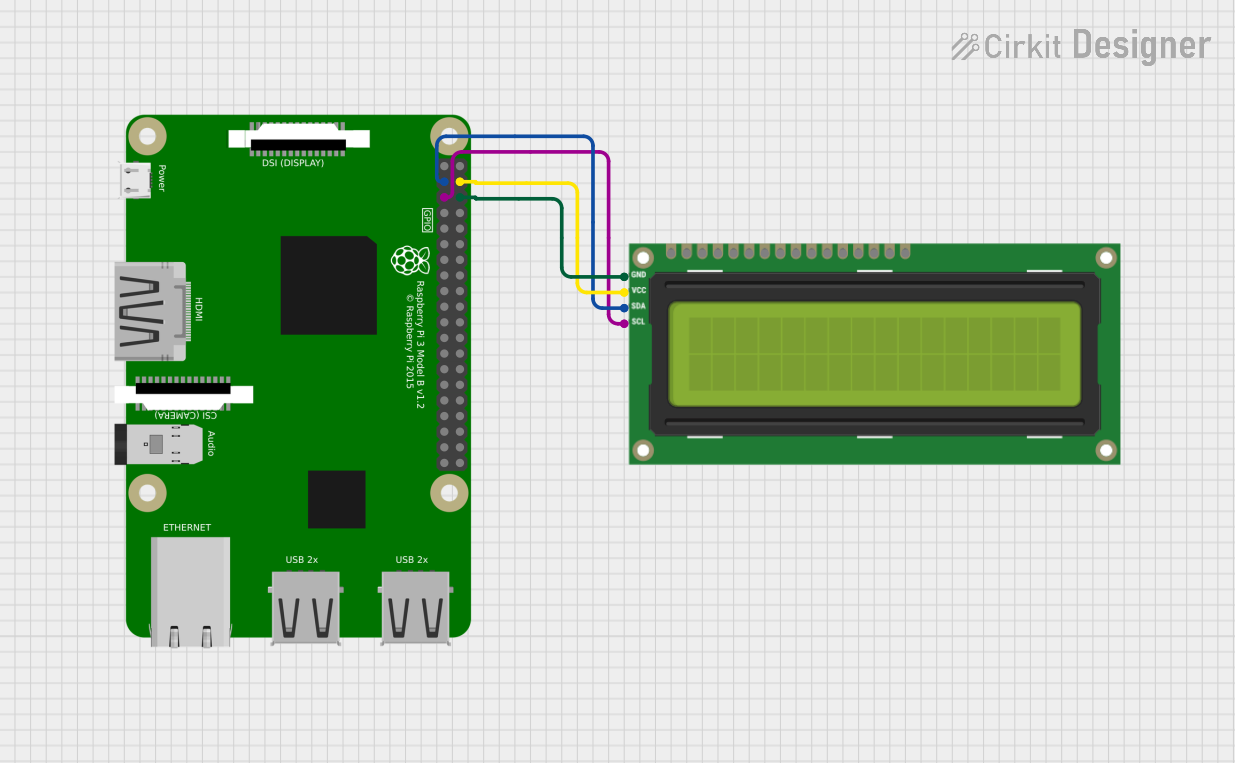
Explore Projects Built with Raspberry Pi LCD Capacitive Touch Screen 7 inch 1024*600 HDMI Display Touch Screen
Common Applications and Use Cases
- Home Automation Systems: Control smart home devices with a touch interface.
- Portable Media Players: Create a compact media player with touch controls.
- Educational Projects: Interactive displays for learning and teaching.
- Kiosk Systems: Information kiosks with touch navigation.
- Gaming Consoles: Touch-enabled gaming interfaces.
Technical Specifications
Key Technical Details
| Specification | Value |
|---|---|
| Display Size | 7 inches |
| Resolution | 1024x600 |
| Touch Type | Capacitive |
| Interface | HDMI |
| Touch Interface | USB |
| Power Supply | 5V via USB |
| Viewing Angle | 170° |
| Dimensions | 164.9mm x 124.27mm x 20.6mm |
| Weight | 350g |
Pin Configuration and Descriptions
HDMI Connector
| Pin Number | Description |
|---|---|
| 1 | TMDS Data2+ |
| 2 | TMDS Data2 Shield |
| 3 | TMDS Data2- |
| 4 | TMDS Data1+ |
| 5 | TMDS Data1 Shield |
| 6 | TMDS Data1- |
| 7 | TMDS Data0+ |
| 8 | TMDS Data0 Shield |
| 9 | TMDS Data0- |
| 10 | TMDS Clock+ |
| 11 | TMDS Clock Shield |
| 12 | TMDS Clock- |
| 13 | CEC |
| 14 | Reserved (N.C. on device) |
| 15 | SCL |
| 16 | SDA |
| 17 | DDC/CEC Ground |
| 18 | +5V Power |
| 19 | Hot Plug Detect |
USB Connector (for Touch Interface)
| Pin Number | Description |
|---|---|
| 1 | VCC (5V) |
| 2 | D- (Data -) |
| 3 | D+ (Data +) |
| 4 | GND (Ground) |
Usage Instructions
Connecting the Display to Raspberry Pi
Connect the HDMI Cable:
- Plug one end of the HDMI cable into the HDMI port on the Raspberry Pi.
- Connect the other end to the HDMI port on the display.
Connect the USB Cable:
- Plug one end of the USB cable into a USB port on the Raspberry Pi.
- Connect the other end to the USB port on the display. This will power the display and enable touch functionality.
Power Up:
- Power up your Raspberry Pi. The display should automatically turn on and show the Raspberry Pi desktop.
Important Considerations and Best Practices
Resolution Settings:
- Ensure that the Raspberry Pi is set to the correct resolution (1024x600) for optimal display quality. This can be configured in the
/boot/config.txtfile:sudo nano /boot/config.txthdmi_group=2 hdmi_mode=87 hdmi_cvt 1024 600 60 6 0 0 0
- Ensure that the Raspberry Pi is set to the correct resolution (1024x600) for optimal display quality. This can be configured in the
Touch Calibration:
- The touch screen should work out of the box, but if calibration is needed, you can use tools like
xinputto fine-tune the touch response.
- The touch screen should work out of the box, but if calibration is needed, you can use tools like
Power Supply:
- Ensure that your power supply can provide sufficient current. A 5V 2.5A power supply is recommended for the Raspberry Pi when using this display.
Troubleshooting and FAQs
Common Issues and Solutions
No Display Output:
- Ensure that the HDMI cable is securely connected.
- Check that the Raspberry Pi is powered on.
- Verify that the correct HDMI input is selected on the display.
Touch Screen Not Working:
- Ensure the USB cable is connected properly.
- Check if the touch screen is recognized by the Raspberry Pi:
lsusb - If not recognized, try a different USB port or cable.
Display Resolution Issues:
- Verify the resolution settings in the
/boot/config.txtfile. - Reboot the Raspberry Pi after making changes to the configuration file.
- Verify the resolution settings in the
FAQs
Q: Can I use this display with other devices?
- A: Yes, this display can be used with any device that has an HDMI output, but touch functionality may be limited to devices that support USB touch input.
Q: Do I need to install any drivers for the touch screen?
- A: No, the touch screen should work out of the box with the Raspberry Pi. However, for other devices, you may need to install appropriate drivers.
Q: Can I use this display in portrait mode?
- A: Yes, you can rotate the display by modifying the display settings in the Raspberry Pi configuration.
Example Code for Raspberry Pi
Here is an example of how to use the touch screen with a simple Python script to create a touch-enabled interface using the tkinter library:
import tkinter as tk
Create the main window
root = tk.Tk() root.title("Touch Screen Example") root.geometry("1024x600")
Create a label to display touch coordinates
label = tk.Label(root, text="Touch the screen", font=("Helvetica", 24)) label.pack(pady=20)
Function to update the label with touch coordinates
def update_label(event): label.config(text=f"Touch at x={event.x}, y={event.y}")
Bind the touch event to the update_label function
root.bind("
Run the main loop
root.mainloop()
This script creates a simple window that updates the label with the coordinates of the touch point.

By following this documentation, users should be able to effectively utilize the 7-inch capacitive touch screen display with their Raspberry Pi projects.