How to Use Dissolved O2: Examples, Pinouts, and Specs
Introduction
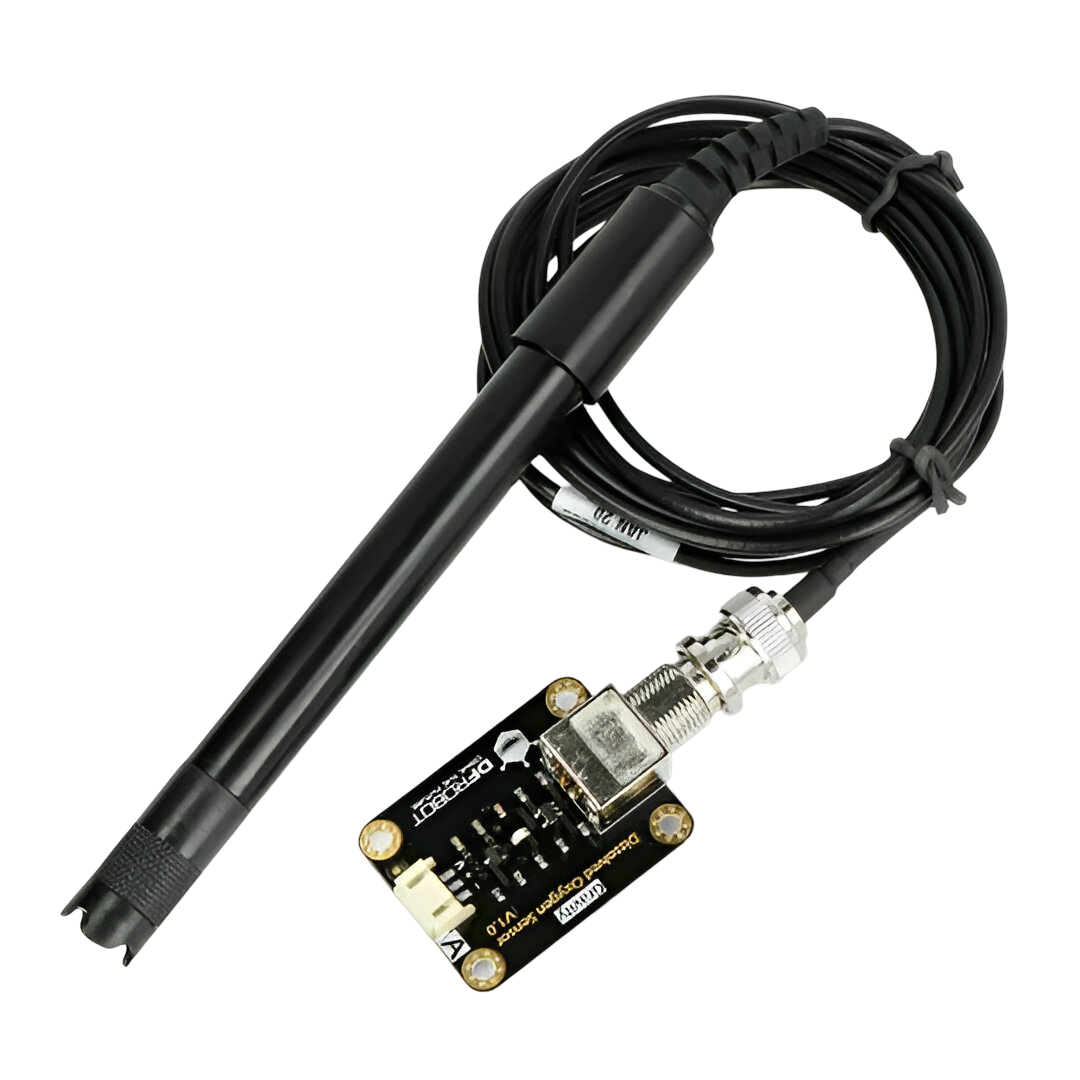
- A Dissolved Oxygen (O2) sensor is an electronic device used to measure the concentration of oxygen dissolved in water. This parameter is crucial for monitoring water quality in various applications, including aquaculture, wastewater treatment, environmental monitoring, and laboratory research.
- Common applications include:
- Monitoring oxygen levels in fish farms to ensure optimal conditions for aquatic life.
- Assessing water quality in rivers, lakes, and oceans for environmental studies.
- Measuring dissolved oxygen in industrial processes, such as wastewater treatment plants.
- Supporting scientific research in laboratories for biological and chemical experiments.
Explore Projects Built with Dissolved O2
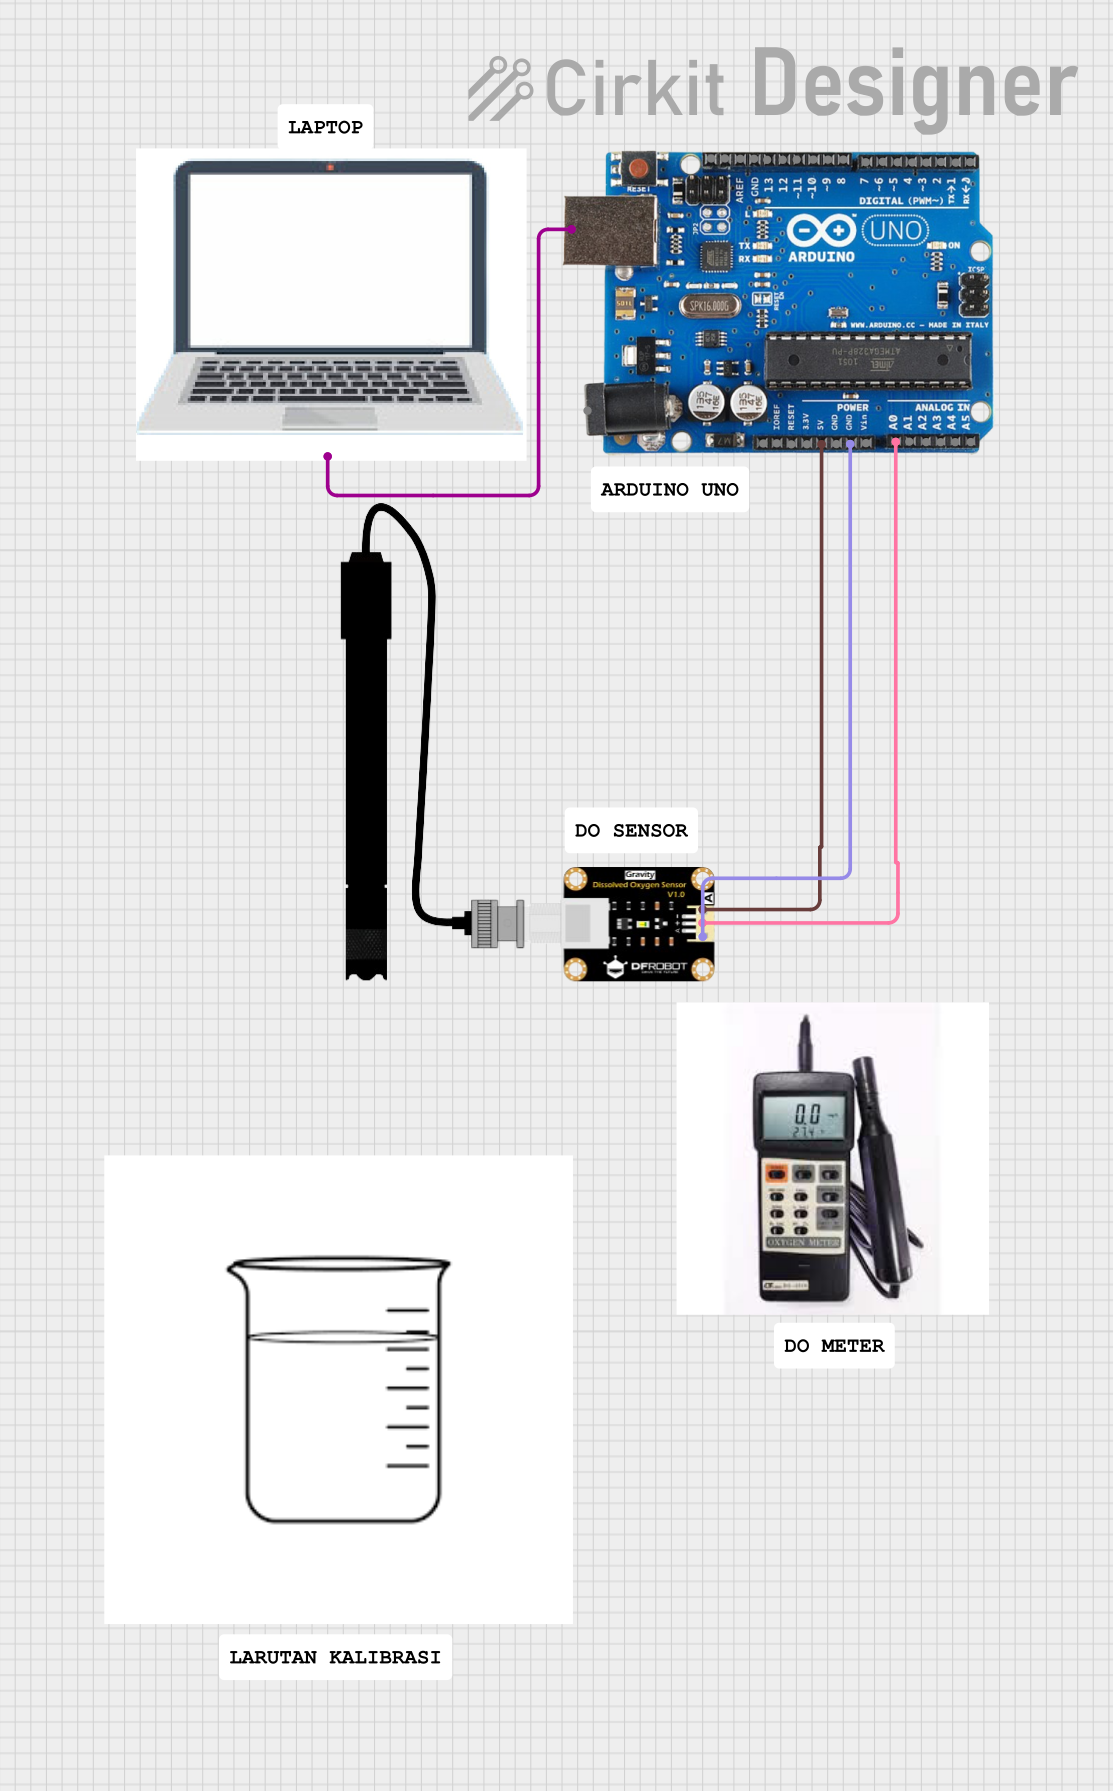
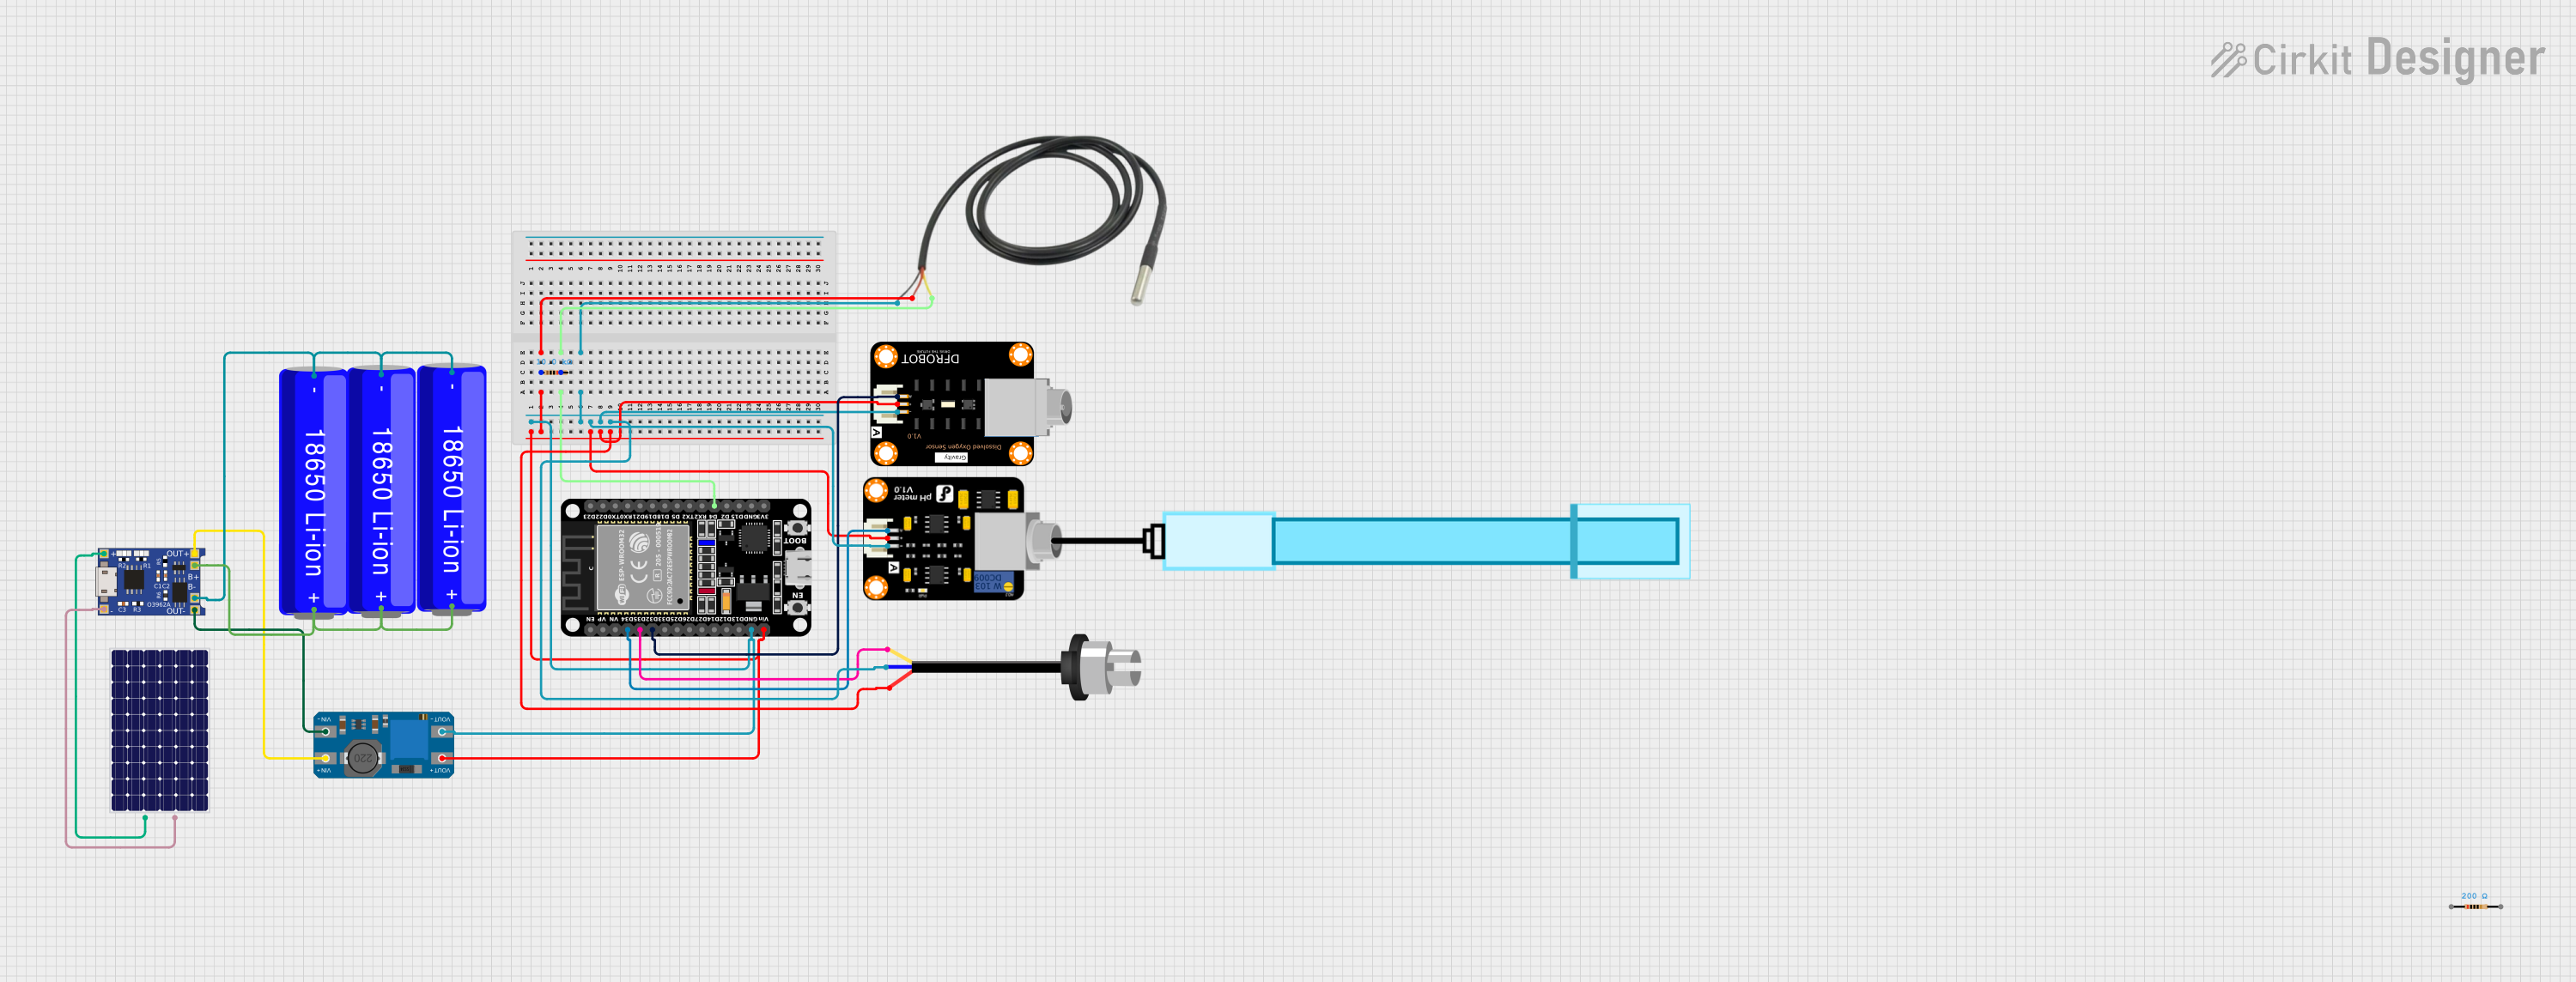
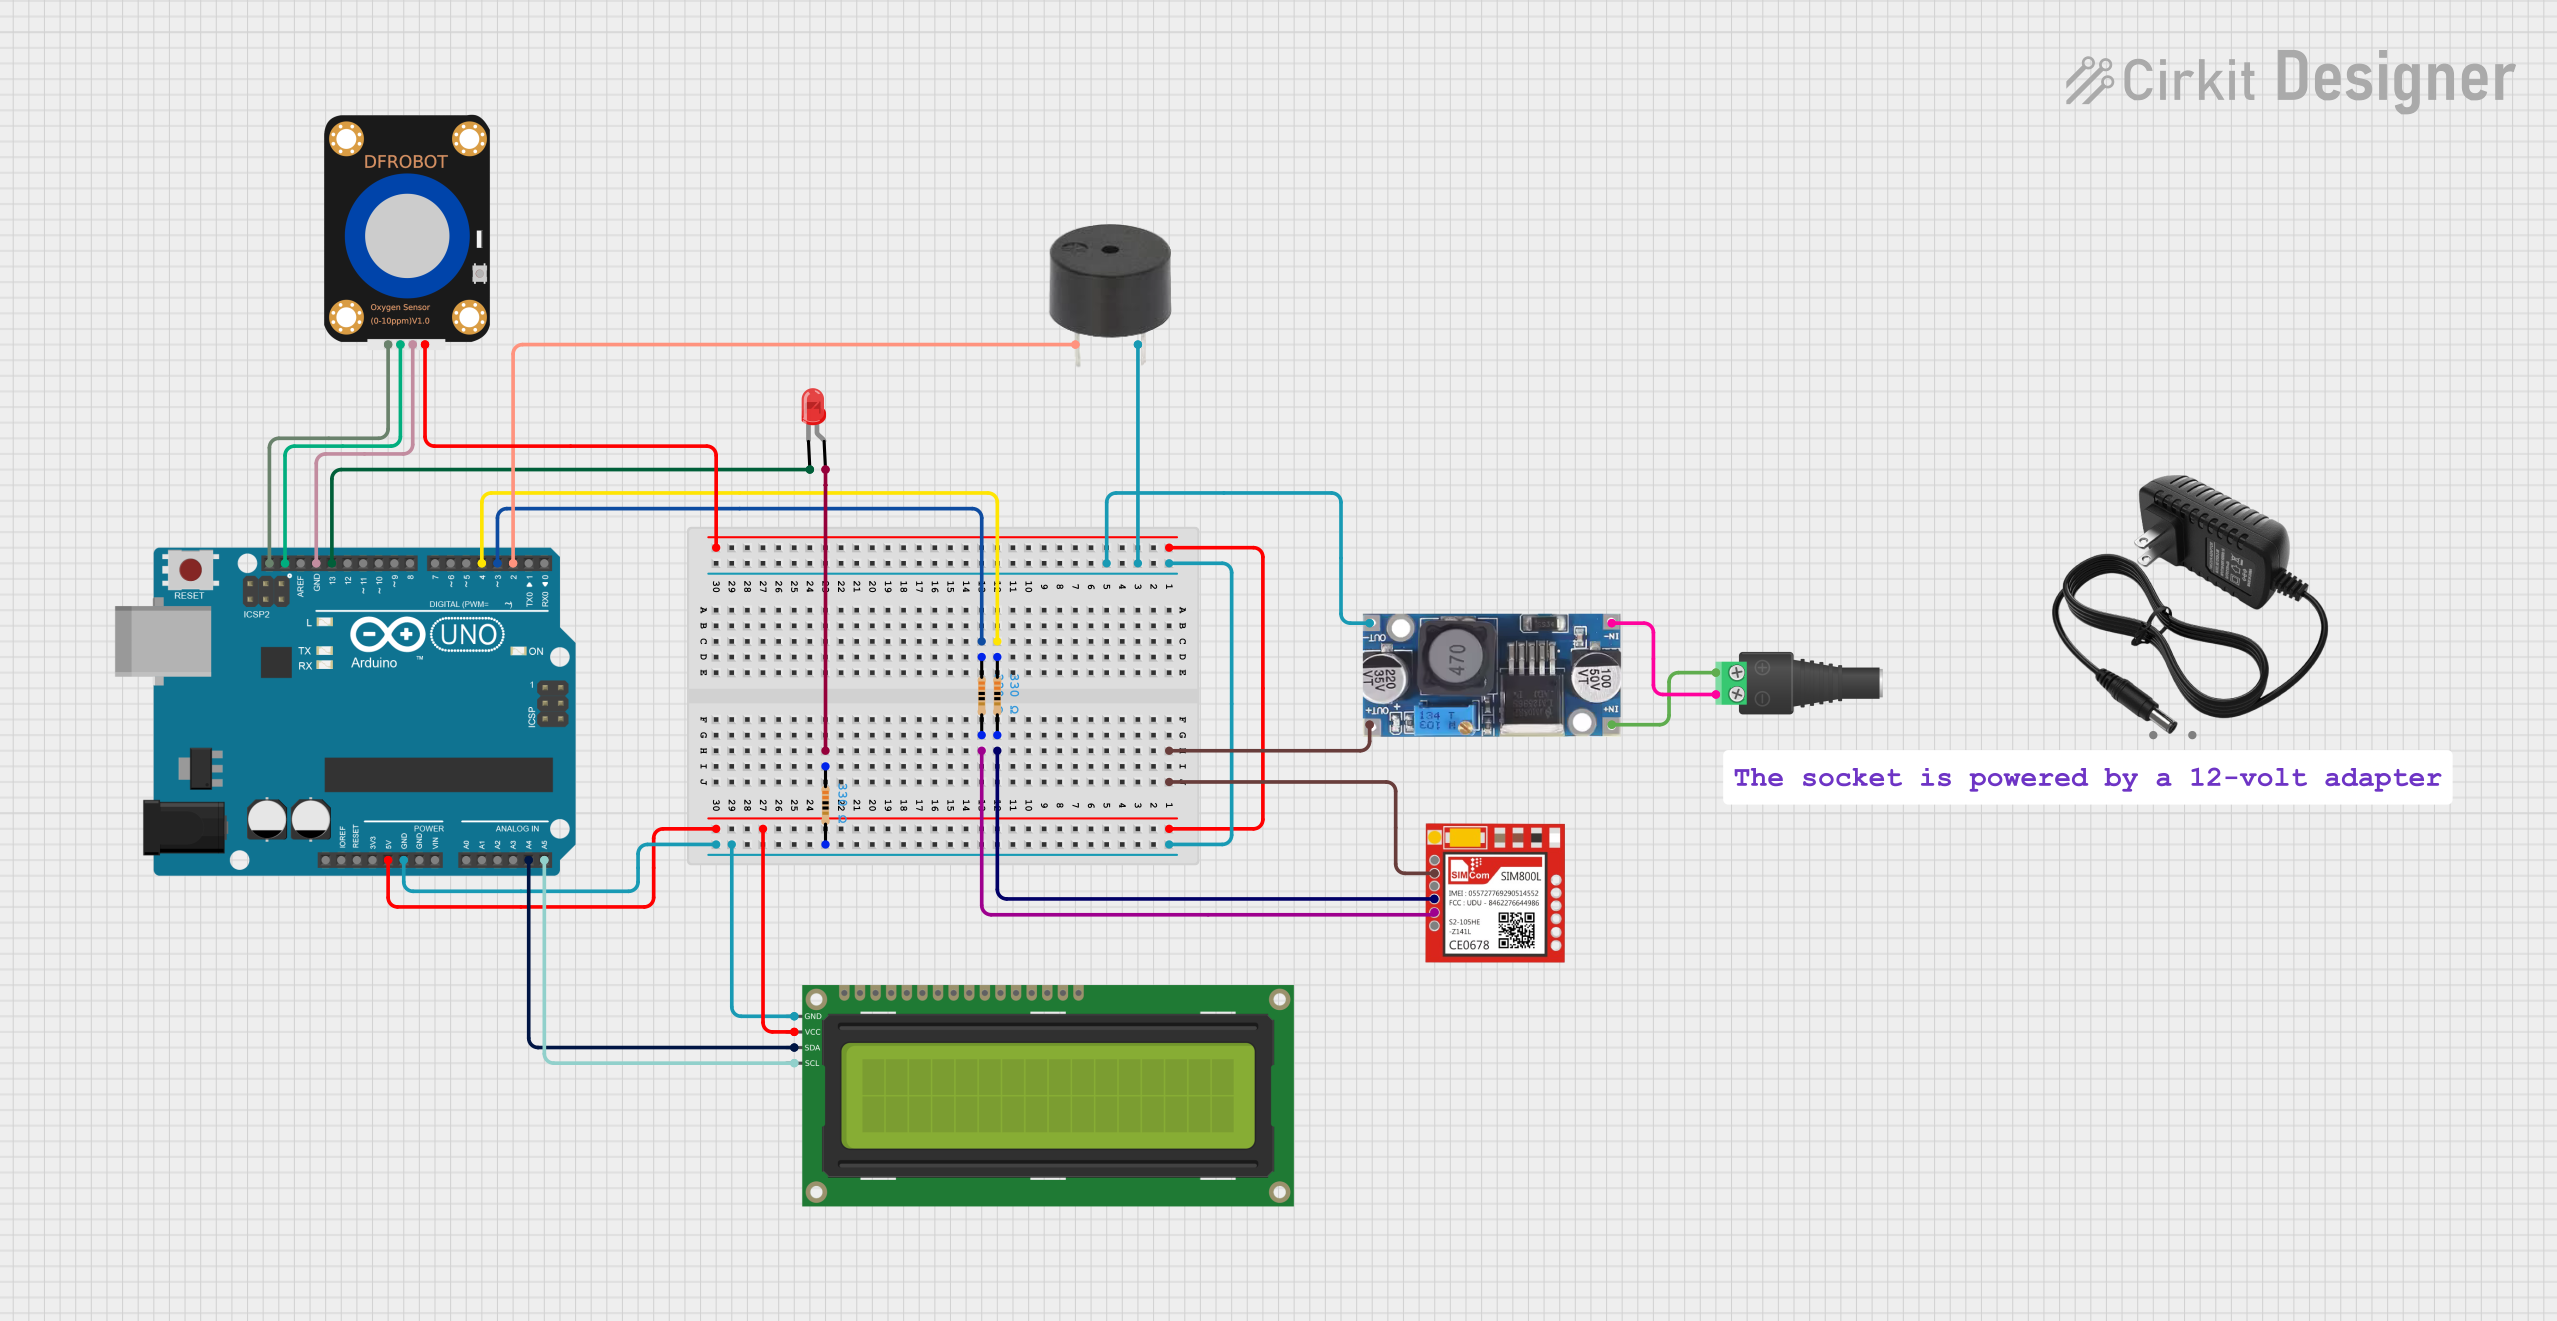
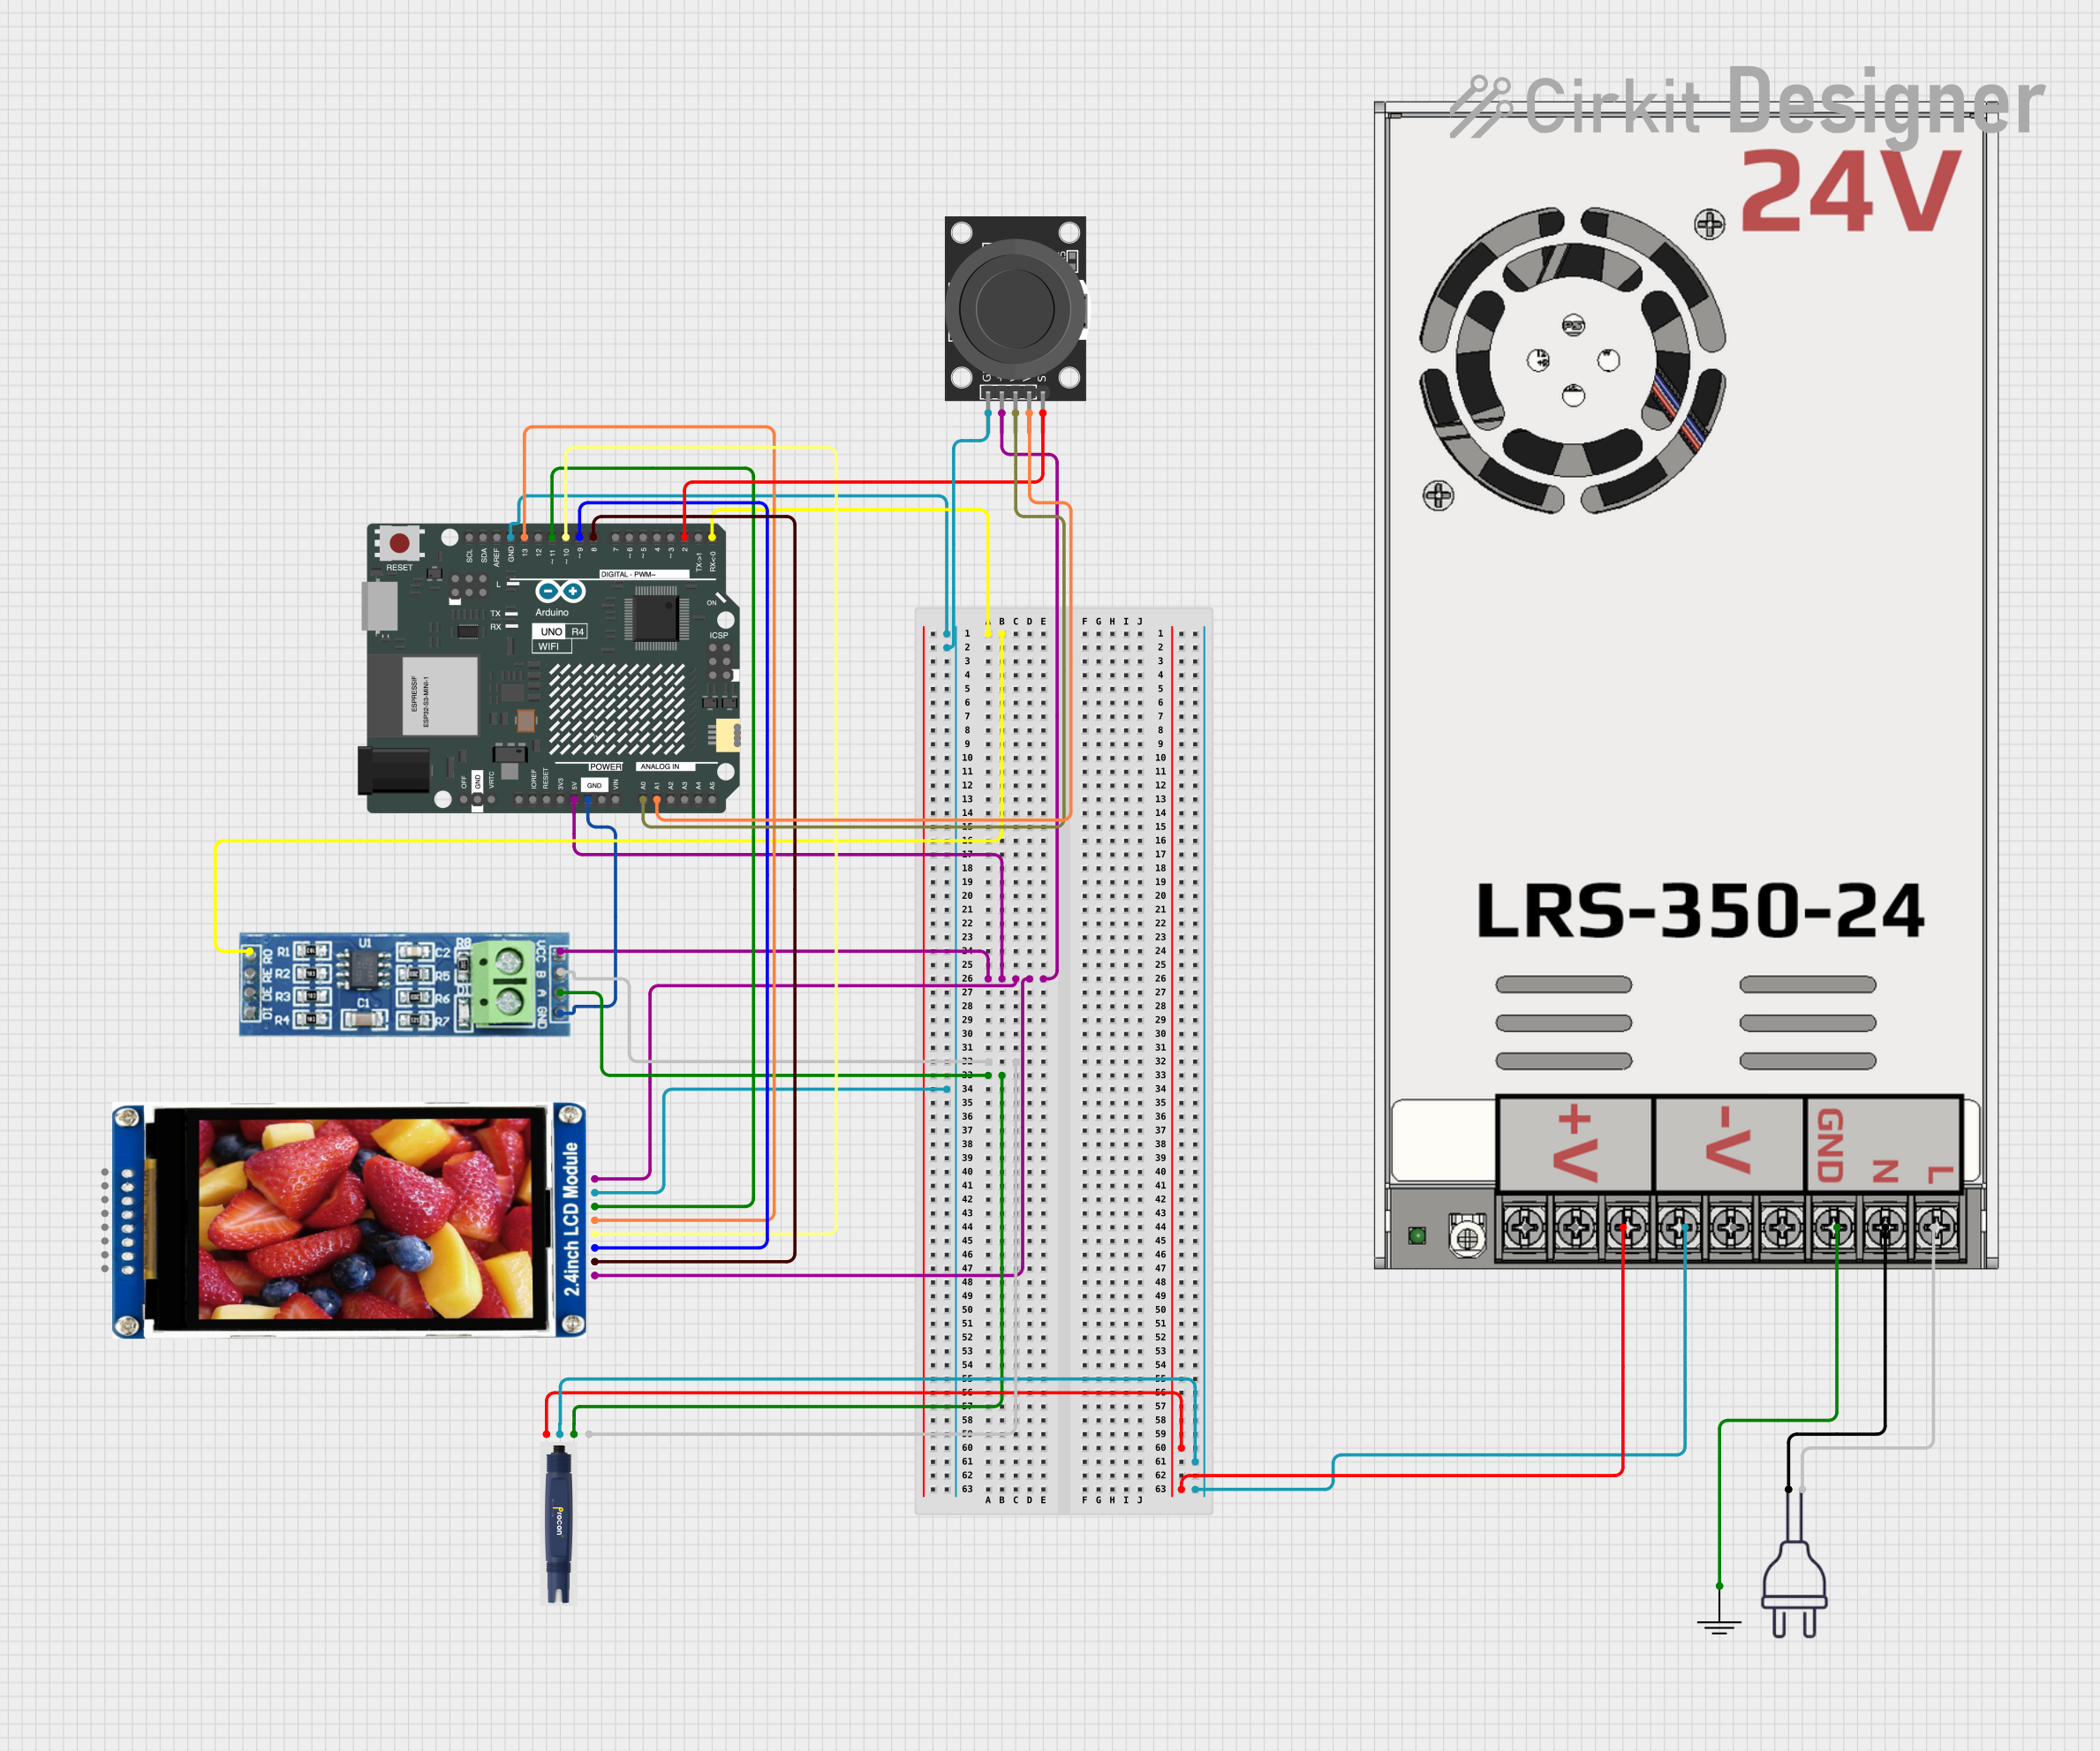
Explore Projects Built with Dissolved O2
Technical Specifications
- Sensor Type: Electrochemical or Optical (depending on the model)
- Measurement Range: 0–20 mg/L (or 0–200% saturation)
- Accuracy: ±0.1 mg/L (typical)
- Operating Temperature: 0°C to 50°C
- Response Time: <30 seconds (typical)
- Power Supply: 3.3V–5V DC (for most sensor modules)
- Output Signal: Analog voltage or digital (I2C/UART, depending on the model)
- Calibration: Single-point or two-point calibration (air and zero oxygen solution)
Pin Configuration and Descriptions
Below is a typical pinout for a dissolved oxygen sensor module:
| Pin | Name | Description |
|---|---|---|
| 1 | VCC | Power supply input (3.3V–5V DC). |
| 2 | GND | Ground connection. |
| 3 | AOUT | Analog output signal proportional to the dissolved oxygen level. |
| 4 | DOUT (optional) | Digital output signal (if supported, e.g., UART or I2C communication). |
| 5 | CAL | Calibration pin for initiating sensor calibration (if applicable). |
Note: Pin configuration may vary depending on the specific sensor model. Always refer to the manufacturer's datasheet for exact details.
Usage Instructions
How to Use the Component in a Circuit
- Power the Sensor: Connect the VCC pin to a 3.3V or 5V power source and the GND pin to the ground of your circuit.
- Signal Connection:
- For analog output, connect the AOUT pin to an analog input pin on your microcontroller (e.g., Arduino).
- For digital output, connect the DOUT pin to the appropriate communication interface (e.g., UART or I2C).
- Calibration:
- Perform a single-point or two-point calibration before use. For single-point calibration, expose the sensor to air and adjust the calibration pin as per the manufacturer's instructions.
- For two-point calibration, use a zero oxygen solution (e.g., sodium sulfite solution) and air for calibration.
- Read Data: Use the microcontroller to read the sensor's output and convert it to dissolved oxygen concentration using the sensor's calibration curve or formula.
Important Considerations and Best Practices
- Temperature Compensation: Dissolved oxygen readings are temperature-dependent. Use a temperature sensor for compensation if your sensor does not have built-in temperature correction.
- Avoid Contamination: Keep the sensor clean and free from biofouling or debris to ensure accurate readings.
- Regular Calibration: Calibrate the sensor periodically to maintain accuracy, especially in long-term deployments.
- Avoid Air Bubbles: Ensure the sensor is fully submerged in water without air bubbles around the sensing element.
Example Code for Arduino UNO
Below is an example of how to interface a dissolved oxygen sensor with an Arduino UNO:
// Example code for interfacing a dissolved oxygen sensor with Arduino UNO
// This code assumes the sensor provides an analog output signal.

const int DO_SENSOR_PIN = A0; // Analog pin connected to the sensor's AOUT pin
float voltage;               // Variable to store the sensor's output voltage
float dissolvedOxygen;       // Variable to store the calculated dissolved oxygen value

void setup() {
  Serial.begin(9600); // Initialize serial communication for debugging
  pinMode(DO_SENSOR_PIN, INPUT); // Set the sensor pin as input
}

void loop() {
  // Read the analog voltage from the sensor
  voltage = analogRead(DO_SENSOR_PIN) * (5.0 / 1023.0);
  // Convert the voltage to dissolved oxygen concentration
  // Example formula: DO (mg/L) = (voltage - offset) * scale
  // Replace 'offset' and 'scale' with calibration values from the sensor datasheet
  dissolvedOxygen = (voltage - 0.4) * 10.0;

  // Print the dissolved oxygen value to the Serial Monitor
  Serial.print("Dissolved Oxygen (mg/L): ");
  Serial.println(dissolvedOxygen);

  delay(1000); // Wait for 1 second before the next reading
}
Note: Replace the
offsetandscalevalues in the formula with the calibration constants provided by the sensor manufacturer.
Troubleshooting and FAQs
Common Issues and Solutions
Inaccurate Readings:
- Cause: Sensor not calibrated properly.
- Solution: Perform a single-point or two-point calibration as per the manufacturer's instructions.
No Output Signal:
- Cause: Incorrect wiring or insufficient power supply.
- Solution: Verify the connections and ensure the sensor is powered with the correct voltage.
Slow Response Time:
- Cause: Sensor membrane is dirty or damaged.
- Solution: Clean the sensor membrane gently with distilled water or replace it if damaged.
Fluctuating Readings:
- Cause: Air bubbles around the sensor or electrical noise.
- Solution: Ensure the sensor is fully submerged without air bubbles and use proper grounding in the circuit.
FAQs
Q: Can I use the sensor in saltwater?
- A: Yes, but ensure the sensor is rated for use in saline environments and calibrate it accordingly.
Q: How often should I calibrate the sensor?
- A: Calibration frequency depends on usage. For critical applications, calibrate before each use. For long-term deployments, calibrate weekly or as recommended by the manufacturer.
Q: Can the sensor measure oxygen in other liquids besides water?
- A: The sensor is designed for water-based solutions. For other liquids, consult the manufacturer for compatibility.
Q: What is the lifespan of a dissolved oxygen sensor?
- A: The lifespan varies by model and usage but typically ranges from 1 to 2 years for electrochemical sensors. Optical sensors may last longer with proper maintenance.
By following this documentation, users can effectively integrate and maintain a dissolved oxygen sensor in their projects.