How to Use Capacitive Non-Contact Liquid Level Sensor: Examples, Pinouts, and Specs
Introduction
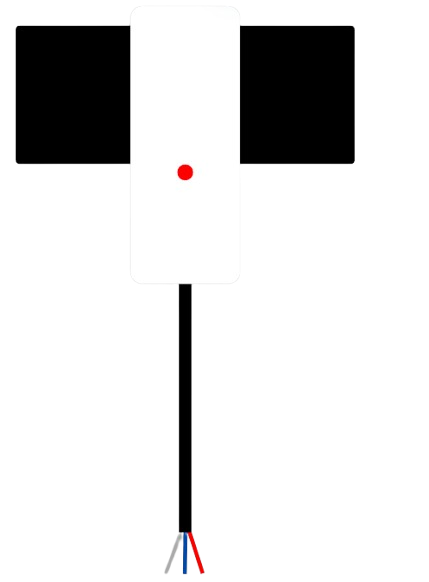
The Capacitive Non-Contact Liquid Level Sensor (Manufacturer Part ID: SEN0368) by DFRobot is a highly versatile sensor designed to detect the level of liquid in a container without requiring direct contact with the liquid. It uses capacitive sensing technology to measure changes in capacitance caused by the presence of liquid, making it ideal for applications where hygiene, safety, or non-invasive measurement is critical.
Explore Projects Built with Capacitive Non-Contact Liquid Level Sensor

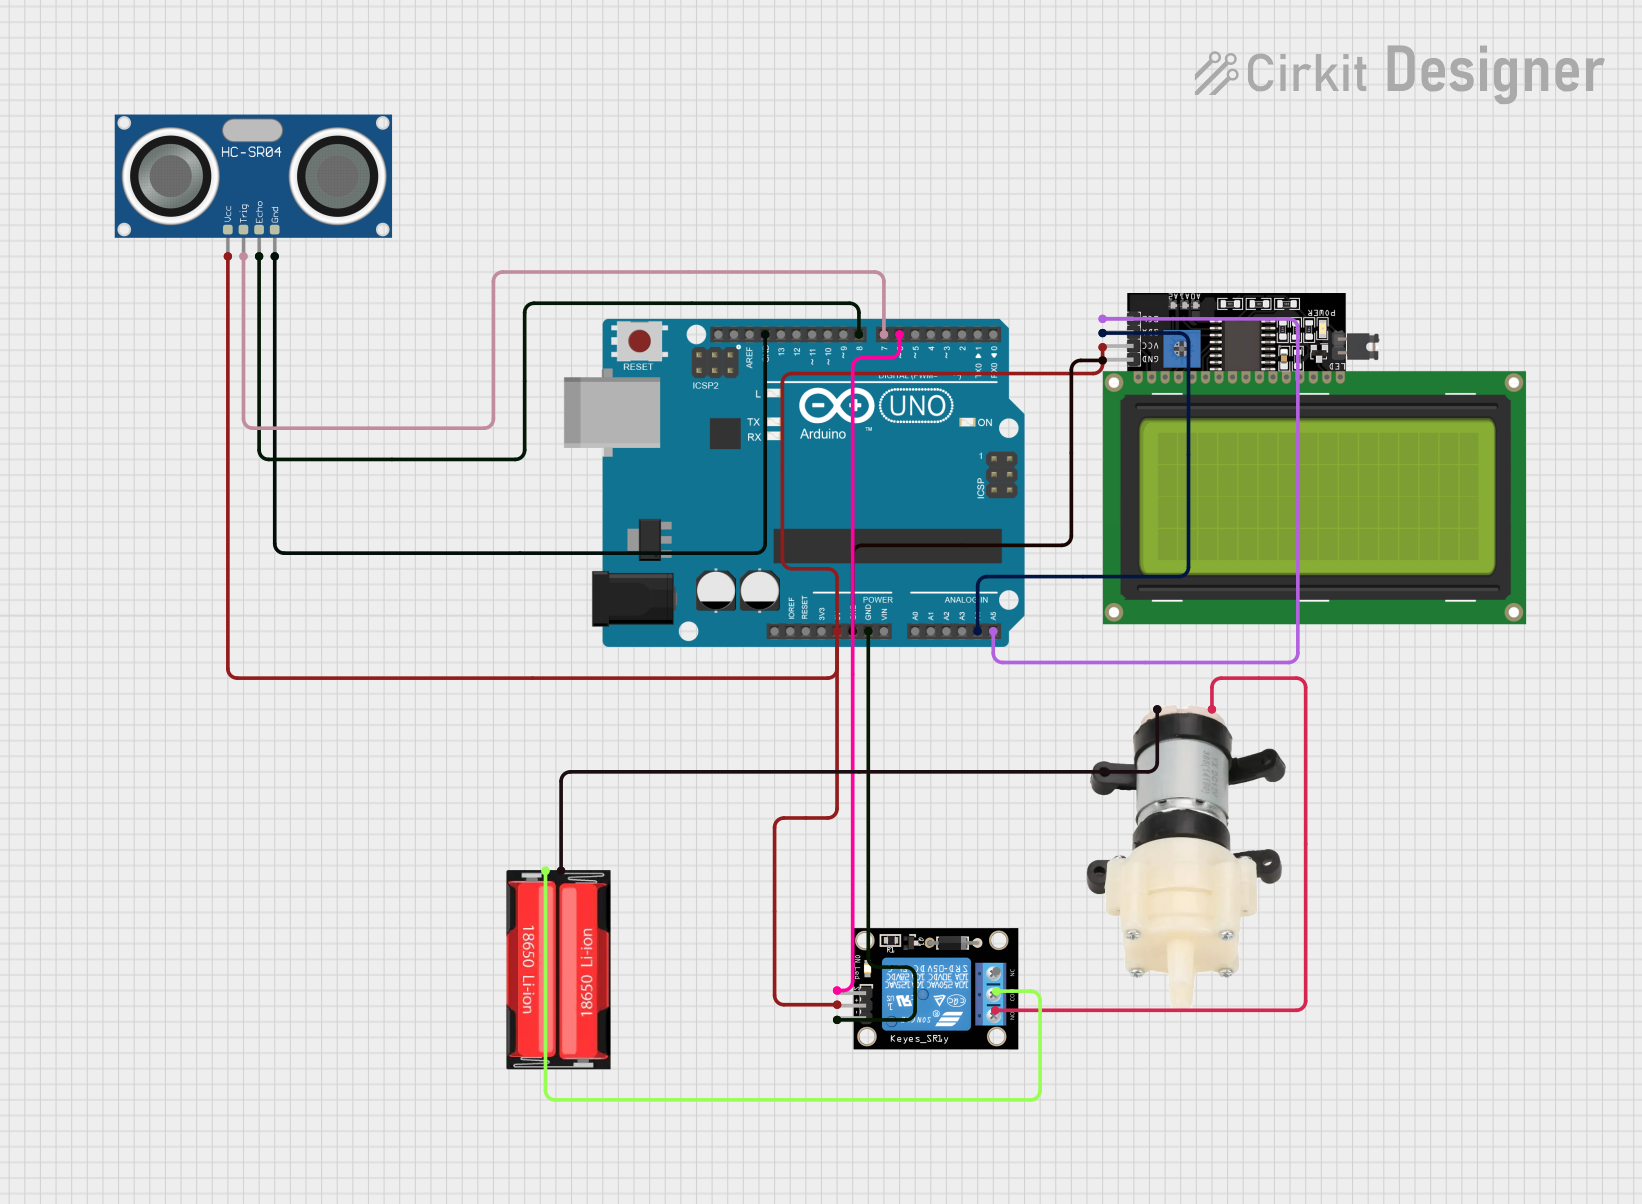

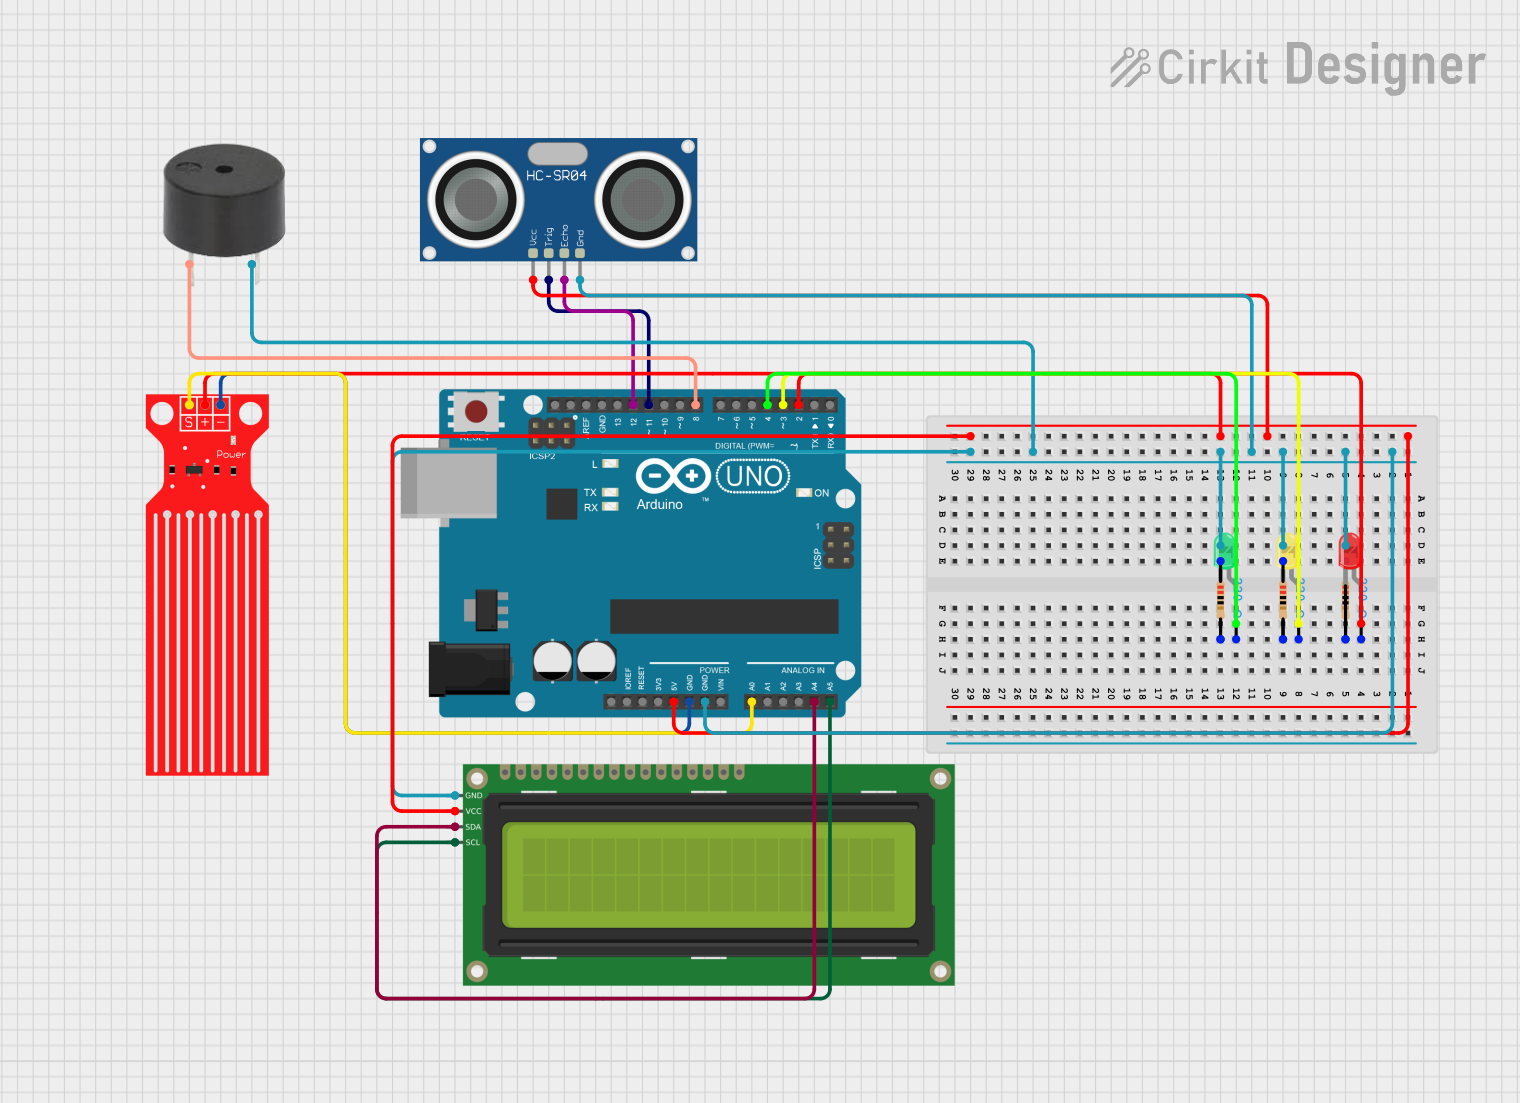
Explore Projects Built with Capacitive Non-Contact Liquid Level Sensor
Common Applications and Use Cases
- Water level monitoring in tanks and reservoirs
- Liquid level detection in medical or laboratory equipment
- Food and beverage industry for non-invasive liquid measurement
- Industrial automation and fluid management systems
- Smart home appliances, such as water dispensers or humidifiers
Technical Specifications
The following table outlines the key technical details of the SEN0368 sensor:
| Parameter | Value |
|---|---|
| Operating Voltage | 5V DC |
| Operating Current | ≤ 5mA |
| Output Signal | High/Low (Digital) |
| Detection Range | 0–12mm (distance from sensor to container) |
| Compatible Container Material | Non-metallic (e.g., glass, plastic) |
| Operating Temperature | -5°C to 105°C |
| Humidity Range | 5%–100% RH |
| Dimensions | 28mm x 28mm x 8mm |
| Cable Length | 500mm |
Pin Configuration and Descriptions
The SEN0368 sensor has a 3-pin interface. The pinout is as follows:
| Pin | Name | Description |
|---|---|---|
| 1 | VCC | Power supply input (5V DC) |
| 2 | GND | Ground |
| 3 | OUT | Digital output signal (High when liquid detected) |
Usage Instructions
How to Use the Sensor in a Circuit
- Power the Sensor: Connect the
VCCpin to a 5V DC power source and theGNDpin to ground. - Connect the Output: Connect the
OUTpin to a digital input pin on your microcontroller (e.g., Arduino UNO). - Mount the Sensor: Attach the sensor to the outside of a non-metallic container at the desired liquid level. Ensure the sensor is within the detection range (0–12mm) from the liquid.
- Read the Output: When liquid is detected at the sensor's position, the
OUTpin will output a HIGH signal (5V). Otherwise, it will output a LOW signal (0V).
Important Considerations and Best Practices
- Container Material: The sensor works only with non-metallic containers such as glass or plastic. Avoid using it with metallic containers, as they interfere with capacitive sensing.
- Mounting Surface: Ensure the sensor is mounted on a clean, flat surface for accurate detection.
- Environmental Factors: The sensor is designed to operate in a wide temperature and humidity range, but avoid exposing it to extreme conditions beyond its specifications.
- Power Supply: Use a stable 5V DC power source to ensure reliable operation.
Example Code for Arduino UNO
The following example demonstrates how to use the SEN0368 sensor with an Arduino UNO to detect liquid levels:
// Define the pin connected to the sensor's OUT pin
const int sensorPin = 2; // Digital pin 2
const int ledPin = 13;   // Built-in LED for visual indication

void setup() {
  pinMode(sensorPin, INPUT); // Set sensor pin as input
  pinMode(ledPin, OUTPUT);   // Set LED pin as output
  Serial.begin(9600);        // Initialize serial communication
}

void loop() {
  int sensorState = digitalRead(sensorPin); // Read the sensor output

  if (sensorState == HIGH) {
    // Liquid detected
    digitalWrite(ledPin, HIGH); // Turn on LED
    Serial.println("Liquid detected!");
  } else {
    // No liquid detected
    digitalWrite(ledPin, LOW);  // Turn off LED
    Serial.println("No liquid detected.");
  }

  delay(500); // Wait for 500ms before the next reading
}
Troubleshooting and FAQs
Common Issues and Solutions
Sensor Not Detecting Liquid
- Ensure the sensor is mounted within the detection range (0–12mm) from the liquid.
- Verify that the container is made of a non-metallic material.
- Check the power supply voltage (should be 5V DC).
False Positives or Erratic Readings
- Clean the container surface where the sensor is mounted to remove dirt or moisture.
- Ensure the sensor is securely attached to the container to prevent movement.
- Avoid electrical noise or interference near the sensor.
No Output Signal
- Verify the wiring connections, especially the
VCC,GND, andOUTpins. - Check if the sensor is receiving power (measure voltage at the
VCCpin).
- Verify the wiring connections, especially the
FAQs
Q: Can the sensor detect all types of liquids?
A: The sensor can detect most liquids, but its performance may vary depending on the liquid's dielectric constant. It works best with water and other liquids with high dielectric constants.
Q: Can I use the sensor with a metallic container?
A: No, the sensor is designed for use with non-metallic containers only. Metallic containers interfere with the capacitive sensing mechanism.
Q: Is the sensor waterproof?
A: The sensor is designed for non-contact operation and should not be submerged in liquid. However, it can operate in high-humidity environments.
Q: Can I extend the sensor's cable?
A: Yes, but ensure the extension does not introduce significant resistance or noise, which could affect the sensor's performance.
By following this documentation, you can effectively integrate the SEN0368 Capacitive Non-Contact Liquid Level Sensor into your projects for reliable and non-invasive liquid level detection.