How to Use Adafruit MPRLS Sensor Breakout: Examples, Pinouts, and Specs
Introduction
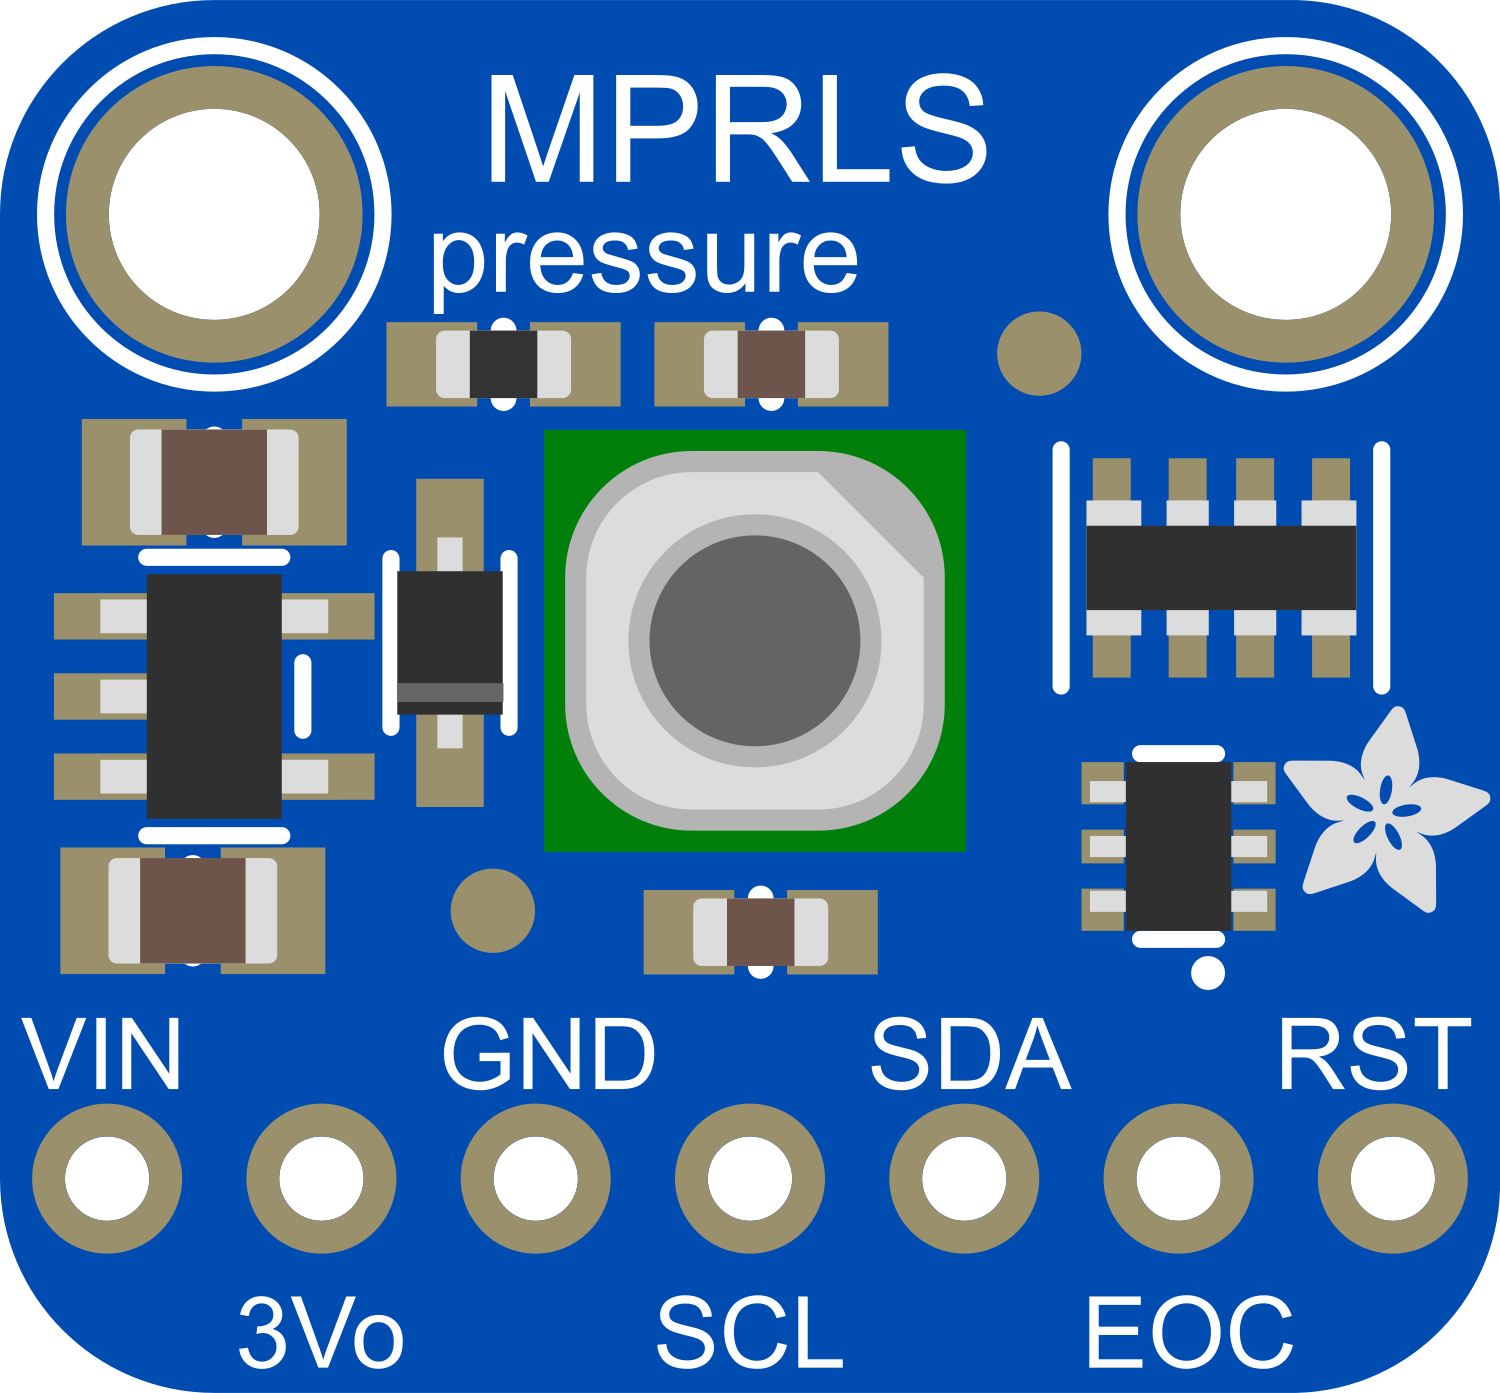
The Adafruit MPRLS Sensor Breakout is a compact and versatile board designed for measuring pressure with precision. It utilizes the MPRLS ported pressure sensor, capable of measuring both absolute and differential pressure within a specified range. This sensor is ideal for a variety of applications, including weather stations, medical devices, and any system requiring accurate pressure measurements.
Explore Projects Built with Adafruit MPRLS Sensor Breakout


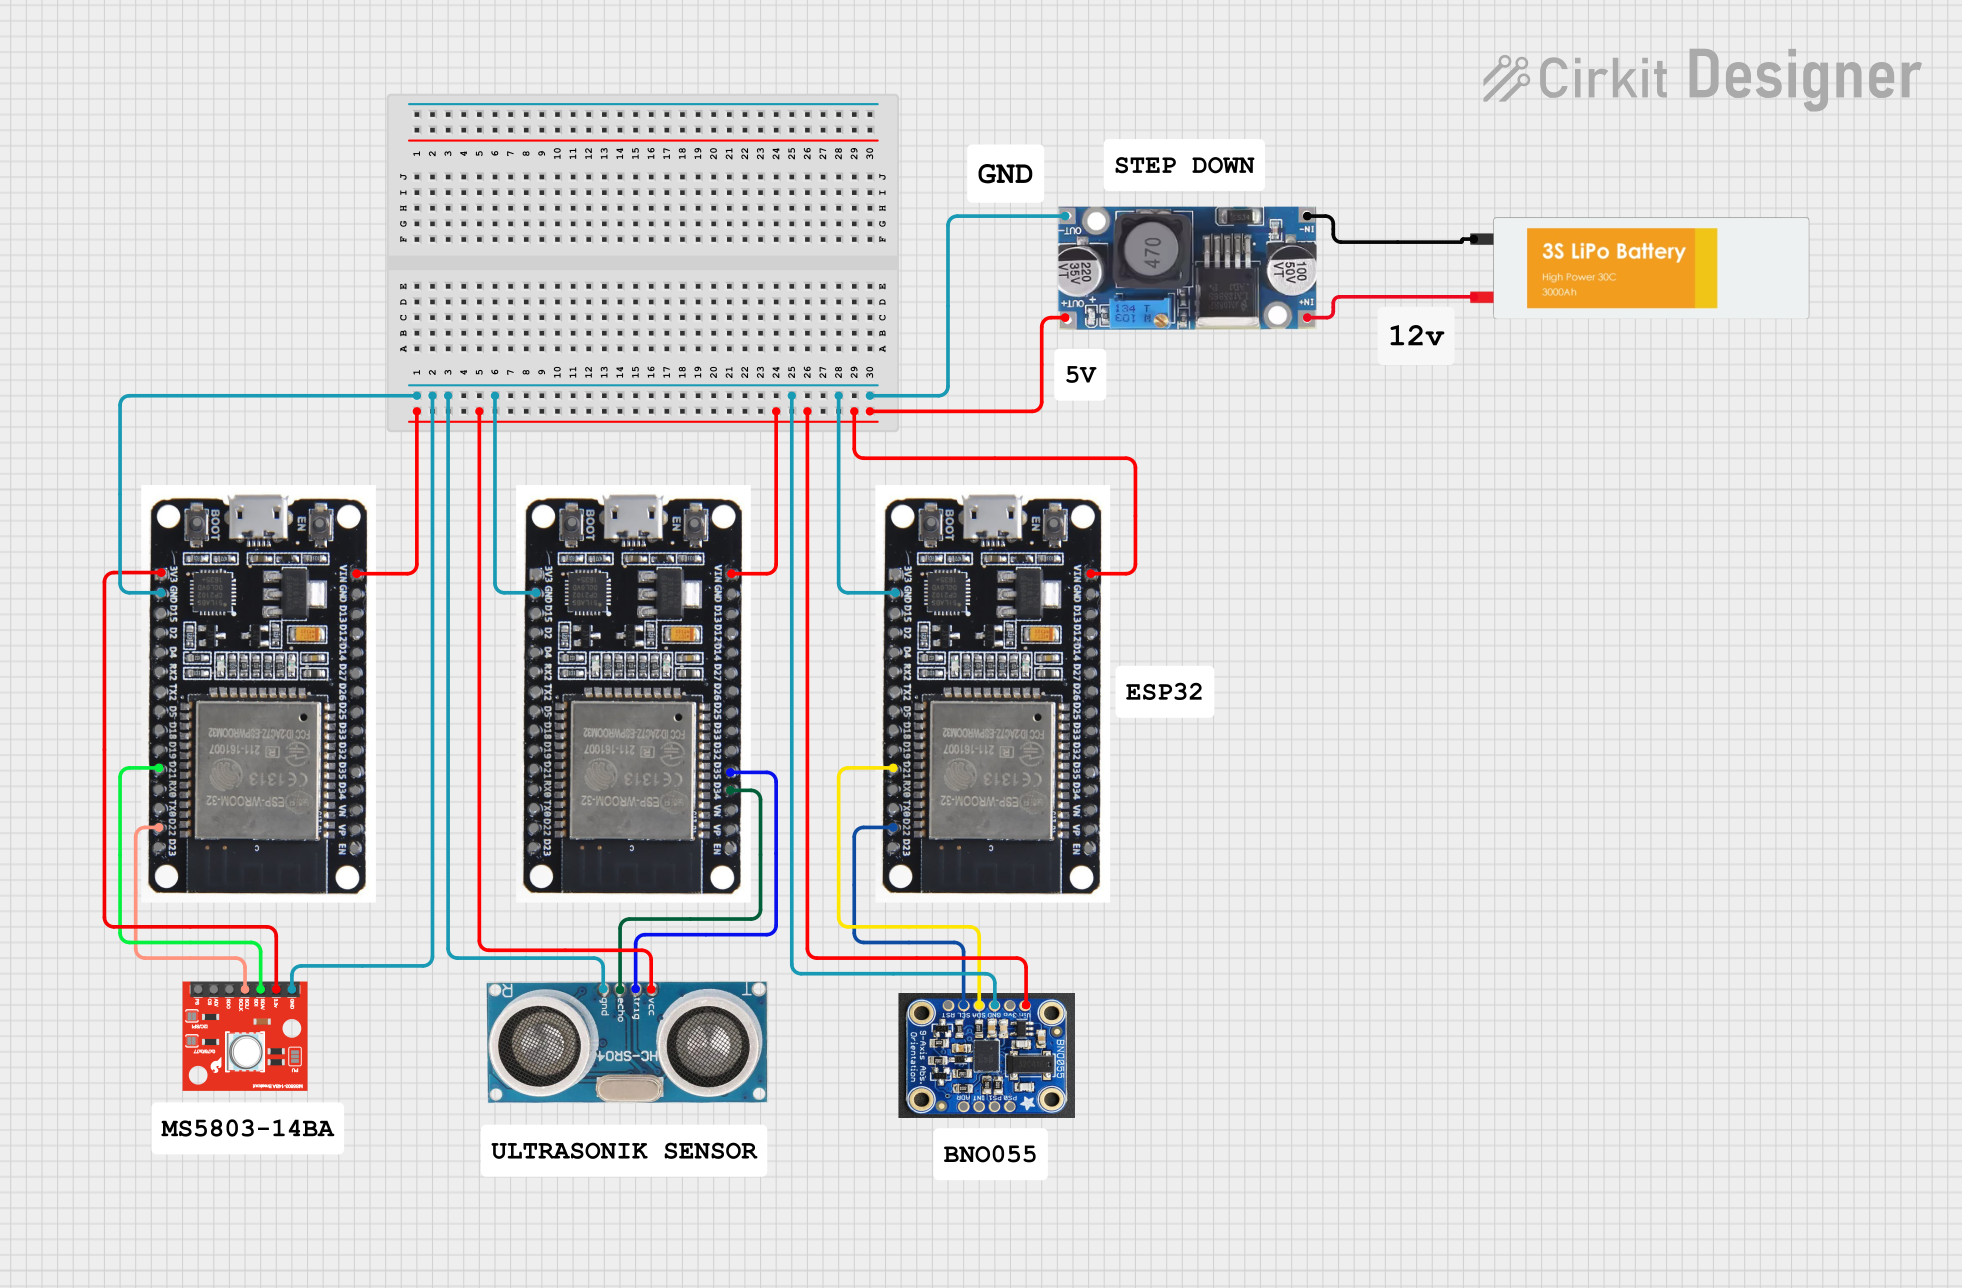
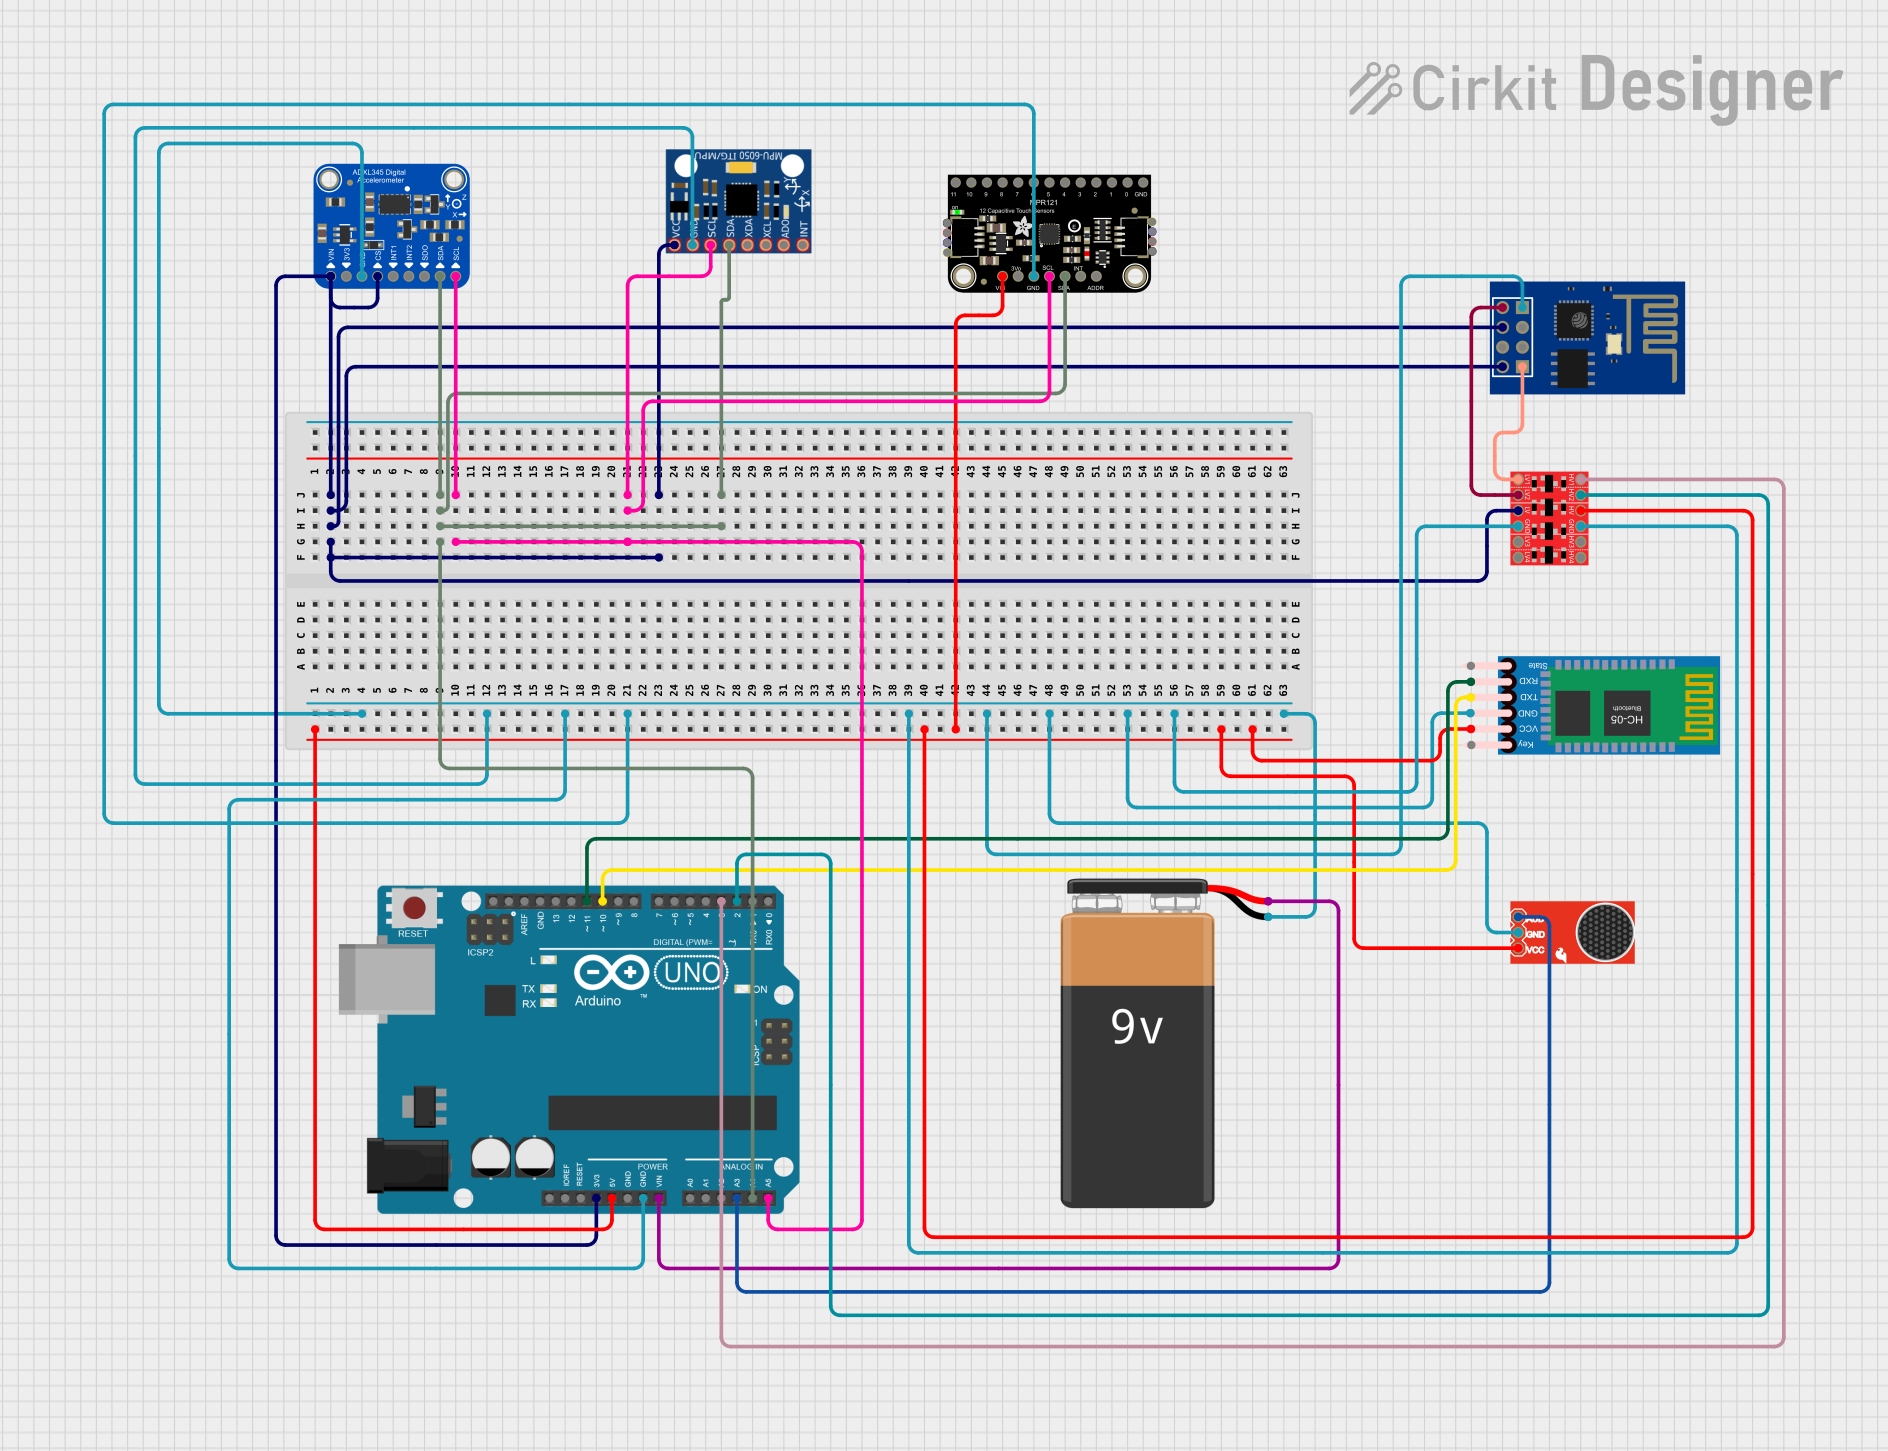
Explore Projects Built with Adafruit MPRLS Sensor Breakout
Common Applications and Use Cases
- Weather monitoring systems
- Altitude and barometric pressure sensing for drones and UAVs
- Medical applications such as blood pressure monitoring
- Industrial controls for fluid and gas pressure systems
Technical Specifications
Key Technical Details
- Pressure Range: 0 to 25 PSI (0 to 1724 millibar)
- Supply Voltage: 3.3V to 5V DC
- Output: 24-bit digital pressure reading
- Interface: I2C
- Accuracy: ±1.5% full-scale over the temperature range of -20°C to 85°C
Pin Configuration and Descriptions
| Pin Number | Name | Description |
|---|---|---|
| 1 | VIN | Supply voltage (3.3V to 5V DC) |
| 2 | GND | Ground connection |
| 3 | SCL | I2C clock line |
| 4 | SDA | I2C data line |
| 5 | SHDN | Shutdown pin (active low) |
Usage Instructions
How to Use the Component in a Circuit
- Power Supply: Connect the VIN pin to a 3.3V or 5V power supply, and the GND pin to the ground.
- I2C Communication: Connect the SCL and SDA pins to the corresponding I2C clock and data lines on your microcontroller.
- Shutdown Control (Optional): The SHDN pin can be connected to a digital output on your microcontroller if you wish to put the sensor into a low-power state when not in use.
Important Considerations and Best Practices
- Ensure that the power supply is within the specified voltage range to prevent damage to the sensor.
- Use pull-up resistors on the I2C lines if they are not already present on your microcontroller board.
- Keep the sensor away from direct contact with liquids or high-humidity environments to prevent damage.
- When mounting the sensor, ensure that the pressure port is accessible and unobstructed.
Example Code for Arduino UNO
#include <Wire.h>
#include <Adafruit_MPRLS.h>

// Create MPRLS object
Adafruit_MPRLS mpr = Adafruit_MPRLS(-1, -1);

void setup() {
  Serial.begin(9600);
  while (!Serial) { delay(10); } // Wait for serial console to open

  if (!mpr.begin()) { // Initialize MPRLS sensor
    Serial.println("Failed to initialize MPRLS sensor!");
    while (1);
  }
}

void loop() {
  float pressure_hPa = mpr.readPressure(); // Read pressure

  // Check if reading was successful
  if (pressure_hPa != NAN) {
    Serial.print("Pressure: ");
    Serial.print(pressure_hPa);
    Serial.println(" hPa");
  } else {
    Serial.println("Failed to read pressure!");
  }

  delay(500); // Wait half a second between readings
}
Troubleshooting and FAQs
Common Issues Users Might Face
- Inaccurate Readings: Ensure that the sensor is calibrated correctly and that there are no obstructions to the pressure port.
- No Pressure Readings: Check the wiring and connections to the I2C lines, and ensure that the correct I2C address is being used in the code.
- Sensor Not Responding: Verify that the power supply is within the specified range and that the sensor is not in shutdown mode.
Solutions and Tips for Troubleshooting
- Calibration: Perform a calibration procedure as specified in the sensor datasheet.
- Wiring Check: Double-check all connections, especially the I2C lines and power supply.
- I2C Address: Use an I2C scanner sketch to confirm the sensor's address if unsure.
FAQs
Q: Can the sensor measure liquid pressure? A: The sensor is designed for gas pressure measurement and should not be used with liquids directly.
Q: What is the maximum pressure the sensor can measure? A: The sensor can measure pressures up to 25 PSI (1724 millibar).
Q: How do I put the sensor into low-power mode? A: Pull the SHDN pin low to put the sensor into shutdown mode, reducing its power consumption.