Cirkit Designer Logo
Cirkit Designer
Your all-in-one circuit design IDE
Home / 
Component Documentation

How to Use SparkFun 7-Segment Serial Display-Yellow: Examples, Pinouts, and Specs

Image of SparkFun 7-Segment Serial Display-Yellow
Cirkit Designer LogoDesign with SparkFun 7-Segment Serial Display-Yellow in Cirkit Designer

Introduction

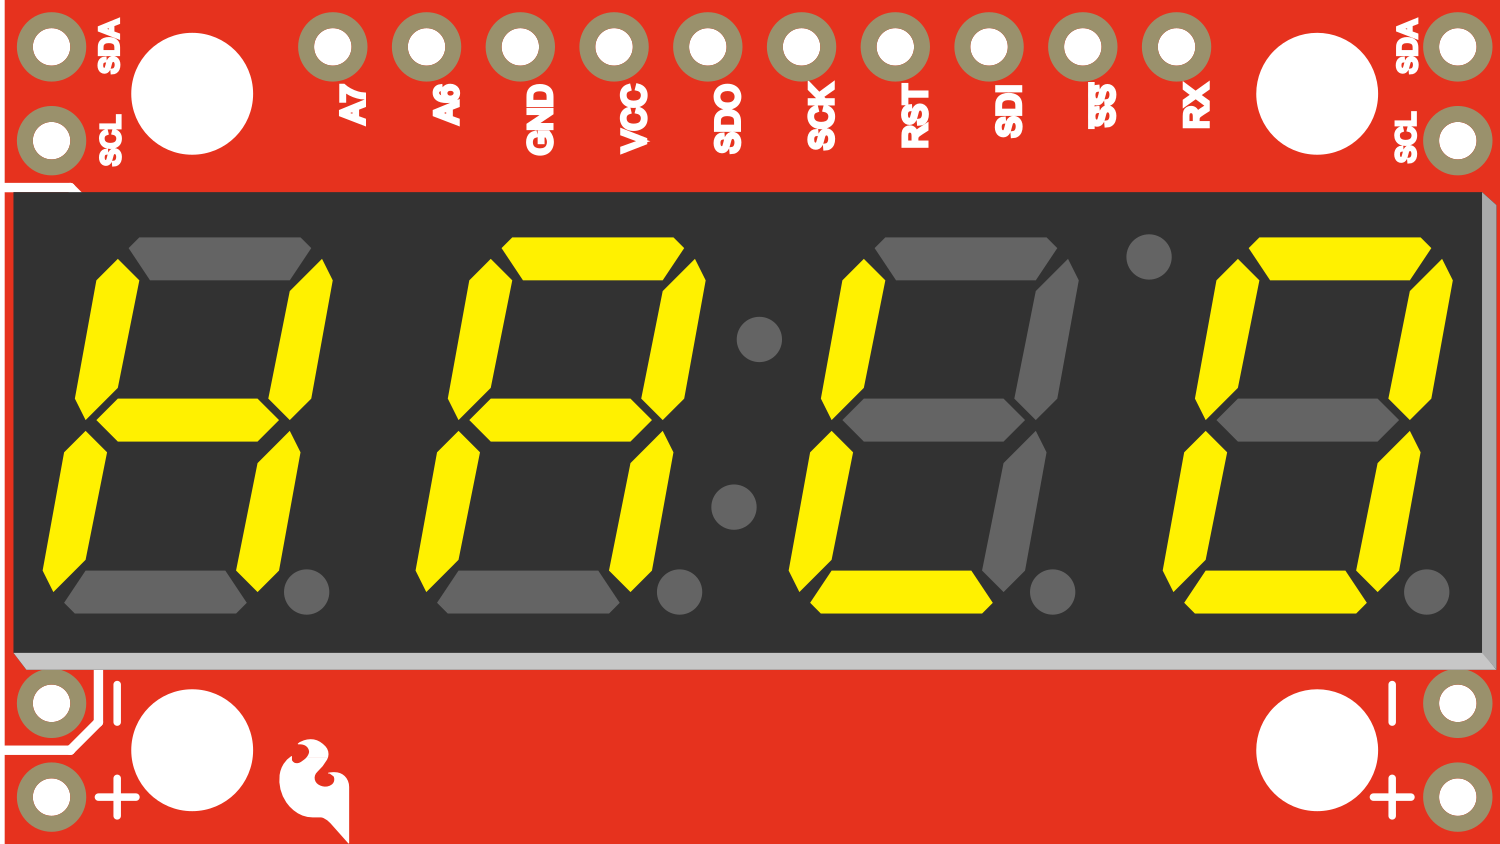
The SparkFun 7-Segment Serial Display is a versatile and bright alphanumeric display module that can be controlled through a serial interface. It is designed to display numbers and characters in a variety of electronics projects, ranging from simple timers and counters to more complex user interfaces. Its yellow color provides high visibility, and the serial communication protocol simplifies the connection to microcontrollers like the Arduino UNO.

Explore Projects Built with SparkFun 7-Segment Serial Display-Yellow

Use Cirkit Designer to design, explore, and prototype these projects online. Some projects support real-time simulation. Click "Open Project" to start designing instantly!
Arduino UNO Controlled Seven-Segment Display Counter
Image of Arduino Uno - Seven Segment Display (Sim-C): A project utilizing SparkFun 7-Segment Serial Display-Yellow in a practical application
This circuit uses an Arduino UNO to control a seven-segment display, displaying digits from 0 to 9 with a one-second delay between each digit. The Arduino drives the segments of the common anode display by setting the corresponding pins to LOW, as defined in the provided sketch code.
Cirkit Designer LogoOpen Project in Cirkit Designer
Arduino UNO 4-Digit 7-Segment Display Counter
Image of arduino: A project utilizing SparkFun 7-Segment Serial Display-Yellow in a practical application
This circuit uses an Arduino UNO to control a 4-digit 7-segment display. The Arduino is programmed to sequentially display the numbers 1, 2, 3, and 4 on the display by driving the appropriate segments and digits.
Cirkit Designer LogoOpen Project in Cirkit Designer
Arduino UNO Controlled LED and 7-Segment Display Circuit
Image of Beunen aan water: A project utilizing SparkFun 7-Segment Serial Display-Yellow in a practical application
This circuit features an Arduino UNO controlling multiple blue LEDs and a 4-digit 7-segment display. The LEDs are configured with current-limiting resistors, and the display is interfaced with the Arduino for potential numeric or character output. The provided code for the Arduino is a template without specific functionality.
Cirkit Designer LogoOpen Project in Cirkit Designer
Arduino UNO Controlled Seven Segment Display with Pushbutton Interaction
Image of ghghghghgh: A project utilizing SparkFun 7-Segment Serial Display-Yellow in a practical application
This is a user-interactive circuit where an Arduino UNO microcontroller drives a seven-segment display and reads input from two pushbuttons. The display's segments are individually controlled by the Arduino, and the pushbuttons are set up to provide user input, potentially to change the displayed digit or trigger other actions.
Cirkit Designer LogoOpen Project in Cirkit Designer

Explore Projects Built with SparkFun 7-Segment Serial Display-Yellow

Use Cirkit Designer to design, explore, and prototype these projects online. Some projects support real-time simulation. Click "Open Project" to start designing instantly!
Image of Arduino Uno - Seven Segment Display (Sim-C): A project utilizing SparkFun 7-Segment Serial Display-Yellow in a practical application
Arduino UNO Controlled Seven-Segment Display Counter
This circuit uses an Arduino UNO to control a seven-segment display, displaying digits from 0 to 9 with a one-second delay between each digit. The Arduino drives the segments of the common anode display by setting the corresponding pins to LOW, as defined in the provided sketch code.
Cirkit Designer LogoOpen Project in Cirkit Designer
Image of arduino: A project utilizing SparkFun 7-Segment Serial Display-Yellow in a practical application
Arduino UNO 4-Digit 7-Segment Display Counter
This circuit uses an Arduino UNO to control a 4-digit 7-segment display. The Arduino is programmed to sequentially display the numbers 1, 2, 3, and 4 on the display by driving the appropriate segments and digits.
Cirkit Designer LogoOpen Project in Cirkit Designer
Image of Beunen aan water: A project utilizing SparkFun 7-Segment Serial Display-Yellow in a practical application
Arduino UNO Controlled LED and 7-Segment Display Circuit
This circuit features an Arduino UNO controlling multiple blue LEDs and a 4-digit 7-segment display. The LEDs are configured with current-limiting resistors, and the display is interfaced with the Arduino for potential numeric or character output. The provided code for the Arduino is a template without specific functionality.
Cirkit Designer LogoOpen Project in Cirkit Designer
Image of ghghghghgh: A project utilizing SparkFun 7-Segment Serial Display-Yellow in a practical application
Arduino UNO Controlled Seven Segment Display with Pushbutton Interaction
This is a user-interactive circuit where an Arduino UNO microcontroller drives a seven-segment display and reads input from two pushbuttons. The display's segments are individually controlled by the Arduino, and the pushbuttons are set up to provide user input, potentially to change the displayed digit or trigger other actions.
Cirkit Designer LogoOpen Project in Cirkit Designer

Technical Specifications

Key Technical Details

  • Display Type: 7-Segment LED
  • Color: Yellow
  • Operating Voltage: 3.3V to 7.5V
  • Maximum Current: 160mA
  • Communication: Serial (9600 bps default)
  • Dimensions: 41mm x 23mm

Pin Configuration and Descriptions

Pin Number Name Description
1 VCC Power supply (3.3V to 7.5V)
2 GND Ground connection
3 RXI Serial Receive Input
4 TXO Serial Transmit Output (not used)
5 RST Reset pin (active low)

Usage Instructions

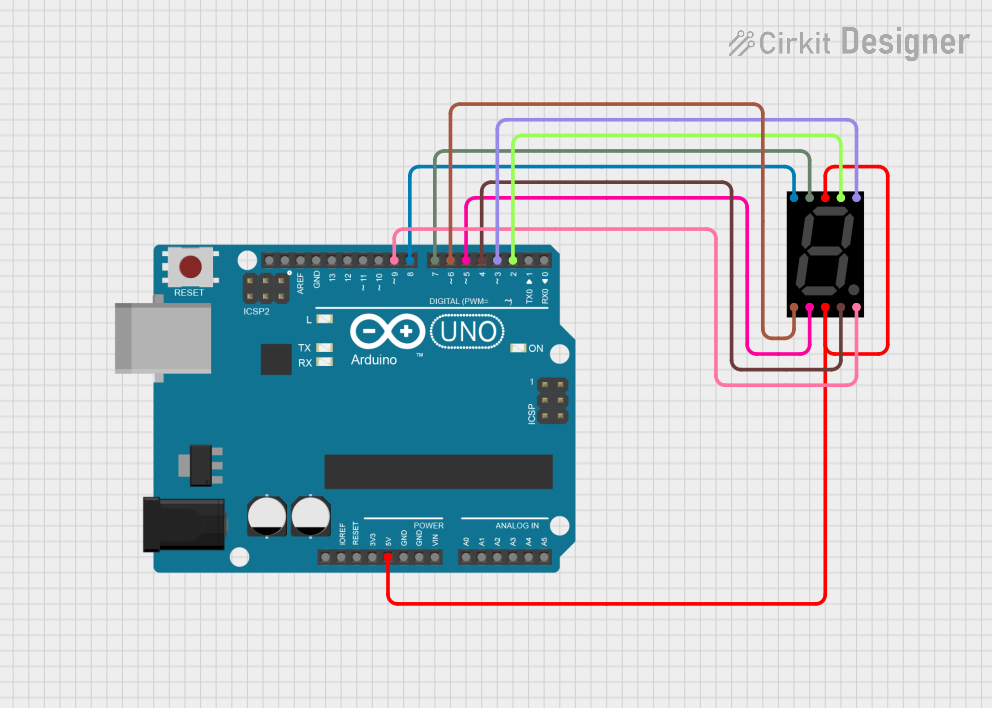
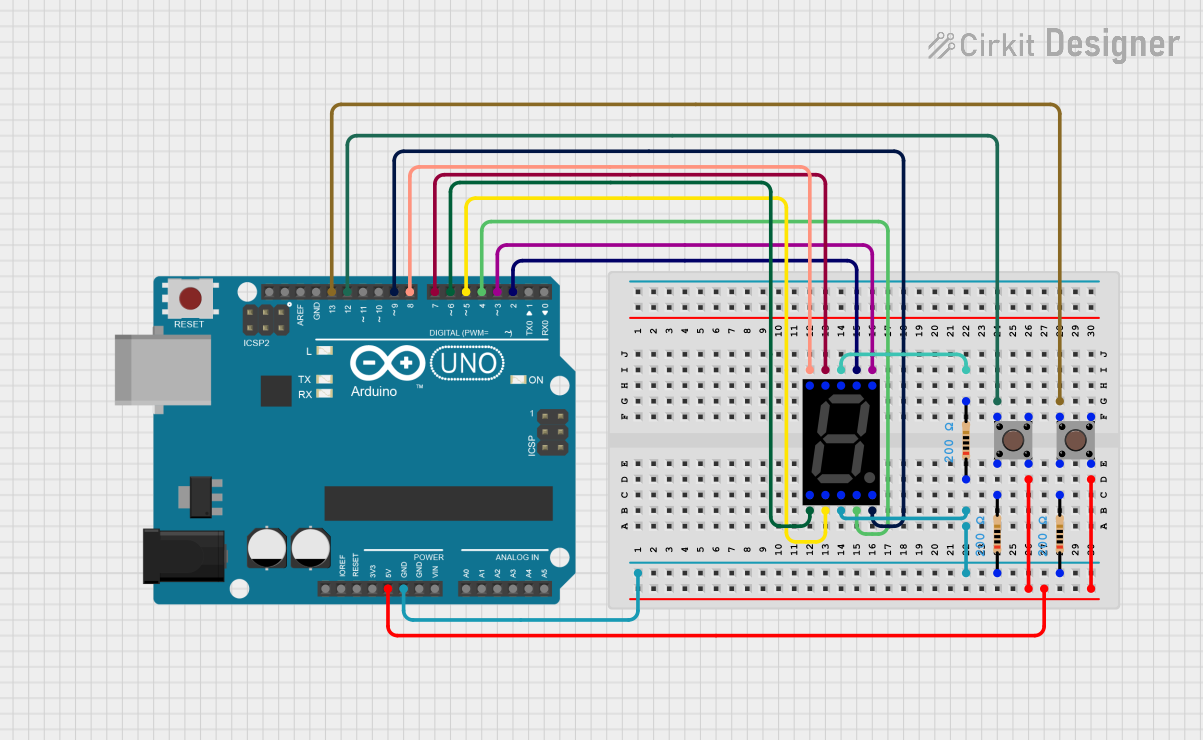
Connecting to an Arduino UNO

  1. Connect the VCC pin to the 5V output on the Arduino.
  2. Connect the GND pin to one of the GND pins on the Arduino.
  3. Connect the RXI pin to a digital pin on the Arduino (e.g., pin 2).
  4. The TXO pin is not used in this setup.
  5. The RST pin can be connected to another digital pin if reset functionality is desired.

Programming the Display

To control the SparkFun 7-Segment Serial Display with an Arduino UNO, you can use the following example code:

#include <SoftwareSerial.h>

// RX, TX
SoftwareSerial sevenSegSerial(2, 3); // RX pin, TX pin (TX not used)

void setup() {
  // Start serial communication at 9600 bps
  sevenSegSerial.begin(9600);
}

void loop() {
  // Send a command to clear the display
  sevenSegSerial.write(0x76); // Clear display command
  
  // Display the number "1234"
  sevenSegSerial.print("1234");
  
  delay(1000); // Wait for 1 second
  
  // Display the letter "AbCd"
  sevenSegSerial.print("AbCd");
  
  delay(1000); // Wait for 1 second
}

Important Considerations and Best Practices

  • Ensure that the power supply voltage does not exceed 7.5V to prevent damage.
  • When using multiple displays, ensure that the current draw does not exceed the power supply capacity.
  • Use a current-limiting resistor if connecting the RST pin directly to an Arduino digital pin.

Troubleshooting and FAQs

Common Issues

  • Display Not Lighting Up: Check the power connections and ensure that the voltage is within the specified range.
  • Garbled Characters: Ensure that the serial communication baud rate matches between the Arduino and the display.
  • Partial Display: Check for loose connections or damaged segments.

Solutions and Tips for Troubleshooting

  • Double-check wiring, especially the RXI connection.
  • Use the SoftwareSerial library to create a serial connection on any digital pins.
  • Reset the display using the RST pin if it becomes unresponsive.

FAQs

Q: Can I daisy-chain multiple displays? A: Yes, multiple displays can be daisy-chained, but each must be individually addressed.

Q: How do I control the brightness of the display? A: Brightness control can be achieved by sending specific commands to the display. Refer to the SparkFun 7-Segment Serial Display datasheet for the command set.

Q: What is the default baud rate for serial communication? A: The default baud rate is 9600 bps.

For further assistance, consult the SparkFun 7-Segment Serial Display datasheet or contact SparkFun customer support.