How to Use 3.7v LiPo 2200 mAh: Examples, Pinouts, and Specs
Introduction
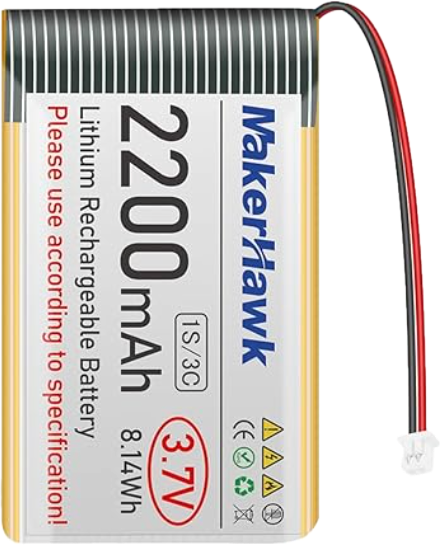
The MakerHawk Rechargeable LiPo Battery is a lightweight and high-capacity lithium polymer (LiPo) battery with a nominal voltage of 3.7V and a capacity of 2200 mAh. This battery is widely used in portable electronics, remote-controlled (RC) devices, IoT projects, and other applications requiring a compact, rechargeable power source. Its high energy density and stable discharge characteristics make it an excellent choice for powering small to medium-sized electronic devices.
Explore Projects Built with 3.7v LiPo 2200 mAh


Explore Projects Built with 3.7v LiPo 2200 mAh
Common Applications
- RC vehicles (drones, cars, boats, etc.)
- Wearable devices
- Portable electronics (e.g., handheld gaming consoles, cameras)
- DIY electronics and IoT projects
- Backup power for microcontroller-based systems (e.g., Arduino, Raspberry Pi)
Technical Specifications
Key Specifications
| Parameter | Value |
|---|---|
| Manufacturer | MakerHawk |
| Part ID | Rechargeable LiPo Battery |
| Nominal Voltage | 3.7V |
| Capacity | 2200 mAh |
| Maximum Discharge Current | 2C (4.4A) |
| Charging Voltage | 4.2V (max) |
| Charging Current | 0.5C (1.1A recommended) |
| Connector Type | JST-XH 2-pin |
| Dimensions | 60mm x 34mm x 8mm |
| Weight | ~45g |
Pin Configuration
The battery is equipped with a JST-XH 2-pin connector. Below is the pinout description:
| Pin Number | Pin Name | Description |
|---|---|---|
| 1 | Positive (+) | Connects to the positive terminal of the circuit |
| 2 | Negative (-) | Connects to the ground (GND) of the circuit |
Usage Instructions
How to Use the 3.7V LiPo Battery in a Circuit
Connection:
- Connect the positive (+) pin of the battery to the positive power rail of your circuit.
- Connect the negative (-) pin to the ground (GND) of your circuit.
- Ensure the connector is securely attached to avoid loose connections.
Charging:
- Use a LiPo-compatible charger with a constant current/constant voltage (CC/CV) charging profile.
- Set the charging voltage to 4.2V and the charging current to 1.1A (recommended).
- Avoid overcharging or discharging below 3.0V, as this can damage the battery.
Discharge:
- Do not exceed the maximum discharge current of 4.4A.
- Monitor the battery voltage during use to prevent over-discharge. Use a battery management system (BMS) or low-voltage cutoff circuit for safety.
Mounting:
- Secure the battery in your project using a battery holder or adhesive tape to prevent movement or damage.
Important Considerations and Best Practices
- Safety: Never puncture, short-circuit, or expose the battery to fire or water.
- Storage: Store the battery at room temperature, ideally at 40-60% charge, to prolong its lifespan.
- Balancing: If using multiple batteries in series, ensure they are balanced to avoid uneven charging/discharging.
- Protection Circuit: Use a protection circuit module (PCM) to safeguard against overcharging, over-discharging, and short circuits.
Example: Using the Battery with an Arduino UNO
Below is an example of connecting the 3.7V LiPo battery to an Arduino UNO using a step-up converter to provide 5V:
Circuit Diagram
- Connect the battery's positive terminal to the input of a step-up converter.
- Connect the step-up converter's output to the Arduino's 5V and GND pins.
Sample Code
// Example code to read battery voltage using an analog pin on Arduino UNO
// Assumes a voltage divider circuit is used to scale down the battery voltage

const int batteryPin = A0; // Analog pin connected to the voltage divider
const float voltageDividerRatio = 2.0; // Adjust based on your resistor values
const float referenceVoltage = 5.0; // Arduino UNO's reference voltage

void setup() {
  Serial.begin(9600); // Initialize serial communication
}

void loop() {
  int rawValue = analogRead(batteryPin); // Read the analog value
  float batteryVoltage = (rawValue / 1023.0) * referenceVoltage * voltageDividerRatio;

  // Print the battery voltage to the Serial Monitor
  Serial.print("Battery Voltage: ");
  Serial.print(batteryVoltage);
  Serial.println(" V");

  delay(1000); // Wait for 1 second before the next reading
}
Troubleshooting and FAQs
Common Issues and Solutions
| Issue | Possible Cause | Solution |
|---|---|---|
| Battery not charging | Faulty charger or incorrect settings | Verify charger settings and connections |
| Battery overheating during use | Exceeding maximum discharge current | Reduce load or use a higher-capacity battery |
| Low runtime | Over-discharge or aging battery | Avoid over-discharging; replace if needed |
| Arduino resets unexpectedly | Insufficient voltage or current supply | Use a step-up converter or larger battery |
FAQs
Can I use this battery directly with a 5V device?
- No, the battery's nominal voltage is 3.7V. Use a step-up converter to boost the voltage to 5V.
How do I know when the battery is fully charged?
- The battery is fully charged when the charger indicates 4.2V on the output.
What happens if I over-discharge the battery?
- Over-discharging can permanently damage the battery. Use a low-voltage cutoff circuit to prevent this.
Can I connect multiple batteries in series or parallel?
- Yes, but ensure proper balancing and use a BMS to manage the pack safely.
By following these guidelines, you can safely and effectively use the MakerHawk 3.7V LiPo 2200 mAh battery in your projects.