Cirkit Designer Logo
Cirkit Designer
Your all-in-one circuit design IDE
Home / 
Component Documentation

How to Use speaker: Examples, Pinouts, and Specs

Image of speaker
Cirkit Designer LogoDesign with speaker in Cirkit Designer

Introduction

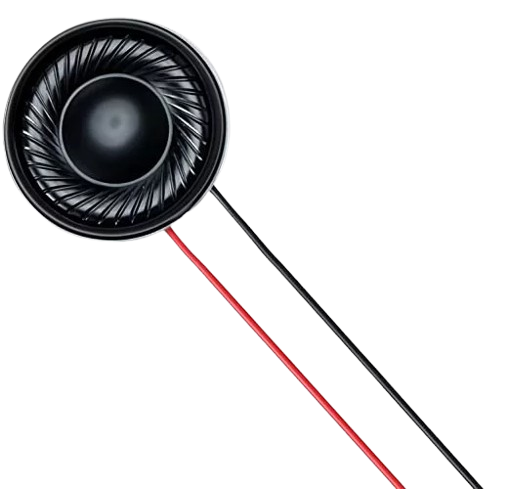
A speaker is an electroacoustic transducer that converts electrical energy into sound waves, allowing audio signals to be heard. It is a fundamental component in audio systems, used to reproduce sound in various applications. Speakers are available in different sizes, power ratings, and impedance values to suit a wide range of use cases.

Explore Projects Built with speaker

Use Cirkit Designer to design, explore, and prototype these projects online. Some projects support real-time simulation. Click "Open Project" to start designing instantly!
ESP32-Based Voice Assistant with Battery-Powered Microphone and Speaker
Image of Minor: A project utilizing speaker in a practical application
This circuit is a voice-controlled system that uses an ESP32 microcontroller to process audio input from a microphone, send the data to a Gemini API for speech-to-text conversion, and output responses through a speaker. It includes an IR sensor for additional input, an LED for status indication, and a battery with a charging module for power management.
Cirkit Designer LogoOpen Project in Cirkit Designer
Arduino UNO Bluetooth-Controlled Speaker
Image of Bluetooth Speaker: A project utilizing speaker in a practical application
This circuit is designed to function as a Bluetooth-controlled speaker system using an Arduino UNO as the central controller. The Arduino is connected to a Bluetooth Mate Gold module for wireless communication and a speaker for audio output. The Arduino's digital pins D0 and D1 are used for RX and TX communication with the Bluetooth module, while pin D9 is configured to drive the speaker.
Cirkit Designer LogoOpen Project in Cirkit Designer
Arduino Nano Controlled PAM8403 Audio Amplifier with Voice Synthesis
Image of Talking-Volt-meter-Using-Arduino: A project utilizing speaker in a practical application
This circuit is designed to drive a loudspeaker using an Arduino Nano and a PAM8403 audio amplifier. The Arduino Nano is programmed to generate voice signals using the Talkie library, which are then fed into the PAM8403 amplifier's right channel input. A resistor is connected to the ground and input pins of the PAM8403, likely for noise reduction or signal conditioning.
Cirkit Designer LogoOpen Project in Cirkit Designer
ESP32-Based Voice-Controlled Speaker
Image of Main Design: A project utilizing speaker in a practical application
This circuit is a digital voice playback and recording system powered by a 3.7V battery. It features an ESP32 microcontroller for processing, an Adafruit MAX98357A amplifier to drive a loudspeaker for audio output, and an Adafruit MAX9814 microphone amplifier for audio input. A pushbutton provides user interaction, and a 3.3V regulator ensures stable power supply to the components.
Cirkit Designer LogoOpen Project in Cirkit Designer

Explore Projects Built with speaker

Use Cirkit Designer to design, explore, and prototype these projects online. Some projects support real-time simulation. Click "Open Project" to start designing instantly!
Image of Minor: A project utilizing speaker in a practical application
ESP32-Based Voice Assistant with Battery-Powered Microphone and Speaker
This circuit is a voice-controlled system that uses an ESP32 microcontroller to process audio input from a microphone, send the data to a Gemini API for speech-to-text conversion, and output responses through a speaker. It includes an IR sensor for additional input, an LED for status indication, and a battery with a charging module for power management.
Cirkit Designer LogoOpen Project in Cirkit Designer
Image of Bluetooth Speaker: A project utilizing speaker in a practical application
Arduino UNO Bluetooth-Controlled Speaker
This circuit is designed to function as a Bluetooth-controlled speaker system using an Arduino UNO as the central controller. The Arduino is connected to a Bluetooth Mate Gold module for wireless communication and a speaker for audio output. The Arduino's digital pins D0 and D1 are used for RX and TX communication with the Bluetooth module, while pin D9 is configured to drive the speaker.
Cirkit Designer LogoOpen Project in Cirkit Designer
Image of Talking-Volt-meter-Using-Arduino: A project utilizing speaker in a practical application
Arduino Nano Controlled PAM8403 Audio Amplifier with Voice Synthesis
This circuit is designed to drive a loudspeaker using an Arduino Nano and a PAM8403 audio amplifier. The Arduino Nano is programmed to generate voice signals using the Talkie library, which are then fed into the PAM8403 amplifier's right channel input. A resistor is connected to the ground and input pins of the PAM8403, likely for noise reduction or signal conditioning.
Cirkit Designer LogoOpen Project in Cirkit Designer
Image of Main Design: A project utilizing speaker in a practical application
ESP32-Based Voice-Controlled Speaker
This circuit is a digital voice playback and recording system powered by a 3.7V battery. It features an ESP32 microcontroller for processing, an Adafruit MAX98357A amplifier to drive a loudspeaker for audio output, and an Adafruit MAX9814 microphone amplifier for audio input. A pushbutton provides user interaction, and a 3.3V regulator ensures stable power supply to the components.
Cirkit Designer LogoOpen Project in Cirkit Designer

Common Applications and Use Cases

  • Home audio systems and entertainment setups
  • Public address systems
  • Portable Bluetooth speakers
  • Automotive audio systems
  • DIY electronics and hobby projects
  • Alarm and notification systems

Technical Specifications

Below are the key technical details for the 8-ohm speaker:

Parameter Value
Manufacturer Speaker
Part ID 8 ohm
Impedance 8 Ω
Power Rating 0.5 W to 5 W (typical range)
Frequency Response 100 Hz to 20 kHz
Sensitivity 85 dB to 90 dB (typical)
Diameter Varies (e.g., 2", 3", 4")
Operating Temperature -20°C to 60°C

Pin Configuration and Descriptions

Speakers typically have two terminals for electrical connections:

Pin Description
+ Positive terminal (connect to the audio signal or amplifier output)
- Negative terminal (connect to ground or the return path of the circuit)

Usage Instructions

How to Use the Speaker in a Circuit

  1. Connect to an Audio Source:

    • Use an amplifier or audio driver circuit to provide sufficient power to the speaker.
    • Ensure the amplifier's output impedance matches the speaker's impedance (8 Ω in this case).
  2. Polarity Matters:

    • Connect the positive terminal of the speaker to the positive output of the amplifier.
    • Connect the negative terminal to the ground or negative output of the amplifier.
  3. Power Considerations:

    • Ensure the power supplied to the speaker does not exceed its rated power to avoid damage.
    • Use a series resistor or capacitor if needed to limit current or filter frequencies.
  4. Mounting:

    • Secure the speaker in an enclosure or mounting frame to enhance sound quality and protect it from damage.

Important Considerations and Best Practices

  • Impedance Matching: Always match the speaker's impedance with the amplifier's output impedance to prevent distortion or damage.
  • Power Handling: Avoid exceeding the speaker's power rating to prevent overheating or permanent damage.
  • Enclosure Design: Use a properly designed enclosure to improve sound quality and bass response.
  • Frequency Filtering: Use capacitors or inductors to filter out unwanted frequencies if the speaker is part of a multi-speaker system.

Example: Connecting to an Arduino UNO

You can use an Arduino UNO to drive a small 8-ohm speaker for simple sound generation. Below is an example code to generate a tone:

// Example: Generate a tone on an 8-ohm speaker using Arduino UNO
// Connect the positive terminal of the speaker to pin 9
// Connect the negative terminal of the speaker to GND

int speakerPin = 9; // Pin connected to the speaker

void setup() {
  pinMode(speakerPin, OUTPUT); // Set the speaker pin as an output
}

void loop() {
  tone(speakerPin, 1000); // Generate a 1 kHz tone
  delay(500);             // Play the tone for 500 ms
  noTone(speakerPin);     // Stop the tone
  delay(500);             // Wait for 500 ms before repeating
}

Note: For higher power applications, use an external amplifier circuit between the Arduino and the speaker.

Troubleshooting and FAQs

Common Issues and Solutions

  1. No Sound from the Speaker:

    • Cause: Incorrect wiring or loose connections.
    • Solution: Verify the connections and ensure the amplifier or audio source is functioning.
  2. Distorted Sound:

    • Cause: Mismatched impedance or overdriving the speaker.
    • Solution: Match the speaker's impedance with the amplifier and reduce the input power.
  3. Speaker Overheating:

    • Cause: Exceeding the power rating of the speaker.
    • Solution: Use a resistor or reduce the amplifier's output power.
  4. Low Volume Output:

    • Cause: Insufficient power from the audio source.
    • Solution: Use an amplifier to boost the signal.

FAQs

  • Q: Can I connect the speaker directly to a microcontroller like Arduino?
    A: While you can connect a small speaker directly, it is recommended to use a transistor or amplifier circuit to drive the speaker for better sound quality and to avoid damaging the microcontroller.

  • Q: How do I improve the bass response of the speaker?
    A: Use a properly designed enclosure and consider adding a low-pass filter to enhance bass frequencies.

  • Q: Can I use this speaker for stereo sound?
    A: Yes, but you will need two speakers and a stereo amplifier to create a stereo audio system.

  • Q: What happens if I reverse the polarity of the speaker?
    A: Reversing polarity may cause phase cancellation in multi-speaker setups, reducing sound quality. For single speakers, it may not have a noticeable effect. Always connect the speaker with the correct polarity for optimal performance.