How to Use Adafruit BMP390: Examples, Pinouts, and Specs
Introduction
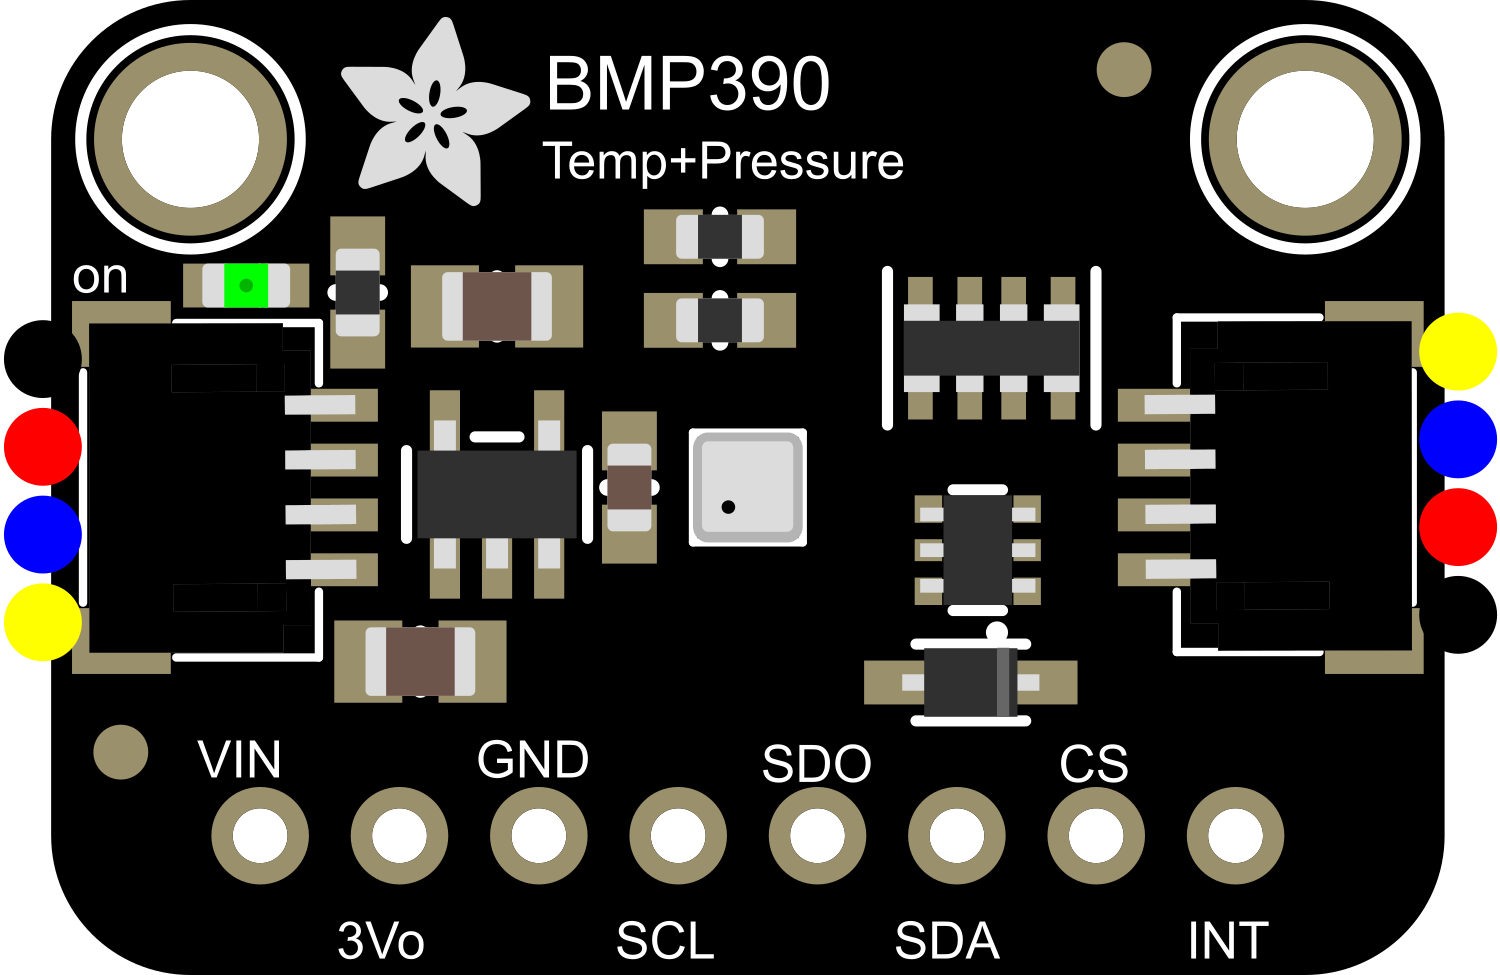
The Adafruit BMP390 is a high-precision sensor module designed for measuring barometric pressure and altitude with great accuracy. It is an ideal choice for various applications, including weather stations, indoor navigation, drones, and altitude tracking for outdoor activities. The BMP390 is an upgrade to the earlier BMP280 and BMP388, offering improved accuracy and noise performance.
Explore Projects Built with Adafruit BMP390
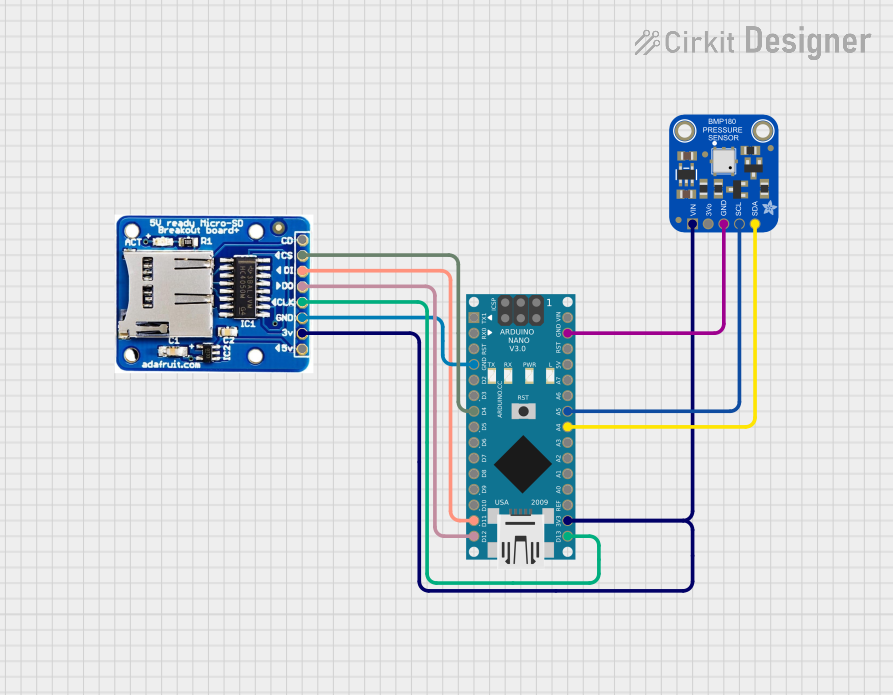
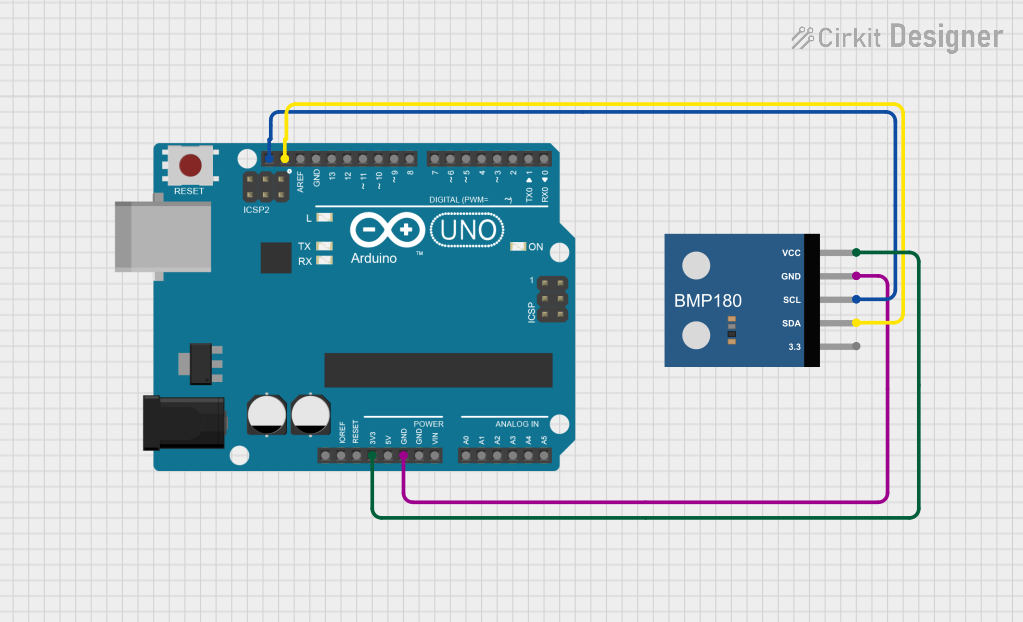
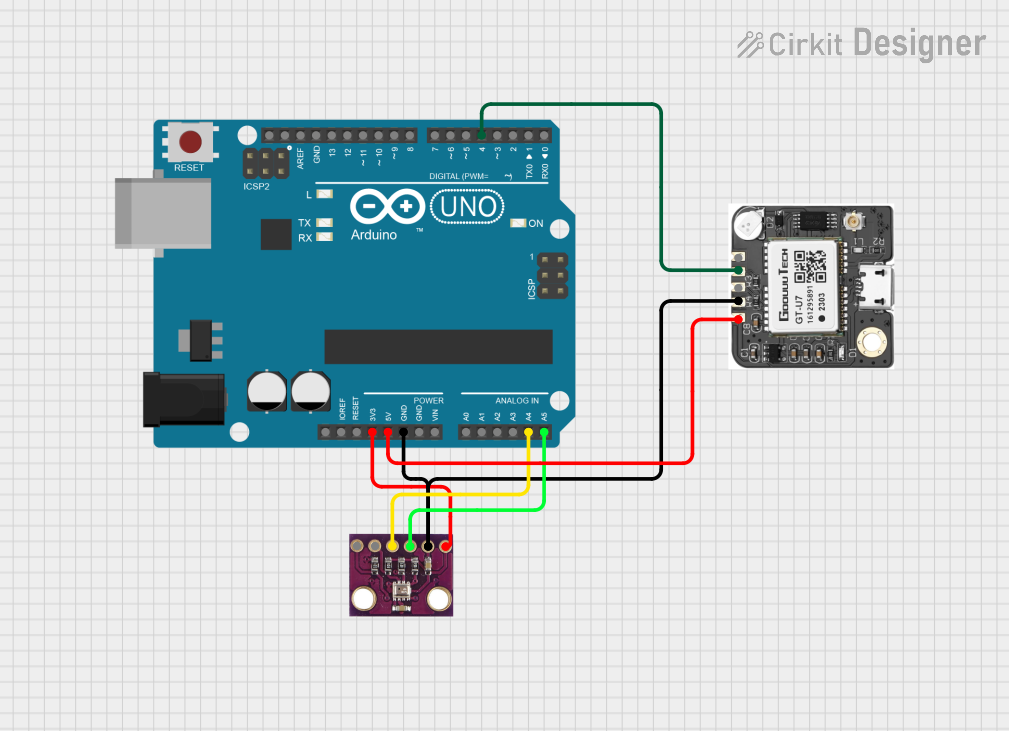
Explore Projects Built with Adafruit BMP390
Technical Specifications
Key Features
- Pressure Range: 300 hPa to 1250 hPa
- Relative Accuracy: ±0.08 hPa (equivalent to ±0.66 m)
- Absolute Accuracy: ±0.5 hPa
- Temperature Coefficient Offset: ±1.5 Pa/K
- Operating Temperature Range: -40°C to +85°C
- Supply Voltage: 1.65V to 3.6V
- Interface: I2C and SPI
Pin Configuration and Descriptions
| Pin Number | Pin Name | Description |
|---|---|---|
| 1 | VDD | Power supply (1.65V to 3.6V) |
| 2 | GND | Ground |
| 3 | SCL/SCK | I2C Clock / SPI Clock |
| 4 | SDA/SDI | I2C Data / SPI Data Input |
| 5 | SD0/SDO | SPI Data Output |
| 6 | CSB | SPI Chip Select (active low) |
Usage Instructions
Integration into a Circuit
To use the BMP390 in a circuit, connect the VDD pin to a power supply between 1.65V and 3.6V and the GND pin to the ground. For I2C communication, connect the SCL pin to the I2C clock line and the SDA pin to the I2C data line. For SPI communication, connect SCK, SDI, SDO, and CSB to the corresponding SPI lines on your microcontroller.
Best Practices
- Ensure that the power supply is stable and within the specified voltage range.
- Use pull-up resistors on the I2C lines if they are not already present on the microcontroller board.
- Keep the sensor away from heat sources to avoid affecting the temperature readings.
- For accurate pressure readings, calibrate the sensor at a known altitude and pressure.
Example Code for Arduino UNO
#include <Wire.h>
#include <Adafruit_BMP3XX.h>

#define SEALEVELPRESSURE_HPA (1013.25)

Adafruit_BMP3XX bmp;

void setup() {
  Serial.begin(9600);
  if (!bmp.begin()) {
    Serial.println("Could not find a valid BMP390 sensor, check wiring!");
    while (1);
  }

  // Set up oversampling and filter initialization
  bmp.setTemperatureOversampling(BMP3_OVERSAMPLING_8X);
  bmp.setPressureOversampling(BMP3_OVERSAMPLING_4X);
  bmp.setIIRFilterCoeff(BMP3_IIR_FILTER_COEFF_3);
}

void loop() {
  if (!bmp.performReading()) {
    Serial.println("Failed to perform reading :(");
    return;
  }
  Serial.print("Temperature = ");
  Serial.print(bmp.temperature);
  Serial.println(" *C");

  Serial.print("Pressure = ");
  Serial.print(bmp.pressure / 100.0);
  Serial.println(" hPa");

  Serial.print("Approx. Altitude = ");
  Serial.print(bmp.readAltitude(SEALEVELPRESSURE_HPA));
  Serial.println(" m");

  delay(2000);
}
Troubleshooting and FAQs
Common Issues
- Sensor not detected: Ensure that the wiring is correct and that the sensor is properly powered.
- Inaccurate readings: Verify that the sensor is calibrated and that it's not exposed to sudden temperature changes.
- Communication errors: Check the pull-up resistors on the I2C lines and ensure that the SPI lines are not shared with other devices without proper management.
FAQs
Q: Can the BMP390 be used for both I2C and SPI communication? A: Yes, the BMP390 supports both I2C and SPI communication modes.
Q: What is the purpose of the CSB pin? A: The CSB pin is the chip select for SPI communication. It is active low and is used to initiate communication with the sensor.
Q: How can I improve the accuracy of altitude measurements? A: For best accuracy, calibrate the sensor at a known altitude and pressure, and use the temperature compensation feature.
Q: Is the BMP390 waterproof? A: No, the BMP390 is not waterproof. Protect it from moisture and other environmental conditions that could damage the sensor.
For further assistance, consult the Adafruit BMP390 datasheet and the community forums for additional support and resources.