How to Use Solenoid valve 3/2 double coil: Examples, Pinouts, and Specs

Introduction
The EMC Solenoid Valve 3/2 Double Coil is an electromechanical device designed to control the flow of fluids in a system. It features three ports and two positions, allowing it to direct fluid between different pathways. The valve is operated by two electromagnetic coils, which switch the valve between its two states. This component is widely used in pneumatic and hydraulic systems, as well as in industrial automation, where precise control of fluid flow is required.
Explore Projects Built with Solenoid valve 3/2 double coil
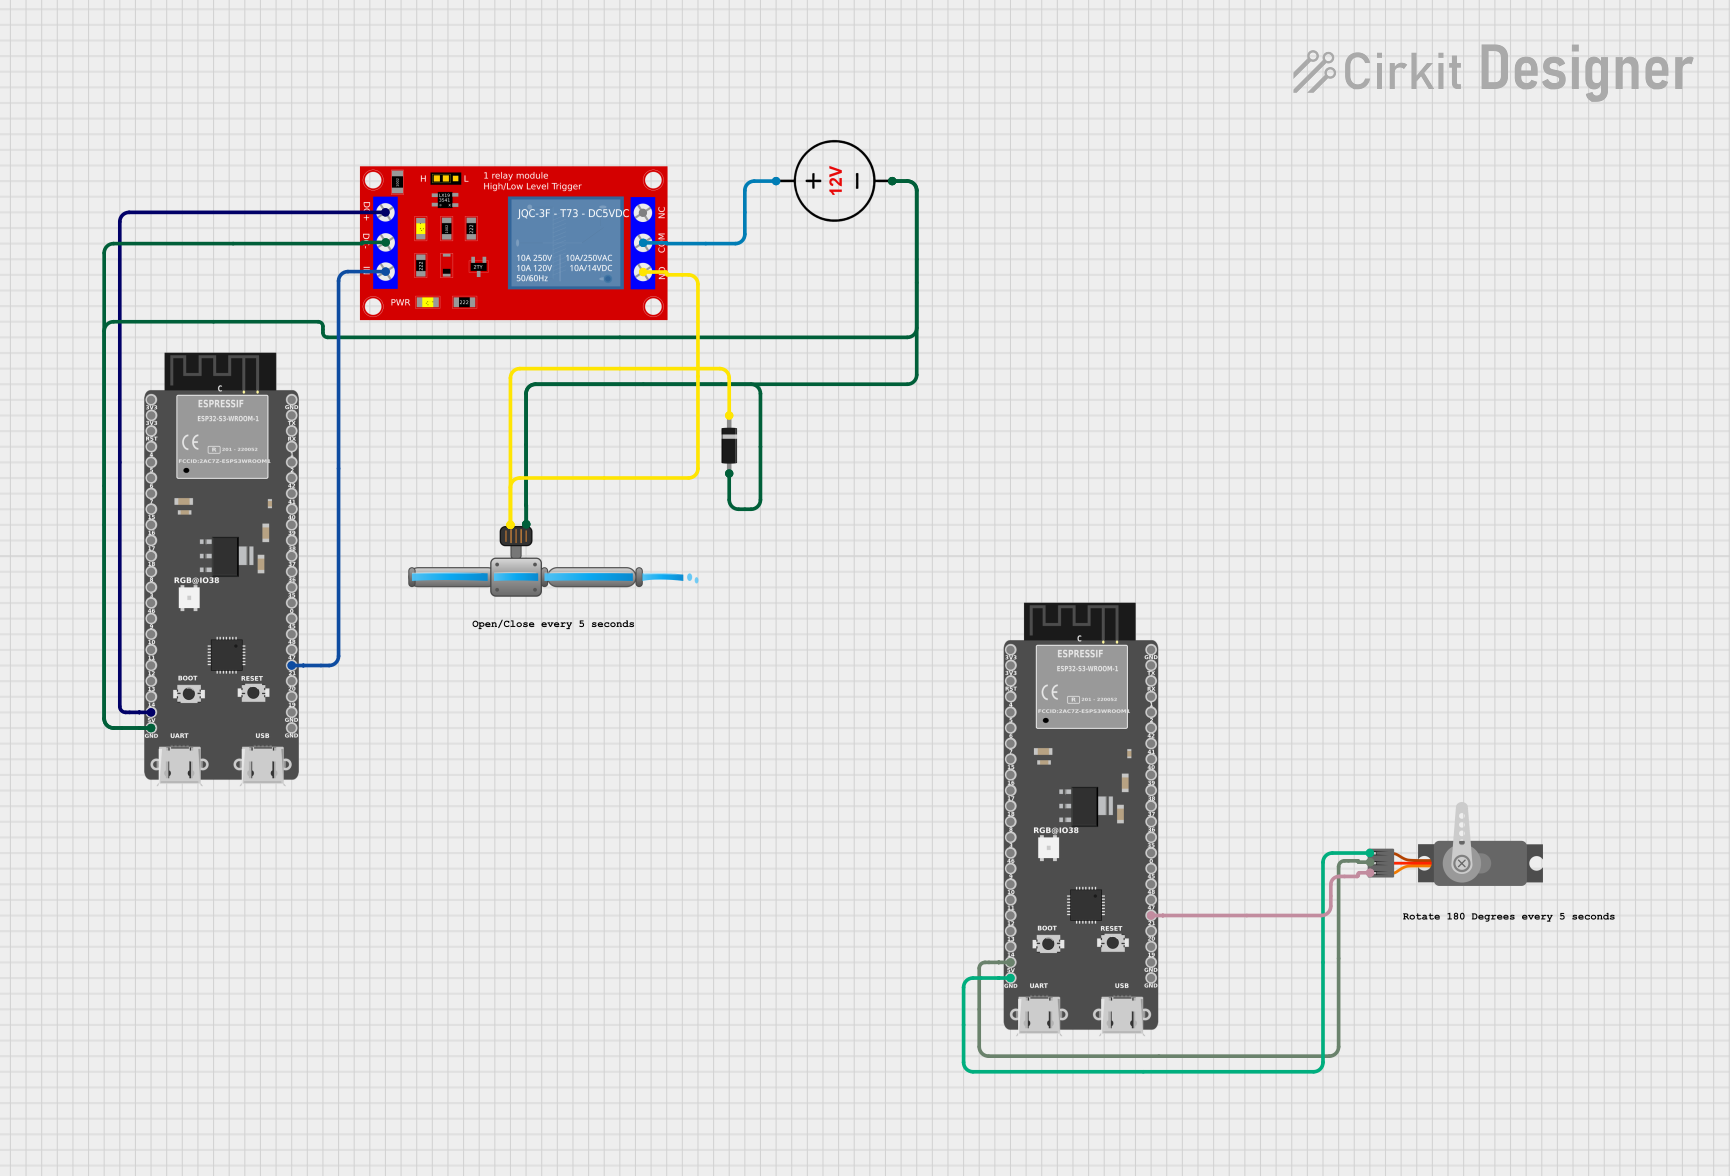
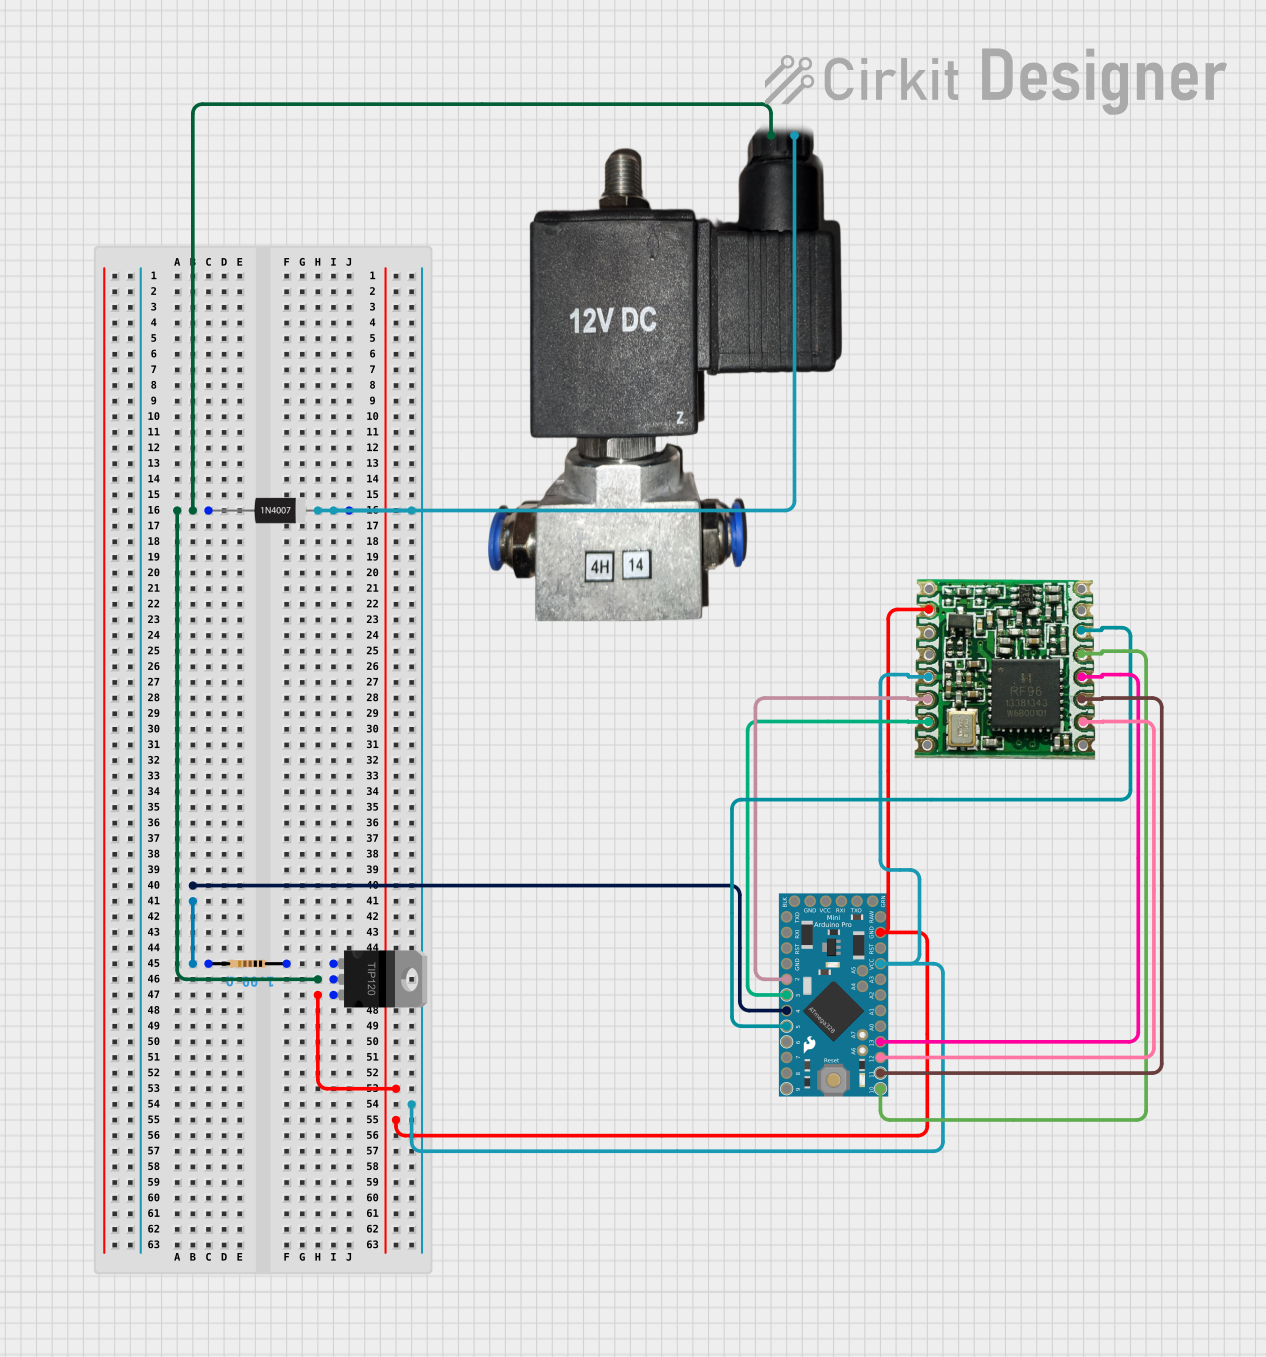
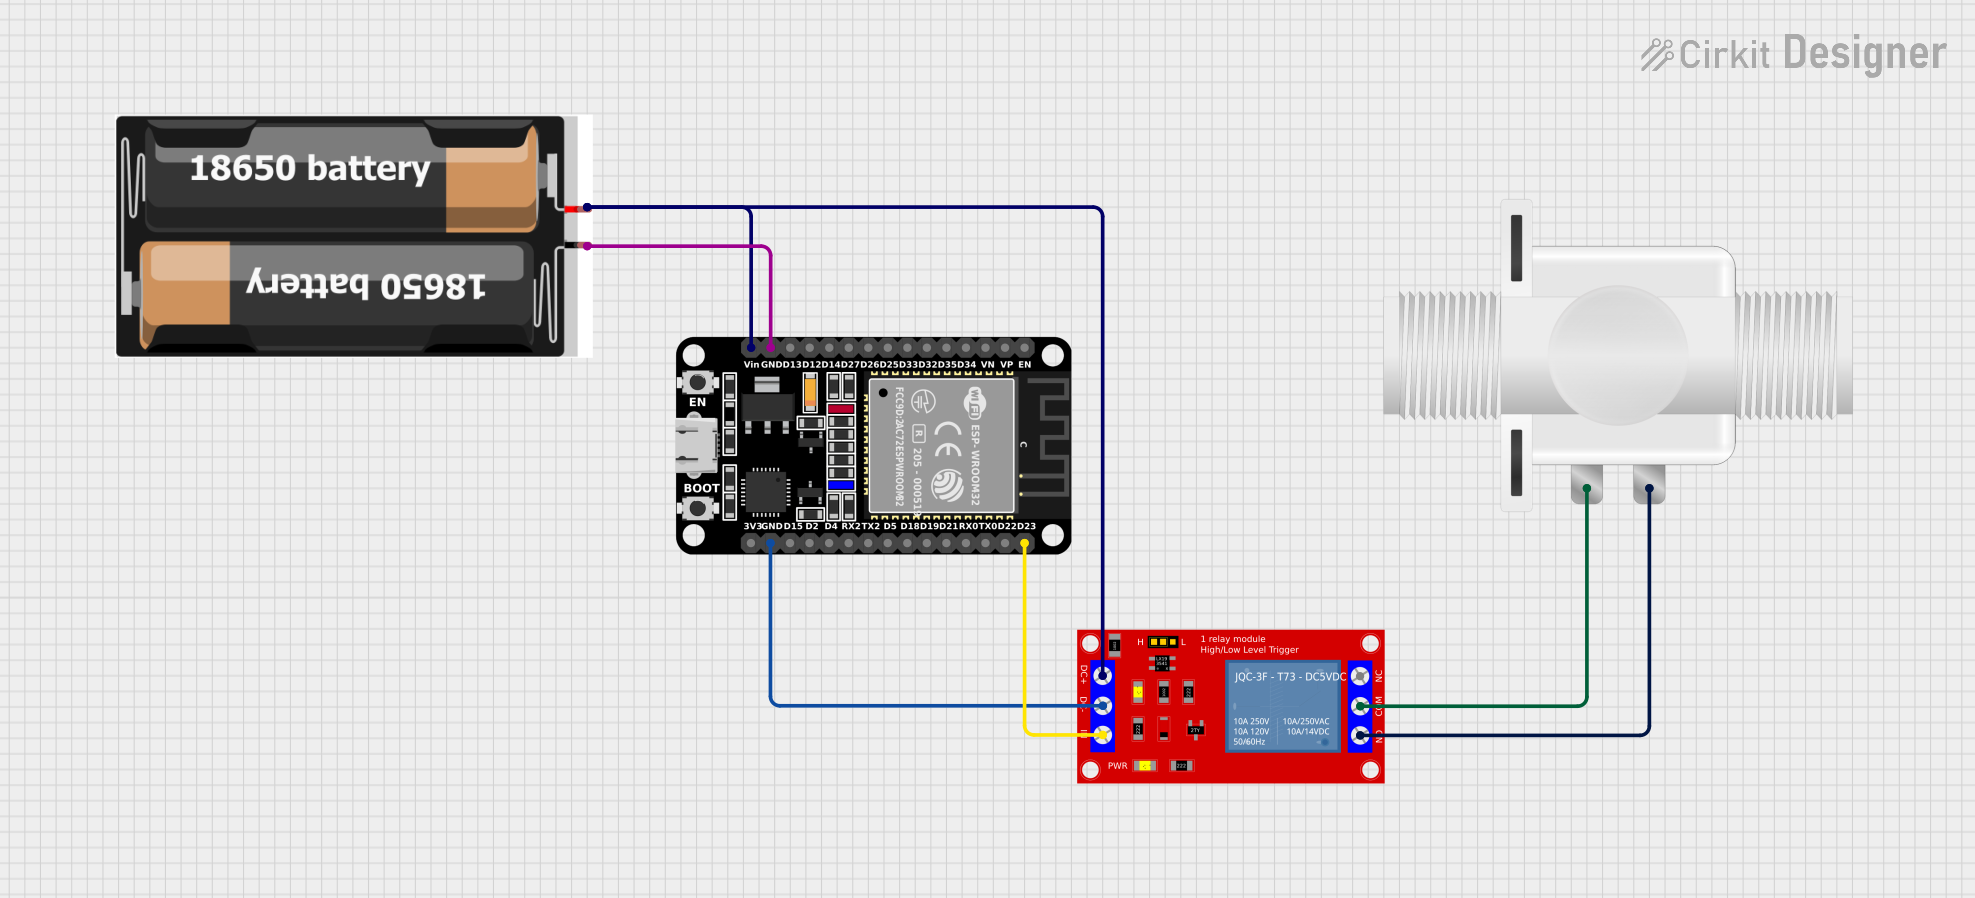
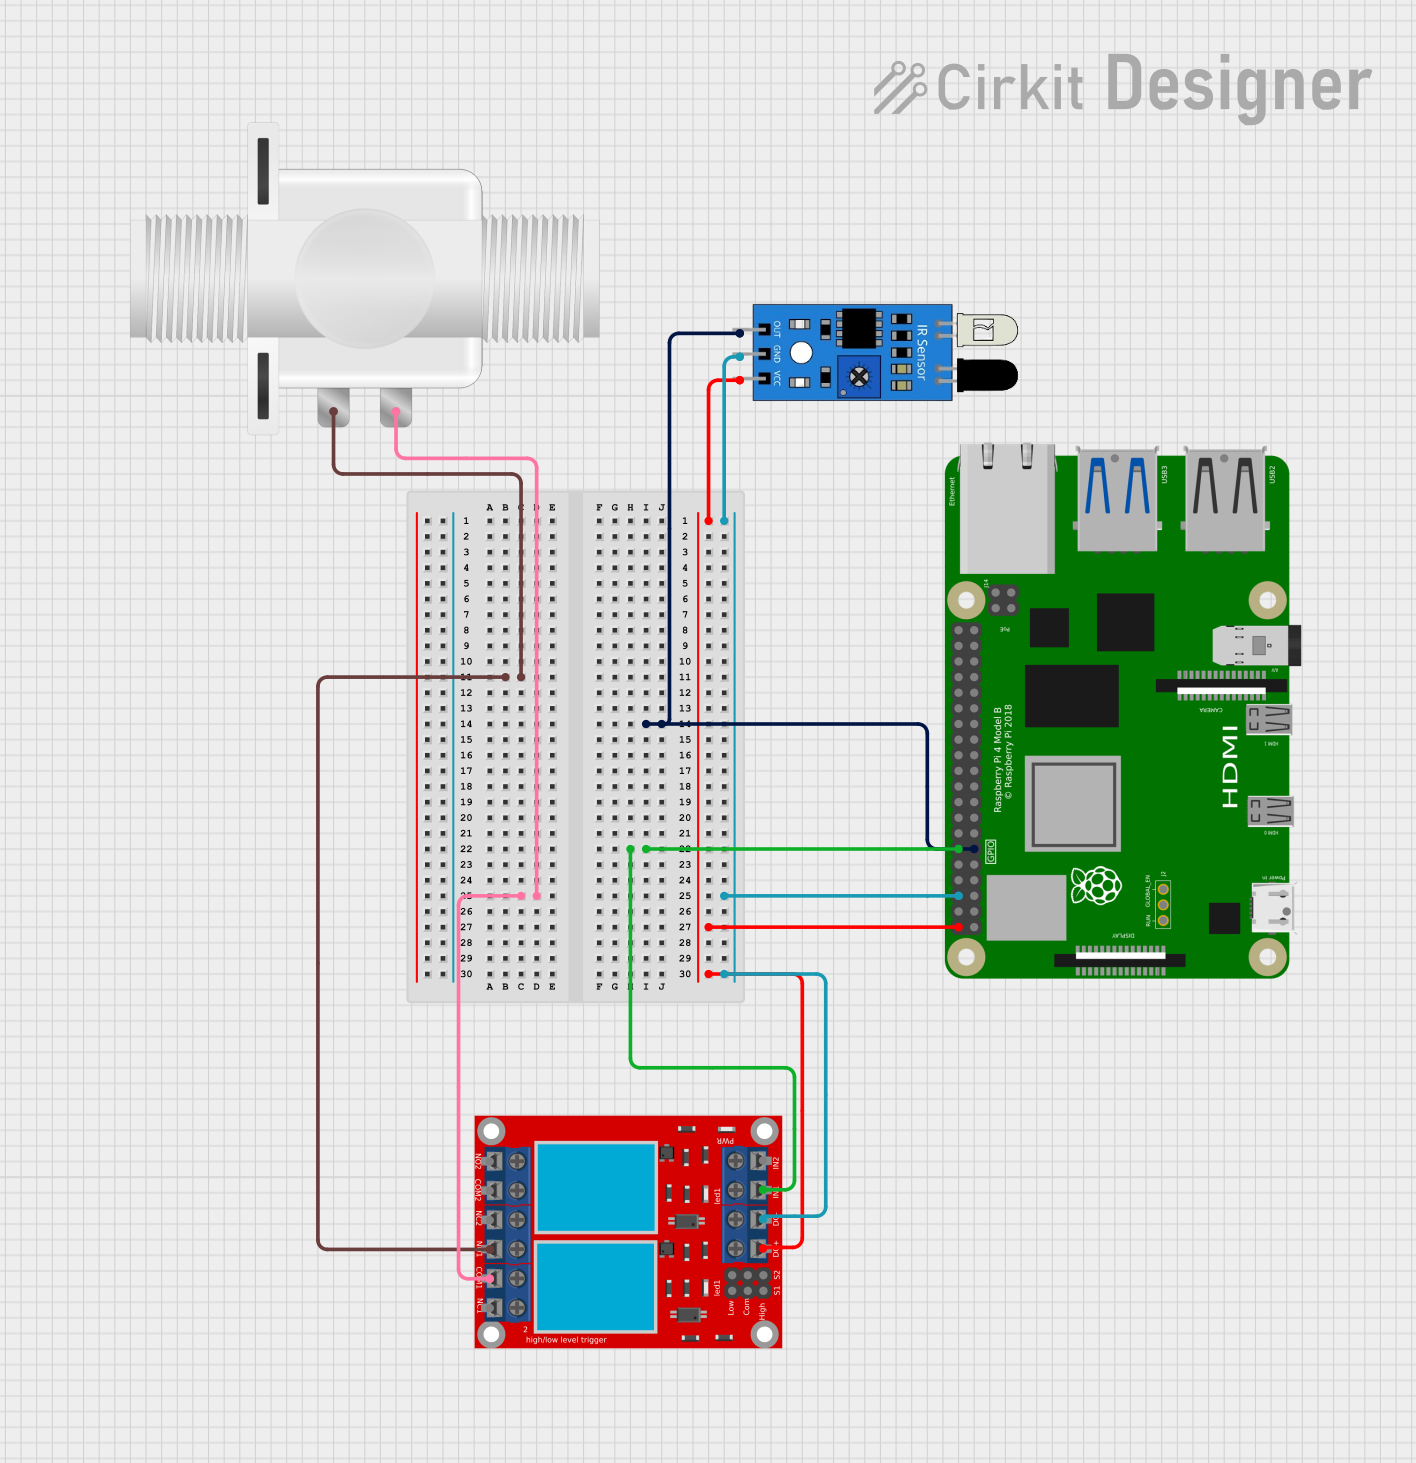
Explore Projects Built with Solenoid valve 3/2 double coil
Common Applications
- Pneumatic systems for controlling air flow
- Hydraulic systems for fluid direction
- Industrial automation and process control
- Medical equipment for fluid regulation
- Automotive systems, such as fuel or air control
Technical Specifications
Below are the key technical details for the EMC Solenoid Valve 3/2 Double Coil:
| Parameter | Value |
|---|---|
| Manufacturer | EMC |
| Part ID | Solenoid valve |
| Valve Type | 3/2 (Three ports, two positions) |
| Coil Voltage | 12V DC / 24V DC / 110V AC / 220V AC |
| Power Consumption | 4.5W (DC) / 8VA (AC) |
| Operating Pressure | 0.15 to 0.8 MPa |
| Port Size | 1/8", 1/4", or 3/8" (varies by model) |
| Response Time | ≤ 50 ms |
| Material | Aluminum alloy body, NBR seals |
| Operating Temperature | -5°C to 50°C |
| Duty Cycle | 100% (Continuous operation) |
Pin Configuration and Descriptions
The solenoid valve does not have traditional "pins" like an IC but instead has electrical terminals for the coils. Below is the description of the terminals:
| Terminal | Description |
|---|---|
| Coil A | Connects to the first coil to activate Position 1 |
| Coil B | Connects to the second coil to activate Position 2 |
| Common | Shared ground or neutral connection for both coils |
Usage Instructions
How to Use the Solenoid Valve in a Circuit
- Power Supply: Ensure the power supply matches the voltage rating of the solenoid valve (e.g., 12V DC or 24V DC). Use a regulated power source to avoid voltage spikes.
- Wiring:
- Connect one terminal of Coil A to the positive voltage supply and the other to a control switch or microcontroller output.
- Repeat the same for Coil B.
- Connect the Common terminal to the ground or neutral of the power supply.
- Control Logic:
- Energizing Coil A switches the valve to Position 1, directing fluid flow between Port 1 and Port 2.
- Energizing Coil B switches the valve to Position 2, directing fluid flow between Port 1 and Port 3.
- Ensure only one coil is energized at a time to prevent damage.
Important Considerations and Best Practices
- Diodes for Protection: When using DC coils, place a flyback diode across each coil to protect the circuit from voltage spikes caused by coil de-energization.
- Avoid Overheating: Do not exceed the rated duty cycle or operating voltage to prevent coil overheating.
- Fluid Compatibility: Ensure the fluid used is compatible with the valve's materials (e.g., aluminum alloy and NBR seals).
- Mounting Orientation: Install the valve in the recommended orientation for optimal performance and longevity.
Example: Connecting to an Arduino UNO
Below is an example of how to control the solenoid valve using an Arduino UNO and two NPN transistors as switches:
// Define the pins connected to the transistors controlling the solenoid coils
const int coilA = 9; // Pin for Coil A
const int coilB = 10; // Pin for Coil B

void setup() {
  // Set the pins as outputs
  pinMode(coilA, OUTPUT);
  pinMode(coilB, OUTPUT);
}

void loop() {
  // Activate Coil A (Position 1)
  digitalWrite(coilA, HIGH); // Turn on Coil A
  digitalWrite(coilB, LOW);  // Ensure Coil B is off
  delay(2000);              // Keep Position 1 for 2 seconds

  // Activate Coil B (Position 2)
  digitalWrite(coilA, LOW);  // Ensure Coil A is off
  digitalWrite(coilB, HIGH); // Turn on Coil B
  delay(2000);              // Keep Position 2 for 2 seconds
}
Note: Use appropriate transistors (e.g., 2N2222) and resistors to interface the Arduino with the solenoid valve. Add flyback diodes across the coils to protect the transistors from voltage spikes.
Troubleshooting and FAQs
Common Issues and Solutions
Valve Not Switching States:
- Cause: Insufficient voltage or current to the coils.
- Solution: Verify the power supply voltage and current rating. Ensure proper wiring.
Coil Overheating:
- Cause: Continuous energization or overvoltage.
- Solution: Check the duty cycle and ensure the voltage matches the coil rating.
Fluid Leakage:
- Cause: Damaged seals or improper installation.
- Solution: Inspect the seals and replace if necessary. Ensure proper mounting.
No Response from Valve:
- Cause: Faulty coil or electrical connection.
- Solution: Test the coil resistance with a multimeter. Replace the coil if it is open.
FAQs
Q1: Can I use the solenoid valve with AC power?
A1: Yes, the valve is available in AC versions (110V or 220V). Ensure you select the correct model for your application.
Q2: What happens if both coils are energized simultaneously?
A2: Energizing both coils simultaneously can cause erratic behavior or damage the valve. Always energize only one coil at a time.
Q3: Can this valve handle high-pressure fluids?
A3: The valve is rated for pressures up to 0.8 MPa. For higher pressures, consider a valve with a higher pressure rating.
Q4: Is the valve suitable for corrosive fluids?
A4: The valve's aluminum alloy body and NBR seals are not suitable for highly corrosive fluids. Use a valve with compatible materials for such applications.