How to Use Adafruit Crickit for microbit: Examples, Pinouts, and Specs
Introduction
The Adafruit Crickit for micro:bit is a versatile robotics extension board that transforms your BBC micro:bit into a powerful platform for robotics and interactive projects. It is designed to control motors, servos, solenoids, and other actuators, while also providing additional inputs and outputs for sensors and devices. This board is ideal for educators, hobbyists, and anyone interested in exploring the world of electronics and robotics.
Explore Projects Built with Adafruit Crickit for microbit
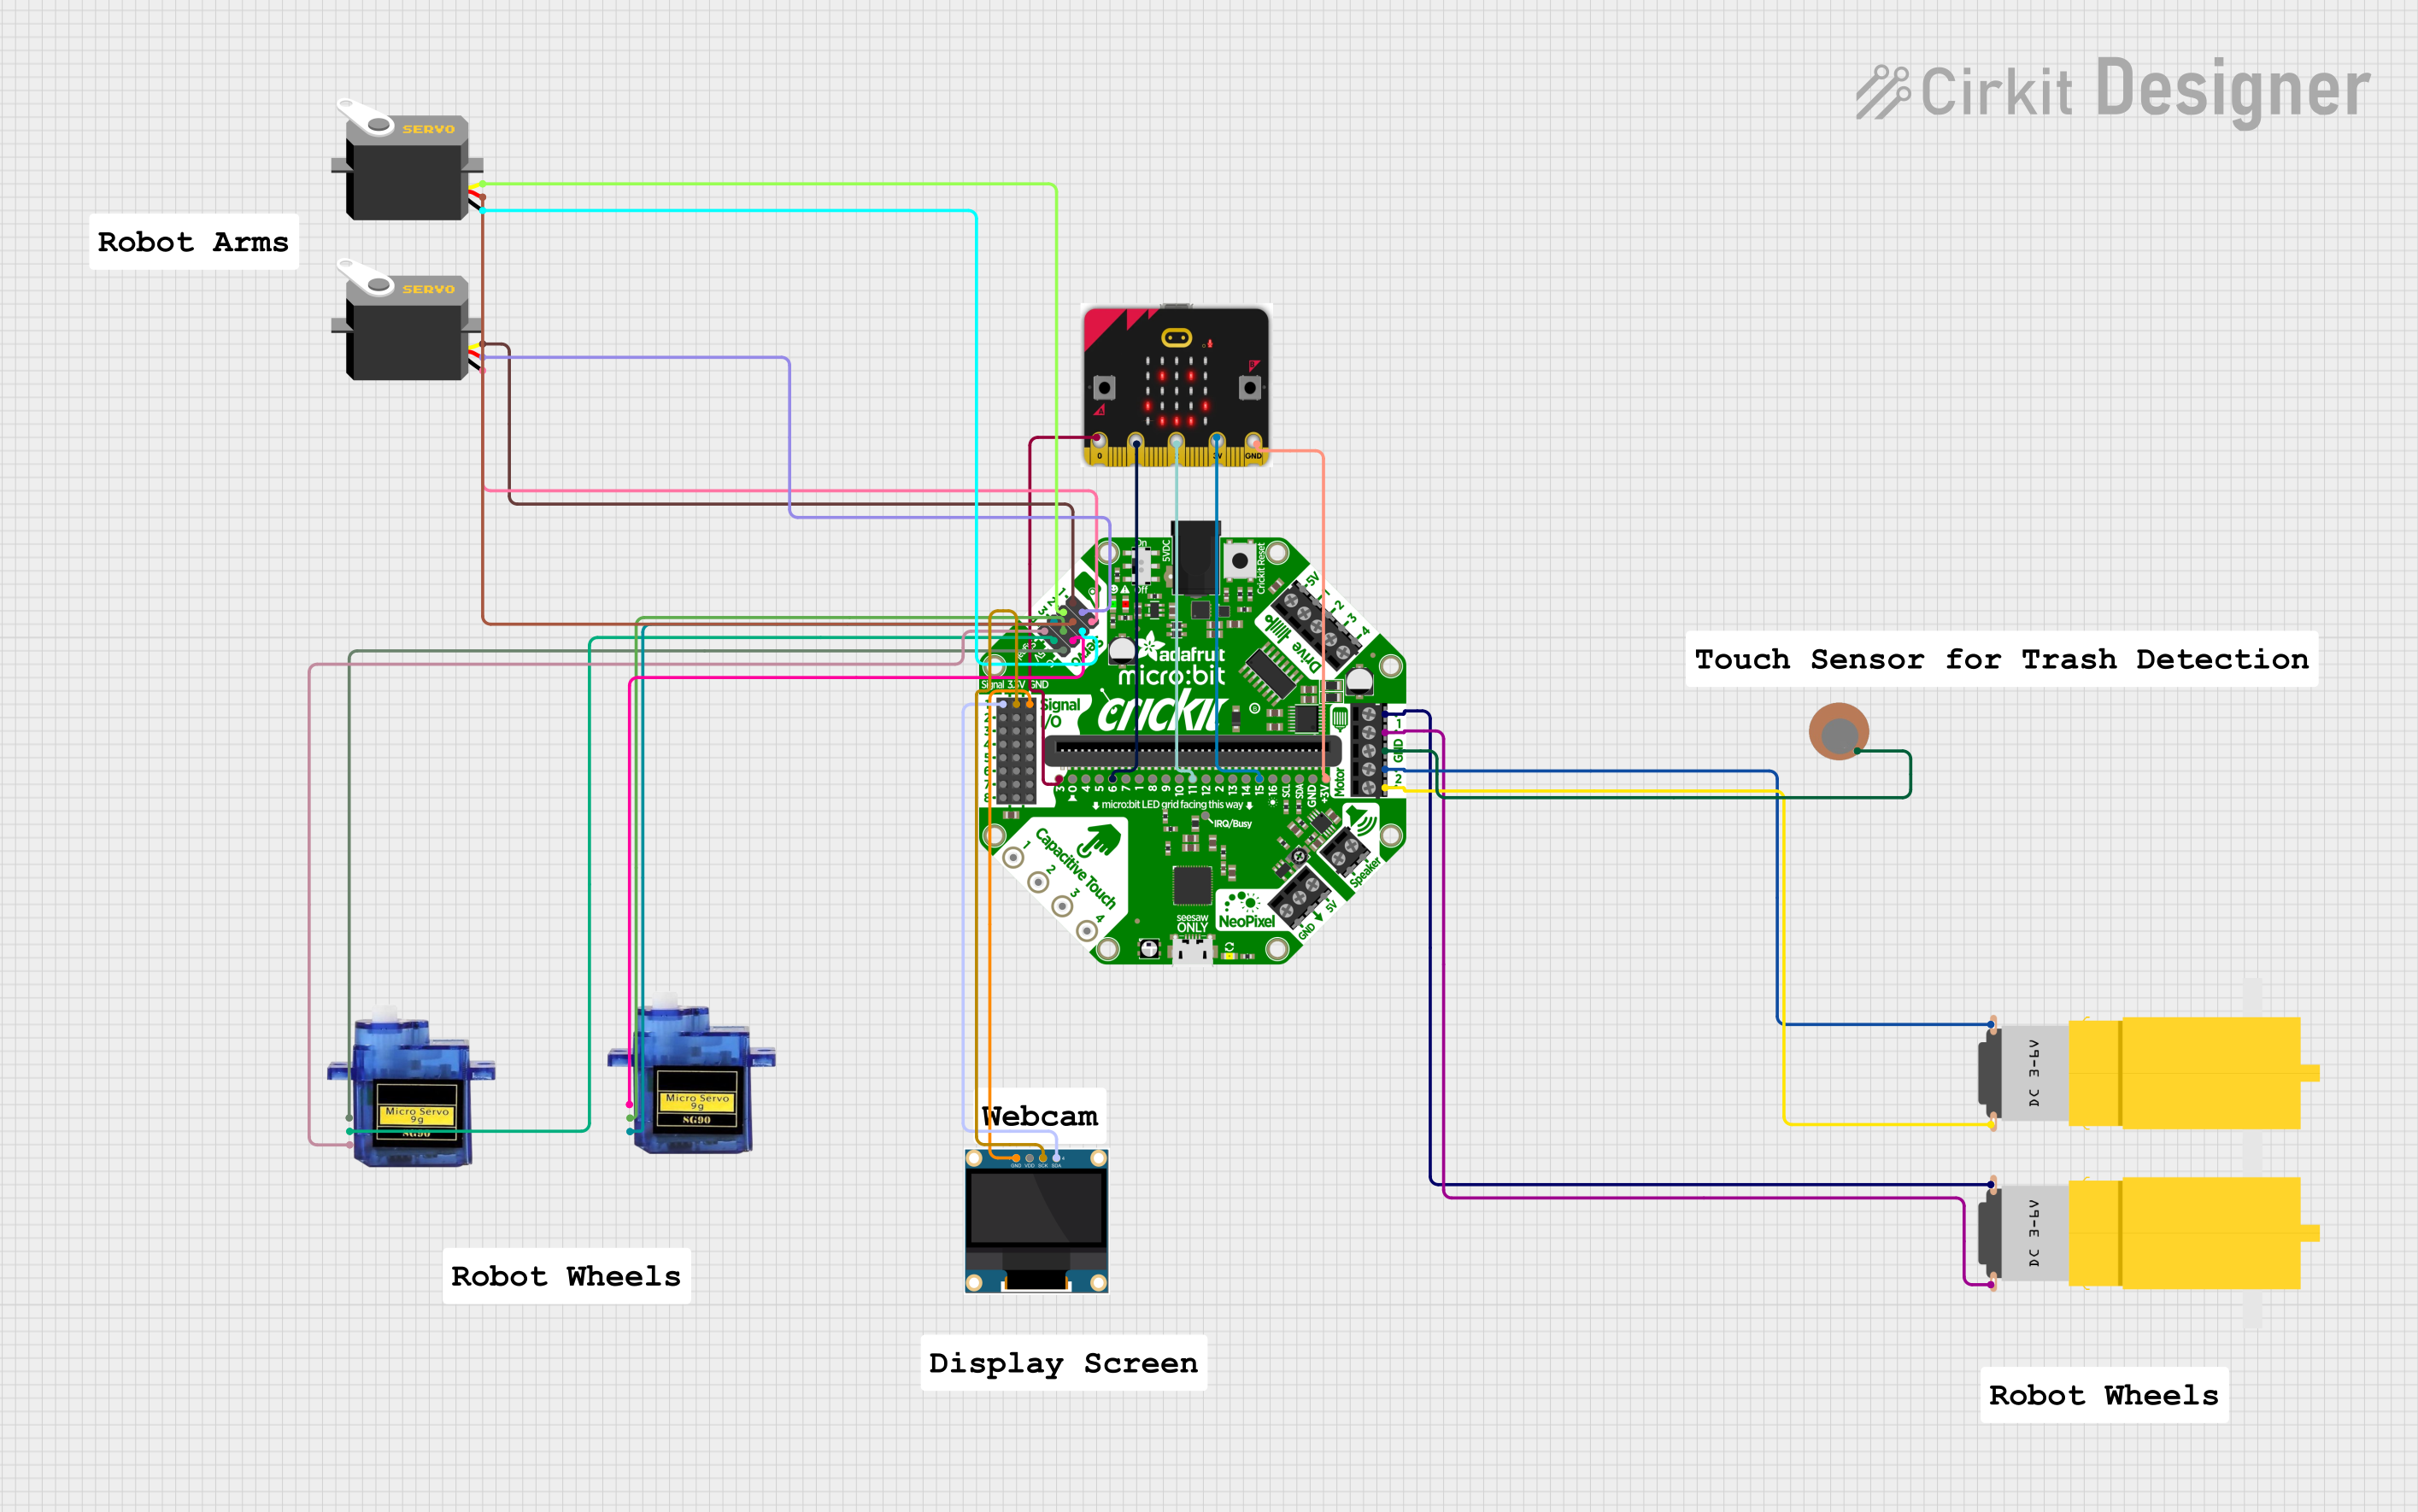
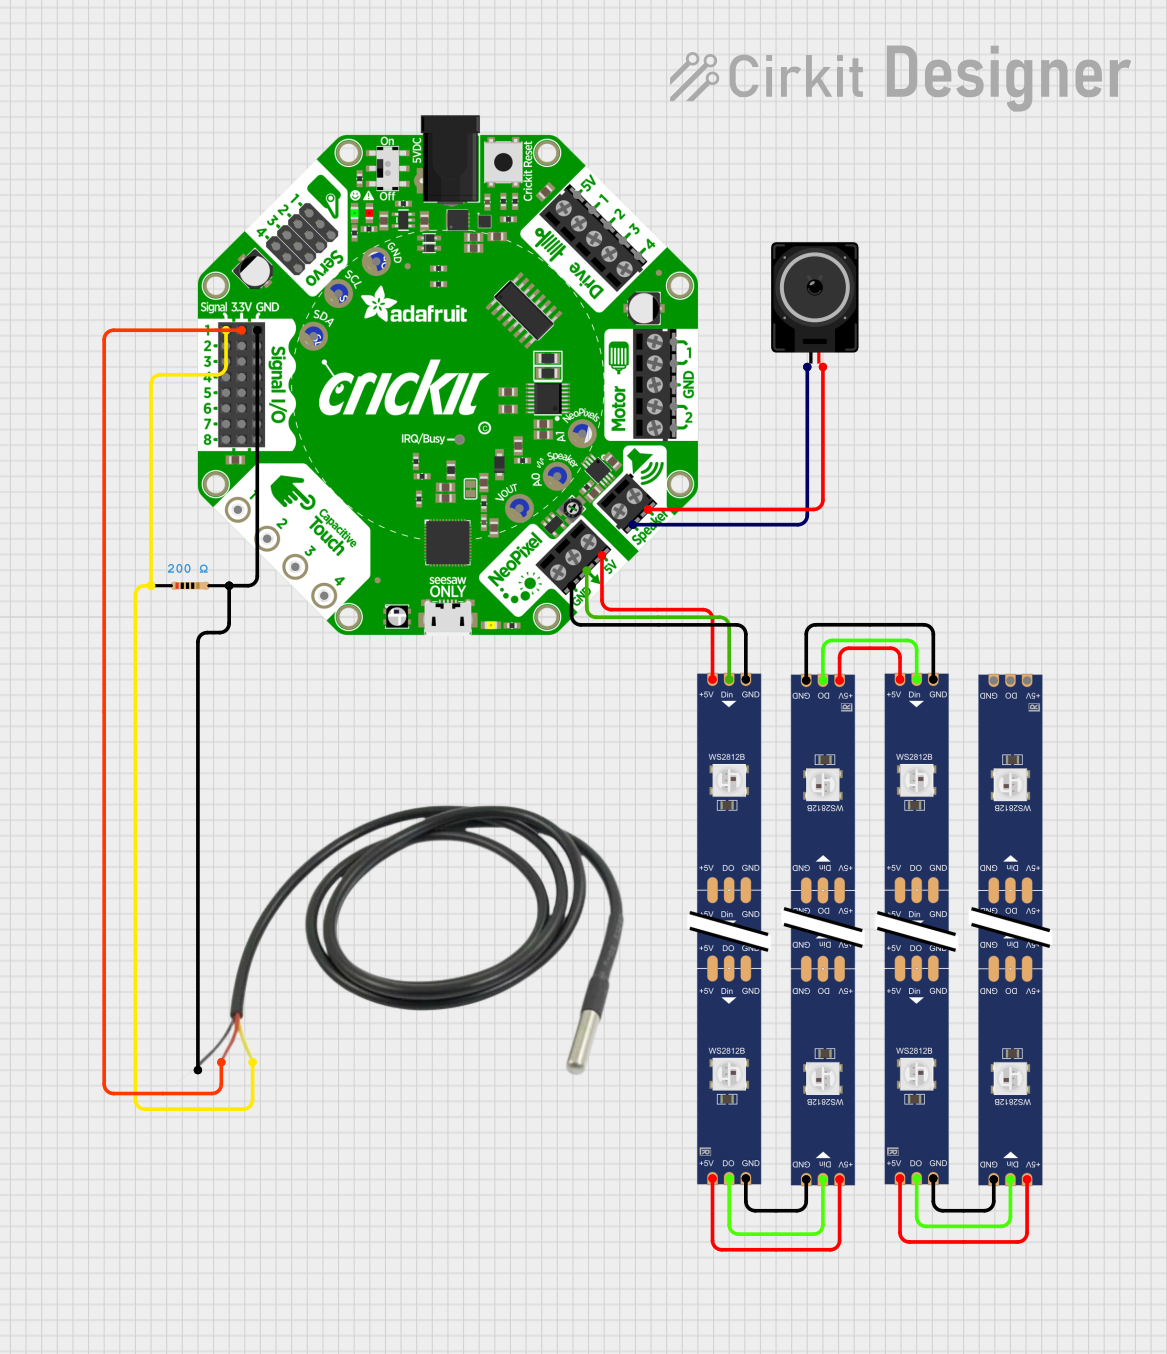


Explore Projects Built with Adafruit Crickit for microbit
Common Applications and Use Cases
- Educational robotics projects
- DIY home automation systems
- Interactive art installations
- Prototyping and invention kits
- Custom controllers for games and applications
Technical Specifications
Key Technical Details
- Voltage: 4.5V to 9V DC power supply
- Current: Varies based on connected components
- Power Ratings: Each output can drive up to 1A
- Communication: I2C interface to micro:bit
- Dimensions: 94.9mm x 61.0mm x 18mm
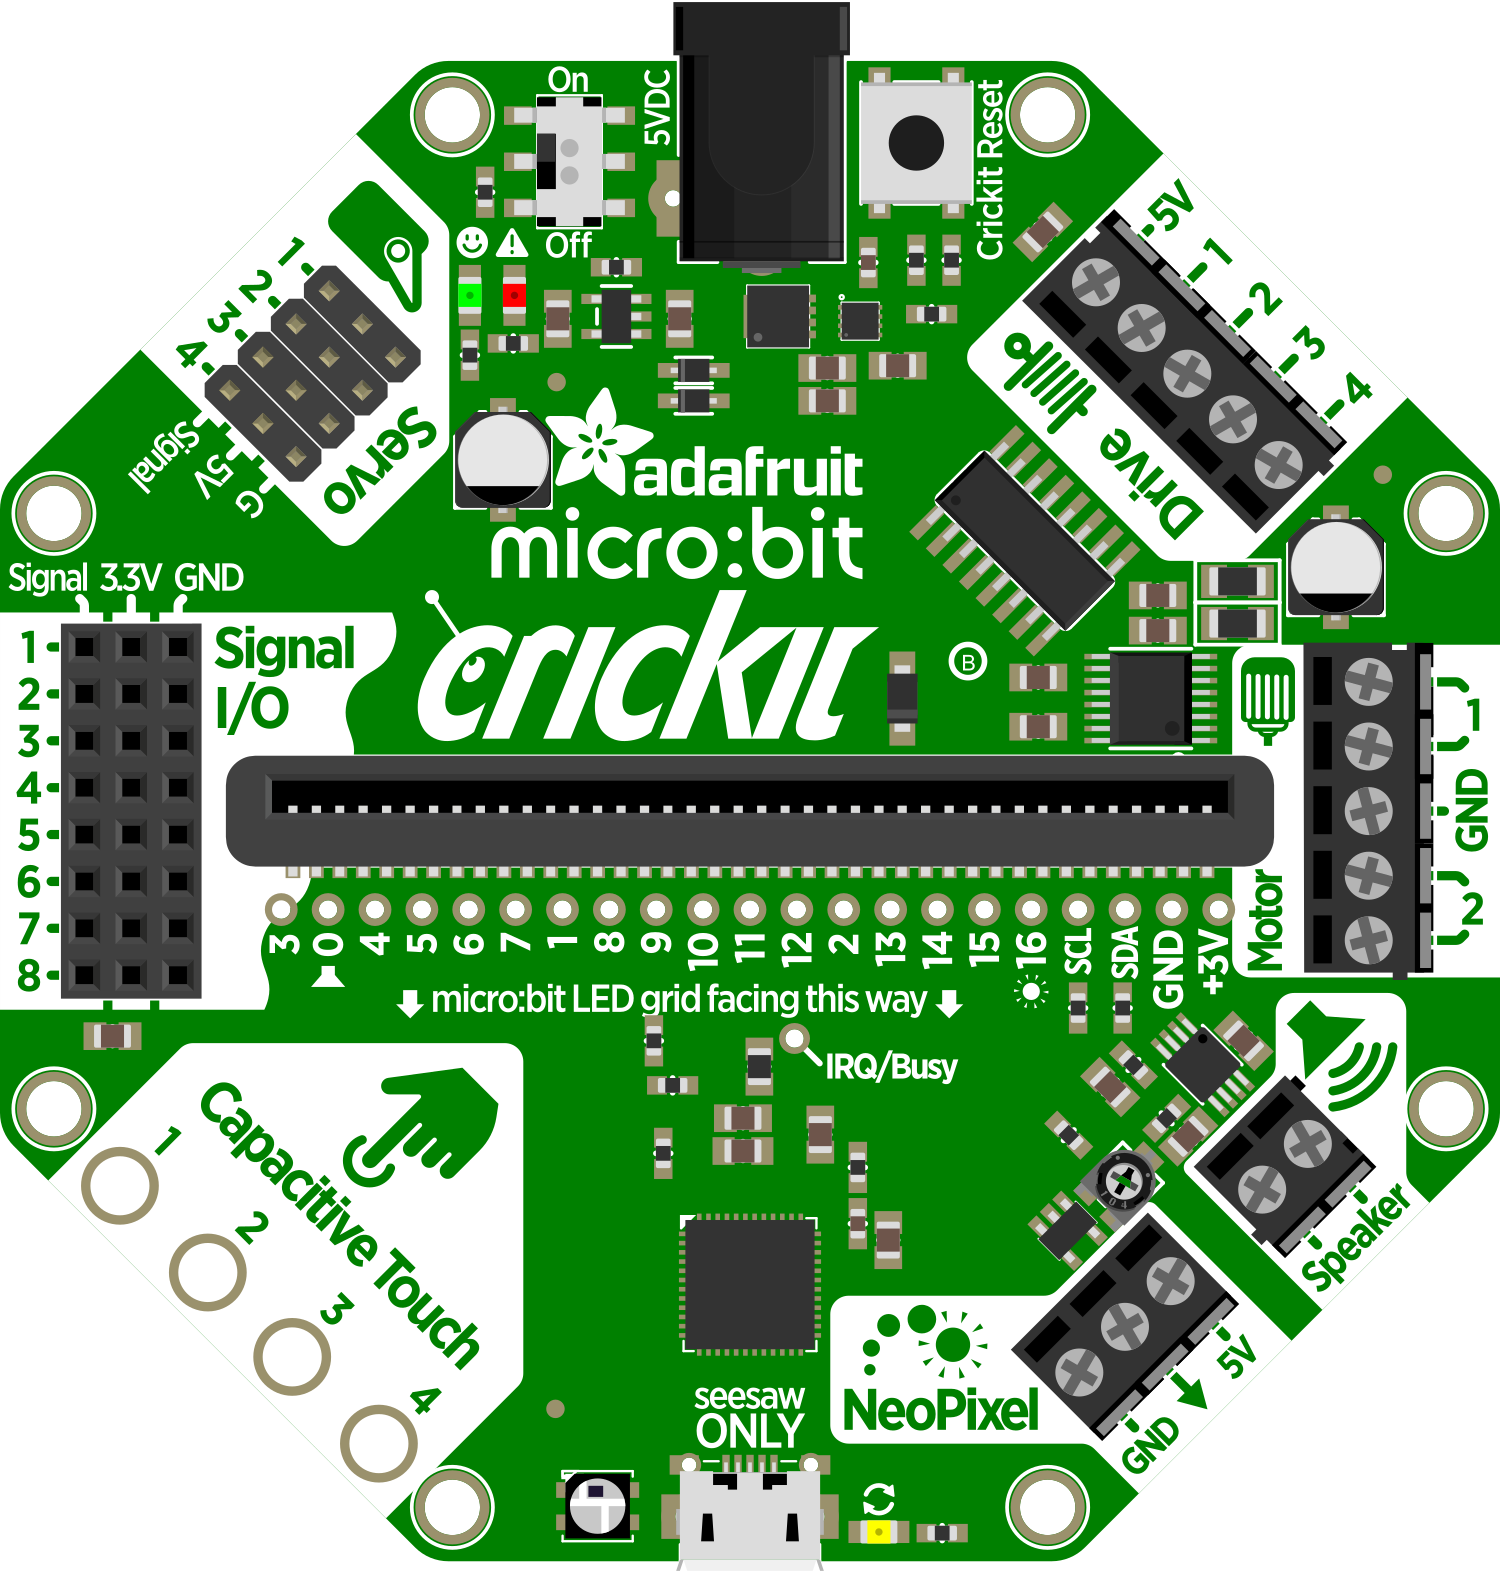
Pin Configuration and Descriptions
| Pin | Function | Description |
|---|---|---|
| 1 | Signal | Servo motor control signal |
| 2 | Signal | Servo motor control signal |
| 3 | Signal | Servo motor control signal |
| 4 | Signal | Servo motor control signal |
| A1 | Analog/Digital I/O | General-purpose I/O pin |
| A2 | Analog/Digital I/O | General-purpose I/O pin |
| A3 | Analog/Digital I/O | General-purpose I/O pin |
| A4 | Analog/Digital I/O | General-purpose I/O pin |
| A5 | Analog/Digital I/O | General-purpose I/O pin |
| A6 | Analog/Digital I/O | General-purpose I/O pin |
| A7 | Analog/Digital I/O | General-purpose I/O pin |
| A8 | Analog/Digital I/O | General-purpose I/O pin |
| 5V | Power | 5V output for powering external devices |
| GND | Ground | Ground reference for circuits |
Usage Instructions
How to Use the Component in a Circuit
- Powering the Crickit: Connect a suitable power supply (4.5V to 9V) to the Crickit's power jack.
- Connecting the micro:bit: Insert the micro:bit into the edge connector on the Crickit board.
- Wiring Actuators: Connect servos, motors, or other actuators to the appropriate output pins.
- Connecting Sensors: Attach sensors or input devices to the analog/digital I/O pins.
- Programming the micro:bit: Use the MakeCode editor or Python to write programs for the micro:bit that interact with the Crickit board.
Important Considerations and Best Practices
- Ensure the power supply voltage is within the specified range to avoid damaging the board.
- Do not exceed the current rating of 1A per output to prevent overloading the drivers.
- Always disconnect the power before making or changing connections to the board.
- Use external pull-up or pull-down resistors with digital inputs if required by the sensor.
- Check the orientation of the micro:bit when inserting it into the Crickit to avoid reverse insertion.
Example Code for Arduino UNO
// Note: The Adafruit Crickit for micro:bit is not directly compatible with Arduino UNO.
// This section is for illustrative purposes only.

#include <Servo.h>

Servo myservo;  // create servo object to control a servo

void setup() {
  myservo.attach(9);  // attaches the servo on pin 9 to the servo object
}

void loop() {
  myservo.write(90);  // sets the servo position to 90 degrees
  delay(1000);        // waits for a second
  myservo.write(0);   // sets the servo back to 0 degrees
  delay(1000);        // waits for a second
}
Troubleshooting and FAQs
Common Issues Users Might Face
- Motors not working: Check the power supply and connections. Ensure the motors do not exceed the current rating.
- Servos jittering: This can be due to insufficient power supply. Use a separate power source for servos if necessary.
- Sensors not responding: Verify the wiring and check if pull-up/pull-down resistors are needed.
Solutions and Tips for Troubleshooting
- Double-check all connections and ensure they are secure and correctly oriented.
- Use a multimeter to verify power supply voltage and continuity of connections.
- Review your code for any logical errors or incorrect pin assignments.
- Consult the Adafruit Crickit forums and community for help and advice.
FAQs
Q: Can I use the Crickit with an Arduino UNO? A: The Crickit is designed for the micro:bit and does not directly interface with an Arduino UNO. However, you can use similar motor driver shields that are compatible with Arduino.
Q: What programming languages can I use with the Crickit? A: You can use the MakeCode editor, which provides a block-based interface, or you can write code in Python.
Q: How many servos can the Crickit control? A: The Crickit can control up to four servos simultaneously.
For further assistance, please refer to the Adafruit Crickit for micro:bit guide available on the Adafruit website.