Cirkit Designer Logo
Cirkit Designer
Your all-in-one circuit design IDE
Home / 
Component Documentation

How to Use MAch3 CNC USB: Examples, Pinouts, and Specs

Image of MAch3 CNC USB
Cirkit Designer LogoDesign with MAch3 CNC USB in Cirkit Designer

Introduction

The MAch3 CNC USB Controller by RAt is a powerful interface that connects a computer running Mach3 software to a CNC machine. Mach3 is a software package that converts G-code into signals that control the movements of the machine. This controller is commonly used in applications such as milling, engraving, and lathe operations, providing a reliable and efficient way to automate the machining process.

Explore Projects Built with MAch3 CNC USB

Use Cirkit Designer to design, explore, and prototype these projects online. Some projects support real-time simulation. Click "Open Project" to start designing instantly!
CNC Machine Control System with Dual tb6600 Stepper Drivers and MAch3 USB Interface
Image of Jayshree CNC: A project utilizing MAch3 CNC USB in a practical application
This circuit appears to be a control system for a CNC machine or similar automated equipment. It includes two tb6600 Micro Stepping Motor Drivers for controlling stepper motors, a DC power source with a step-down buck converter to provide the necessary voltage levels, and a 4-channel relay module for switching higher power loads. The MAch3 CNC USB interface suggests the system is designed to interface with computer numerical control software, and the RMCS_3001 BLDC Driver indicates the presence of a brushless DC motor control. The Tiva C launchpad microcontroller and various connectors imply that the system is modular and may be programmable for specific automation tasks.
Cirkit Designer LogoOpen Project in Cirkit Designer
Arduino CNC Machine with Joystick Control and LED Indicator
Image of CNC Machine 2 Axis: A project utilizing MAch3 CNC USB in a practical application
This circuit is a CNC control system that uses an Arduino UNO to interface with a CNC Shield V3, which drives two NEMA23 stepper motors for X and Y axis control. A KY-023 Dual Axis Joystick Module provides manual control inputs, and an LED with a current-limiting resistor indicates the spindle direction status.
Cirkit Designer LogoOpen Project in Cirkit Designer
Arduino CNC Machine with Joystick Control and LED Indicator
Image of Arduino CNC Machine with Joystick Control and LED Indicator: A project utilizing MAch3 CNC USB in a practical application
This circuit controls a CNC machine using an Arduino UNO, a joystick module, and stepper motors. The joystick inputs are used to control the X and Y axes of the CNC machine, while an LED indicates the spindle direction. The CNC shield and motor drivers interface the Arduino with the stepper motors.
Cirkit Designer LogoOpen Project in Cirkit Designer
Arduino UNO CNC Robot with Ultrasonic Sensor and MPU6050
Image of Ati Robot: A project utilizing MAch3 CNC USB in a practical application
This circuit is a robotic control system that uses an Arduino UNO to manage a CNC Shield V3, which drives NEMA23 stepper motors for movement. It also incorporates an HC-SR04 ultrasonic sensor for distance measurement and an MPU6050 accelerometer and gyroscope for orientation sensing, enabling precise navigation and obstacle avoidance.
Cirkit Designer LogoOpen Project in Cirkit Designer

Explore Projects Built with MAch3 CNC USB

Use Cirkit Designer to design, explore, and prototype these projects online. Some projects support real-time simulation. Click "Open Project" to start designing instantly!
Image of Jayshree CNC: A project utilizing MAch3 CNC USB in a practical application
CNC Machine Control System with Dual tb6600 Stepper Drivers and MAch3 USB Interface
This circuit appears to be a control system for a CNC machine or similar automated equipment. It includes two tb6600 Micro Stepping Motor Drivers for controlling stepper motors, a DC power source with a step-down buck converter to provide the necessary voltage levels, and a 4-channel relay module for switching higher power loads. The MAch3 CNC USB interface suggests the system is designed to interface with computer numerical control software, and the RMCS_3001 BLDC Driver indicates the presence of a brushless DC motor control. The Tiva C launchpad microcontroller and various connectors imply that the system is modular and may be programmable for specific automation tasks.
Cirkit Designer LogoOpen Project in Cirkit Designer
Image of CNC Machine 2 Axis: A project utilizing MAch3 CNC USB in a practical application
Arduino CNC Machine with Joystick Control and LED Indicator
This circuit is a CNC control system that uses an Arduino UNO to interface with a CNC Shield V3, which drives two NEMA23 stepper motors for X and Y axis control. A KY-023 Dual Axis Joystick Module provides manual control inputs, and an LED with a current-limiting resistor indicates the spindle direction status.
Cirkit Designer LogoOpen Project in Cirkit Designer
Image of Arduino CNC Machine with Joystick Control and LED Indicator: A project utilizing MAch3 CNC USB in a practical application
Arduino CNC Machine with Joystick Control and LED Indicator
This circuit controls a CNC machine using an Arduino UNO, a joystick module, and stepper motors. The joystick inputs are used to control the X and Y axes of the CNC machine, while an LED indicates the spindle direction. The CNC shield and motor drivers interface the Arduino with the stepper motors.
Cirkit Designer LogoOpen Project in Cirkit Designer
Image of Ati Robot: A project utilizing MAch3 CNC USB in a practical application
Arduino UNO CNC Robot with Ultrasonic Sensor and MPU6050
This circuit is a robotic control system that uses an Arduino UNO to manage a CNC Shield V3, which drives NEMA23 stepper motors for movement. It also incorporates an HC-SR04 ultrasonic sensor for distance measurement and an MPU6050 accelerometer and gyroscope for orientation sensing, enabling precise navigation and obstacle avoidance.
Cirkit Designer LogoOpen Project in Cirkit Designer

Common Applications and Use Cases

  • Hobbyist CNC milling and engraving
  • Small-scale manufacturing
  • Prototyping and model making
  • Educational purposes in schools and universities

Technical Specifications

Key Technical Details

  • Supported Operating Systems: Windows 2000, XP, Vista, or 7 (32-bit)
  • USB Interface: USB 2.0
  • Maximum Step-Pulse Frequency: 100kHz
  • Power Supply: 5V DC from USB port
  • I/O Pins: 12 programmable output pins, 5 programmable input pins

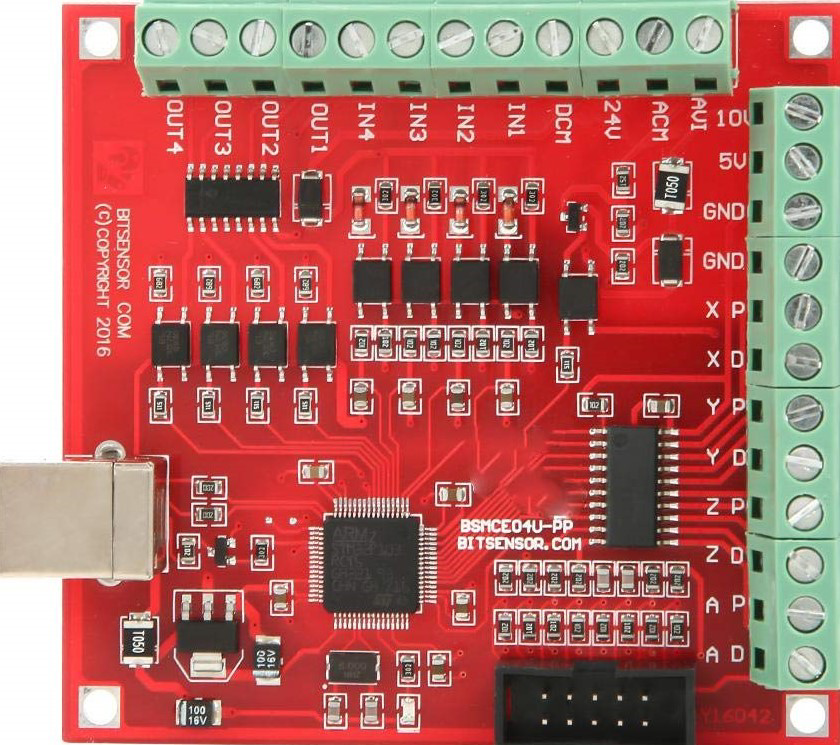
Pin Configuration and Descriptions

Pin Number Description Type
1-12 Programmable Output Pins Digital Output
13-17 Programmable Input Pins Digital Input
18-25 Ground Connections Ground

Usage Instructions

How to Use the Component in a Circuit

  1. Installation:

    • Install the Mach3 software on a compatible Windows PC.
    • Connect the MAch3 CNC USB Controller to the PC using a USB cable.
  2. Configuration:

    • Open Mach3 and configure the software to recognize the USB controller.
    • Assign the input and output pins according to your CNC machine's requirements.
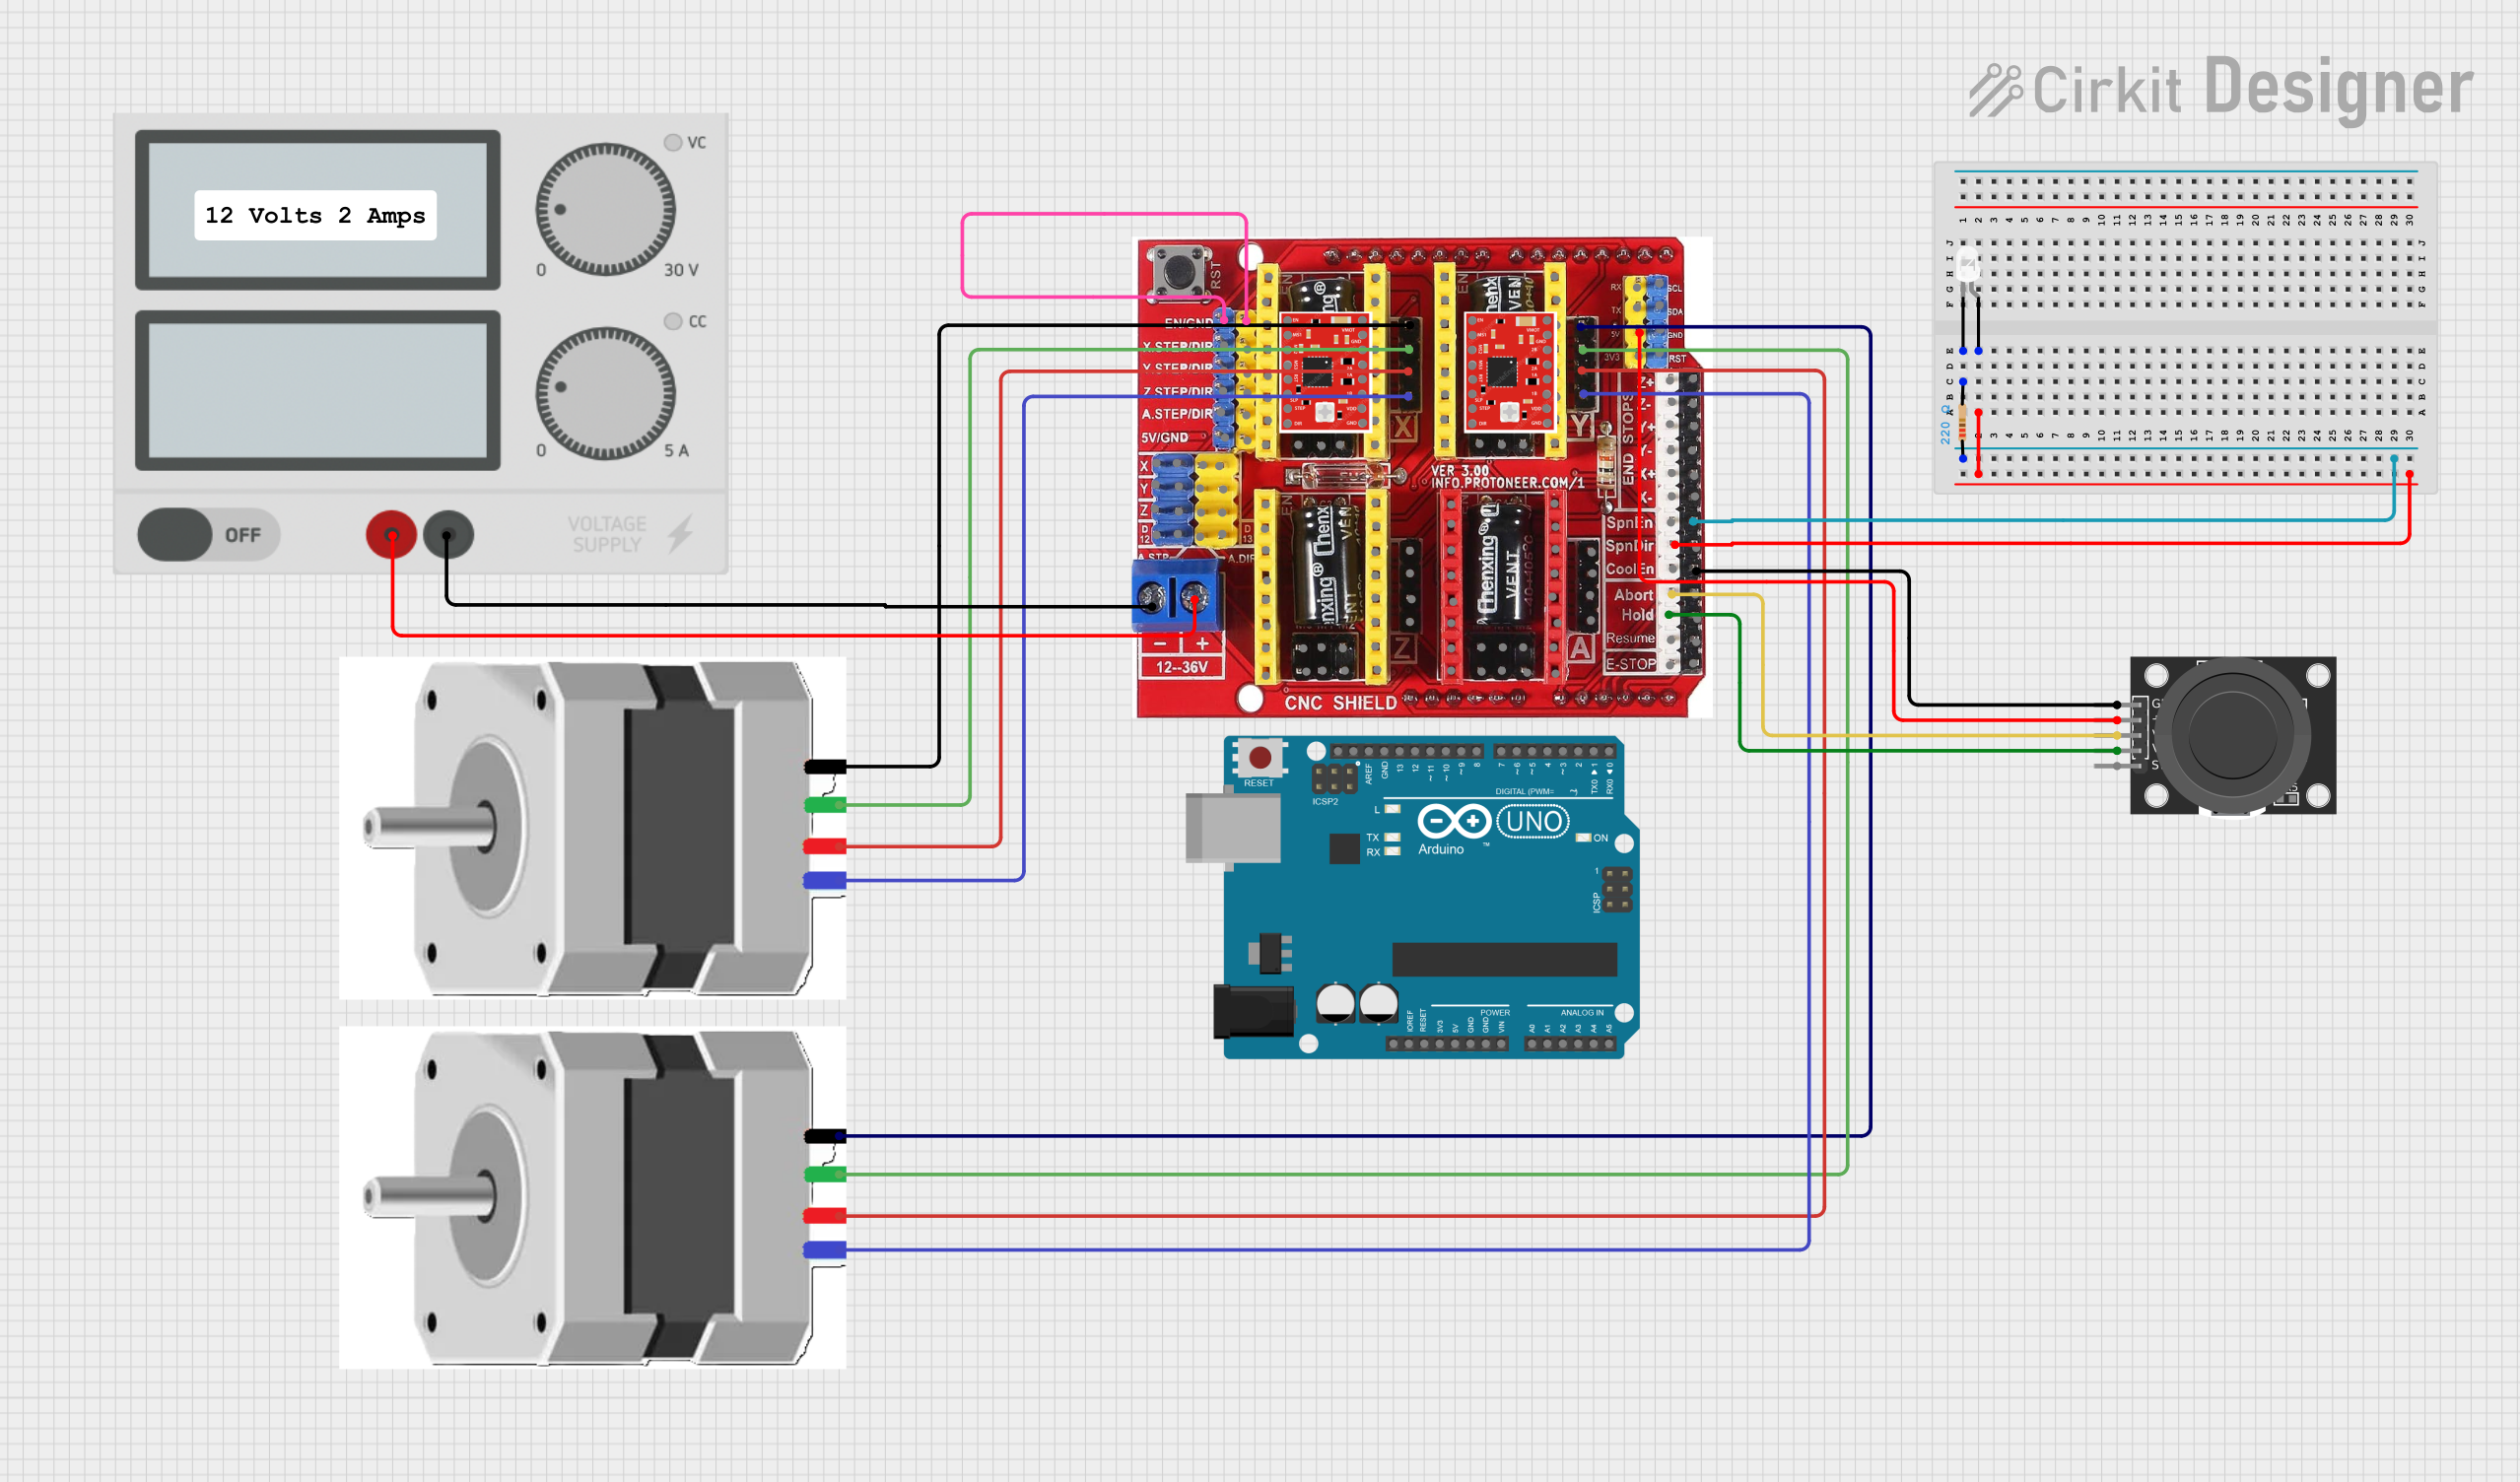
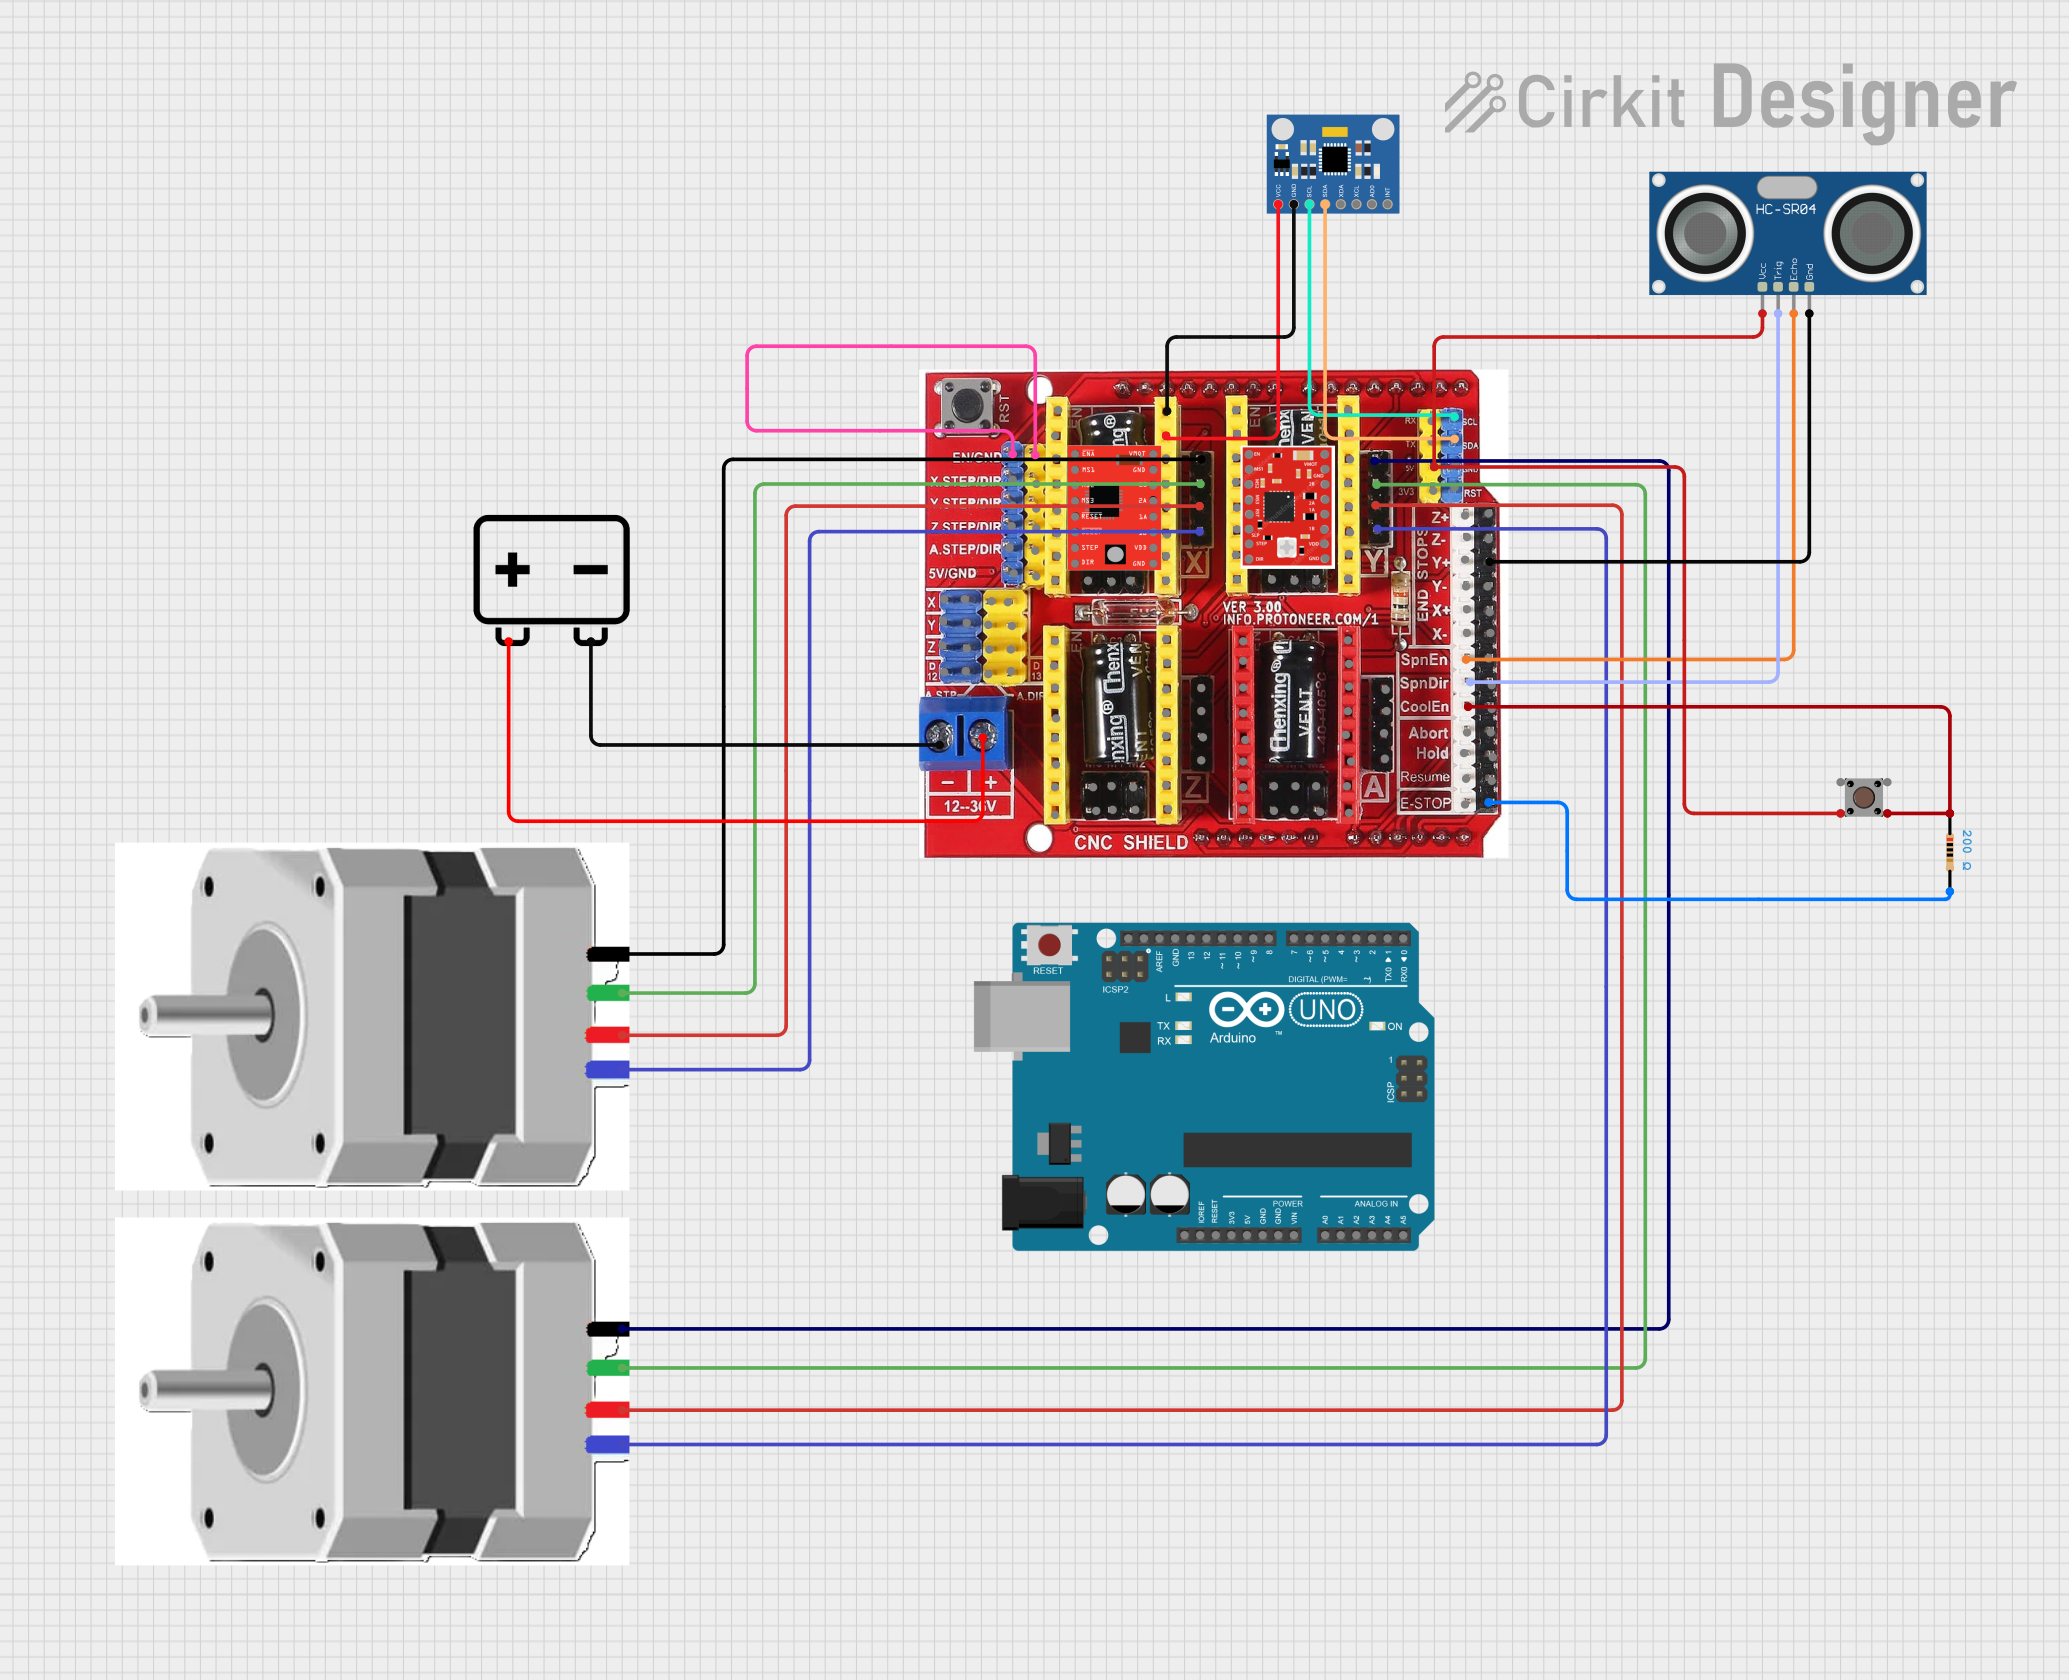
  3. Connection to CNC Machine:

    • Connect the output pins from the controller to the corresponding inputs on the CNC machine, such as stepper motor drivers, limit switches, and emergency stop.
  4. Testing:

    • Use the Mach3 interface to test each axis of the CNC machine.
    • Ensure that all movements are correct and that limit switches are functioning.

Important Considerations and Best Practices

  • Always ensure that the controller is connected to a grounded USB port to prevent electrical damage.
  • Verify that the power requirements of the CNC machine match the controller's specifications.
  • Use shielded cables for connections to reduce electromagnetic interference.
  • Regularly update the Mach3 software to the latest version for optimal performance.

Troubleshooting and FAQs

Common Issues Users Might Face

  • Controller Not Recognized: Ensure that the USB drivers are correctly installed and that the USB cable is functioning.
  • Incorrect Movements: Double-check the pin assignments and configurations in Mach3.
  • Loss of Steps: Verify that the step-pulse frequency is within the capabilities of your stepper motor drivers.

Solutions and Tips for Troubleshooting

  • If the controller is not recognized, try using a different USB port or reinstalling the USB drivers.
  • For incorrect movements, recalibrate each axis within Mach3 and check for mechanical issues on the CNC machine.
  • In case of loss of steps, reduce the step-pulse frequency or check for mechanical binding in the CNC machine.

FAQs

Q: Can I use the MAch3 CNC USB Controller with a 64-bit operating system? A: No, the controller is designed to work with a 32-bit operating system.

Q: What is the maximum number of axes the controller can support? A: The controller typically supports up to 6 axes, but this can vary based on the Mach3 software configuration.

Q: How do I update the firmware on the controller? A: Firmware updates are not typically required for the MAch3 CNC USB Controller. Any updates would be provided by the manufacturer, RAt, with instructions.

Q: Can I use the controller with software other than Mach3? A: The controller is specifically designed for use with Mach3 software and may not be compatible with other CNC control software.


Please note that this documentation is a general guide and may not cover all aspects or unique configurations of the MAch3 CNC USB Controller. For specific questions or advanced setup, consult the manufacturer's manual or technical support.