Cirkit Designer Logo
Cirkit Designer
Your all-in-one circuit design IDE
Home / 
Component Documentation

How to Use pH: Examples, Pinouts, and Specs

Image of pH
Cirkit Designer LogoDesign with pH in Cirkit Designer

Introduction

A pH sensor is an electronic component used to measure the acidity or alkalinity of a solution. It provides a pH value, which indicates the concentration of hydrogen ions (H+) present in the solution. The pH scale ranges from 0 to 14, where values below 7 indicate acidity, values above 7 indicate alkalinity, and a value of 7 represents a neutral solution.

Explore Projects Built with pH

Use Cirkit Designer to design, explore, and prototype these projects online. Some projects support real-time simulation. Click "Open Project" to start designing instantly!
Arduino UNO Based pH Meter with LCD Display and Indicator LEDs
Image of pH meter arduino: A project utilizing pH in a practical application
This circuit is designed to measure the pH level of a solution and display the value on an LCD screen. It uses an Arduino UNO microcontroller to read the pH sensor's signal and control three LEDs (yellow, green, blue) to indicate the pH level: yellow for acidic (pH < 5), green for neutral (pH 5-8), and blue for basic (pH > 8). The LCD displays a welcome message on startup and then continuously updates with the current pH value.
Cirkit Designer LogoOpen Project in Cirkit Designer
Arduino UNO pH Meter with LCD Display
Image of ph: A project utilizing pH in a practical application
This circuit is designed to measure pH levels using a pH meter and display the readings on an LCD screen. An Arduino UNO microcontroller reads the pH sensor data through its analog input pin A1 and controls the LCD display via its digital pins to show the pH value.
Cirkit Designer LogoOpen Project in Cirkit Designer
Arduino UNO Based pH Meter with LCD Display
Image of PH SENSOR: A project utilizing pH in a practical application
This circuit is designed to measure the pH level of a solution using a pH meter connected to an Arduino UNO microcontroller. The Arduino reads the pH value from the sensor, processes the signal, and displays the result on an LCD I2C display. The code for the Arduino includes initialization of the display, reading and filtering the sensor signal, calculating the pH value, and updating the display with the current pH reading.
Cirkit Designer LogoOpen Project in Cirkit Designer
Arduino UNO Based pH Meter Interface
Image of ph sensor: A project utilizing pH in a practical application
This circuit is designed to measure the pH level of a solution using a pH meter connected to an Arduino UNO. The Arduino reads the analog signal from the pH meter, processes the readings to calculate the pH value, and outputs the result to the serial monitor. It also blinks the onboard LED at pin 13 with each measurement cycle.
Cirkit Designer LogoOpen Project in Cirkit Designer

Explore Projects Built with pH

Use Cirkit Designer to design, explore, and prototype these projects online. Some projects support real-time simulation. Click "Open Project" to start designing instantly!
Image of pH meter arduino: A project utilizing pH in a practical application
Arduino UNO Based pH Meter with LCD Display and Indicator LEDs
This circuit is designed to measure the pH level of a solution and display the value on an LCD screen. It uses an Arduino UNO microcontroller to read the pH sensor's signal and control three LEDs (yellow, green, blue) to indicate the pH level: yellow for acidic (pH < 5), green for neutral (pH 5-8), and blue for basic (pH > 8). The LCD displays a welcome message on startup and then continuously updates with the current pH value.
Cirkit Designer LogoOpen Project in Cirkit Designer
Image of ph: A project utilizing pH in a practical application
Arduino UNO pH Meter with LCD Display
This circuit is designed to measure pH levels using a pH meter and display the readings on an LCD screen. An Arduino UNO microcontroller reads the pH sensor data through its analog input pin A1 and controls the LCD display via its digital pins to show the pH value.
Cirkit Designer LogoOpen Project in Cirkit Designer
Image of PH SENSOR: A project utilizing pH in a practical application
Arduino UNO Based pH Meter with LCD Display
This circuit is designed to measure the pH level of a solution using a pH meter connected to an Arduino UNO microcontroller. The Arduino reads the pH value from the sensor, processes the signal, and displays the result on an LCD I2C display. The code for the Arduino includes initialization of the display, reading and filtering the sensor signal, calculating the pH value, and updating the display with the current pH reading.
Cirkit Designer LogoOpen Project in Cirkit Designer
Image of ph sensor: A project utilizing pH in a practical application
Arduino UNO Based pH Meter Interface
This circuit is designed to measure the pH level of a solution using a pH meter connected to an Arduino UNO. The Arduino reads the analog signal from the pH meter, processes the readings to calculate the pH value, and outputs the result to the serial monitor. It also blinks the onboard LED at pin 13 with each measurement cycle.
Cirkit Designer LogoOpen Project in Cirkit Designer

Common Applications and Use Cases

  • Water quality monitoring in aquariums, pools, and wastewater treatment plants
  • Soil pH measurement for agriculture and gardening
  • Food and beverage industry for quality control
  • Laboratory experiments and chemical analysis
  • Environmental monitoring of natural water bodies

Technical Specifications

Below are the general technical specifications for a typical pH sensor module:

Parameter Value
Operating Voltage 3.3V - 5V
Output Signal Analog voltage (0-5V)
pH Measurement Range 0 - 14
Accuracy ±0.1 pH (at 25°C)
Temperature Range 0°C - 60°C
Response Time ≤ 1 second
Calibration Two-point (pH 4.0 and pH 7.0)

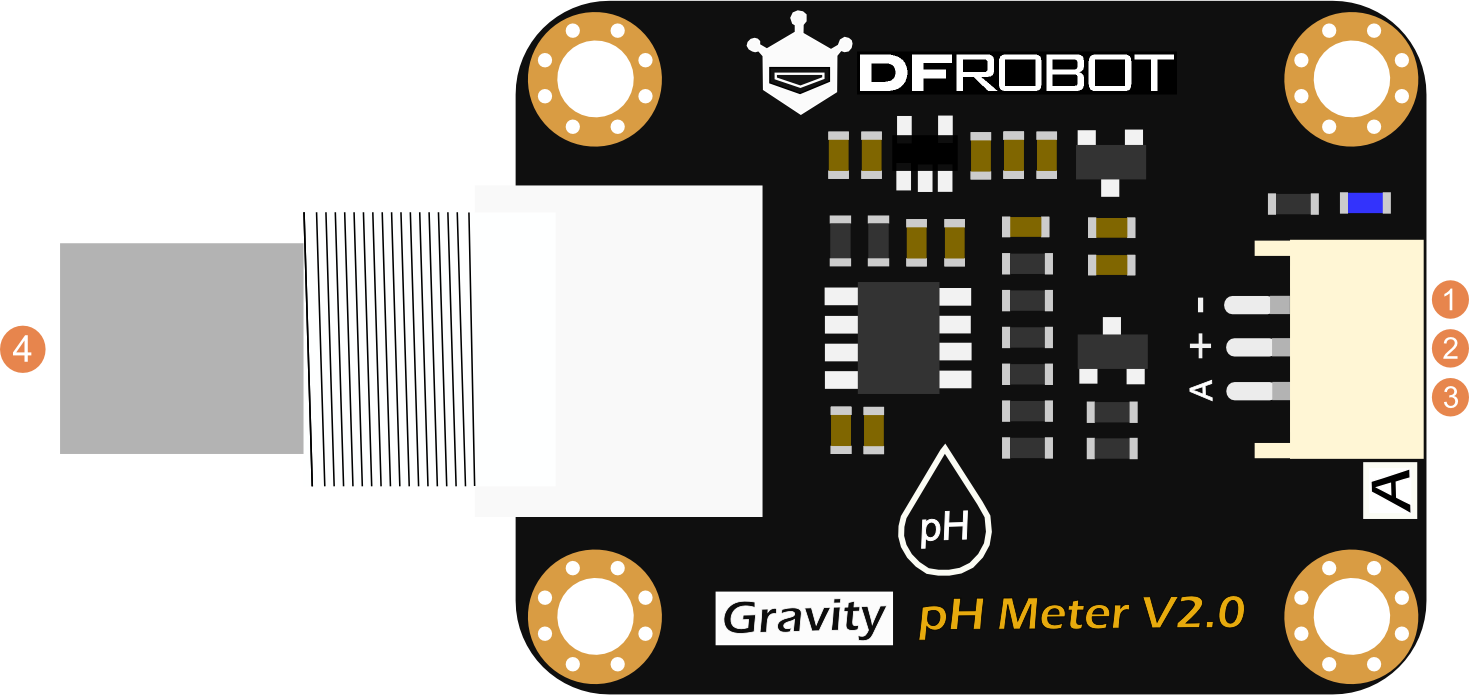
Pin Configuration and Descriptions

Pin Name Description
VCC Power supply input (3.3V - 5V)
GND Ground connection
AO Analog output signal (proportional to pH)

Usage Instructions

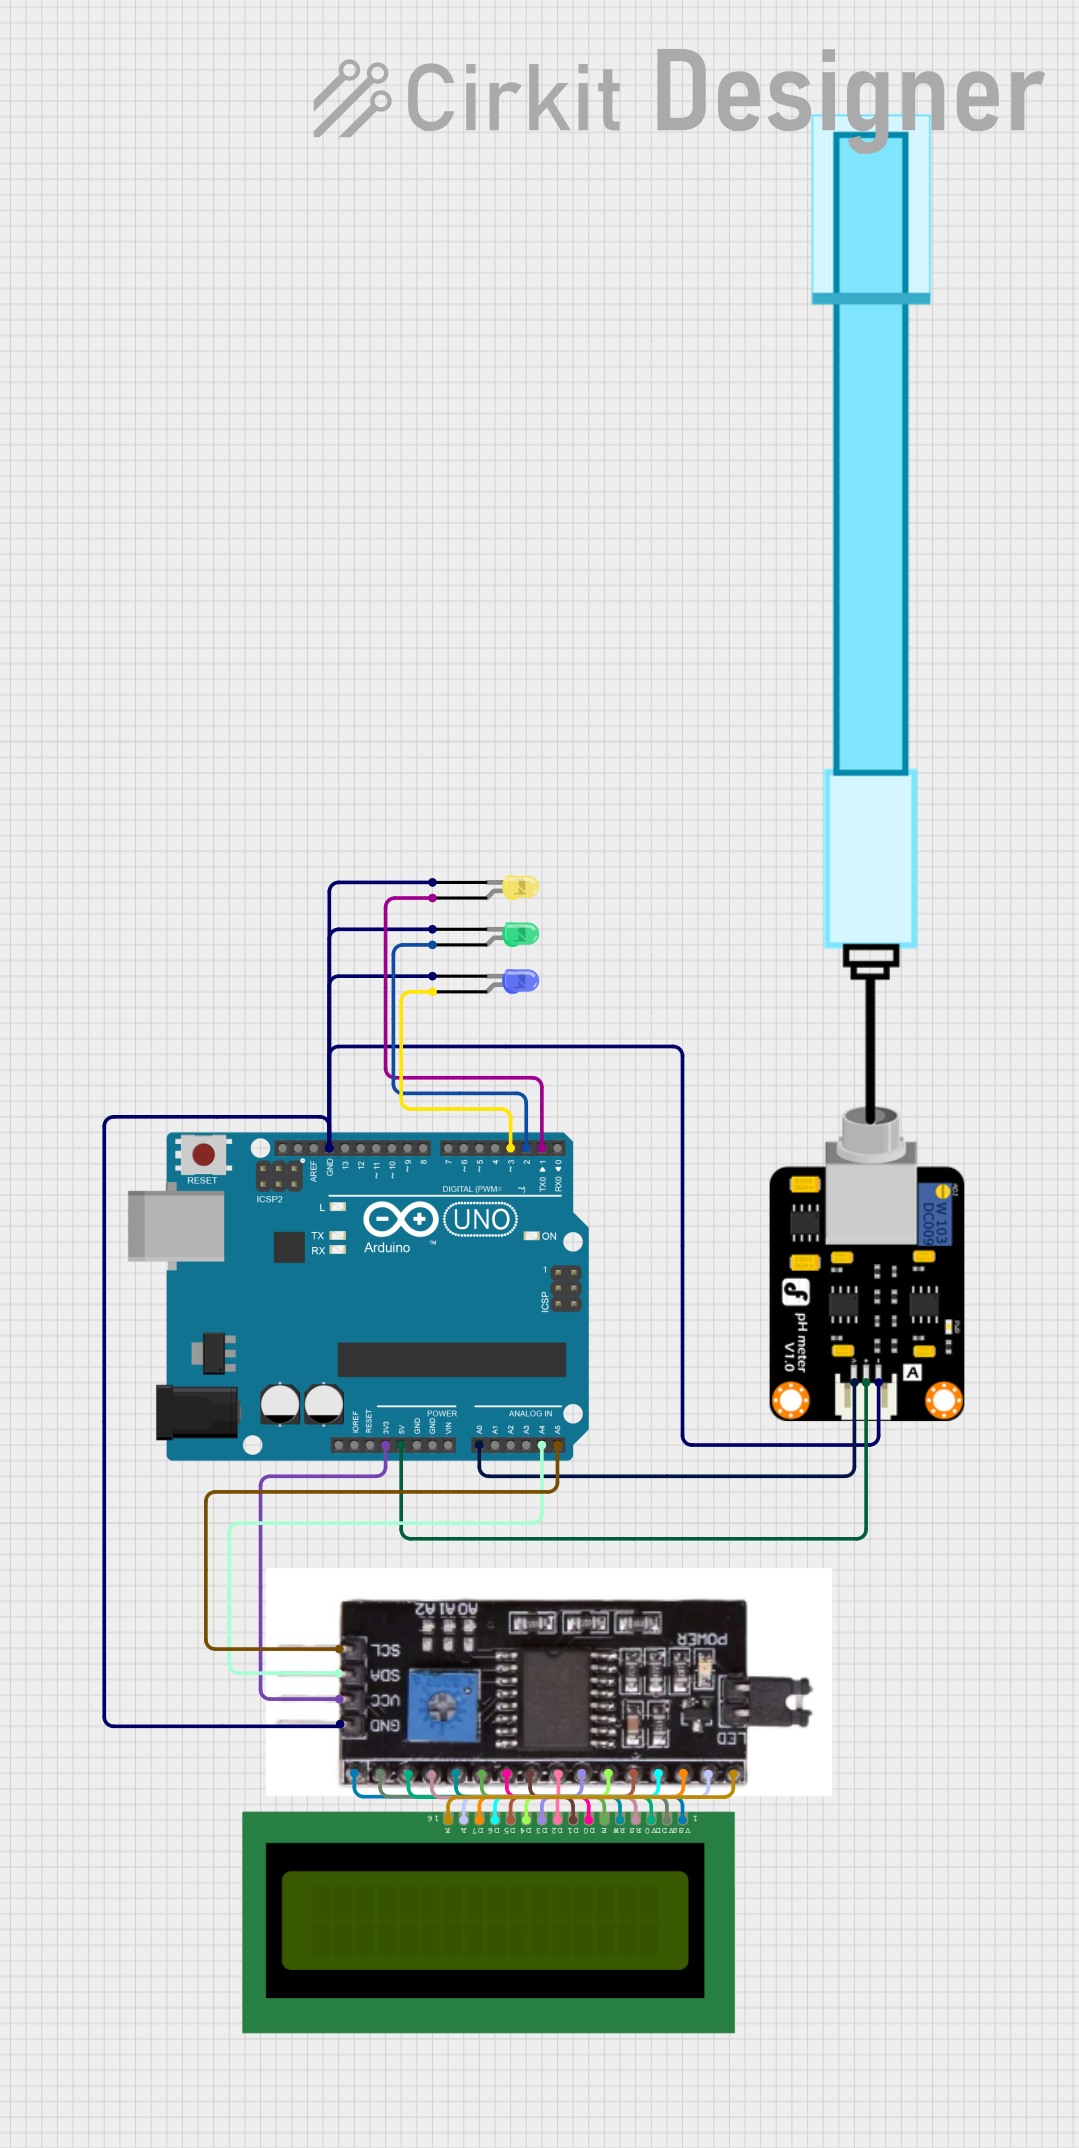
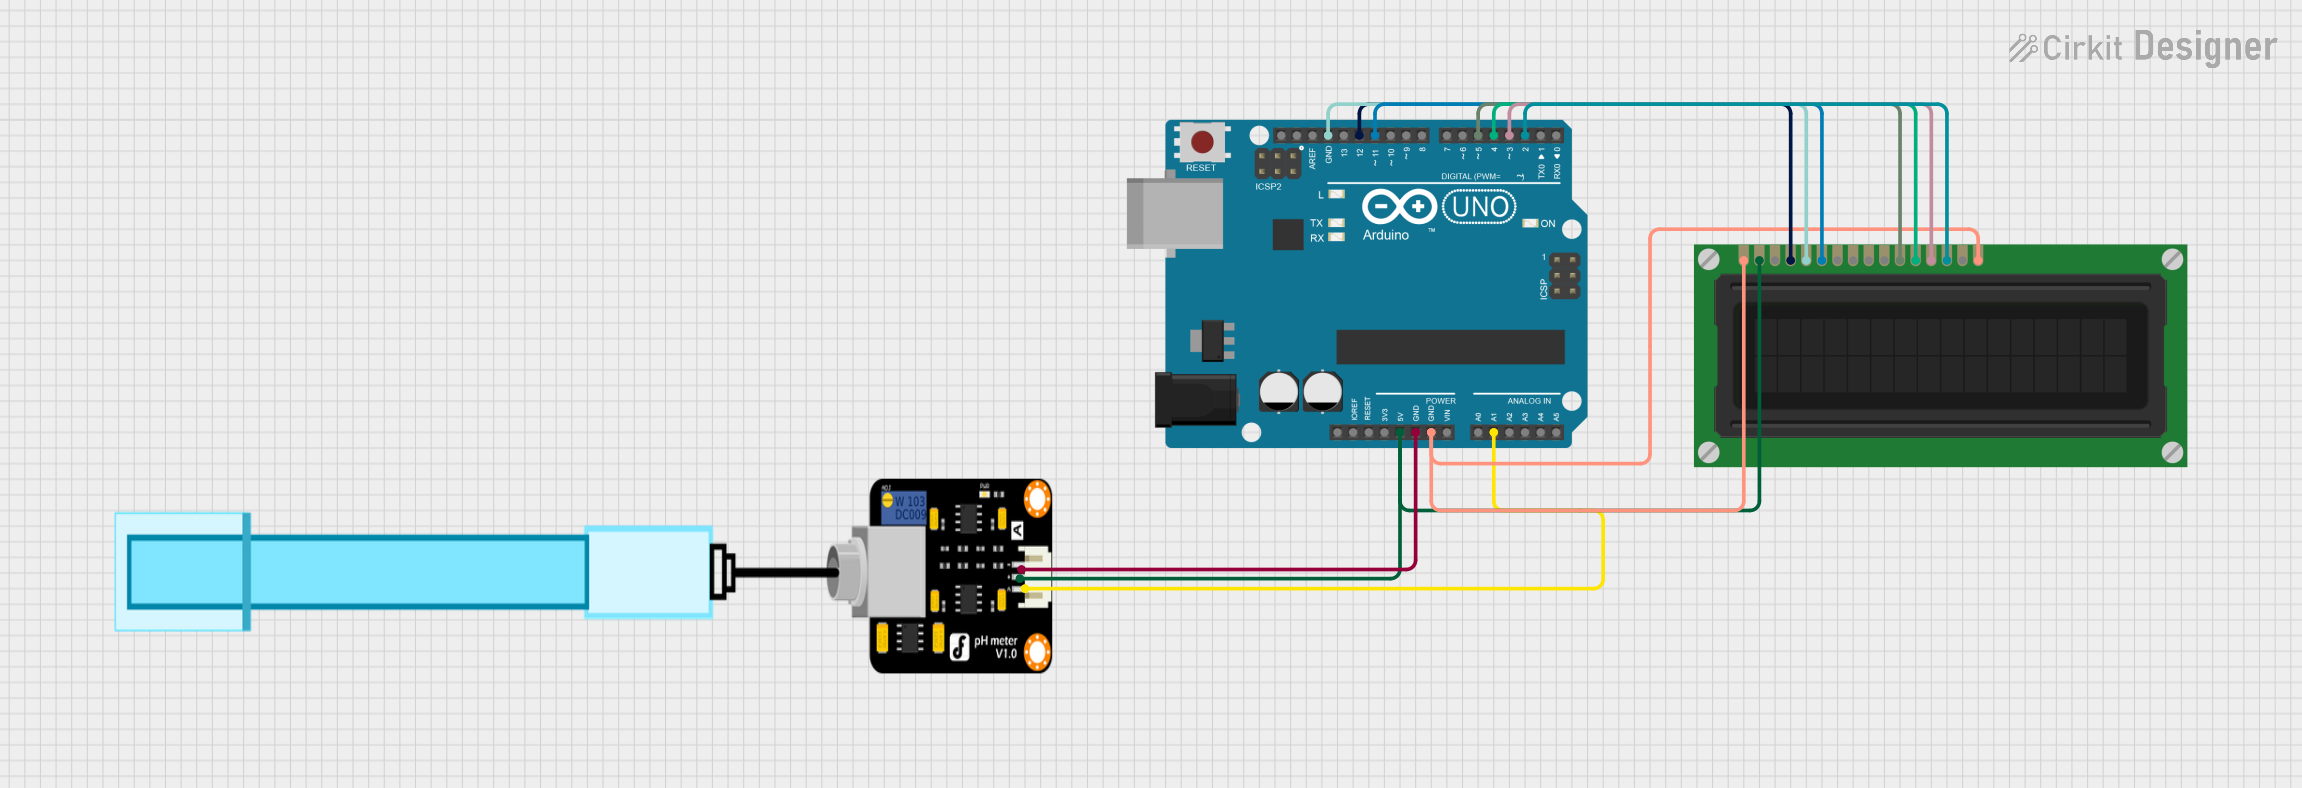
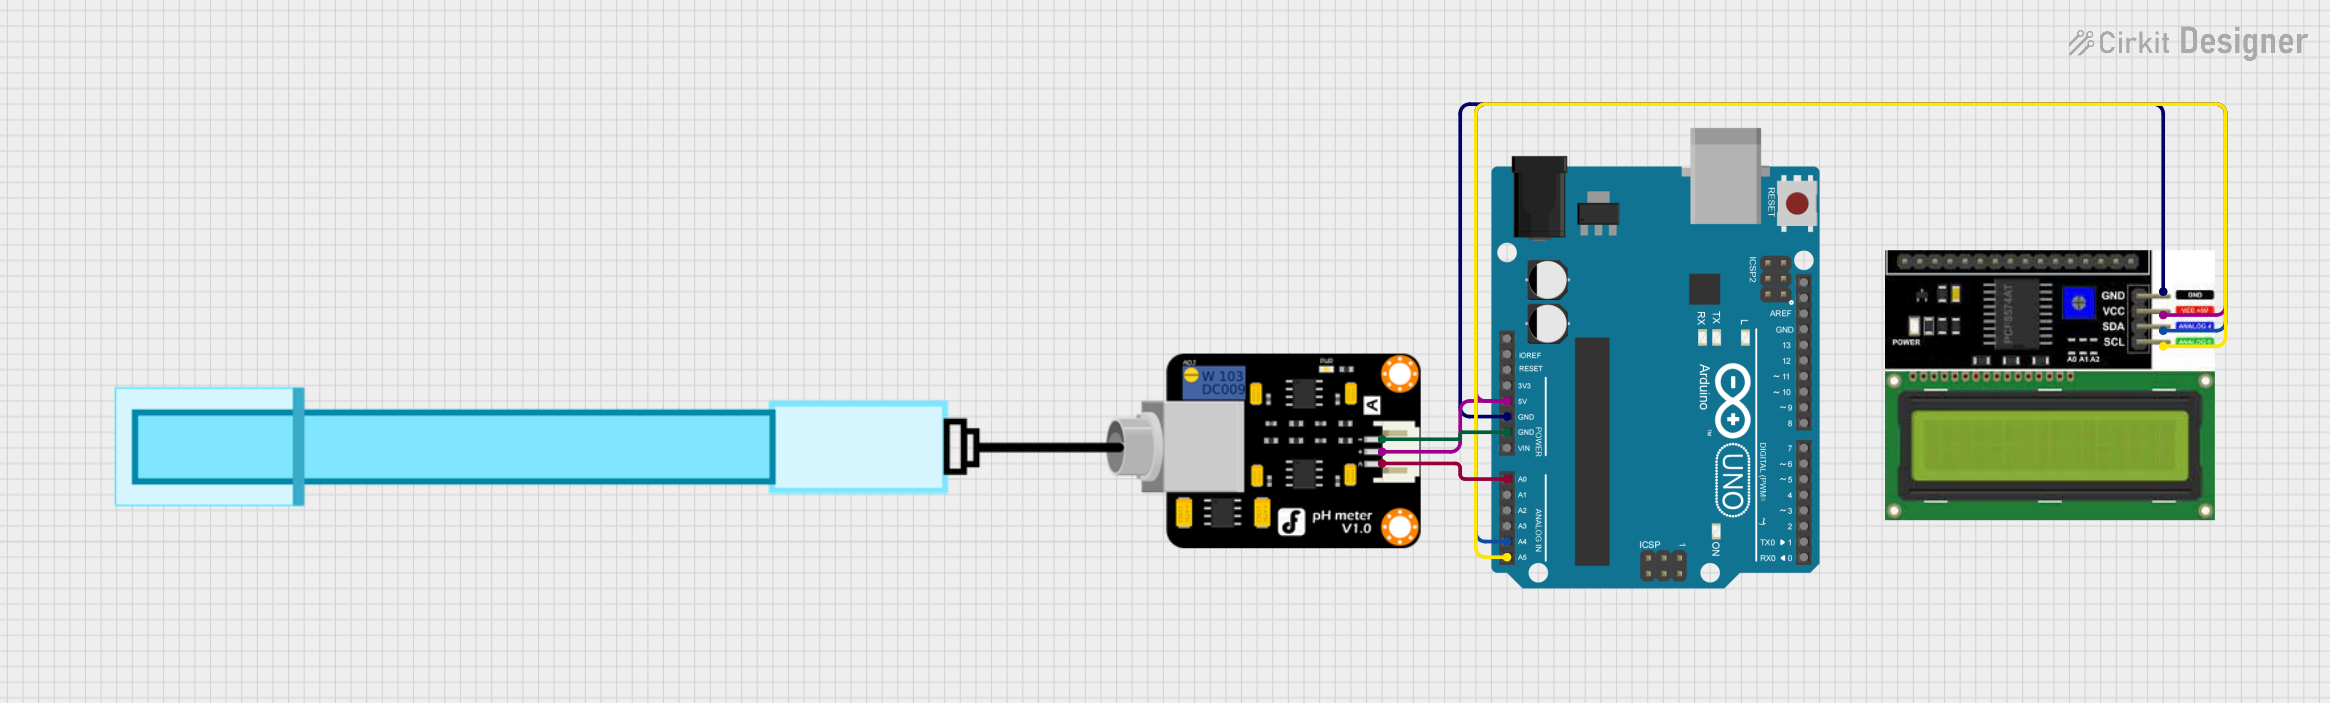
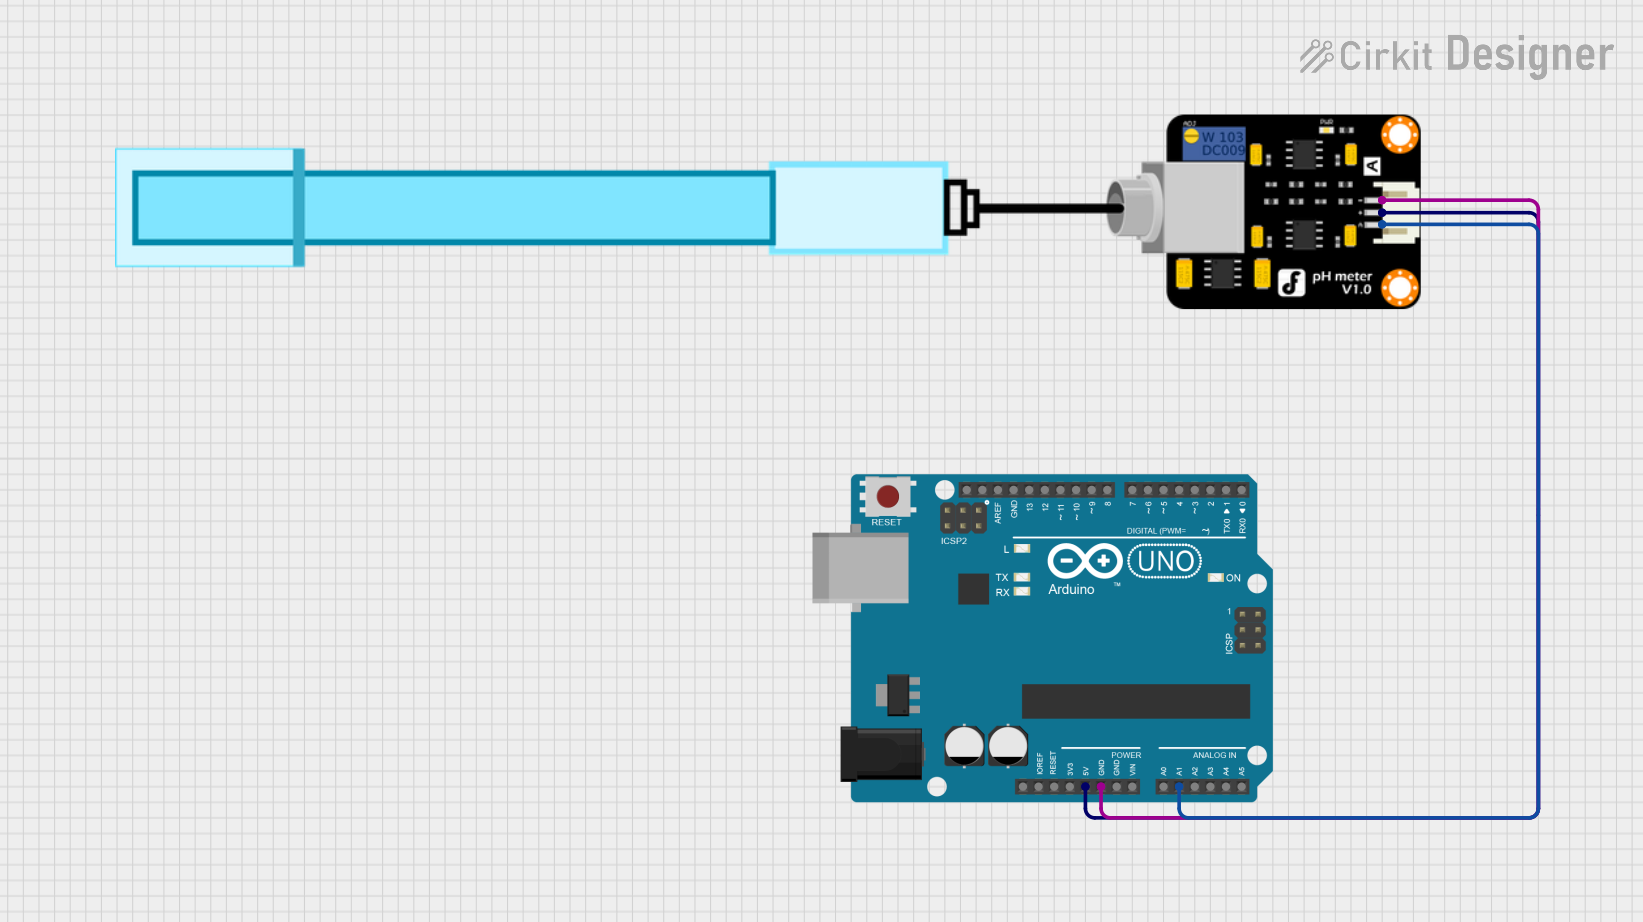
How to Use the pH Sensor in a Circuit

  1. Connect the Sensor:

    • Connect the VCC pin of the pH sensor module to the 5V pin of your microcontroller (e.g., Arduino UNO).
    • Connect the GND pin to the ground (GND) of the microcontroller.
    • Connect the AO pin to an analog input pin (e.g., A0) on the microcontroller.
  2. Calibrate the Sensor:

    • Immerse the pH probe in a standard buffer solution with a known pH value (e.g., pH 7.0).
    • Adjust the potentiometer on the sensor module until the output matches the expected value.
    • Repeat the process with a second buffer solution (e.g., pH 4.0) for two-point calibration.
  3. Read the pH Value:

    • Use the analog output signal to calculate the pH value. The sensor typically outputs a voltage proportional to the pH level.

Important Considerations and Best Practices

  • Always rinse the pH probe with distilled water before and after use to prevent contamination.
  • Store the pH probe in a storage solution or buffer solution to maintain accuracy and prolong its lifespan.
  • Avoid exposing the probe to extreme temperatures or harsh chemicals that could damage it.
  • Periodically recalibrate the sensor to ensure accurate readings.

Example Code for Arduino UNO

Below is an example of how to interface a pH sensor with an Arduino UNO:

// Define the analog pin connected to the pH sensor
const int pH_pin = A0;

// Calibration values (adjust based on your sensor's output)
const float voltage_at_pH7 = 2.5; // Voltage at pH 7.0
const float voltage_per_pH = 0.18; // Voltage change per pH unit

void setup() {
  Serial.begin(9600); // Initialize serial communication
  pinMode(pH_pin, INPUT); // Set the pH pin as input
}

void loop() {
  // Read the analog value from the pH sensor
  int sensorValue = analogRead(pH_pin);

  // Convert the analog value to voltage (assuming 5V reference)
  float voltage = sensorValue * (5.0 / 1023.0);

  // Calculate the pH value based on the voltage
  float pH = 7.0 + ((voltage - voltage_at_pH7) / voltage_per_pH);

  // Print the pH value to the Serial Monitor
  Serial.print("pH Value: ");
  Serial.println(pH);

  delay(1000); // Wait for 1 second before the next reading
}

Troubleshooting and FAQs

Common Issues and Solutions

  1. Inaccurate Readings:

    • Cause: The sensor is not calibrated properly.
    • Solution: Perform a two-point calibration using standard buffer solutions.
  2. Fluctuating Output:

    • Cause: Electrical noise or unstable power supply.
    • Solution: Use a decoupling capacitor between the VCC and GND pins to stabilize the power supply.
  3. Sensor Not Responding:

    • Cause: Damaged probe or incorrect wiring.
    • Solution: Check the wiring connections and ensure the probe is not physically damaged.
  4. Slow Response Time:

    • Cause: Probe is dirty or clogged.
    • Solution: Clean the probe with a soft brush and rinse with distilled water.

FAQs

Q: How often should I calibrate the pH sensor?
A: It is recommended to calibrate the sensor before each use or at least once a week for consistent accuracy.

Q: Can I use the pH sensor in high-temperature solutions?
A: Most pH sensors are designed for temperatures up to 60°C. Check the specifications of your specific sensor before use.

Q: What should I do if the probe dries out?
A: Soak the probe in a storage solution or pH 4.0 buffer solution for several hours to rehydrate it.

Q: Can I use the pH sensor for long-term monitoring?
A: Yes, but ensure the probe is properly maintained and stored when not in use to prevent degradation.