How to Use Pushbutton: Examples, Pinouts, and Specs
Introduction
A pushbutton is a fundamental electronic component that operates as a simple switch to control a circuit. It is a momentary switch mechanism that, when pressed, either completes or interrupts a circuit connection. Pushbuttons are widely used in various applications, from consumer electronics to industrial control systems, serving as input devices for user interaction.
Explore Projects Built with Pushbutton

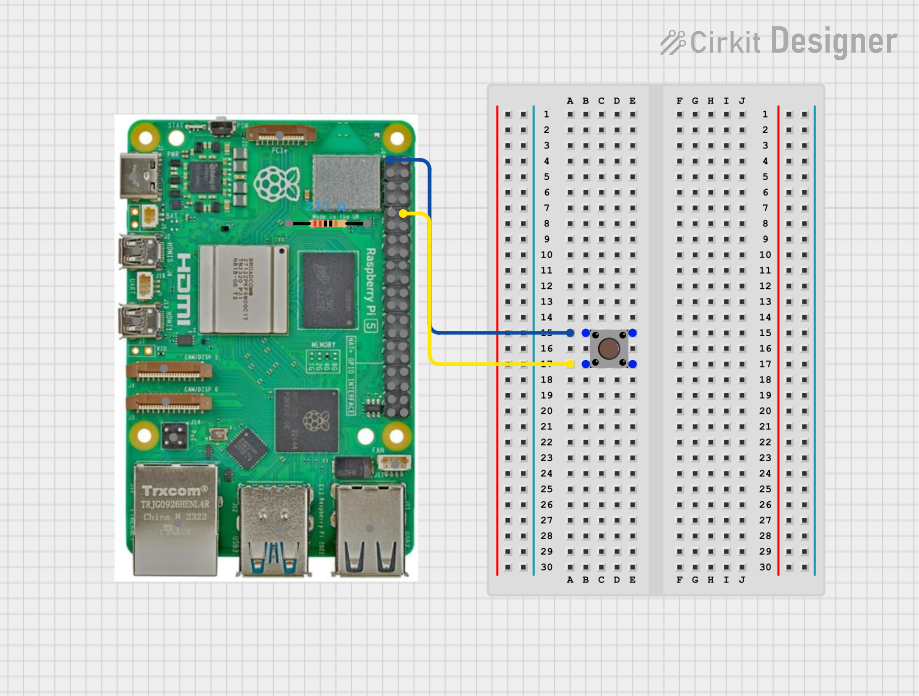

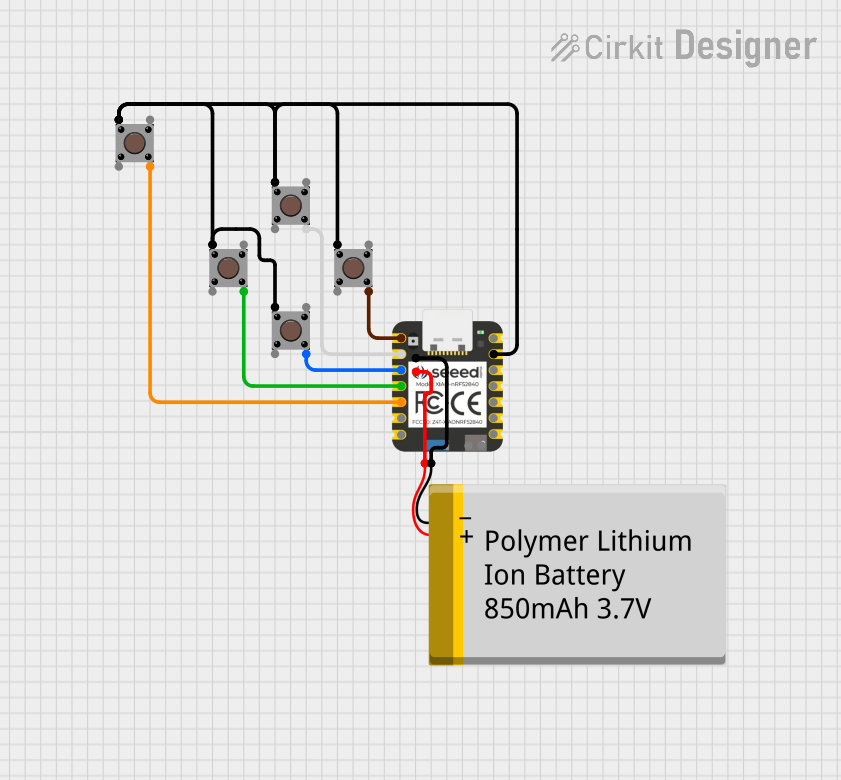
Explore Projects Built with Pushbutton
Common Applications and Use Cases
- Initiating an action, such as turning on a light or starting a machine
- User input for interactive projects, like games or kiosks
- Debounce circuits to ensure single action per press
- Input device for microcontroller projects, such as Arduino-based systems
Technical Specifications
Key Technical Details
- Voltage Rating: Typically 3.3V to 5V for logic-level circuits
- Current Rating: Varies, often around 10mA to 50mA for signal-level circuits
- Contact Resistance: Usually less than 10Ω when closed
- Mechanical Life: Can range from 10,000 to 1,000,000 cycles depending on quality
Pin Configuration and Descriptions
| Pin Number | Description |
|---|---|
| 1 | Terminal 1 (Contact) |
| 2 | Terminal 2 (Contact) |
Note: Some pushbuttons may have more than two pins for additional functionality or to support different mounting options.
Usage Instructions
How to Use the Pushbutton in a Circuit
- Identify the Pins: Determine which pins are the contacts that close when the button is pressed.
- Connect to Power: Connect one terminal to the power supply (e.g., 5V).
- Connect to Input: Connect the other terminal to the input of your device or microcontroller.
- Add a Pull-down Resistor: To ensure a clear LOW signal when the button is not pressed, connect a 10kΩ resistor from the input pin to the ground.
- Debounce the Signal: Implement a debounce algorithm in software or use a hardware debounce circuit to prevent false triggering from mechanical bounce.
Important Considerations and Best Practices
- Current Limiting: Ensure that the current through the button does not exceed its rating.
- Debouncing: Always debounce the pushbutton either in hardware or software to avoid multiple triggers from a single press.
- Mounting: Secure the pushbutton firmly to avoid intermittent connections.
Example Code for Arduino UNO
// Define the pushbutton pin
const int buttonPin = 2;
// Variable for reading the pushbutton status
int buttonState = 0;

void setup() {
  // Initialize the pushbutton pin as an input with a pull-up resistor
  pinMode(buttonPin, INPUT_PULLUP);
}

void loop(){
  // Read the state of the pushbutton value
  buttonState = digitalRead(buttonPin);

  // Check if the pushbutton is pressed
  // If it is, the buttonState is LOW
  if (buttonState == LOW) {
    // Turn on the LED
  } else {
    // Turn off the LED
  }
}
Note: In this example, the internal pull-up resistor is used instead of an external pull-down resistor.
Troubleshooting and FAQs
Common Issues Users Might Face
- Button Does Not Respond: Check the connections and ensure the button is not damaged.
- Multiple Inputs Detected: Implement a debounce mechanism to filter out the noise.
- Always On/Off: Verify the pull-up or pull-down resistor is correctly connected and functioning.
Solutions and Tips for Troubleshooting
- Check Connections: Ensure all wires are securely connected and not damaged.
- Test the Button: Use a multimeter to check if the button is working by testing for continuity when pressed.
- Resistor Value: Confirm that the pull-up or pull-down resistor is the correct value, typically 10kΩ.
FAQs
Q: Can I use a pushbutton without a resistor? A: It is not recommended as it may cause undefined states. Always use a pull-up or pull-down resistor.
Q: How do I know if my pushbutton is normally open or normally closed? A: A normally open pushbutton does not make contact until pressed, while a normally closed one is always in contact until pressed.
Q: What is debouncing and why is it necessary? A: Debouncing is the process of filtering out the noise from a mechanical switch to prevent multiple triggers from what should be a single action. It is necessary because mechanical switches inherently produce noise when contacts meet or separate.