How to Use DA7280: Examples, Pinouts, and Specs
Introduction
The DA7280, manufactured by Renesas, is a high-performance, low-power audio amplifier designed for portable devices. It utilizes a Class D architecture, ensuring efficient power usage while delivering high-quality sound output. This component is ideal for applications requiring compact, energy-efficient audio solutions, such as smartphones, tablets, portable speakers, and wearable devices.
Explore Projects Built with DA7280


Explore Projects Built with DA7280
Common Applications and Use Cases
- Smartphones and tablets
- Portable and Bluetooth speakers
- Wearable devices (e.g., smartwatches)
- IoT devices with audio output
- Battery-powered audio systems
Technical Specifications
The DA7280 is designed to provide excellent audio performance while maintaining low power consumption. Below are the key technical specifications:
Key Technical Details
| Parameter | Value |
|---|---|
| Supply Voltage Range | 2.5V to 5.5V |
| Output Power | Up to 2.5W (at 4Ω, 5V supply) |
| Efficiency | >90% (typical, at full load) |
| Supported Load Impedance | 4Ω to 8Ω |
| Audio Input Format | Analog |
| Signal-to-Noise Ratio | 98 dB |
| Total Harmonic Distortion | <0.05% (typical) |
| Operating Temperature | -40°C to +85°C |
| Package Type | WLCSP (Wafer Level Chip Scale Package) |
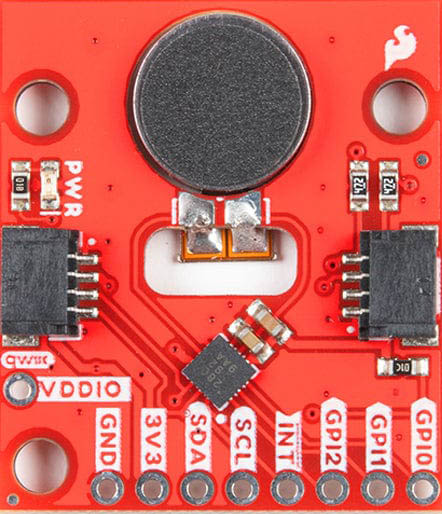
Pin Configuration and Descriptions
The DA7280 features a compact WLCSP package with the following pin configuration:
| Pin Number | Pin Name | Description |
|---|---|---|
| 1 | VDD | Power supply input (2.5V to 5.5V) |
| 2 | GND | Ground connection |
| 3 | IN+ | Positive audio input |
| 4 | IN- | Negative audio input |
| 5 | OUT+ | Positive audio output |
| 6 | OUT- | Negative audio output |
| 7 | EN | Enable pin (active high) |
| 8 | NC | No connection (leave floating or grounded) |
Usage Instructions
The DA7280 is straightforward to use in audio amplification circuits. Below are the steps and considerations for integrating it into your design:
How to Use the DA7280 in a Circuit
- Power Supply: Connect the VDD pin to a stable power source within the range of 2.5V to 5.5V. Ensure proper decoupling with a low-ESR capacitor (e.g., 10µF) close to the VDD pin.
- Audio Input: Connect the audio signal source to the IN+ and IN- pins. Use a differential input configuration for optimal noise rejection.
- Audio Output: Connect the OUT+ and OUT- pins to the load (e.g., speaker). Ensure the load impedance is within the supported range (4Ω to 8Ω).
- Enable Pin: Drive the EN pin high to enable the amplifier. Pull it low to disable the amplifier and reduce power consumption.
- Grounding: Connect the GND pin to the system ground. Ensure a low-impedance ground connection to minimize noise.
Important Considerations and Best Practices
- Thermal Management: Although the DA7280 is highly efficient, ensure adequate thermal dissipation, especially in high-power applications.
- Input Filtering: Use a low-pass filter at the input to remove high-frequency noise from the audio signal.
- Output Filtering: For EMI compliance, consider adding a ferrite bead or LC filter at the output.
- Protection Features: The DA7280 includes built-in protections against overcurrent and thermal overload. However, ensure the circuit design does not exceed the specified voltage and current limits.
Example: Using the DA7280 with an Arduino UNO
The DA7280 can be used with an Arduino UNO to amplify audio signals. Below is an example of how to control the DA7280 using the Arduino:
Circuit Connections
- Connect the VDD pin of the DA7280 to the 5V pin of the Arduino.
- Connect the GND pin of the DA7280 to the GND pin of the Arduino.
- Connect the EN pin of the DA7280 to a digital output pin on the Arduino (e.g., pin 7).
- Connect the audio input source to the IN+ and IN- pins of the DA7280.
- Connect the speaker to the OUT+ and OUT- pins of the DA7280.
Arduino Code
// DA7280 Control Example with Arduino UNO
// This code enables and disables the DA7280 amplifier using a digital pin.

#define DA7280_EN_PIN 7  // Define the pin connected to the EN pin of DA7280

void setup() {
  pinMode(DA7280_EN_PIN, OUTPUT);  // Set the EN pin as an output
  digitalWrite(DA7280_EN_PIN, LOW); // Start with the amplifier disabled
}

void loop() {
  // Enable the DA7280 amplifier
  digitalWrite(DA7280_EN_PIN, HIGH);
  delay(5000);  // Keep the amplifier enabled for 5 seconds

  // Disable the DA7280 amplifier
  digitalWrite(DA7280_EN_PIN, LOW);
  delay(5000);  // Keep the amplifier disabled for 5 seconds
}
Troubleshooting and FAQs
Common Issues and Solutions
No Audio Output
- Cause: The EN pin is not driven high.
- Solution: Ensure the EN pin is connected to a high logic level (e.g., 3.3V or 5V).
Distorted Audio
- Cause: Input signal is too high or load impedance is too low.
- Solution: Reduce the input signal amplitude or ensure the load impedance is within the 4Ω to 8Ω range.
Overheating
- Cause: Insufficient thermal dissipation or excessive power draw.
- Solution: Improve thermal management (e.g., add a heatsink) and ensure the load does not exceed the power rating.
High Noise or EMI
- Cause: Poor grounding or lack of output filtering.
- Solution: Use proper grounding techniques and add an LC filter at the output.
FAQs
Q: Can the DA7280 operate with a single-ended input?
A: Yes, the DA7280 can operate with a single-ended input, but a differential input configuration is recommended for better noise rejection.
Q: What is the maximum output power of the DA7280?
A: The DA7280 can deliver up to 2.5W of output power at 4Ω with a 5V supply.
Q: Does the DA7280 require an external heatsink?
A: In most cases, the DA7280 does not require an external heatsink due to its high efficiency. However, for high-power applications, additional thermal management may be necessary.
Q: Is the DA7280 suitable for battery-powered devices?
A: Yes, the DA7280 is highly efficient and operates at low voltages, making it ideal for battery-powered devices.