How to Use Estardyn 1.3 Inch OLED Display with EC11 Rotary Encoder Module: Examples, Pinouts, and Specs
Introduction
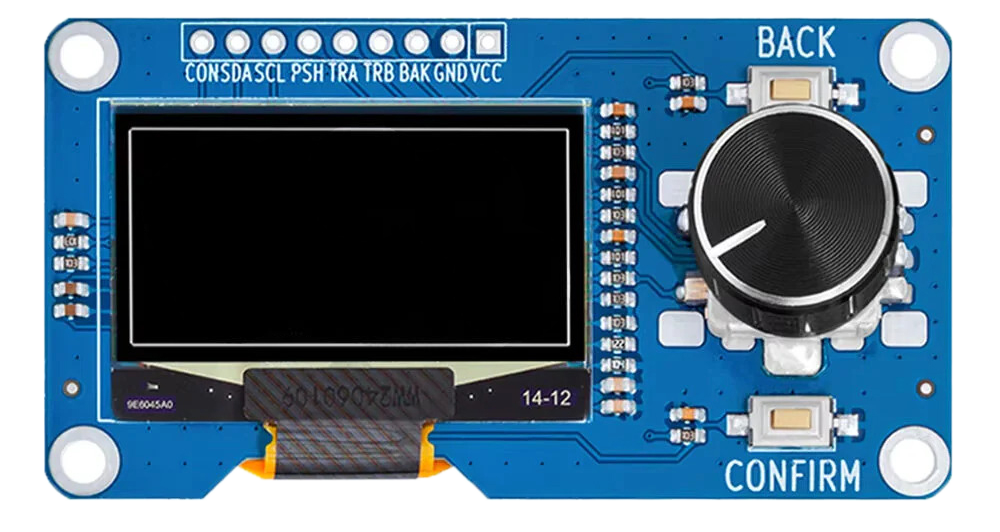
The Estardyn 1.3 Inch OLED Display with EC11 Rotary Encoder Module is a versatile electronic component that combines a high-resolution 1.3-inch OLED display with an EC11 rotary encoder. The OLED display provides crisp and clear visuals, making it ideal for creating user interfaces, displaying data, or visualizing sensor outputs. The EC11 rotary encoder adds functionality for user input, enabling precise control, menu navigation, or parameter adjustments.
This module is widely used in applications such as:
- DIY electronics projects
- Embedded systems with graphical interfaces
- Control panels for industrial or home automation
- Audio equipment for menu navigation and volume control
- Prototyping interactive devices
Explore Projects Built with Estardyn 1.3 Inch OLED Display with EC11 Rotary Encoder Module
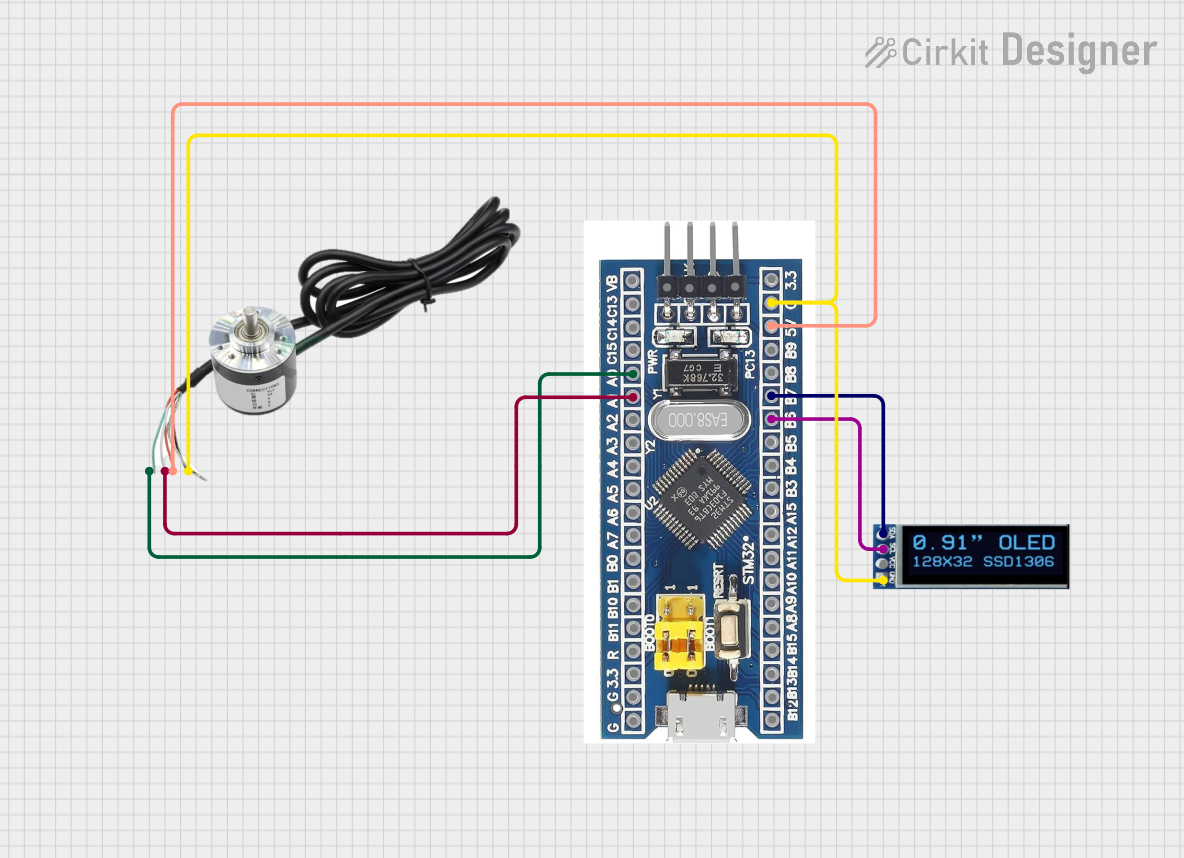
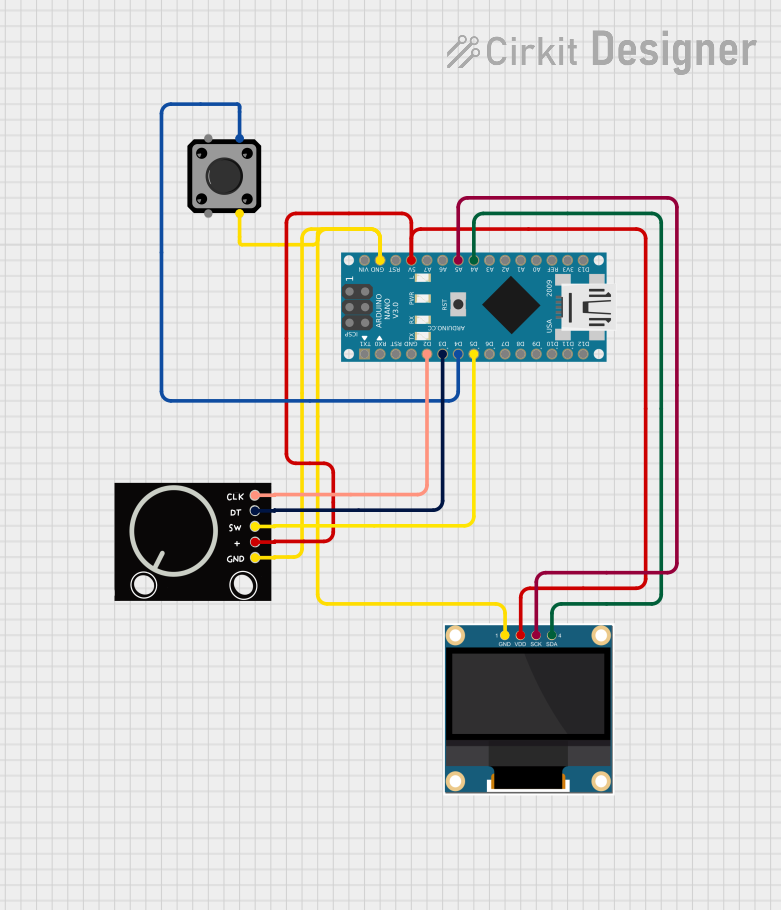
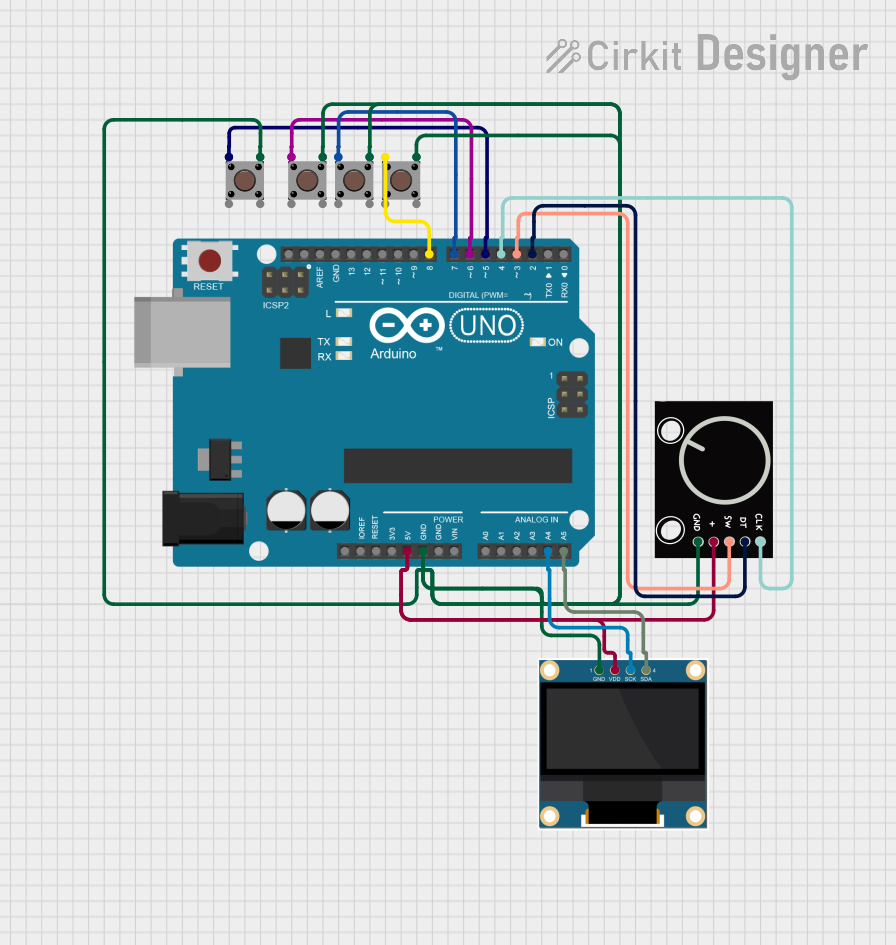
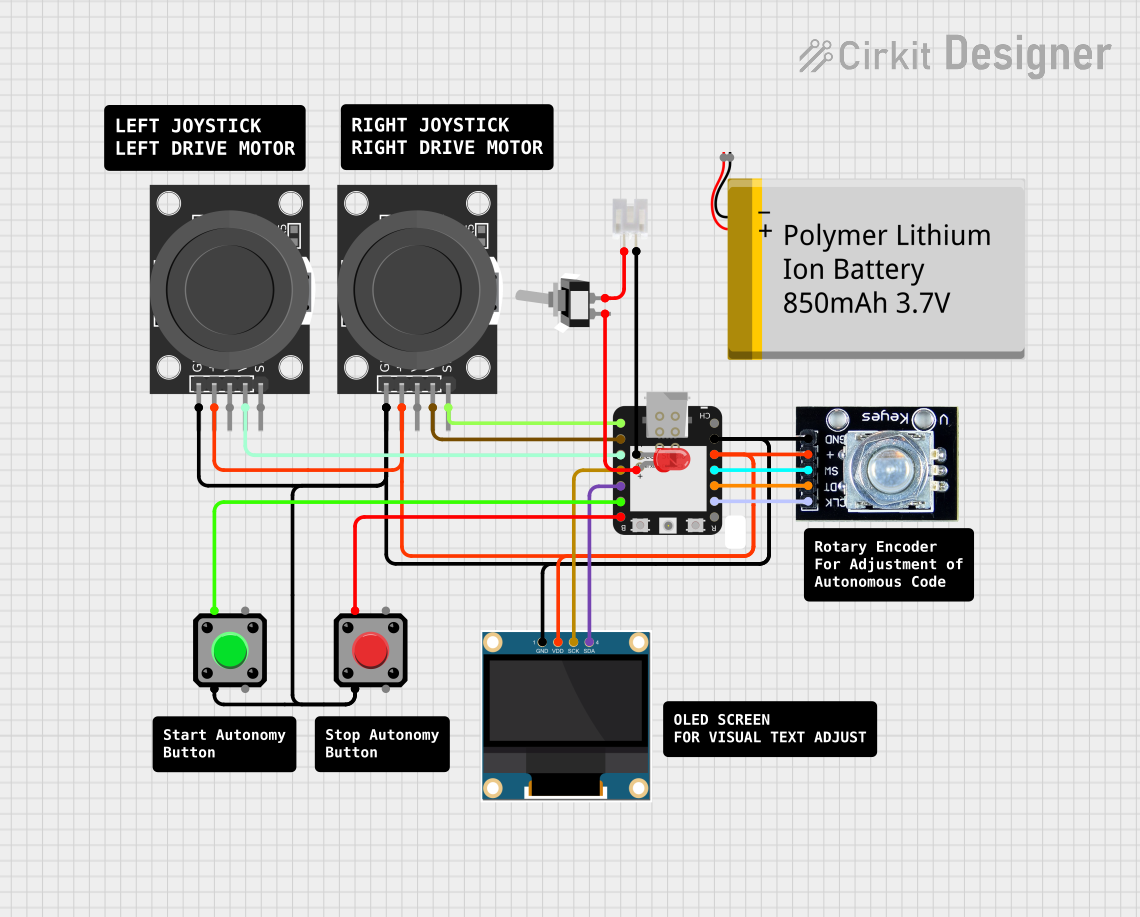
Explore Projects Built with Estardyn 1.3 Inch OLED Display with EC11 Rotary Encoder Module
Technical Specifications
OLED Display Specifications
| Parameter | Value |
|---|---|
| Display Type | OLED |
| Screen Size | 1.3 inches |
| Resolution | 128 x 64 pixels |
| Interface | I2C (Inter-Integrated Circuit) |
| Operating Voltage | 3.3V - 5V |
| Viewing Angle | >160° |
| Color | Monochrome (White) |
EC11 Rotary Encoder Specifications
| Parameter | Value |
|---|---|
| Encoder Type | Incremental |
| Steps per Revolution | 20 |
| Push Button | Integrated (Momentary Switch) |
| Operating Voltage | 3.3V - 5V |
| Pin Count | 5 (CLK, DT, SW, VCC, GND) |
Pin Configuration
OLED Display Pinout
| Pin Name | Description |
|---|---|
| VCC | Power supply (3.3V - 5V) |
| GND | Ground |
| SCL | I2C Clock Line |
| SDA | I2C Data Line |
EC11 Rotary Encoder Pinout
| Pin Name | Description |
|---|---|
| CLK | Clock signal output |
| DT | Data signal output |
| SW | Push button signal output |
| VCC | Power supply (3.3V - 5V) |
| GND | Ground |
Usage Instructions
Connecting the Module to an Arduino UNO
To use the Estardyn 1.3 Inch OLED Display with EC11 Rotary Encoder Module, follow these steps:
Wiring the OLED Display:
- Connect the
VCCpin of the OLED to the 5V pin on the Arduino. - Connect the
GNDpin of the OLED to the GND pin on the Arduino. - Connect the
SCLpin of the OLED to the A5 pin (I2C clock) on the Arduino. - Connect the
SDApin of the OLED to the A4 pin (I2C data) on the Arduino.
- Connect the
Wiring the EC11 Rotary Encoder:
- Connect the
VCCpin of the encoder to the 5V pin on the Arduino. - Connect the
GNDpin of the encoder to the GND pin on the Arduino. - Connect the
CLKpin of the encoder to digital pin 2 on the Arduino. - Connect the
DTpin of the encoder to digital pin 3 on the Arduino. - Connect the
SWpin of the encoder to digital pin 4 on the Arduino.
- Connect the
Sample Arduino Code
Below is an example Arduino sketch to display text on the OLED and read input from the rotary encoder:
#include <Wire.h>
#include <Adafruit_GFX.h>
#include <Adafruit_SSD1306.h>

// OLED display dimensions
#define SCREEN_WIDTH 128
#define SCREEN_HEIGHT 64

// Initialize the OLED display
Adafruit_SSD1306 display(SCREEN_WIDTH, SCREEN_HEIGHT, &Wire, -1);

// Rotary encoder pins
#define CLK 2
#define DT 3
#define SW 4

int counter = 0; // Counter for rotary encoder
int lastStateCLK;
int currentStateCLK;

void setup() {
  // Initialize serial communication
  Serial.begin(9600);

  // Initialize OLED display
  if (!display.begin(SSD1306_I2C_ADDRESS, 0x3C)) {
    Serial.println(F("SSD1306 allocation failed"));
    for (;;);
  }
  display.clearDisplay();
  display.setTextSize(1);
  display.setTextColor(SSD1306_WHITE);
  display.setCursor(0, 0);
  display.println("Rotary Encoder Demo");
  display.display();

  // Set up rotary encoder pins
  pinMode(CLK, INPUT);
  pinMode(DT, INPUT);
  pinMode(SW, INPUT_PULLUP);

  // Read the initial state of the CLK pin
  lastStateCLK = digitalRead(CLK);
}

void loop() {
  // Read the current state of the CLK pin
  currentStateCLK = digitalRead(CLK);

  // If the state has changed, determine the direction
  if (currentStateCLK != lastStateCLK) {
    if (digitalRead(DT) != currentStateCLK) {
      counter++;
    } else {
      counter--;
    }

    // Display the counter value on the OLED
    display.clearDisplay();
    display.setCursor(0, 0);
    display.println("Rotary Encoder Demo");
    display.setCursor(0, 20);
    display.print("Counter: ");
    display.println(counter);
    display.display();
  }

  // Update the last state of the CLK pin
  lastStateCLK = currentStateCLK;

  // Check if the push button is pressed
  if (digitalRead(SW) == LOW) {
    display.clearDisplay();
    display.setCursor(0, 0);
    display.println("Button Pressed!");
    display.display();
    delay(500); // Debounce delay
  }
}
Best Practices
- Use pull-up resistors for the rotary encoder pins if necessary to ensure stable readings.
- Avoid excessive current draw from the Arduino by powering the module through an external power source if needed.
- Use a level shifter if interfacing the module with a 3.3V microcontroller.
Troubleshooting and FAQs
Common Issues
OLED Display Not Turning On:
- Ensure the power and ground connections are secure.
- Verify the I2C address (default is
0x3C) and update the code if necessary. - Check for loose or incorrect wiring.
Rotary Encoder Not Responding:
- Confirm the
CLKandDTpins are connected to the correct Arduino pins. - Check for debounce issues and add software debouncing if needed.
- Confirm the
Push Button Not Working:
- Ensure the
SWpin is connected to the correct Arduino pin. - Verify the button is not stuck or damaged.
- Ensure the
FAQs
Q: Can I use this module with a 3.3V microcontroller?
A: Yes, the module supports both 3.3V and 5V logic levels.
Q: What is the maximum refresh rate of the OLED display?
A: The refresh rate depends on the I2C communication speed, typically up to 400kHz.
Q: Can I use SPI instead of I2C for the OLED?
A: No, this module is designed specifically for I2C communication.
Q: How do I change the I2C address of the OLED?
A: The I2C address is fixed at 0x3C and cannot be changed on this module.
By following this documentation, you can effectively integrate the Estardyn 1.3 Inch OLED Display with EC11 Rotary Encoder Module into your projects!