How to Use SparkFun Environmental Combo Breakout - CCS811/BME280 (Qwiic): Examples, Pinouts, and Specs
Introduction
The SparkFun Environmental Combo Breakout is a comprehensive sensor module that integrates two powerful sensors: the CCS811 and the BME280. This combination allows for the measurement of a wide range of environmental parameters, making it an ideal choice for monitoring indoor air quality and weather conditions. The CCS811 sensor is capable of detecting volatile organic compounds (VOCs) and equivalent CO2 (eCO2) levels, while the BME280 sensor provides accurate readings of temperature, humidity, and barometric pressure. This breakout is designed for easy integration into projects with its Qwiic connect system, eliminating the need for soldering.
Common applications for this sensor include:
- Smart home environmental monitoring
- HVAC system monitoring
- Weather stations
- Indoor air quality assessment
Explore Projects Built with SparkFun Environmental Combo Breakout - CCS811/BME280 (Qwiic)

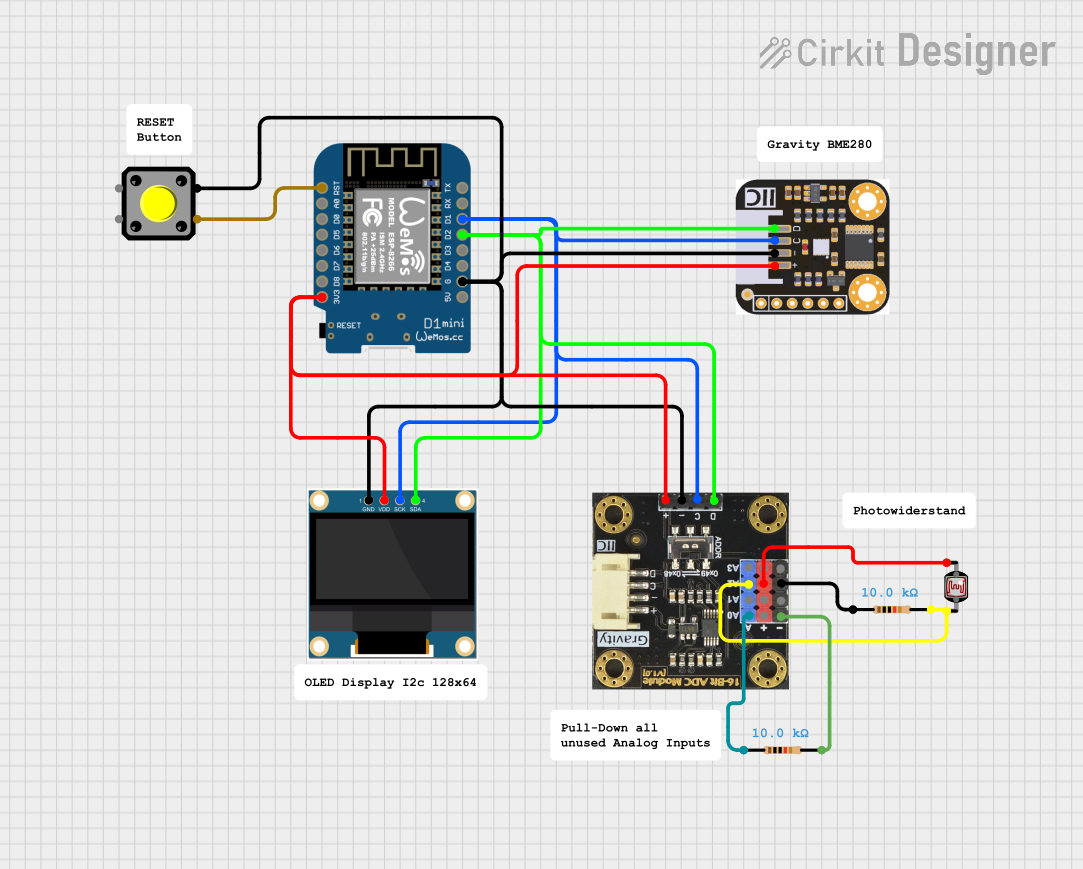
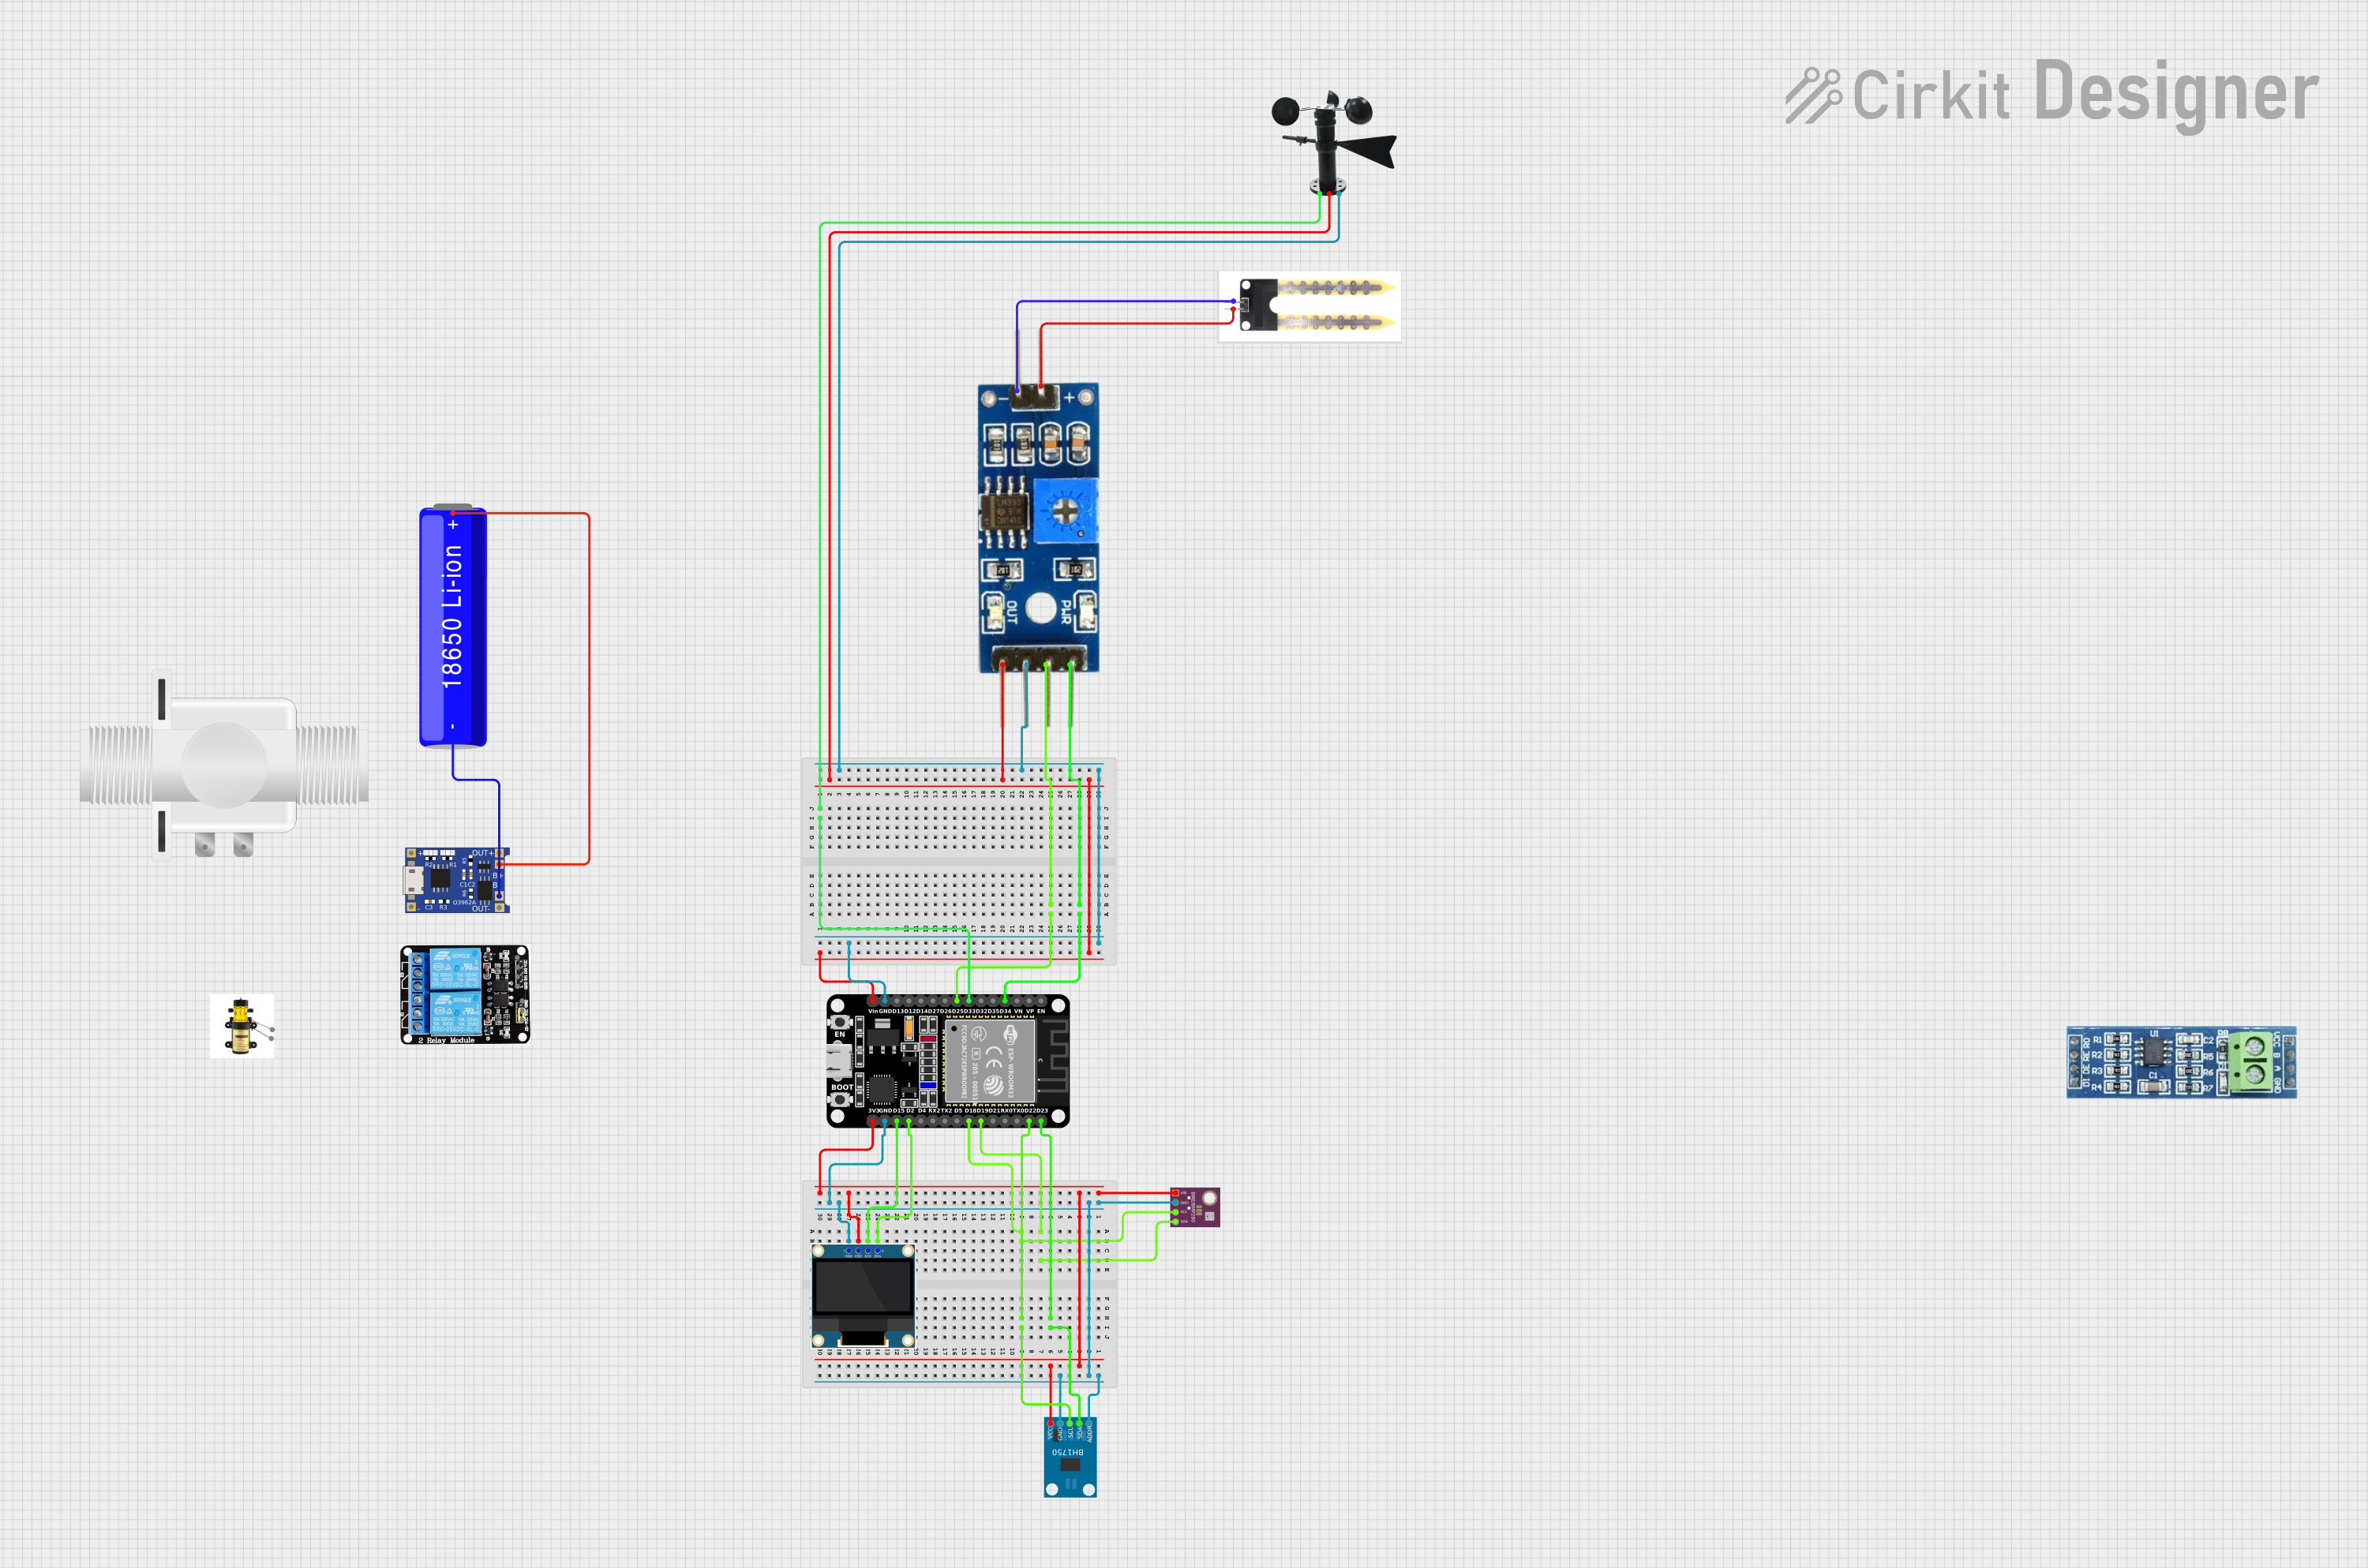
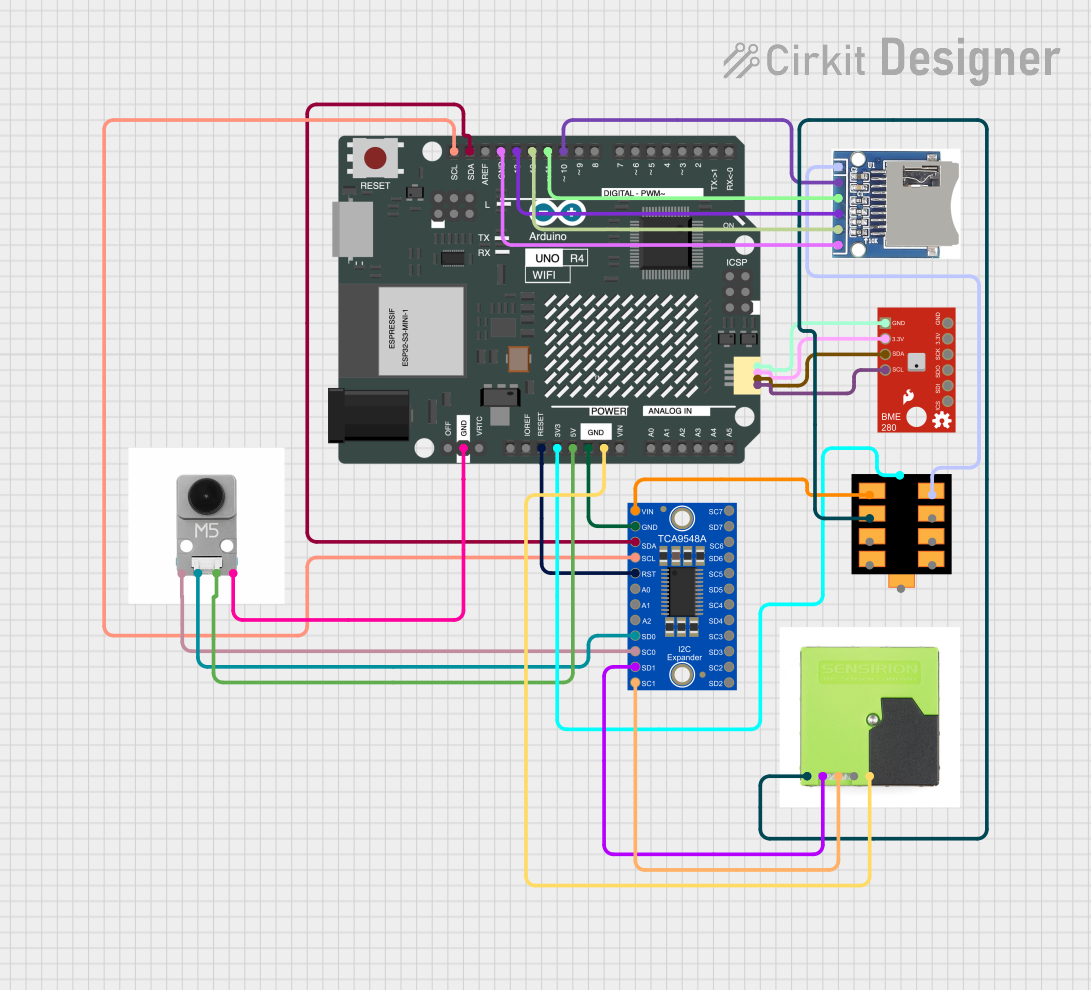
Explore Projects Built with SparkFun Environmental Combo Breakout - CCS811/BME280 (Qwiic)
Technical Specifications
Key Technical Details
- CCS811 Air Quality Sensor:
- Measurement range: 400 to 29206 ppm for eCO2, 0 to 32768 ppb for TVOCs
- Interface: I2C
- BME280 Environmental Sensor:
- Temperature range: -40°C to 85°C
- Humidity range: 0% to 100% RH
- Pressure range: 300 to 1100 hPa
- Interface: I2C
- Operating Voltage: 3.3V
- Current Consumption: 1.2mA (measuring), 10µA (idle)
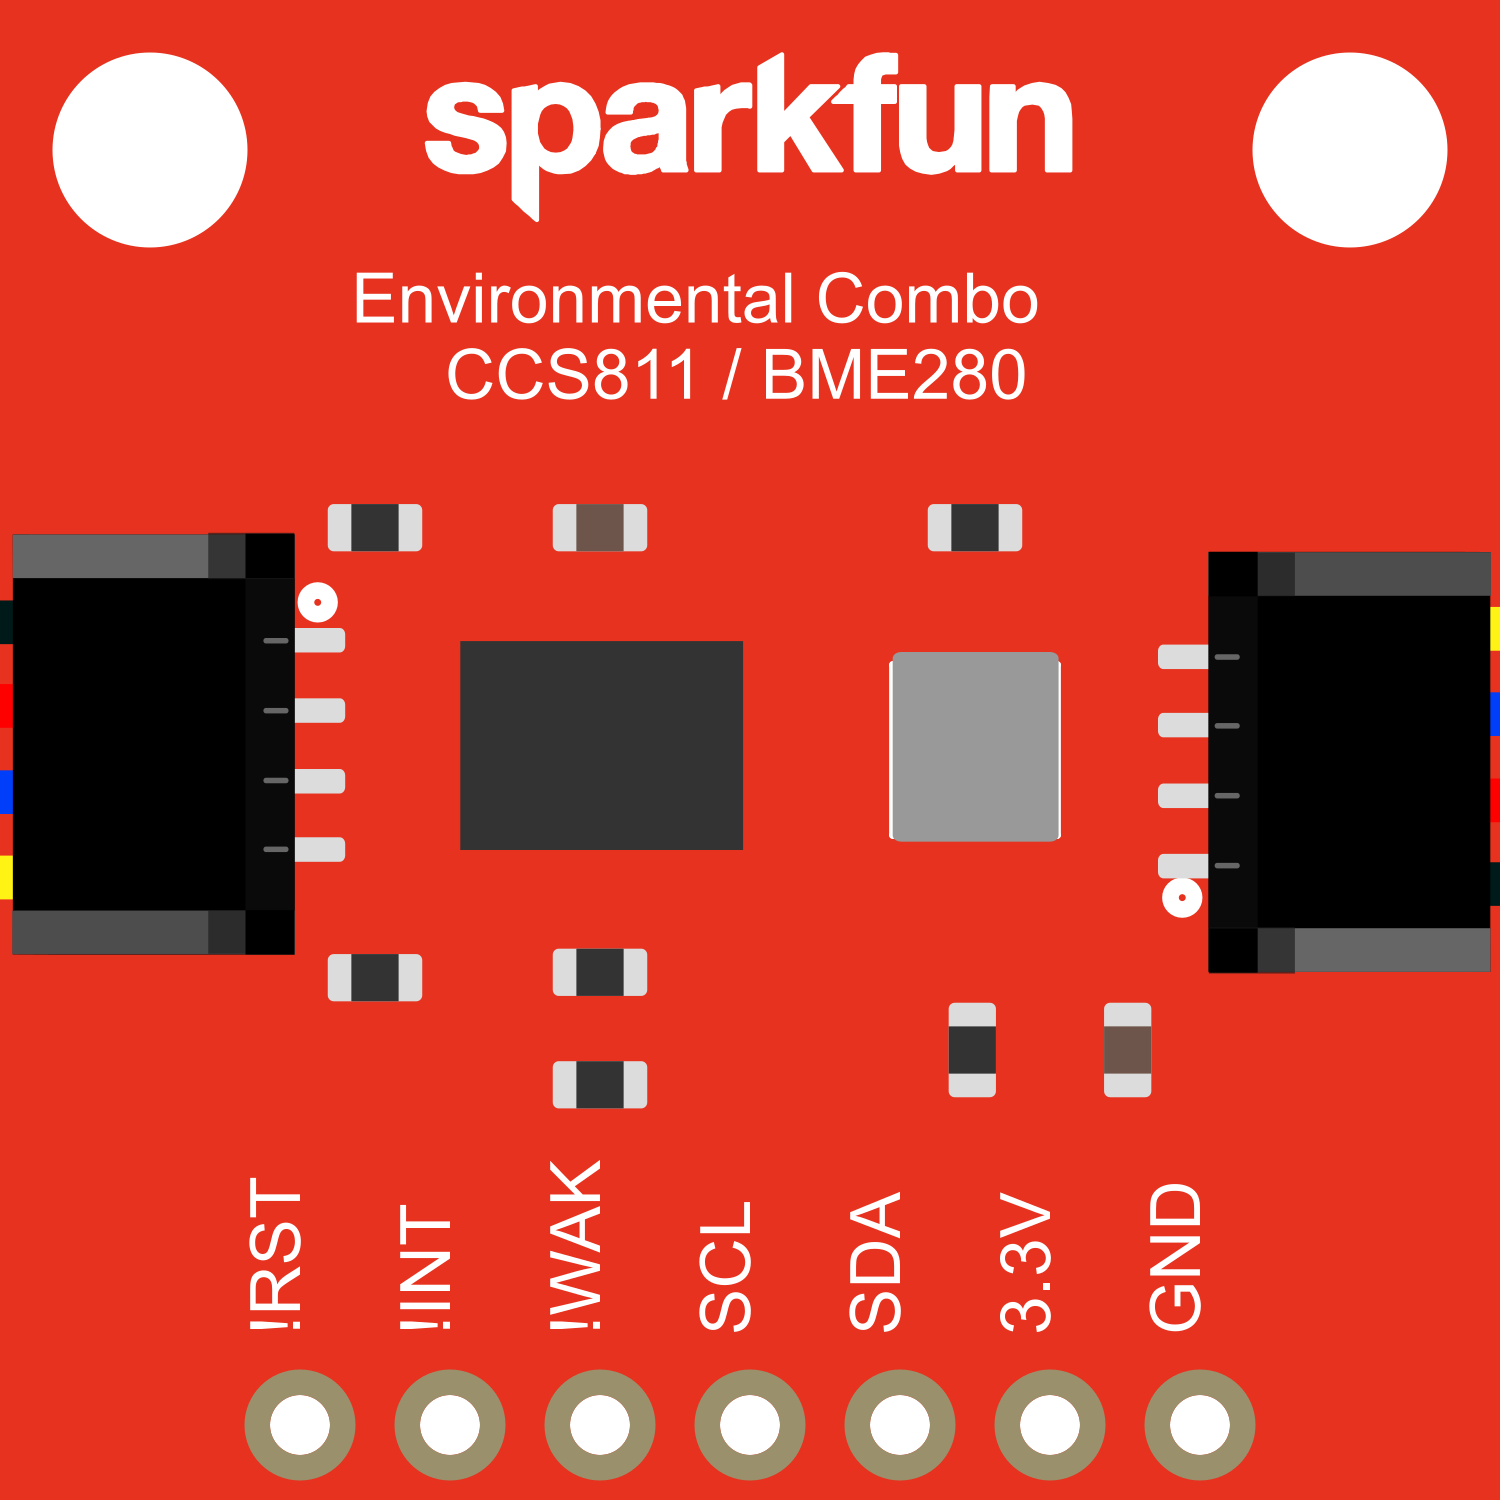
Pin Configuration and Descriptions
| Pin Number | Function | Description |
|---|---|---|
| 1 | GND | Ground |
| 2 | 3V3 | 3.3V power supply |
| 3 | SDA | I2C data line |
| 4 | SCL | I2C clock line |
| 5 | INT | Interrupt pin |
| 6 | WAKE | Wake pin for CCS811 |
| 7 | RST | Reset pin |
| 8 | ADD | I2C address selection (pull to GND for alt.) |
Usage Instructions
Integration into a Circuit
To use the SparkFun Environmental Combo Breakout with an Arduino UNO, follow these steps:
- Connect the 3V3 pin to the 3.3V output on the Arduino.
- Connect the GND pin to a ground pin on the Arduino.
- Connect the SDA and SCL pins to the corresponding I2C pins on the Arduino (A4 and A5, respectively).
- If necessary, use the INT, WAKE, and RST pins for advanced functionalities.
Best Practices
- Ensure that the power supply is stable and does not exceed 3.3V.
- Avoid placing the sensor near heat sources or in direct sunlight to prevent inaccurate readings.
- For more accurate humidity readings, allow the sensor to acclimate to the environment before taking measurements.
Example Code for Arduino UNO
#include <Wire.h>
#include <SparkFunBME280.h>
#include <SparkFunCCS811.h>

#define CCS811_ADDR 0x5B // Default I2C Address
#define BME280_ADDR 0x77 // Default I2C Address

// Create sensor instances
BME280 myBME280;
CCS811 myCCS811(CCS811_ADDR);

void setup() {
  Serial.begin(9600);
  Wire.begin();

  // Initialize the BME280 sensor
  if (myBME280.beginI2C(BME280_ADDR) == false) {
    Serial.println("BME280 sensor not detected. Please check wiring.");
    while (1);
  }

  // Initialize the CCS811 sensor
  if (myCCS811.begin() == false) {
    Serial.println("CCS811 sensor not detected. Please check wiring.");
    while (1);
  }
}

void loop() {
  // Check if data is available to read
  if (myCCS811.dataAvailable()) {
    myCCS811.readAlgorithmResults(); // Read sensor data
    Serial.print("CO2: ");
    Serial.print(myCCS811.getCO2());
    Serial.print(" ppm, TVOC: ");
    Serial.print(myCCS811.getTVOC());
    Serial.println(" ppb");
  }

  // Read BME280 data
  Serial.print("Temperature: ");
  Serial.print(myBME280.readTempC());
  Serial.print(" °C, Humidity: ");
  Serial.print(myBME280.readFloatHumidity());
  Serial.print(" %, Pressure: ");
  Serial.print(myBME280.readFloatPressure() / 100.0F);
  Serial.println(" hPa");

  delay(2000); // Wait for 2 seconds before reading again
}
Troubleshooting and FAQs
Common Issues
- Sensor not detected: Ensure that the wiring is correct and that the sensor is properly powered.
- Inaccurate readings: Check for any environmental factors that may affect the sensor's readings, such as heat sources or direct sunlight.
- I2C communication errors: Confirm that the I2C address is correct and that there are no conflicts with other devices on the I2C bus.
Solutions and Tips
- If the sensor is not responding, try resetting the Arduino and checking the connections again.
- For more stable readings, allow the sensors to warm up for at least 20 minutes before taking measurements.
- Use pull-up resistors on the I2C lines if you encounter communication issues.
FAQs
Q: Can the sensor be used with a 5V system? A: No, the sensor operates at 3.3V. Using it with a 5V system without proper level shifting could damage the sensor.
Q: How do I change the I2C address of the sensor? A: The I2C address can be changed by connecting the ADD pin to GND. This will switch the address to an alternative setting.
Q: What is the maximum I2C bus speed for this sensor? A: The maximum I2C bus speed for the CCS811/BME280 combo is 400kHz (Fast Mode).