How to Use PAM8403 with volume control: Examples, Pinouts, and Specs
Introduction
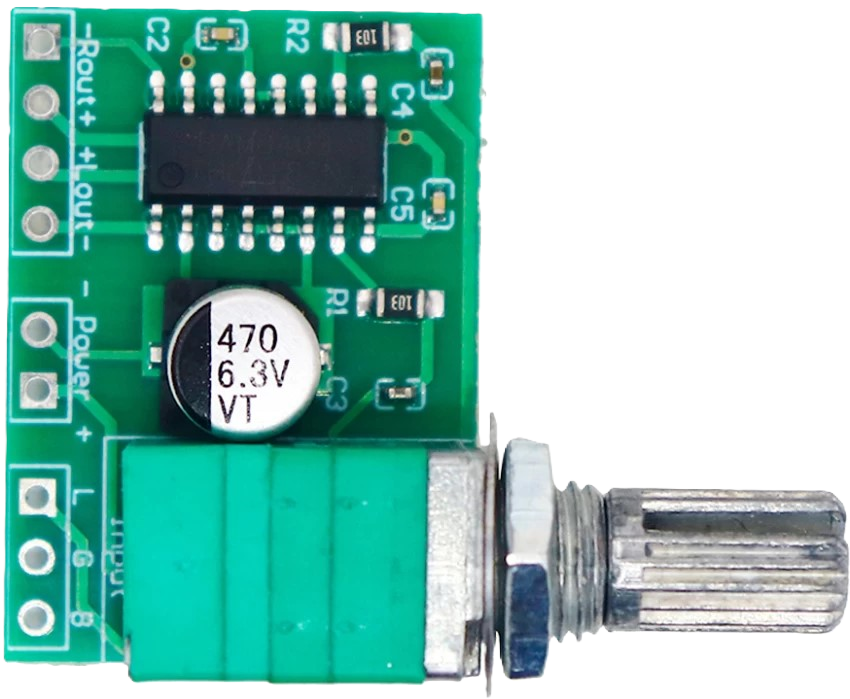
The PAM8403, manufactured by Kit (Part ID: PAM), is a low-power, Class D audio amplifier designed for high efficiency and low distortion. It features an integrated volume control, making it an excellent choice for applications requiring adjustable audio output. This compact amplifier is ideal for portable audio devices, DIY audio projects, and small speaker systems. Its ability to drive speakers directly without requiring additional components makes it a popular choice among hobbyists and professionals alike.
Explore Projects Built with PAM8403 with volume control


Explore Projects Built with PAM8403 with volume control
Common Applications
- Portable audio devices (e.g., MP3 players, Bluetooth speakers)
- DIY audio amplifier projects
- Small speaker systems
- Educational electronics projects
- Battery-powered audio systems
Technical Specifications
The PAM8403 is a highly efficient audio amplifier with the following key specifications:
| Parameter | Value |
|---|---|
| Supply Voltage Range | 2.5V to 5.5V |
| Output Power | 3W per channel (at 4Ω, 5V supply) |
| Efficiency | Up to 90% |
| Total Harmonic Distortion | < 0.1% |
| Signal-to-Noise Ratio | ≥ 90 dB |
| Channels | Stereo (2 channels) |
| Volume Control | Built-in potentiometer |
| Speaker Impedance | 4Ω to 8Ω |
| Operating Temperature | -40°C to +85°C |
Pin Configuration and Descriptions
The PAM8403 module typically comes with the following pin configuration:
| Pin Name | Description |
|---|---|
| VCC | Power supply input (2.5V to 5.5V). Connect to a stable DC power source. |
| GND | Ground connection. Connect to the ground of the power supply and circuit. |
| LOUT+ | Positive output for the left audio channel. Connect to the left speaker (+). |
| LOUT- | Negative output for the left audio channel. Connect to the left speaker (-). |
| ROUT+ | Positive output for the right audio channel. Connect to the right speaker (+). |
| ROUT- | Negative output for the right audio channel. Connect to the right speaker (-). |
| LIN | Left audio input. Connect to the left channel of the audio source. |
| RIN | Right audio input. Connect to the right channel of the audio source. |
Usage Instructions
How to Use the PAM8403 in a Circuit
- Power Supply: Connect the VCC pin to a stable DC power source (2.5V to 5.5V). Ensure the power supply can provide sufficient current for the amplifier and speakers.
- Ground Connection: Connect the GND pin to the ground of the power supply and the circuit.
- Audio Input: Connect the LIN and RIN pins to the left and right audio channels of your audio source (e.g., a 3.5mm audio jack or Bluetooth module).
- Speaker Connection: Connect the LOUT+ and LOUT- pins to the left speaker, and the ROUT+ and ROUT- pins to the right speaker. Ensure the speakers have an impedance of 4Ω to 8Ω.
- Volume Control: Use the built-in potentiometer to adjust the audio output level. Turn clockwise to increase the volume and counterclockwise to decrease it.
Important Considerations
- Power Supply: Use a clean and stable power source to minimize noise and distortion.
- Speaker Impedance: Ensure the connected speakers have an impedance of 4Ω to 8Ω for optimal performance.
- Heat Dissipation: Although the PAM8403 is highly efficient, ensure proper ventilation to prevent overheating during prolonged use.
- Audio Input Levels: Avoid overdriving the audio input to prevent distortion or damage to the amplifier.
Example: Connecting PAM8403 to an Arduino UNO
The PAM8403 can be used with an Arduino UNO to play audio signals. Below is an example of how to generate a simple tone using the Arduino and output it to the PAM8403:
/*
  Example: Generating a tone with Arduino and PAM8403
  This code generates a 1kHz tone on pin 9 of the Arduino UNO.
  Connect the LIN or RIN pin of the PAM8403 to pin 9 for audio input.
*/

const int audioPin = 9; // Pin connected to PAM8403 audio input (LIN or RIN)

void setup() {
  pinMode(audioPin, OUTPUT); // Set the audio pin as an output
}

void loop() {
  // Generate a 1kHz square wave
  tone(audioPin, 1000); // Play a 1kHz tone
  delay(1000);          // Play for 1 second
  noTone(audioPin);     // Stop the tone
  delay(1000);          // Wait for 1 second
}
Note: Use a capacitor (e.g., 10µF) in series with the audio input to block DC offset from the Arduino.
Troubleshooting and FAQs
Common Issues and Solutions
No Sound Output
- Cause: Incorrect wiring or loose connections.
- Solution: Double-check all connections, especially the audio input and speaker connections.
Distorted Audio
- Cause: Overdriven input signal or insufficient power supply.
- Solution: Reduce the input signal level or use a stable power supply with adequate current.
Low Volume
- Cause: Volume control set too low or weak input signal.
- Solution: Adjust the volume control or increase the input signal level.
Overheating
- Cause: Prolonged use at high power levels or poor ventilation.
- Solution: Ensure proper ventilation and avoid operating the amplifier at maximum power for extended periods.
FAQs
Q1: Can I use the PAM8403 with a 3.7V Li-ion battery?
A1: Yes, the PAM8403 can operate with a 3.7V Li-ion battery, as it falls within the 2.5V to 5.5V supply range.
Q2: What is the maximum speaker power I can use with the PAM8403?
A2: The PAM8403 can drive speakers up to 3W per channel at 4Ω impedance with a 5V power supply.
Q3: Can I connect headphones to the PAM8403?
A3: No, the PAM8403 is designed to drive speakers, not headphones. Connecting headphones may result in poor performance or damage.
Q4: Is it possible to use the PAM8403 with a mono audio source?
A4: Yes, you can connect the same mono audio signal to both the LIN and RIN pins to drive both channels.
By following this documentation, you can effectively integrate the PAM8403 into your audio projects and troubleshoot common issues with ease.