Cirkit Designer Logo
Cirkit Designer
Your all-in-one circuit design IDE
Home / 
Component Documentation

How to Use SHT45: Examples, Pinouts, and Specs
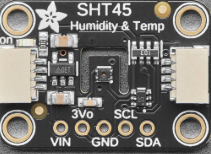

Image of SHT45
Cirkit Designer LogoDesign with SHT45 in Cirkit Designer

Introduction

The SHT45, manufactured by Adafruit (Part ID: 5665), is a high-precision digital humidity and temperature sensor. It is designed to provide accurate environmental measurements with low power consumption, making it ideal for applications such as environmental monitoring, HVAC systems, weather stations, and IoT devices. The sensor communicates via the I2C interface, ensuring easy integration with microcontrollers and development boards like the Arduino UNO.

Explore Projects Built with SHT45
Use Cirkit Designer to design, explore, and prototype these projects online. Some projects support real-time simulation. Click "Open Project" to start designing instantly!
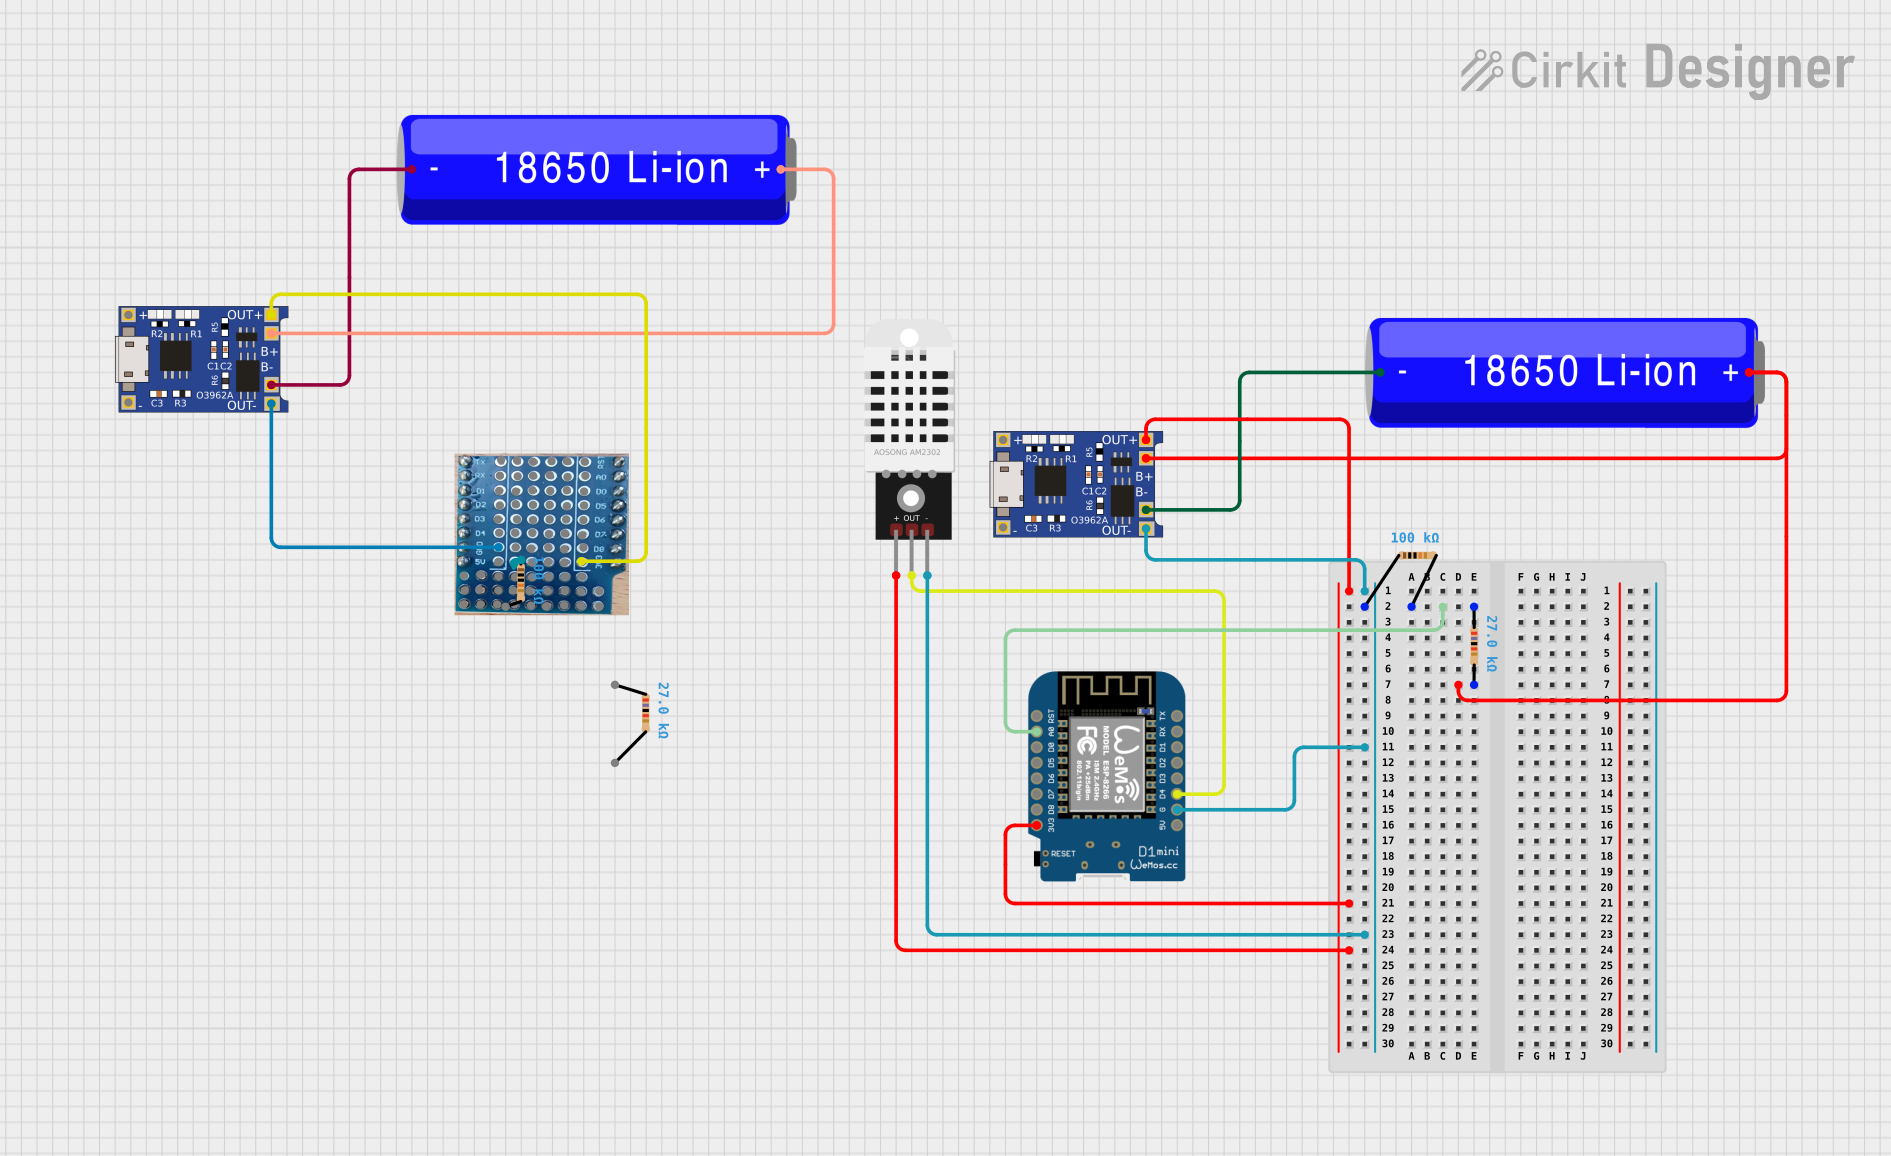
Battery-Powered Wi-Fi Temperature and Humidity Monitor with Wemos D1 Mini and DHT22
Image of Temp, humidity battery powered D1 sensor: A project utilizing SHT45 in a practical application
This circuit appears to be a sensor node with a DHT22 temperature and humidity sensor interfaced with a Wemos D1 Mini microcontroller. The Wemos D1 Mini is powered by a 18650 Li-ion battery, which is charged and protected by a TP4056 charging module. The sensor's data output is connected to the D4 pin of the Wemos D1 Mini for digital signal processing, and voltage dividers made of resistors are likely used for level shifting or pull-up/pull-down purposes.
Cirkit Designer LogoOpen Project in Cirkit Designer
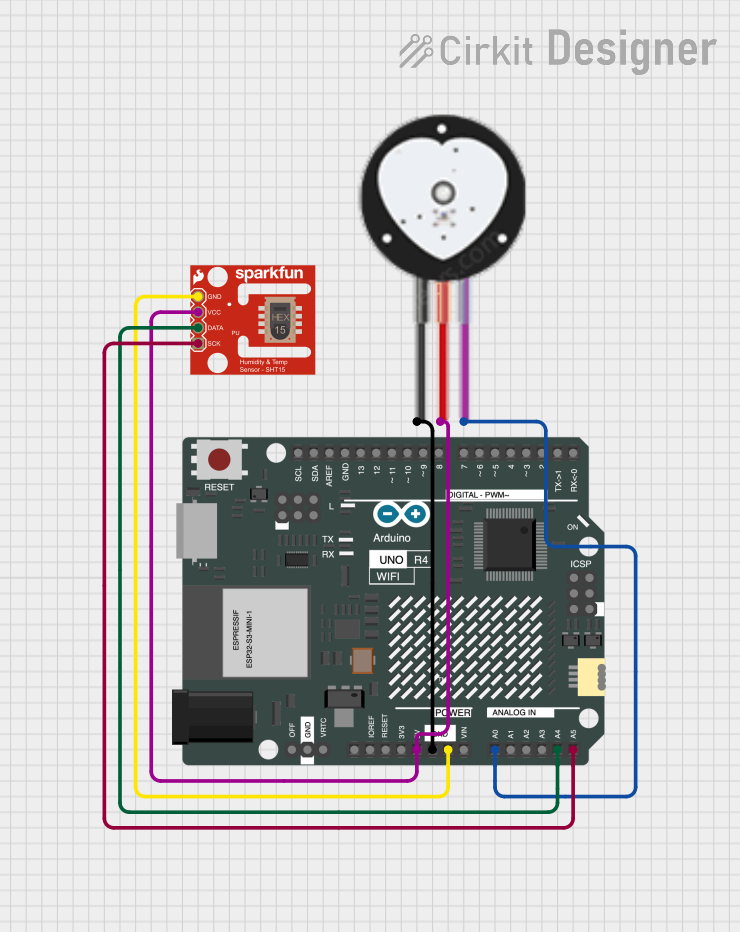
Arduino UNO WiFi with Heart Pulse and Temperature Monitoring
Image of BioTrackers: A project utilizing SHT45 in a practical application
This circuit features an Arduino UNO R4 WiFi microcontroller connected to a Heart Pulse Sensor and an SHT1x-Breakout sensor. The Arduino is configured to read heart pulse signals from the Heart Pulse Sensor on analog pin A0 and temperature/humidity data from the SHT1x-Breakout sensor via the I2C interface on pins A4 (DATA) and A5 (SCK). Both sensors are powered by the Arduino's 5V output, and their ground pins are connected to the Arduino's ground.
Cirkit Designer LogoOpen Project in Cirkit Designer
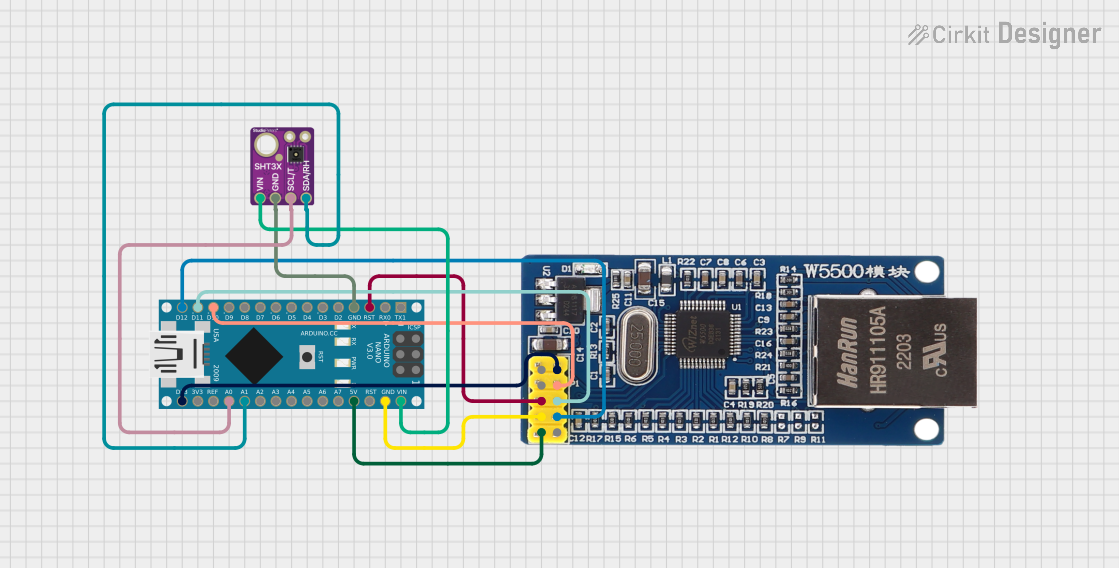
Arduino Nano Weather Station with Ethernet Connectivity
Image of Nano_Sht31_W5500: A project utilizing SHT45 in a practical application
This circuit features an Arduino Nano microcontroller interfaced with an Ethernet W5500 module for network connectivity and an SHT31 sensor for temperature and humidity measurements. The Arduino Nano communicates with the Ethernet module via SPI and reads data from the SHT31 sensor using I2C, enabling remote monitoring of environmental conditions.
Cirkit Designer LogoOpen Project in Cirkit Designer
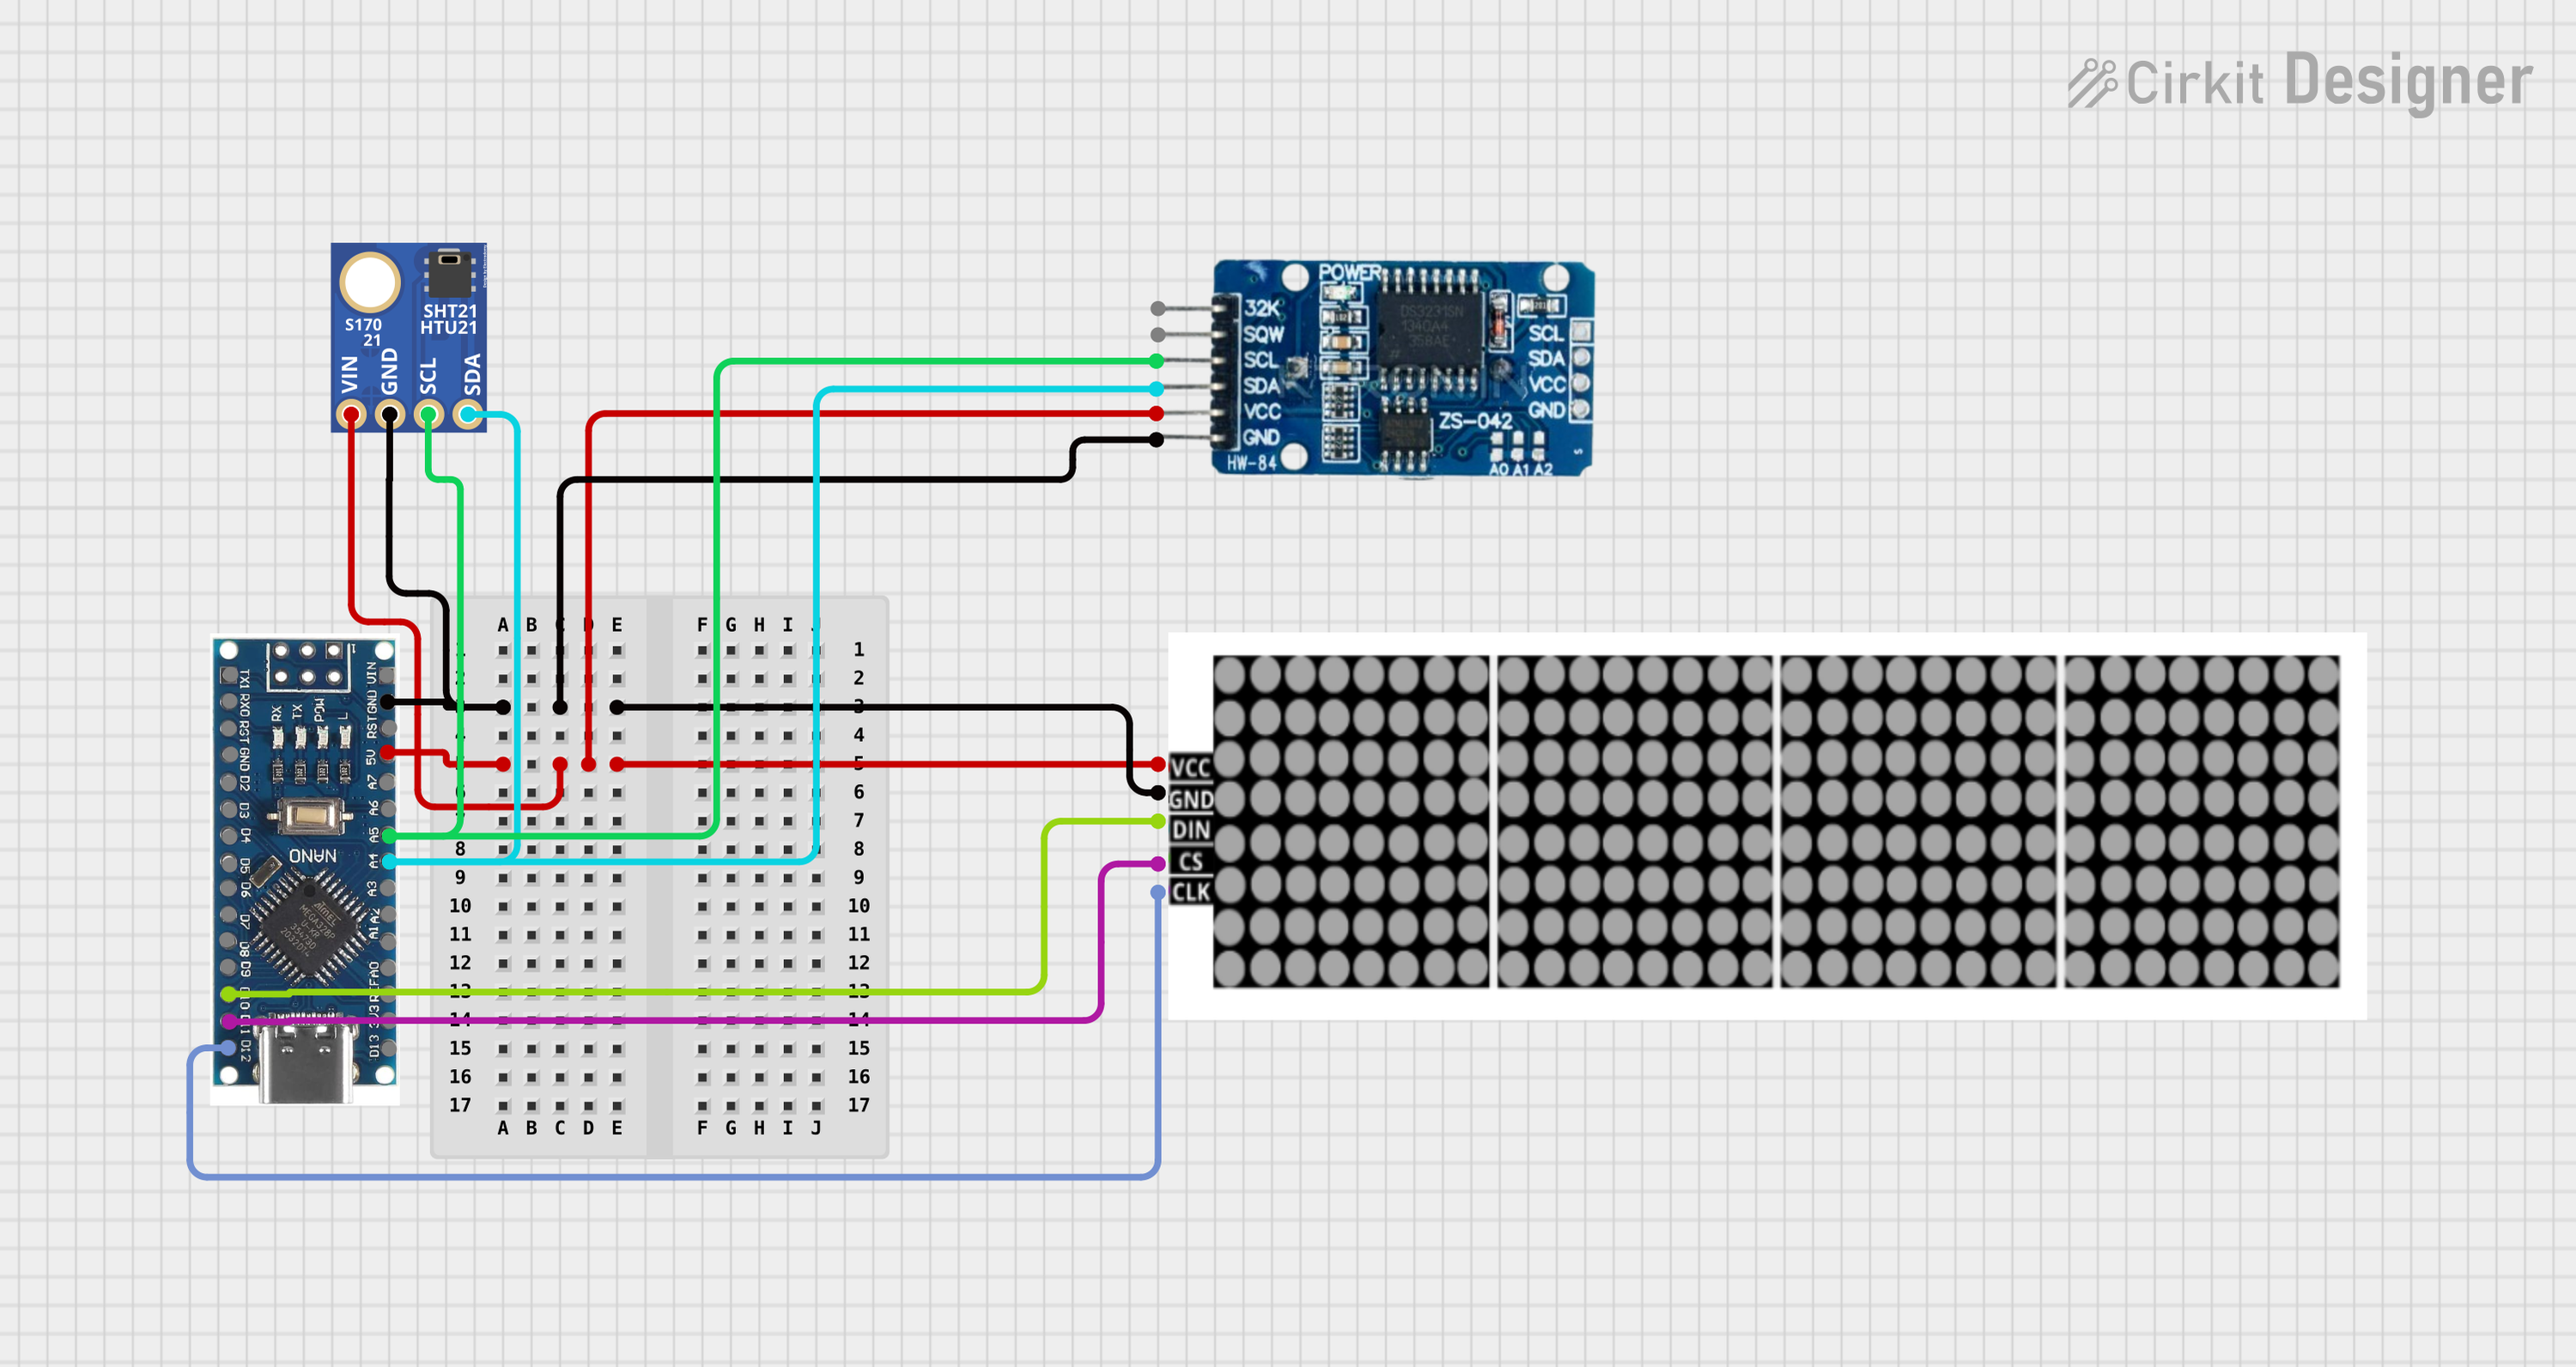
Arduino Nano-Controlled LED Display with RTC and Humidity Sensing
Image of Alarm Clock: A project utilizing SHT45 in a practical application
This circuit features a Nano 3.0 ATmega328P microcontroller connected to an LED dot display, a real-time clock (RTC DS3231), and a humidity and temperature sensor (SHT21). The microcontroller communicates with the RTC and SHT21 via I2C (using A4 and A5 as SDA and SCL lines, respectively), and it controls the LED display through SPI-like signals (using D10, D11, and D12 for DIN, CS, and CLK). The circuit is designed to display time and environmental data on the LED display, with all components sharing a common power supply and ground.
Cirkit Designer LogoOpen Project in Cirkit Designer

Explore Projects Built with SHT45

Use Cirkit Designer to design, explore, and prototype these projects online. Some projects support real-time simulation. Click "Open Project" to start designing instantly!
Image of Temp, humidity battery powered D1 sensor: A project utilizing SHT45 in a practical application
Battery-Powered Wi-Fi Temperature and Humidity Monitor with Wemos D1 Mini and DHT22
This circuit appears to be a sensor node with a DHT22 temperature and humidity sensor interfaced with a Wemos D1 Mini microcontroller. The Wemos D1 Mini is powered by a 18650 Li-ion battery, which is charged and protected by a TP4056 charging module. The sensor's data output is connected to the D4 pin of the Wemos D1 Mini for digital signal processing, and voltage dividers made of resistors are likely used for level shifting or pull-up/pull-down purposes.
Cirkit Designer LogoOpen Project in Cirkit Designer
Image of BioTrackers: A project utilizing SHT45 in a practical application
Arduino UNO WiFi with Heart Pulse and Temperature Monitoring
This circuit features an Arduino UNO R4 WiFi microcontroller connected to a Heart Pulse Sensor and an SHT1x-Breakout sensor. The Arduino is configured to read heart pulse signals from the Heart Pulse Sensor on analog pin A0 and temperature/humidity data from the SHT1x-Breakout sensor via the I2C interface on pins A4 (DATA) and A5 (SCK). Both sensors are powered by the Arduino's 5V output, and their ground pins are connected to the Arduino's ground.
Cirkit Designer LogoOpen Project in Cirkit Designer
Image of Nano_Sht31_W5500: A project utilizing SHT45 in a practical application
Arduino Nano Weather Station with Ethernet Connectivity
This circuit features an Arduino Nano microcontroller interfaced with an Ethernet W5500 module for network connectivity and an SHT31 sensor for temperature and humidity measurements. The Arduino Nano communicates with the Ethernet module via SPI and reads data from the SHT31 sensor using I2C, enabling remote monitoring of environmental conditions.
Cirkit Designer LogoOpen Project in Cirkit Designer
Image of Alarm Clock: A project utilizing SHT45 in a practical application
Arduino Nano-Controlled LED Display with RTC and Humidity Sensing
This circuit features a Nano 3.0 ATmega328P microcontroller connected to an LED dot display, a real-time clock (RTC DS3231), and a humidity and temperature sensor (SHT21). The microcontroller communicates with the RTC and SHT21 via I2C (using A4 and A5 as SDA and SCL lines, respectively), and it controls the LED display through SPI-like signals (using D10, D11, and D12 for DIN, CS, and CLK). The circuit is designed to display time and environmental data on the LED display, with all components sharing a common power supply and ground.
Cirkit Designer LogoOpen Project in Cirkit Designer

Technical Specifications

The SHT45 offers excellent performance and reliability. Below are its key technical details:

Key Specifications

Parameter Value
Supply Voltage 2.4V to 5.5V
Average Current 0.4 µA (at 1 Hz measurement)
Humidity Accuracy ±1.5% RH (typical)
Temperature Accuracy ±0.1°C (typical)
Communication Interface I2C
Operating Temperature -40°C to +125°C
Humidity Range 0% to 100% RH
Dimensions 10mm x 10mm x 2mm

Pin Configuration

The SHT45 sensor has four pins, as described in the table below:

Pin Name Pin Number Description
VCC 1 Power supply (2.4V to 5.5V)
GND 2 Ground
SDA 3 I2C data line
SCL 4 I2C clock line

Usage Instructions

The SHT45 is straightforward to use in a circuit, especially with microcontrollers like the Arduino UNO. Below are the steps to integrate and use the sensor:

Circuit Connection

  1. Connect the VCC pin of the SHT45 to the 3.3V or 5V power supply of the microcontroller.
  2. Connect the GND pin to the ground of the microcontroller.
  3. Connect the SDA pin to the I2C data line (A4 on Arduino UNO).
  4. Connect the SCL pin to the I2C clock line (A5 on Arduino UNO).
  5. Use pull-up resistors (typically 4.7kΩ) on the SDA and SCL lines if not already present.

Arduino Code Example

Below is an example Arduino sketch to read temperature and humidity data from the SHT45 using the Adafruit SHT4x library:

#include <Wire.h>
#include "Adafruit_SHT4x.h"

// Create an instance of the SHT4x sensor
Adafruit_SHT4x sht4 = Adafruit_SHT4x();

void setup() {
  Serial.begin(115200);
  while (!Serial) delay(10); // Wait for Serial Monitor to open

  Serial.println("Adafruit SHT45 Test");

  if (!sht4.begin()) {
    Serial.println("Failed to find SHT4x sensor!");
    while (1) delay(10); // Halt if sensor is not found
  }
  Serial.println("SHT4x sensor found!");

  // Set precision mode (optional)
  sht4.setPrecision(SHT4X_HIGH_PRECISION);
  Serial.println("Set to high precision mode.");
}

void loop() {
  sensors_event_t humidity, temp;
  
  // Read temperature and humidity
  if (!sht4.getEvent(&humidity, &temp)) {
    Serial.println("Failed to read data from sensor!");
    return;
  }

  // Print temperature and humidity to Serial Monitor
  Serial.print("Temperature: ");
  Serial.print(temp.temperature);
  Serial.println(" °C");

  Serial.print("Humidity: ");
  Serial.print(humidity.relative_humidity);
  Serial.println(" %RH");

  delay(2000); // Wait 2 seconds before next reading
}

Important Considerations

  • Ensure the I2C address of the SHT45 matches the default address used in the library (0x44).
  • Use appropriate pull-up resistors on the I2C lines if not already included in your setup.
  • Avoid exposing the sensor to extreme conditions (e.g., condensation or high humidity for prolonged periods) to maintain accuracy and longevity.

Troubleshooting and FAQs

Common Issues

  1. Sensor Not Detected:

    • Ensure proper wiring of the SDA and SCL pins.
    • Verify that the I2C address matches the default address (0x44) in the code.
    • Check for loose connections or damaged wires.
  2. Incorrect Readings:

    • Ensure the sensor is not exposed to condensation or contaminants.
    • Verify that the power supply voltage is within the specified range (2.4V to 5.5V).
    • Check for proper pull-up resistors on the I2C lines.
  3. Code Compilation Errors:

    • Ensure the Adafruit SHT4x library is installed in the Arduino IDE.
    • Update the Arduino IDE and libraries to the latest versions.

FAQs

Q: Can the SHT45 operate at 5V logic levels?
A: Yes, the SHT45 supports a supply voltage range of 2.4V to 5.5V, making it compatible with both 3.3V and 5V logic systems.

Q: What is the typical response time of the sensor?
A: The SHT45 has a response time of approximately 8 seconds for humidity and 2 seconds for temperature under normal conditions.

Q: Is the SHT45 suitable for outdoor use?
A: While the SHT45 is highly accurate, it is recommended to use a protective enclosure to shield it from direct exposure to water, dust, or extreme environmental conditions.

By following this documentation, users can effectively integrate and utilize the SHT45 sensor in their projects.