How to Use dc5v: Examples, Pinouts, and Specs
Introduction
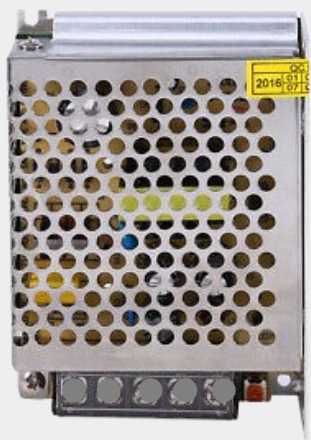
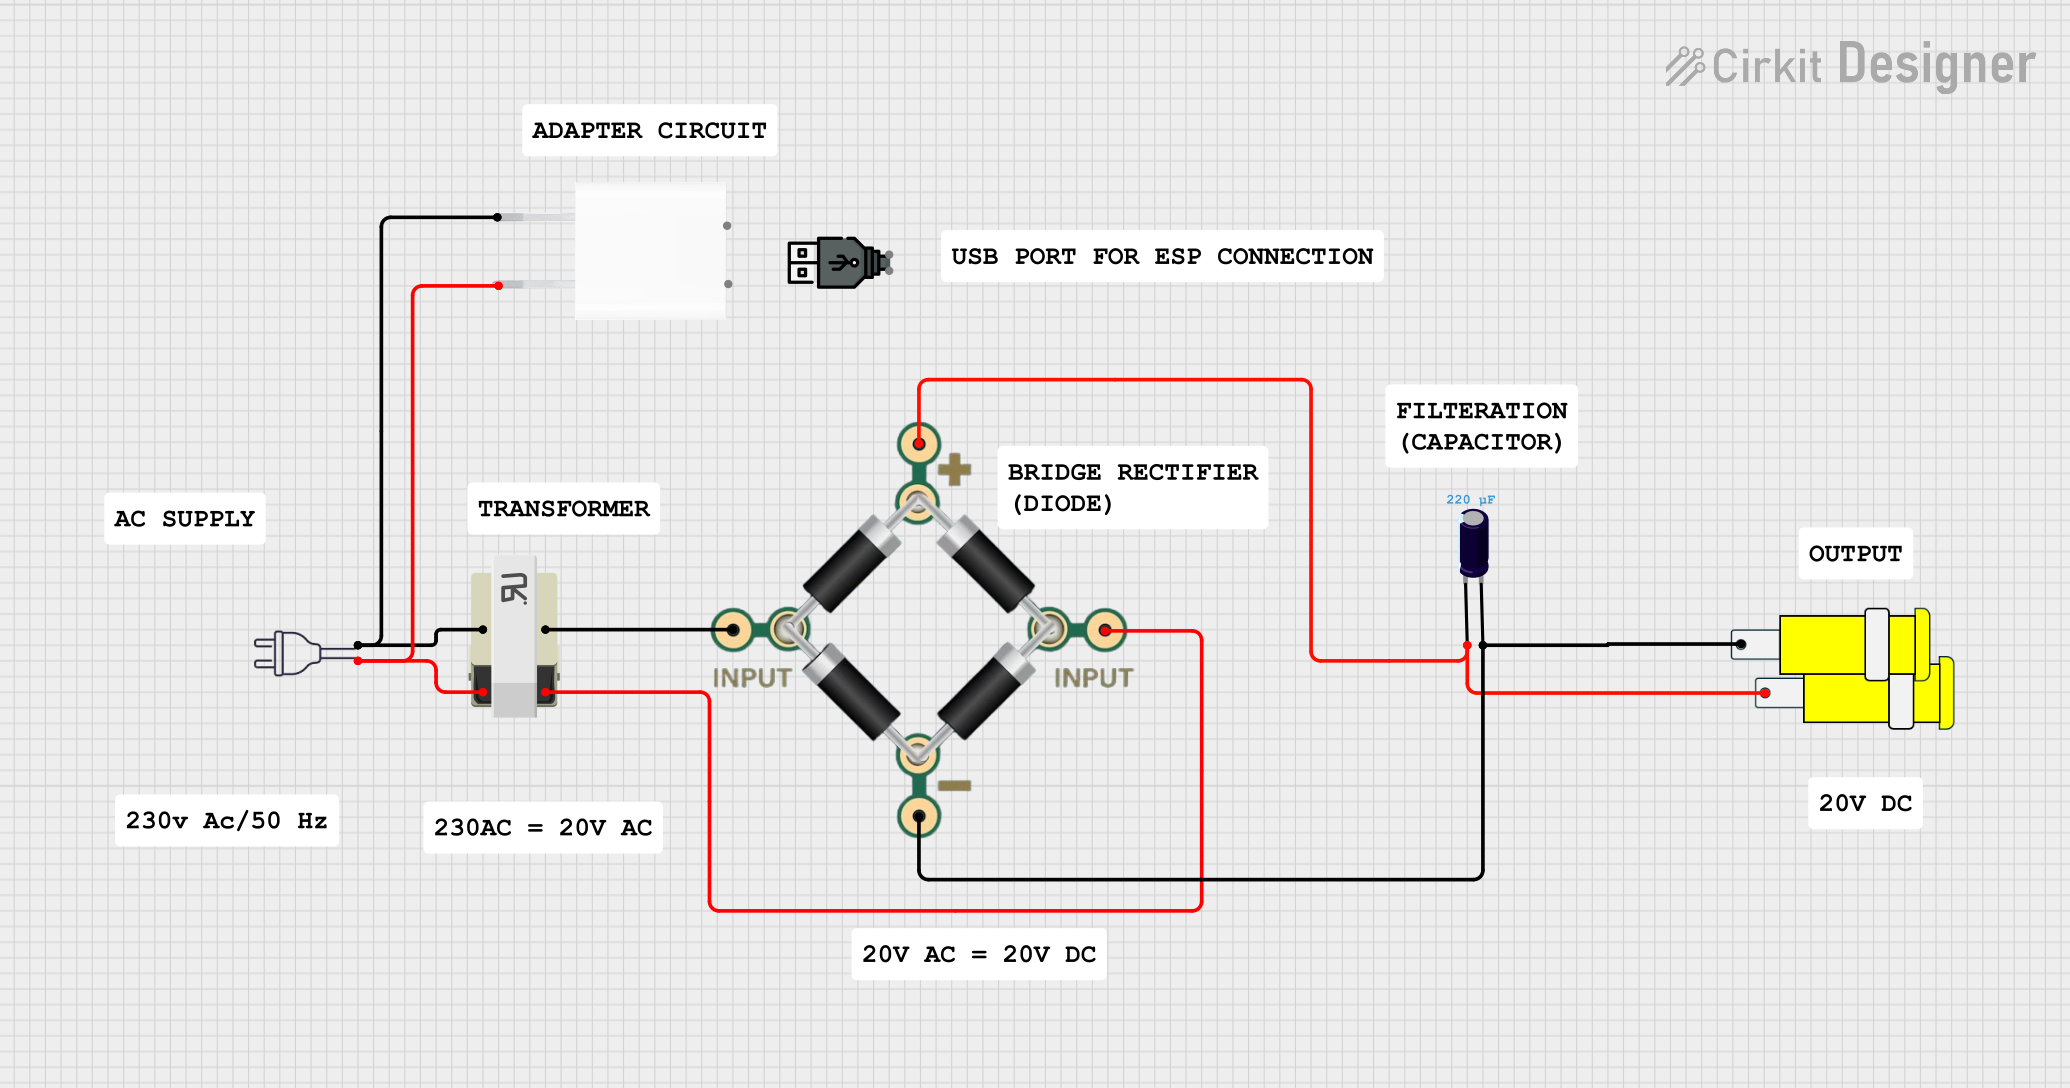
The DC5V is a DC power supply module manufactured by DC, designed to provide a constant output voltage of 5 volts. This component is widely used in powering electronic devices, microcontrollers, sensors, and other low-power circuits. Its stable voltage output makes it an essential component in prototyping, embedded systems, and various consumer electronics applications.
Explore Projects Built with dc5v


Explore Projects Built with dc5v
Common Applications and Use Cases
- Powering microcontrollers such as Arduino, Raspberry Pi, and ESP32.
- Supplying power to sensors, actuators, and small motors.
- Providing a stable voltage source for breadboard prototyping.
- Charging low-power USB devices.
- Powering LED strips and other 5V-compatible components.
Technical Specifications
The following table outlines the key technical details of the DC5V power supply module:
| Parameter | Specification |
|---|---|
| Manufacturer | DC |
| Manufacturer Part ID | DC |
| Output Voltage | 5V DC |
| Input Voltage Range | 6V - 12V DC |
| Maximum Output Current | 1A |
| Efficiency | Up to 90% (depending on load) |
| Operating Temperature | -20°C to 70°C |
| Dimensions | 25mm x 20mm x 10mm |
Pin Configuration and Descriptions
The DC5V module typically has three pins or terminals for connection. The table below describes each pin:
| Pin Name | Description |
|---|---|
| VIN | Input voltage pin (connect 6V-12V DC power source). |
| GND | Ground pin (common ground for input and output). |
| VOUT | Output voltage pin (provides 5V DC output). |
Usage Instructions
How to Use the DC5V in a Circuit
Connect the Input Voltage:
- Connect the VIN pin to a DC power source with a voltage between 6V and 12V.
- Ensure the power source can supply sufficient current for your application.
Connect the Ground:
- Connect the GND pin to the ground of your circuit. This serves as the common reference point.
Connect the Output Voltage:
- Use the VOUT pin to power your 5V devices or circuits. Ensure the total current draw does not exceed 1A.
Verify Connections:
- Double-check all connections before powering the circuit to avoid damage to the module or connected components.
Important Considerations and Best Practices
- Input Voltage Range: Ensure the input voltage is within the specified range (6V-12V). Exceeding this range may damage the module.
- Heat Dissipation: If the module operates near its maximum current rating (1A), it may generate heat. Consider adding a heatsink or ensuring proper ventilation.
- Polarity: Always connect the input and output pins with the correct polarity to prevent damage.
- Load Requirements: Avoid connecting loads that exceed the maximum output current (1A) to maintain stable operation.
Example: Using DC5V with Arduino UNO
The DC5V module can be used to power an Arduino UNO. Below is an example circuit and code:
Circuit Connections:
- Connect the VIN pin of the DC5V module to a 9V battery.
- Connect the GND pin of the DC5V module to the GND pin of the Arduino UNO.
- Connect the VOUT pin of the DC5V module to the 5V pin of the Arduino UNO.
Example Code:
// Example code to blink an LED using Arduino UNO powered by DC5V module

const int ledPin = 13; // Pin connected to the onboard LED

void setup() {
  pinMode(ledPin, OUTPUT); // Set the LED pin as an output
}

void loop() {
  digitalWrite(ledPin, HIGH); // Turn the LED on
  delay(1000);               // Wait for 1 second
  digitalWrite(ledPin, LOW);  // Turn the LED off
  delay(1000);               // Wait for 1 second
}
Troubleshooting and FAQs
Common Issues and Solutions
No Output Voltage:
- Cause: Incorrect input voltage or loose connections.
- Solution: Verify that the input voltage is within the 6V-12V range and check all connections.
Overheating:
- Cause: Excessive current draw or poor ventilation.
- Solution: Reduce the load current or improve airflow around the module.
Voltage Drop Under Load:
- Cause: Load exceeds the maximum current rating (1A).
- Solution: Ensure the connected load does not draw more than 1A.
Module Not Working After Connection:
- Cause: Reversed polarity or input voltage outside the specified range.
- Solution: Check the polarity of the connections and ensure the input voltage is correct.
FAQs
Q1: Can I use the DC5V module to power a Raspberry Pi?
A1: The DC5V module can power a Raspberry Pi if the total current draw (including peripherals) does not exceed 1A. For higher current requirements, consider using a more robust power supply.
Q2: What happens if I connect an input voltage higher than 12V?
A2: Connecting an input voltage higher than 12V may damage the module. Always ensure the input voltage is within the specified range.
Q3: Can I use the DC5V module to charge USB devices?
A3: Yes, the DC5V module can charge USB devices if the current requirement is within 1A. However, ensure proper connections and use a USB breakout board if needed.
Q4: Is the DC5V module protected against short circuits?
A4: The module may not have built-in short-circuit protection. Avoid shorting the output pins to prevent damage.