How to Use battery 3.7v 500mah: Examples, Pinouts, and Specs
Introduction
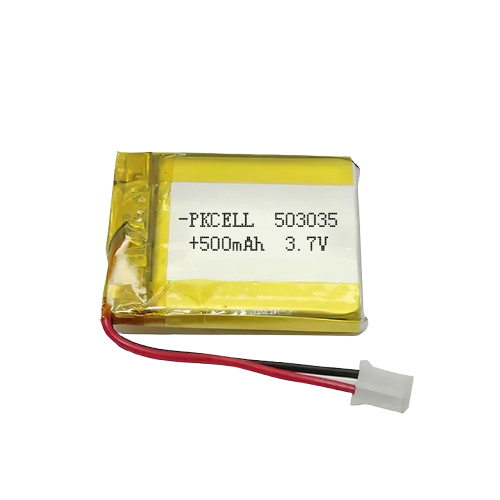
The 3.7V 500mAh rechargeable lithium-ion battery is a compact and lightweight power source designed for small electronic devices. With a nominal voltage of 3.7 volts and a capacity of 500 milliamp-hours (mAh), this battery is ideal for applications requiring reliable, portable energy. Its rechargeable nature makes it an eco-friendly and cost-effective choice for powering devices such as wearables, IoT gadgets, remote controls, and small robotics.
Explore Projects Built with battery 3.7v 500mah


Explore Projects Built with battery 3.7v 500mah
Common Applications and Use Cases
- Wearable devices (e.g., fitness trackers, smartwatches)
- Internet of Things (IoT) devices
- Remote controls and wireless peripherals
- Small robotics and DIY electronics projects
- Backup power for small sensors or modules
Technical Specifications
The following table outlines the key technical details of the 3.7V 500mAh lithium-ion battery:
| Parameter | Value |
|---|---|
| Nominal Voltage | 3.7V |
| Capacity | 500mAh |
| Chemistry | Lithium-Ion (Li-ion) |
| Charging Voltage | 4.2V (maximum) |
| Discharge Cutoff Voltage | 3.0V (minimum) |
| Maximum Discharge Current | 1C (500mA) |
| Standard Charge Current | 0.2C (100mA) |
| Dimensions | Varies (typically ~30x20x5mm) |
| Weight | ~10 grams |
| Connector Type | JST or bare wire leads |
Pin Configuration and Descriptions
The battery typically has two leads or pins for connection:
| Pin | Color | Description |
|---|---|---|
| Positive (+) | Red | Connects to the positive terminal of the circuit. |
| Negative (-) | Black | Connects to the ground or negative terminal of the circuit. |
Usage Instructions
How to Use the Battery in a Circuit
- Connection: Identify the positive (red) and negative (black) leads of the battery. Connect the red lead to the positive terminal of your circuit and the black lead to the ground or negative terminal.
- Charging: Use a dedicated lithium-ion battery charger with a constant current/constant voltage (CC/CV) charging profile. Ensure the charging voltage does not exceed 4.2V.
- Discharging: Avoid discharging the battery below 3.0V to prevent damage and reduce its lifespan.
- Protection Circuit: For safety, use a battery protection circuit module (PCM) to prevent overcharging, over-discharging, and short circuits.
Important Considerations and Best Practices
- Avoid Overcharging: Always use a charger with a voltage cutoff at 4.2V to prevent overheating or damage.
- Prevent Deep Discharge: Discharging below 3.0V can permanently damage the battery.
- Temperature Range: Operate the battery within the recommended temperature range (typically 0°C to 45°C for charging and -20°C to 60°C for discharging).
- Storage: Store the battery in a cool, dry place at around 40-60% charge for long-term storage.
- Polarity: Double-check the polarity before connecting the battery to avoid damaging your circuit.
Example: Connecting to an Arduino UNO
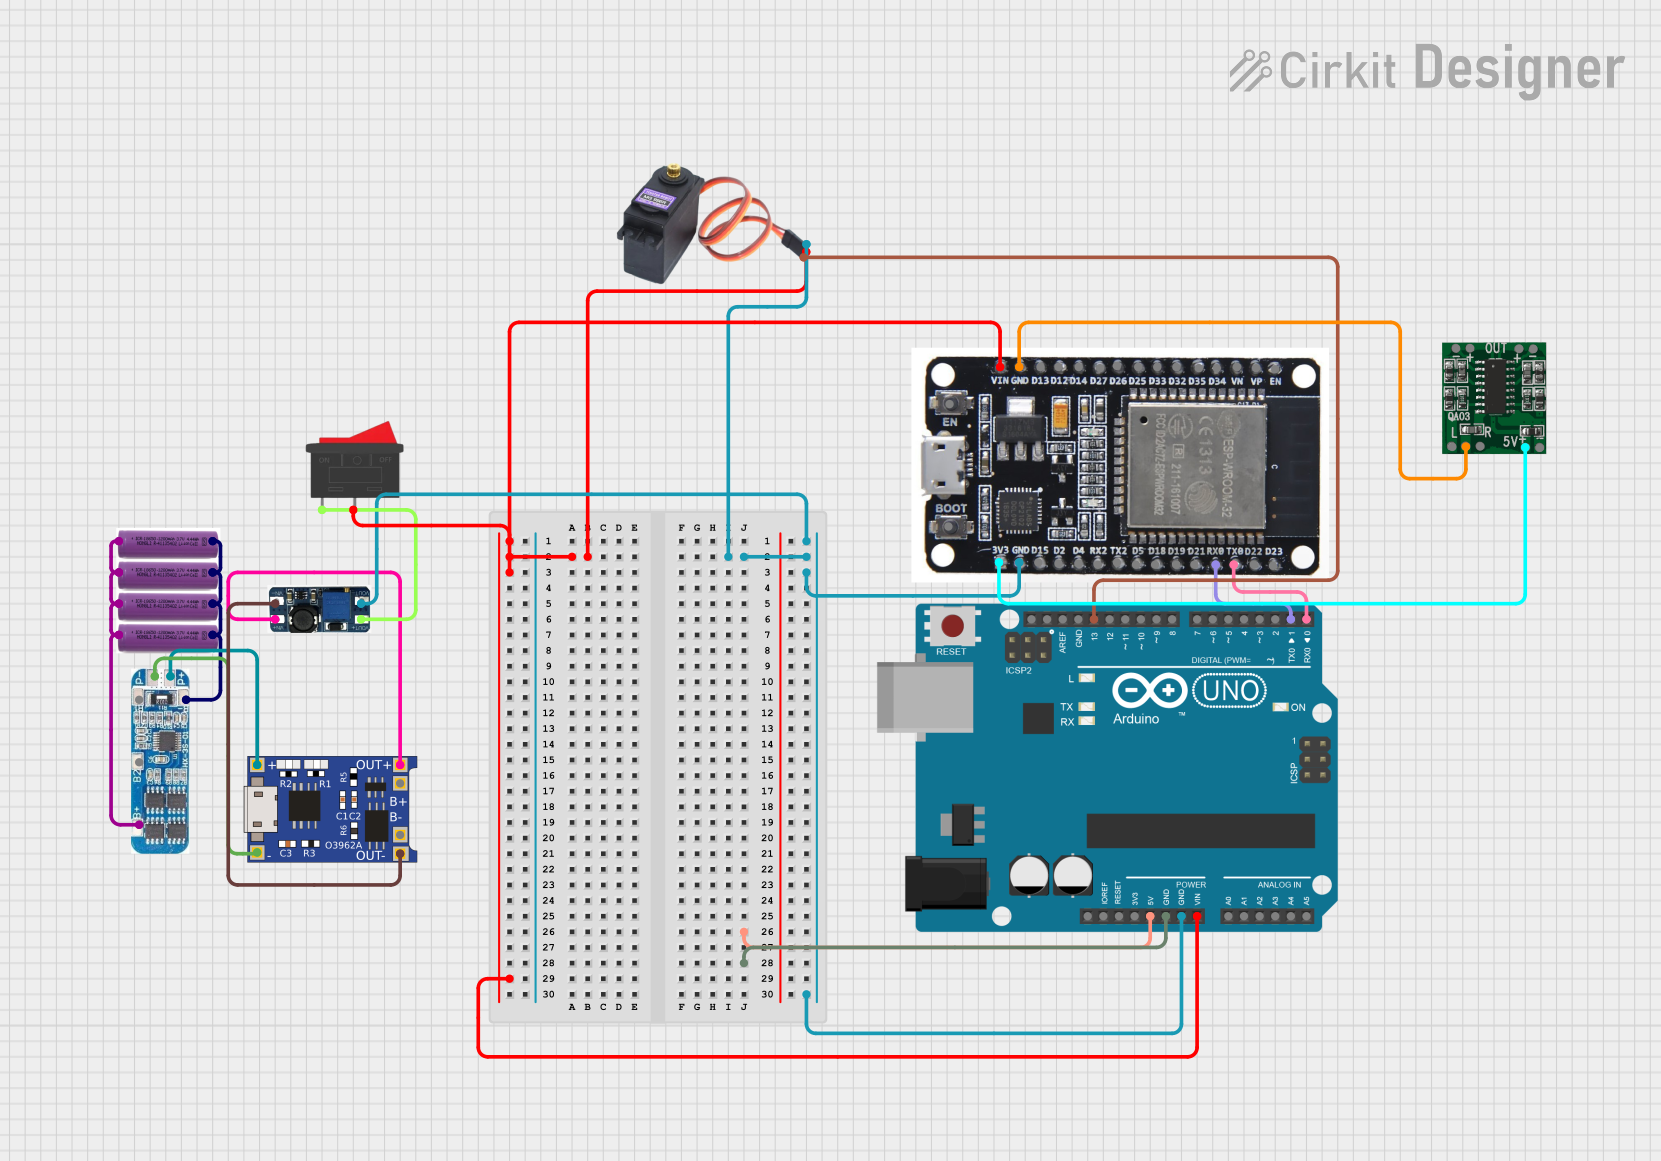
The 3.7V 500mAh battery can be used to power an Arduino UNO via a DC-DC boost converter to step up the voltage to 5V. Below is an example circuit and code:
Circuit Setup
- Connect the battery's positive lead to the input of the DC-DC boost converter.
- Connect the battery's negative lead to the ground of the boost converter.
- Connect the output of the boost converter (5V and GND) to the Arduino UNO's 5V and GND pins.
Example Code
// Example code to blink an LED on pin 13 of the Arduino UNO
// Ensure the battery is connected via a DC-DC boost converter to provide 5V.

void setup() {
  pinMode(13, OUTPUT); // Set pin 13 as an output pin
}

void loop() {
  digitalWrite(13, HIGH); // Turn the LED on
  delay(1000);            // Wait for 1 second
  digitalWrite(13, LOW);  // Turn the LED off
  delay(1000);            // Wait for 1 second
}
Troubleshooting and FAQs
Common Issues and Solutions
Battery Not Charging:
- Cause: Charger not compatible or faulty.
- Solution: Use a charger designed for lithium-ion batteries with a 4.2V cutoff.
Battery Drains Quickly:
- Cause: Excessive load or aging battery.
- Solution: Reduce the load current or replace the battery if it has degraded.
Battery Overheats During Use:
- Cause: Overcurrent or short circuit.
- Solution: Use a protection circuit module (PCM) and ensure the load does not exceed the maximum discharge current.
Battery Voltage Drops Below 3.0V:
- Cause: Deep discharge.
- Solution: Recharge the battery immediately. Avoid deep discharge in the future.
FAQs
Q: Can I use this battery to power a 5V device directly?
A: No, you will need a DC-DC boost converter to step up the voltage to 5V.Q: How many charge cycles can this battery handle?
A: Typically, lithium-ion batteries can handle 300-500 charge cycles before significant capacity loss.Q: Is it safe to solder directly to the battery leads?
A: It is not recommended as excessive heat can damage the battery. Use pre-attached connectors or spot welding for connections.Q: Can I use this battery in parallel or series configurations?
A: Yes, but ensure all batteries are of the same type, capacity, and charge level. Use a battery management system (BMS) for safety.
This documentation provides all the essential details to safely and effectively use the 3.7V 500mAh lithium-ion battery in your projects.