Cirkit Designer Logo
Cirkit Designer
Your all-in-one circuit design IDE
Home / 
Component Documentation

How to Use PicoPSU-150-XT 150W DC-DC ATX Power Supply & 150W AC Adapter: Examples, Pinouts, and Specs

Image of PicoPSU-150-XT 150W DC-DC ATX Power Supply & 150W AC Adapter
Cirkit Designer LogoDesign with PicoPSU-150-XT 150W DC-DC ATX Power Supply & 150W AC Adapter in Cirkit Designer

Introduction

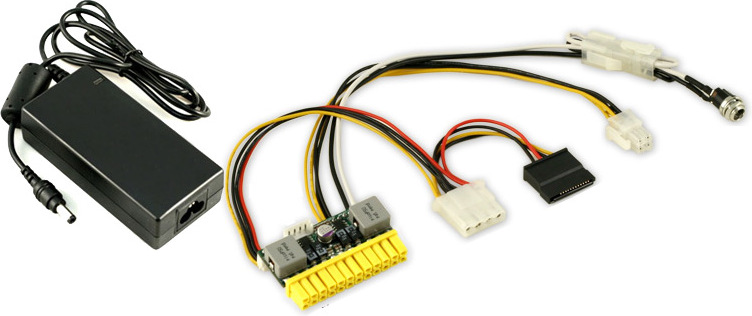
The PicoPSU-150-XT is a compact, high-efficiency power supply unit designed to convert DC power to ATX-compatible power for small form factor computers. This power supply is ideal for applications where space is limited, such as in embedded systems, mini-ITX builds, and other small computing devices. The included 150W AC adapter allows for easy conversion of AC power to DC, making it a versatile solution for various power requirements.

Explore Projects Built with PicoPSU-150-XT 150W DC-DC ATX Power Supply & 150W AC Adapter

Use Cirkit Designer to design, explore, and prototype these projects online. Some projects support real-time simulation. Click "Open Project" to start designing instantly!
12V UPS System with Dual 18650 Li-ion Battery Backup and Voltage Regulation
Image of Power supply: A project utilizing PicoPSU-150-XT 150W DC-DC ATX Power Supply & 150W AC Adapter in a practical application
This circuit is designed to provide an uninterruptible power supply (UPS) system with a 12V DC output. It includes a 12V 5A power supply connected to an AC source through a toggle switch, which charges a pair of 18650 Li-ion batteries via a voltage regulator (XL4016). The UPS module ensures a continuous power supply to the load by switching between the power supply and the battery bank.
Cirkit Designer LogoOpen Project in Cirkit Designer
Multi-Stage Voltage Regulation and Indicator LED Circuit
Image of Subramanyak_Power_Circuit: A project utilizing PicoPSU-150-XT 150W DC-DC ATX Power Supply & 150W AC Adapter in a practical application
This circuit is designed for power management, featuring buck and boost converters for voltage adjustment, and linear regulators for stable voltage output. It includes LEDs for status indication, and terminal blocks for external connections.
Cirkit Designer LogoOpen Project in Cirkit Designer
AC to DC Power Supply with Transformer and Bridge Rectifier
Image of BRIDGE RECTIFIER: A project utilizing PicoPSU-150-XT 150W DC-DC ATX Power Supply & 150W AC Adapter in a practical application
This circuit is a basic AC to DC power supply that steps down 220V AC to a lower voltage using a transformer, rectifies it to DC using a bridge rectifier made of diodes, and smooths the output with an electrolytic capacitor. A rocker switch is used to turn the power supply on and off.
Cirkit Designer LogoOpen Project in Cirkit Designer
Adjustable Voltage Power Supply with LM317 and Digital Voltmeter Display
Image of BEE PBL - Power supply: A project utilizing PicoPSU-150-XT 150W DC-DC ATX Power Supply & 150W AC Adapter in a practical application
This is a variable DC power supply circuit that converts AC to a regulated DC output. It uses a transformer for stepping down the voltage, a bridge rectifier for converting AC to DC, and an LM317 voltage regulator with a potentiometer for adjustable output voltage. The circuit includes a voltmeter for displaying the output voltage and an LED as a power indicator.
Cirkit Designer LogoOpen Project in Cirkit Designer

Explore Projects Built with PicoPSU-150-XT 150W DC-DC ATX Power Supply & 150W AC Adapter

Use Cirkit Designer to design, explore, and prototype these projects online. Some projects support real-time simulation. Click "Open Project" to start designing instantly!
Image of Power supply: A project utilizing PicoPSU-150-XT 150W DC-DC ATX Power Supply & 150W AC Adapter in a practical application
12V UPS System with Dual 18650 Li-ion Battery Backup and Voltage Regulation
This circuit is designed to provide an uninterruptible power supply (UPS) system with a 12V DC output. It includes a 12V 5A power supply connected to an AC source through a toggle switch, which charges a pair of 18650 Li-ion batteries via a voltage regulator (XL4016). The UPS module ensures a continuous power supply to the load by switching between the power supply and the battery bank.
Cirkit Designer LogoOpen Project in Cirkit Designer
Image of Subramanyak_Power_Circuit: A project utilizing PicoPSU-150-XT 150W DC-DC ATX Power Supply & 150W AC Adapter in a practical application
Multi-Stage Voltage Regulation and Indicator LED Circuit
This circuit is designed for power management, featuring buck and boost converters for voltage adjustment, and linear regulators for stable voltage output. It includes LEDs for status indication, and terminal blocks for external connections.
Cirkit Designer LogoOpen Project in Cirkit Designer
Image of BRIDGE RECTIFIER: A project utilizing PicoPSU-150-XT 150W DC-DC ATX Power Supply & 150W AC Adapter in a practical application
AC to DC Power Supply with Transformer and Bridge Rectifier
This circuit is a basic AC to DC power supply that steps down 220V AC to a lower voltage using a transformer, rectifies it to DC using a bridge rectifier made of diodes, and smooths the output with an electrolytic capacitor. A rocker switch is used to turn the power supply on and off.
Cirkit Designer LogoOpen Project in Cirkit Designer
Image of BEE PBL - Power supply: A project utilizing PicoPSU-150-XT 150W DC-DC ATX Power Supply & 150W AC Adapter in a practical application
Adjustable Voltage Power Supply with LM317 and Digital Voltmeter Display
This is a variable DC power supply circuit that converts AC to a regulated DC output. It uses a transformer for stepping down the voltage, a bridge rectifier for converting AC to DC, and an LM317 voltage regulator with a potentiometer for adjustable output voltage. The circuit includes a voltmeter for displaying the output voltage and an LED as a power indicator.
Cirkit Designer LogoOpen Project in Cirkit Designer

Technical Specifications

Key Technical Details

Parameter Value
Input Voltage (DC) 12V
Output Voltage (DC) 3.3V, 5V, 12V, -12V, 5VSB
Maximum Power Output 150W
Efficiency Up to 96%
Operating Temperature 0°C to 65°C
Dimensions 31 x 45 x 20 mm
Weight 55g

Pin Configuration and Descriptions

ATX Connector Pinout

Pin Signal Name Description
1 3.3V +3.3V DC
2 3.3V +3.3V DC
3 GND Ground
4 5V +5V DC
5 GND Ground
6 5V +5V DC
7 GND Ground
8 PWR_OK Power OK Signal
9 5VSB +5V Standby
10 12V +12V DC
11 12V +12V DC
12 3.3V +3.3V DC
13 3.3V +3.3V DC
14 -12V -12V DC
15 GND Ground
16 PS_ON Power Supply On
17 GND Ground
18 GND Ground
19 GND Ground
20 N/C Not Connected
21 5V +5V DC
22 5V +5V DC
23 5V +5V DC
24 GND Ground

Usage Instructions

How to Use the Component in a Circuit

  1. Connect the AC Adapter:

    • Plug the 150W AC adapter into a standard AC outlet.
    • Connect the DC output of the adapter to the input of the PicoPSU-150-XT.
  2. Connect the ATX Connector:

    • Attach the 24-pin ATX connector from the PicoPSU-150-XT to the motherboard's ATX power socket.
  3. Connect Additional Power Cables:

    • If your system requires additional power connections (e.g., 4-pin CPU power, SATA power), connect the appropriate cables from the PicoPSU-150-XT to the corresponding components.
  4. Power On:

    • Turn on the power supply by pressing the power button on your computer case. The PS_ON signal will activate the power supply.

Important Considerations and Best Practices

  • Ensure Proper Ventilation:

    • The PicoPSU-150-XT is designed to operate efficiently, but it is important to ensure proper ventilation to avoid overheating.
  • Check Power Requirements:

    • Verify that the total power consumption of your system does not exceed 150W. Overloading the power supply can lead to instability or damage.
  • Secure Connections:

    • Make sure all power connections are secure and properly seated to prevent intermittent power issues.

Troubleshooting and FAQs

Common Issues Users Might Face

  1. System Does Not Power On:

    • Solution: Check the AC adapter connection and ensure it is plugged into a working outlet. Verify that the ATX connector is securely attached to the motherboard.
  2. Intermittent Power Loss:

    • Solution: Inspect all power connections for secure attachment. Ensure that the power supply is not overloaded by checking the total power consumption of your system.
  3. Overheating:

    • Solution: Ensure proper ventilation around the power supply. Consider adding additional cooling if necessary.

FAQs

Q: Can the PicoPSU-150-XT be used with an Arduino UNO? A: The PicoPSU-150-XT is designed for ATX-compatible systems and may not be directly compatible with an Arduino UNO. However, it can be used to power other components in a larger system that includes an Arduino.

Q: What is the efficiency rating of the PicoPSU-150-XT? A: The PicoPSU-150-XT has an efficiency rating of up to 96%, making it a highly efficient power supply option.

Q: Can I use a different AC adapter with the PicoPSU-150-XT? A: It is recommended to use the included 150W AC adapter to ensure compatibility and optimal performance. Using a different adapter may result in improper operation or damage.

Q: How do I know if the power supply is working correctly? A: The PWR_OK signal on the ATX connector indicates that the power supply is functioning properly. If your system powers on and operates stably, the power supply is likely working correctly.


This documentation provides a comprehensive overview of the PicoPSU-150-XT 150W DC-DC ATX Power Supply & 150W AC Adapter, including technical specifications, usage instructions, and troubleshooting tips. Whether you are a beginner or an experienced user, this guide will help you effectively utilize this compact and efficient power supply in your projects.