How to Use LED Filament 3V: Examples, Pinouts, and Specs

Introduction
The LED Filament 3V is a Light Emitting Diode that mimics the look of traditional incandescent filament bulbs while offering the energy efficiency and longevity of modern LED technology. This component is designed to operate at a voltage of 3 volts and is commonly used in decorative lighting, accent lighting, and in applications where a vintage aesthetic is desired with the benefits of LED.
Explore Projects Built with LED Filament 3V
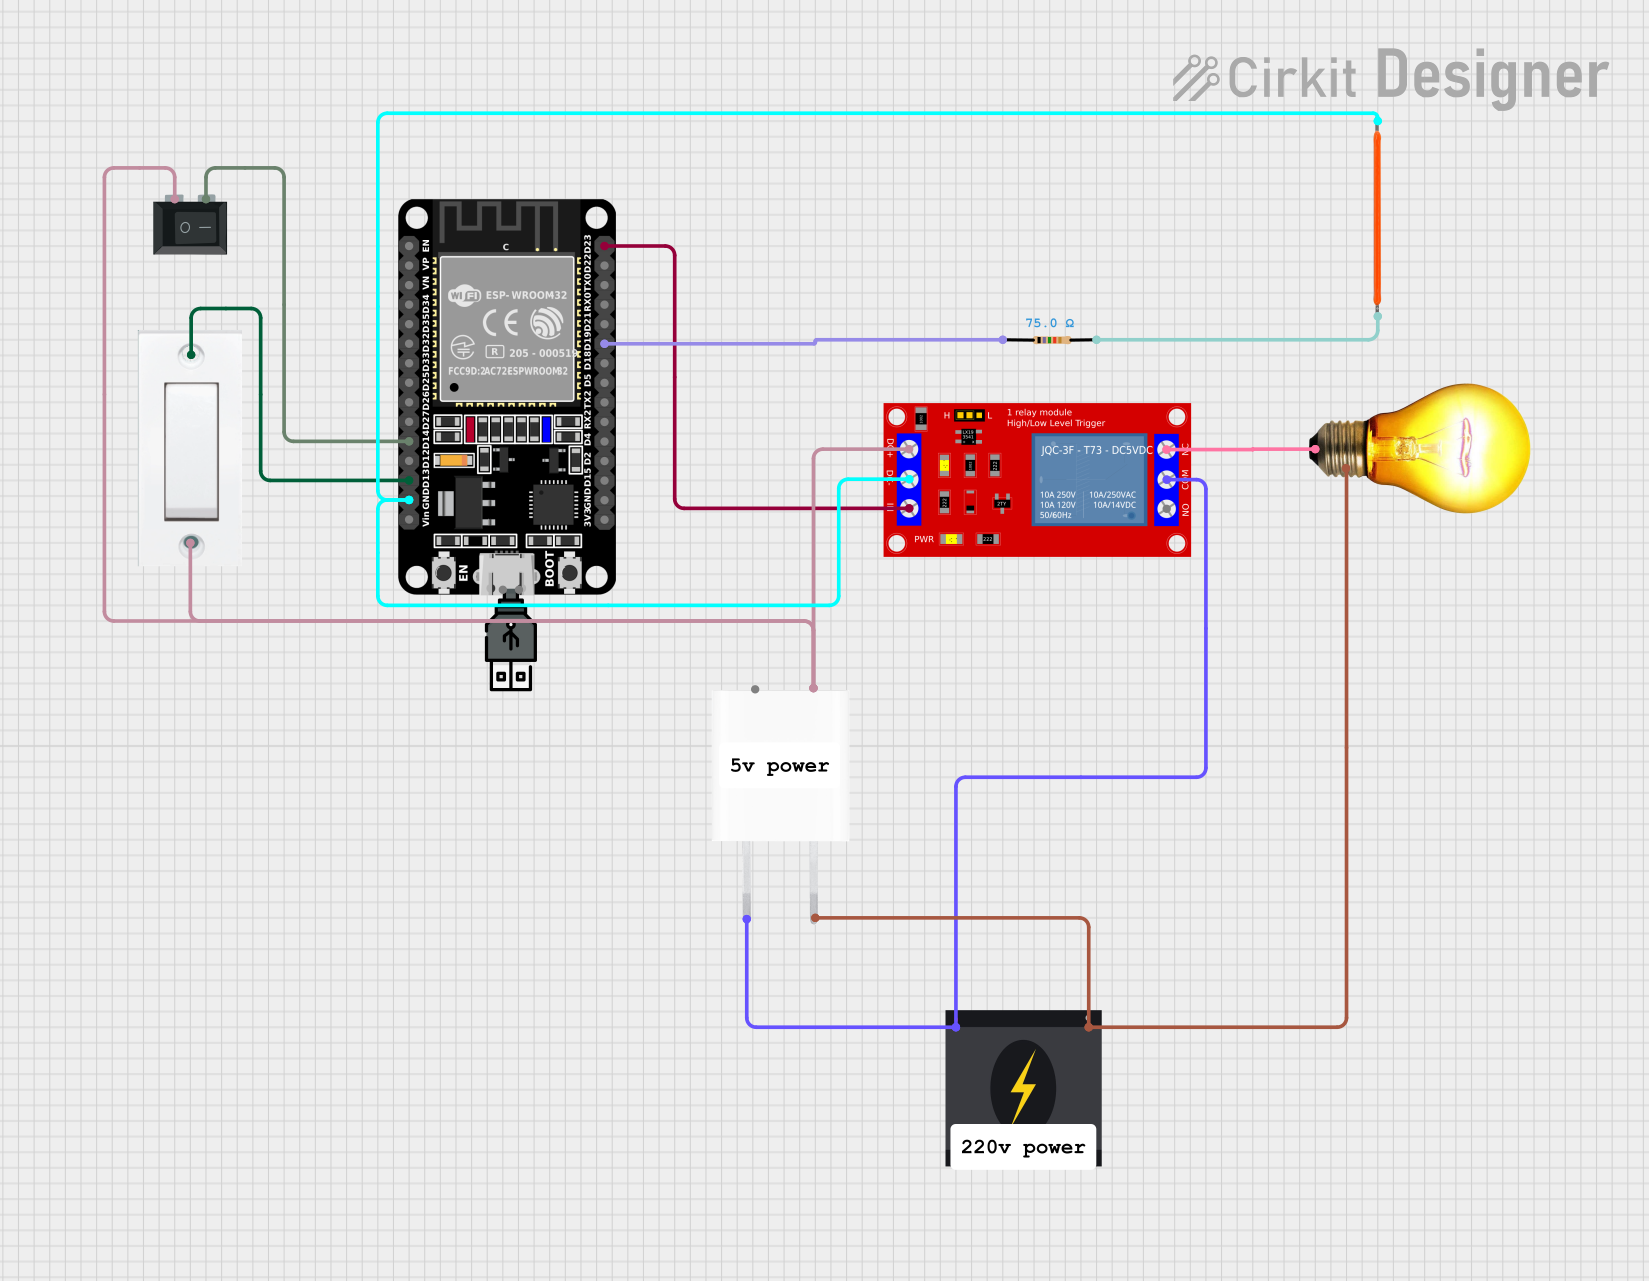
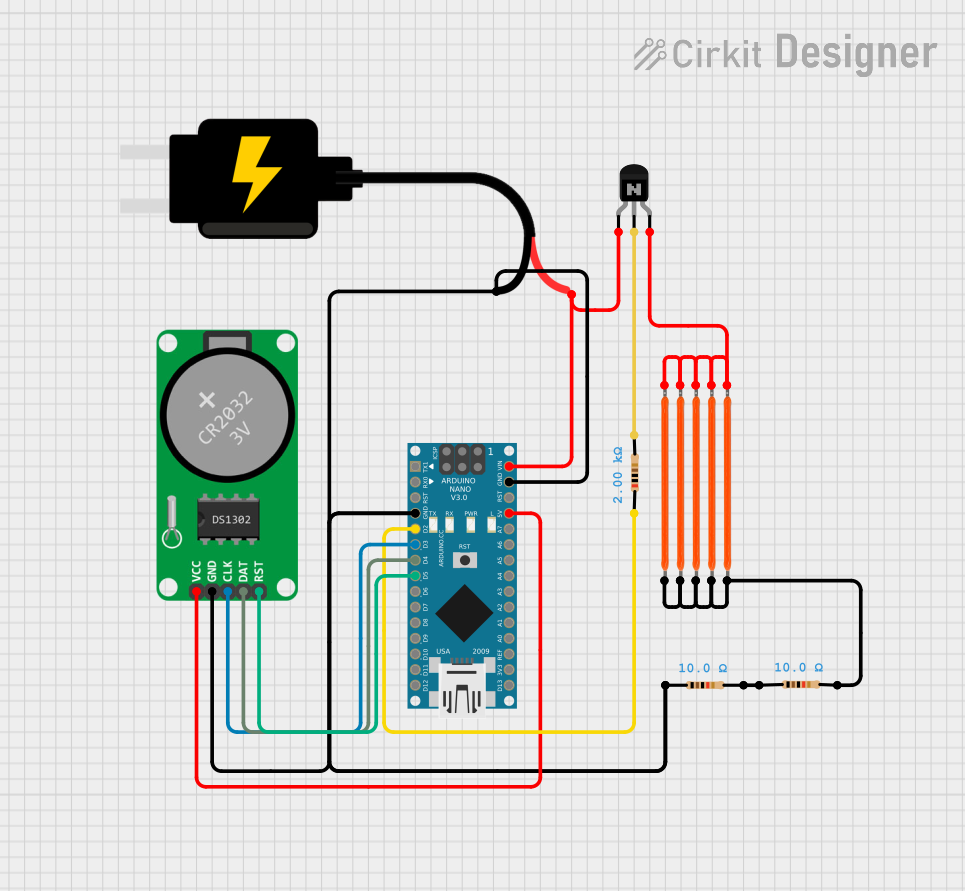
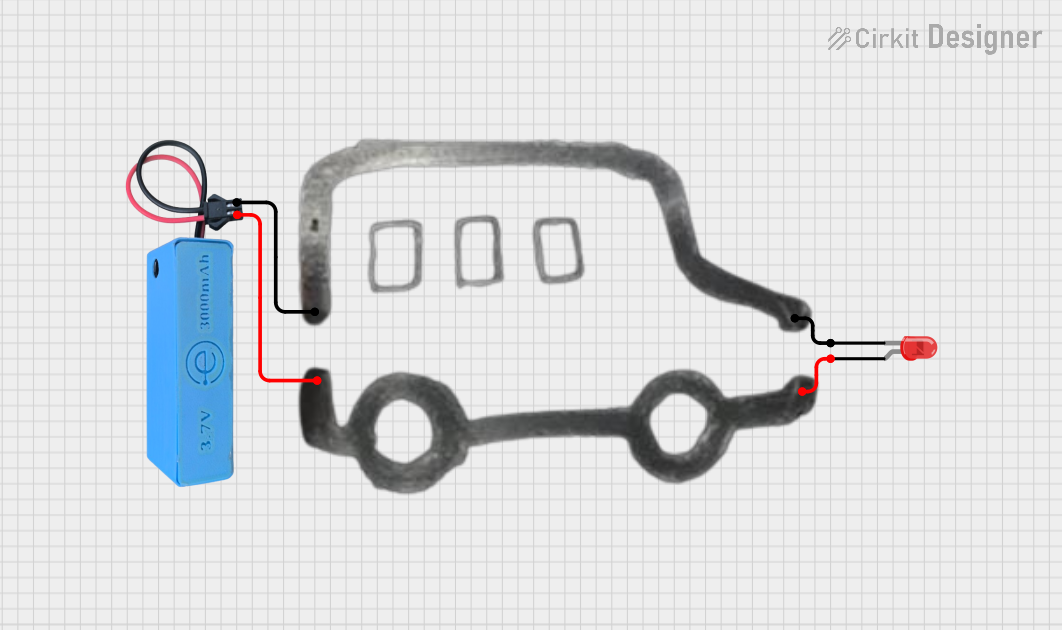
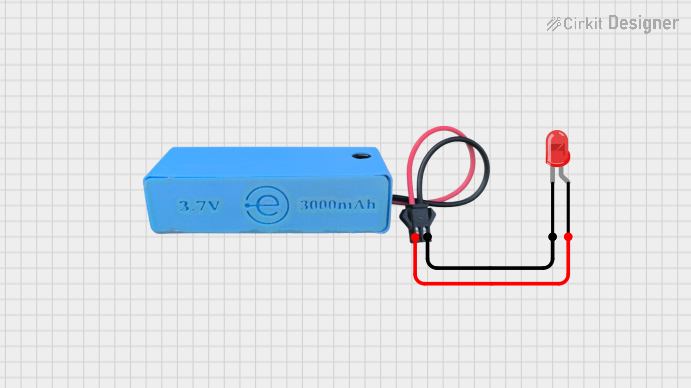
Explore Projects Built with LED Filament 3V
Common Applications and Use Cases
- Decorative lamps and fixtures
- Vintage-style lighting solutions
- DIY projects requiring a classic look with efficient lighting
- Battery-powered lighting applications
Technical Specifications
Key Technical Details
- Rated Voltage: 3V
- Typical Forward Current: 15-30 mA
- Power Dissipation: Varies with specific filament design
- Luminous Flux: Dependent on filament length and current
- Color Temperature: Typically 2700K (Warm White)
- Operating Temperature: -20°C to +85°C
Pin Configuration and Descriptions
| Pin Number | Description |
|---|---|
| 1 | Anode (+) |
| 2 | Cathode (-) |
Usage Instructions
How to Use the Component in a Circuit
- Power Supply: Ensure that the power supply voltage does not exceed 3V. Overvoltage can damage the LED filament.
- Current Limiting: Always use a current-limiting resistor in series with the LED filament to prevent excessive current flow.
- Polarity: Connect the anode (positive) pin to the positive terminal of the power supply and the cathode (negative) pin to the negative terminal.
Important Considerations and Best Practices
- Heat Management: While LED filaments generate less heat than traditional bulbs, ensure adequate ventilation around the component.
- Dimming: If dimming is required, use a dimmer that is compatible with LEDs.
- Handling: Avoid applying pressure to the filament structure, as it can be fragile.
Example Circuit with Arduino UNO
// Define the LED filament pin
const int ledPin = 9; // PWM pin for dimming capability

void setup() {
  pinMode(ledPin, OUTPUT); // Set the LED pin as an output
}

void loop() {
  // Fade the LED filament in and out
  for (int brightness = 0; brightness < 255; brightness++) {
    analogWrite(ledPin, brightness); // Set the brightness
    delay(10); // Wait for 10 milliseconds
  }
  for (int brightness = 254; brightness >= 0; brightness--) {
    analogWrite(ledPin, brightness); // Set the brightness
    delay(10); // Wait for 10 milliseconds
  }
}
Note: When connecting the LED filament to an Arduino UNO, ensure to use a current-limiting resistor and do not exceed the 3V rating of the LED filament.
Troubleshooting and FAQs
Common Issues
- LED Filament Does Not Light Up: Check the polarity of the connections and ensure the power supply is at 3V.
- LED Filament Burns Out: This is often due to overcurrent. Ensure that a proper current-limiting resistor is in place.
- Dim Light Output: The LED filament may be underpowered. Verify that the voltage is close to 3V and the current is within the specified range.
Solutions and Tips for Troubleshooting
- Polarity Check: Always double-check the anode and cathode orientation before powering up the circuit.
- Resistor Calculation: Use Ohm's law to calculate the appropriate resistor value for the desired current (V = IR).
- Power Supply: Use a regulated power supply to prevent voltage spikes that could damage the LED filament.
FAQs:
Q: Can I power the LED filament directly from a 3V battery? A: Yes, but it is still recommended to use a current-limiting resistor to protect the LED.
Q: How do I calculate the value of the current-limiting resistor? A: Use the formula R = (V_supply - V_led) / I_led, where V_supply is the supply voltage, V_led is the LED voltage (3V), and I_led is the desired current in amperes.
Q: Is it possible to connect multiple LED filaments in series? A: Yes, as long as the total voltage drop does not exceed the power supply voltage and each LED filament has its own current-limiting resistor.