Cirkit Designer
Your all-in-one circuit design IDE
Home /
Component Documentation
How to Use soil moisture sensor: Examples, Pinouts, and Specs
Introduction
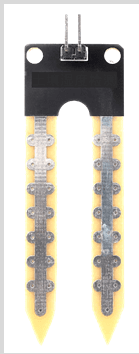
The Arduino Soil Moisture Sensor is a device designed to measure the volumetric water content in soil. It is an essential tool for applications such as agriculture, gardening, and automated irrigation systems. By providing real-time data on soil moisture levels, this sensor helps in maintaining optimal soil conditions for plant growth, ensuring efficient water usage, and preventing overwatering.
Explore Projects Built with soil moisture sensor
Arduino UNO-Based Smart Soil Moisture Monitoring System with LCD Display and Automatic Water Pump Control
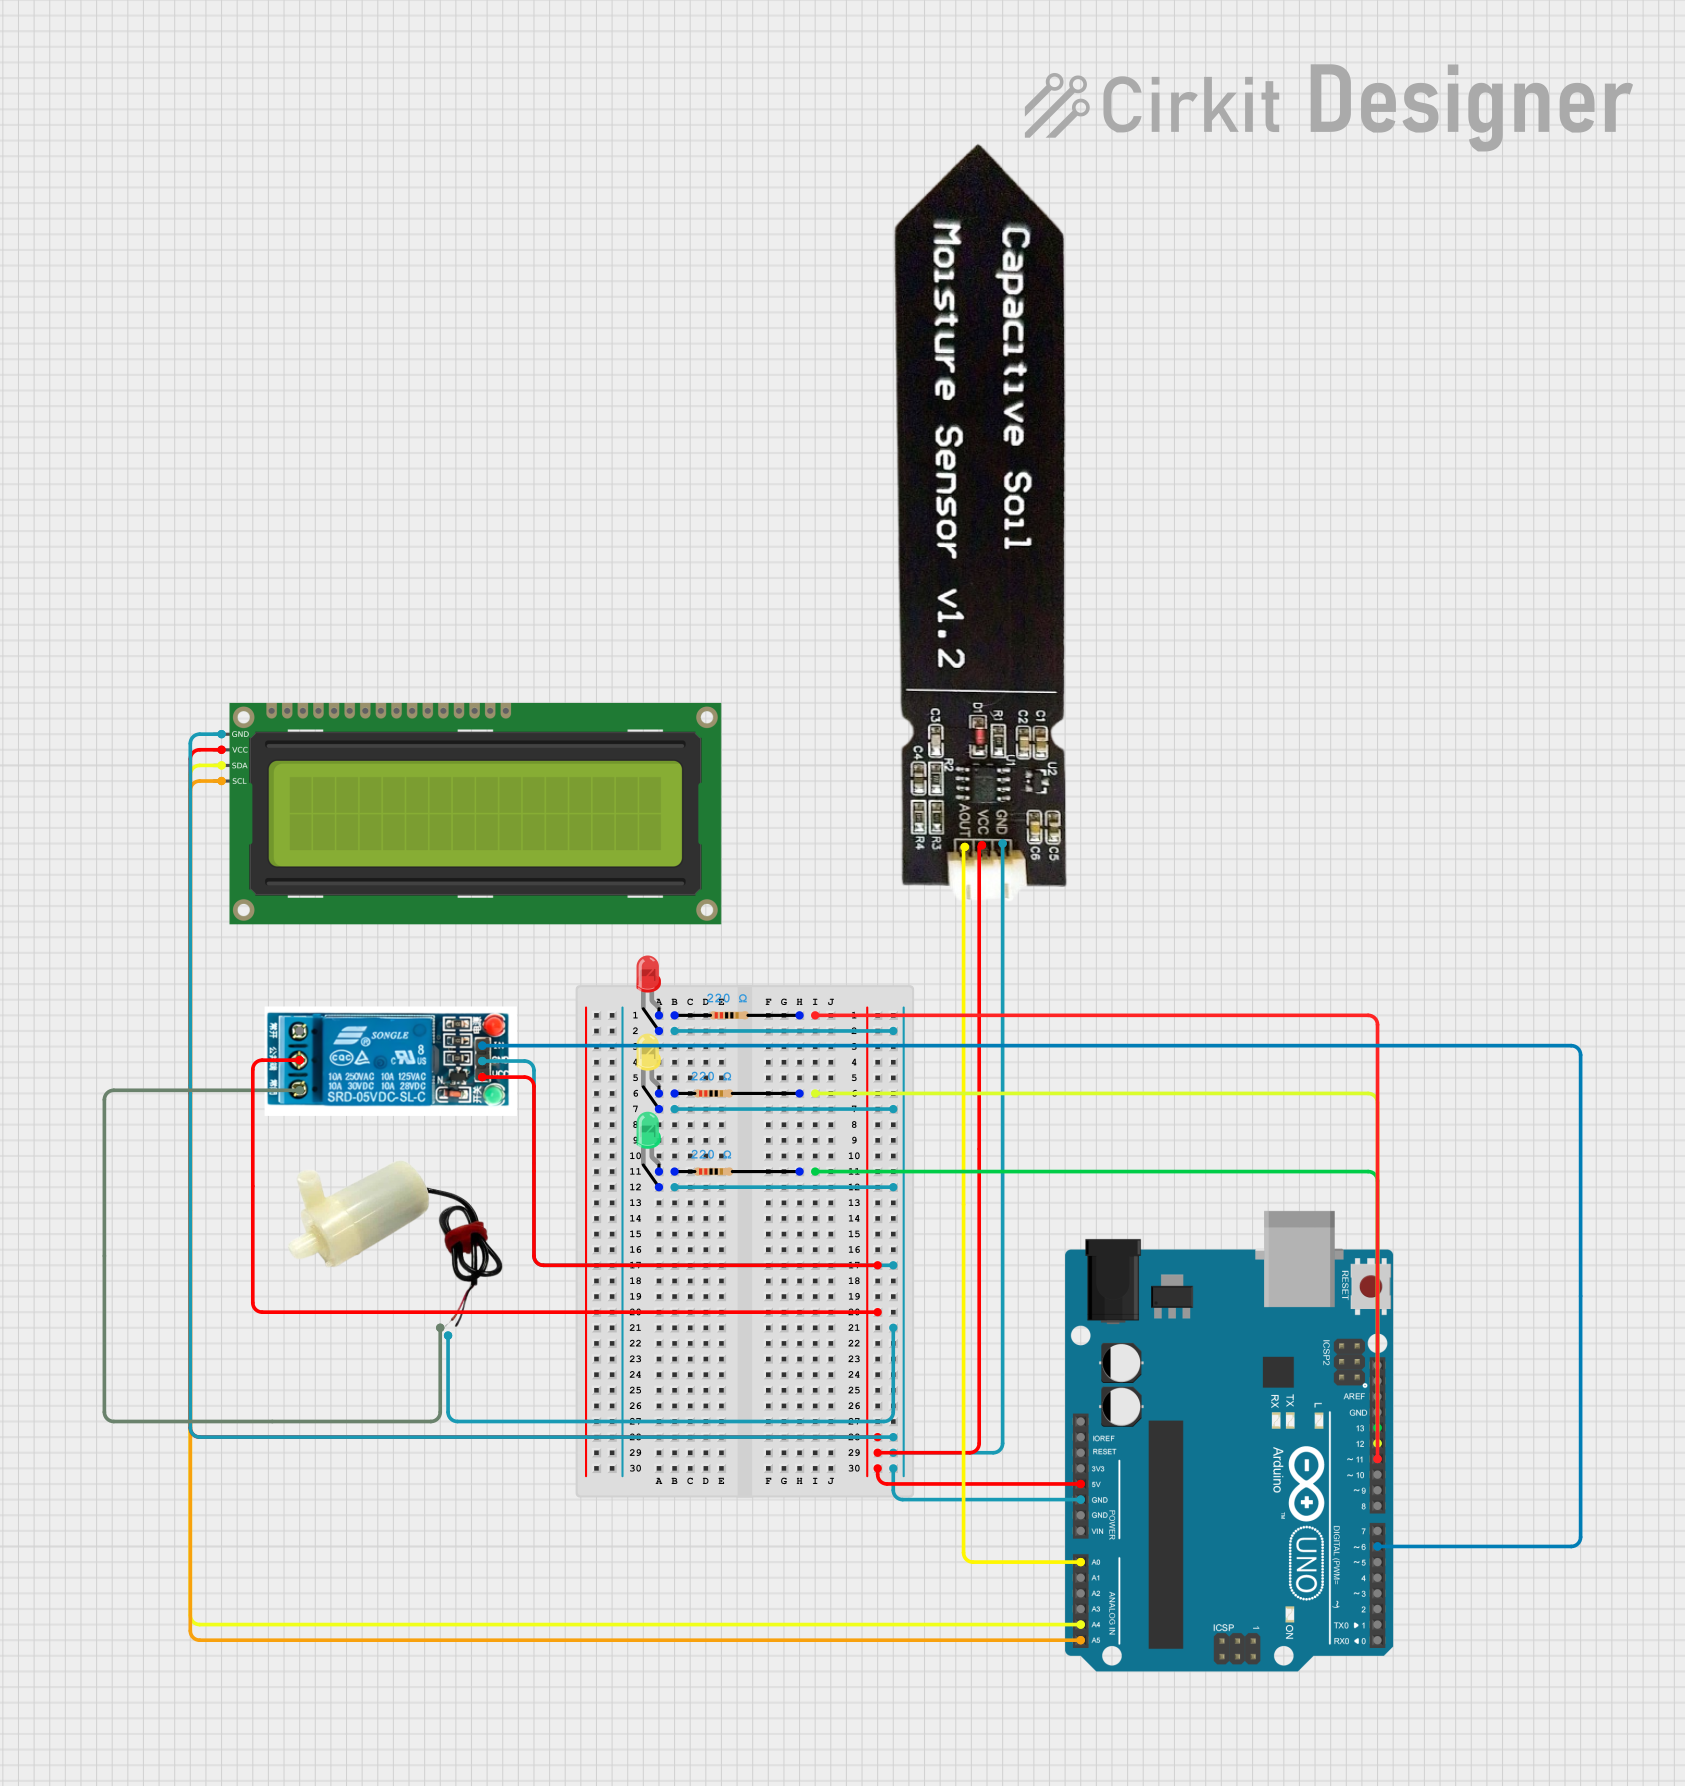
This circuit is an automated soil moisture monitoring and irrigation system. It uses an Arduino UNO to read data from a capacitive soil moisture sensor and display the moisture level on a 16x2 I2C LCD. Based on the moisture level, the Arduino controls three LEDs (green, yellow, red) to indicate the soil status and activates a relay to power a water pump for irrigation when needed.
Arduino-Controlled Soil Moisture Sensing and Water Pump System
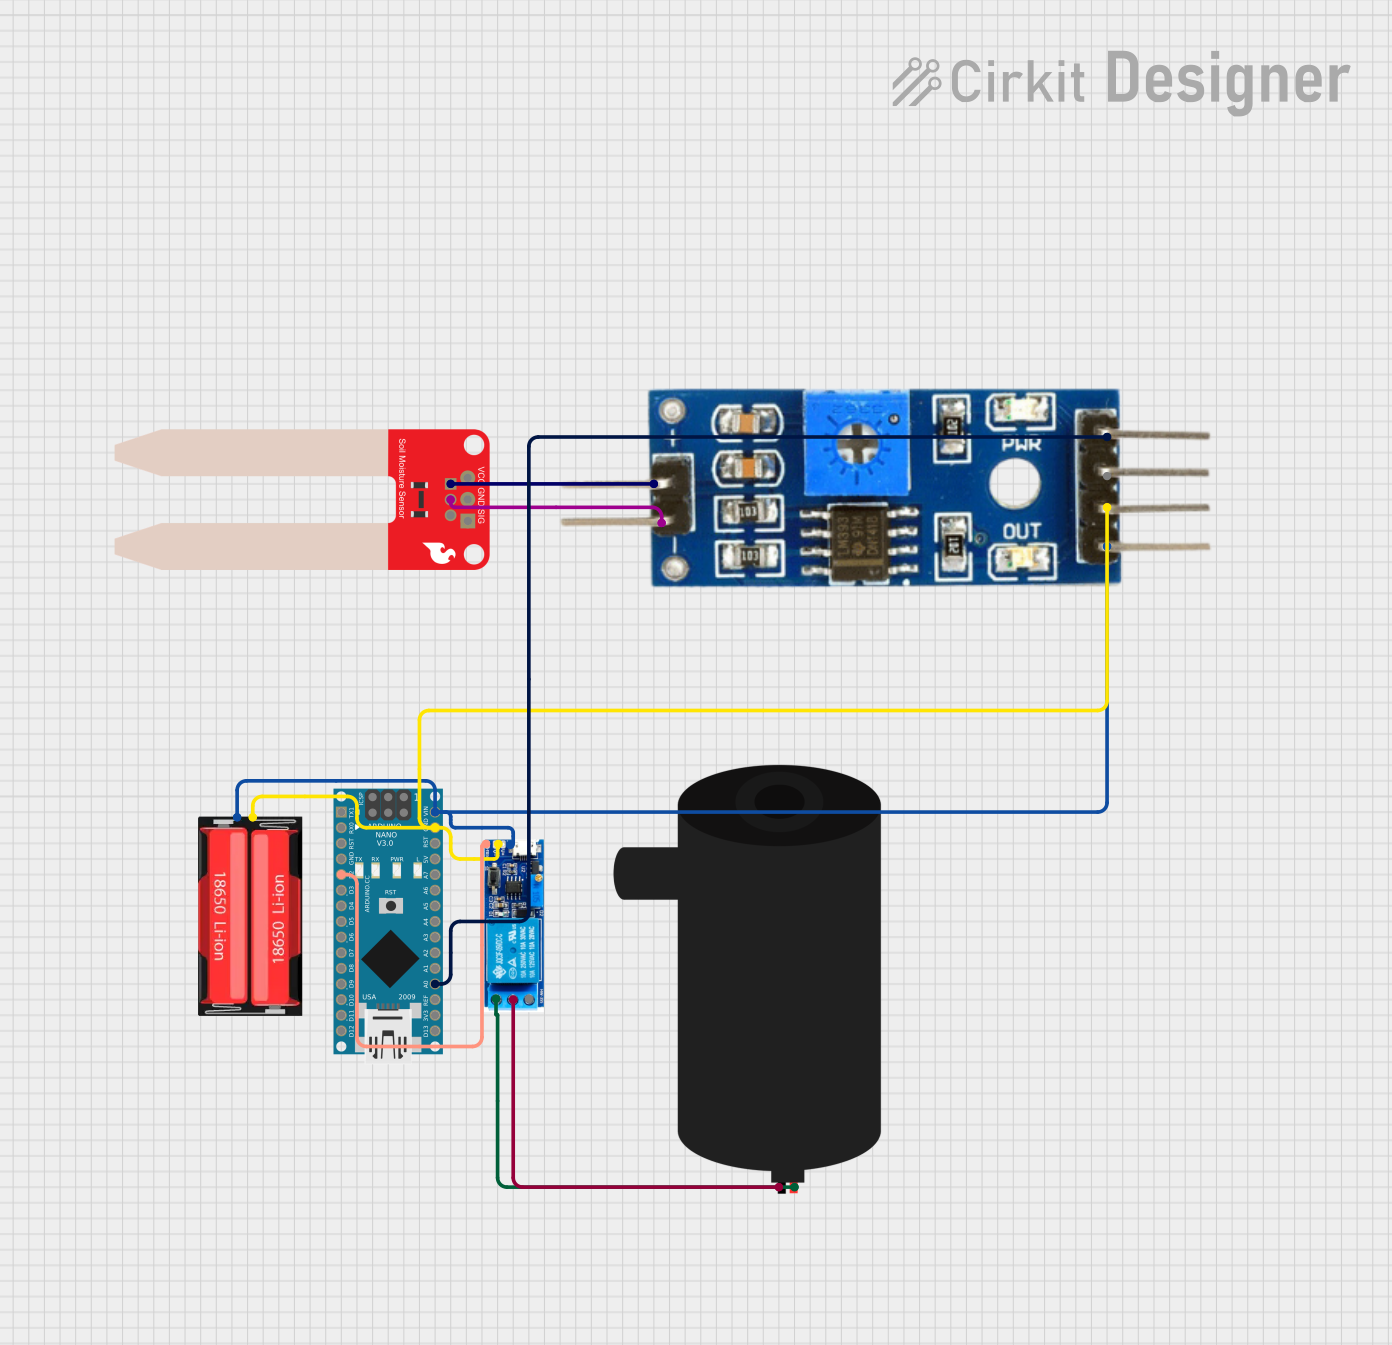
This circuit is designed to monitor soil moisture levels using a SparkFun Soil Moisture Sensor connected to a Soil Moisture Module, which interfaces with an Arduino Nano microcontroller. The Arduino reads the analog moisture level and can control a water pump via a relay module based on the moisture data. The system is powered by an 18650 Li-Ion battery, and the relay ensures that the pump is activated only when the soil moisture falls below a certain threshold, as determined by the Arduino's programmed logic.
Wi-Fi Enabled Soil Moisture Monitoring System with NodeMCU and Soil Moisture Sensor
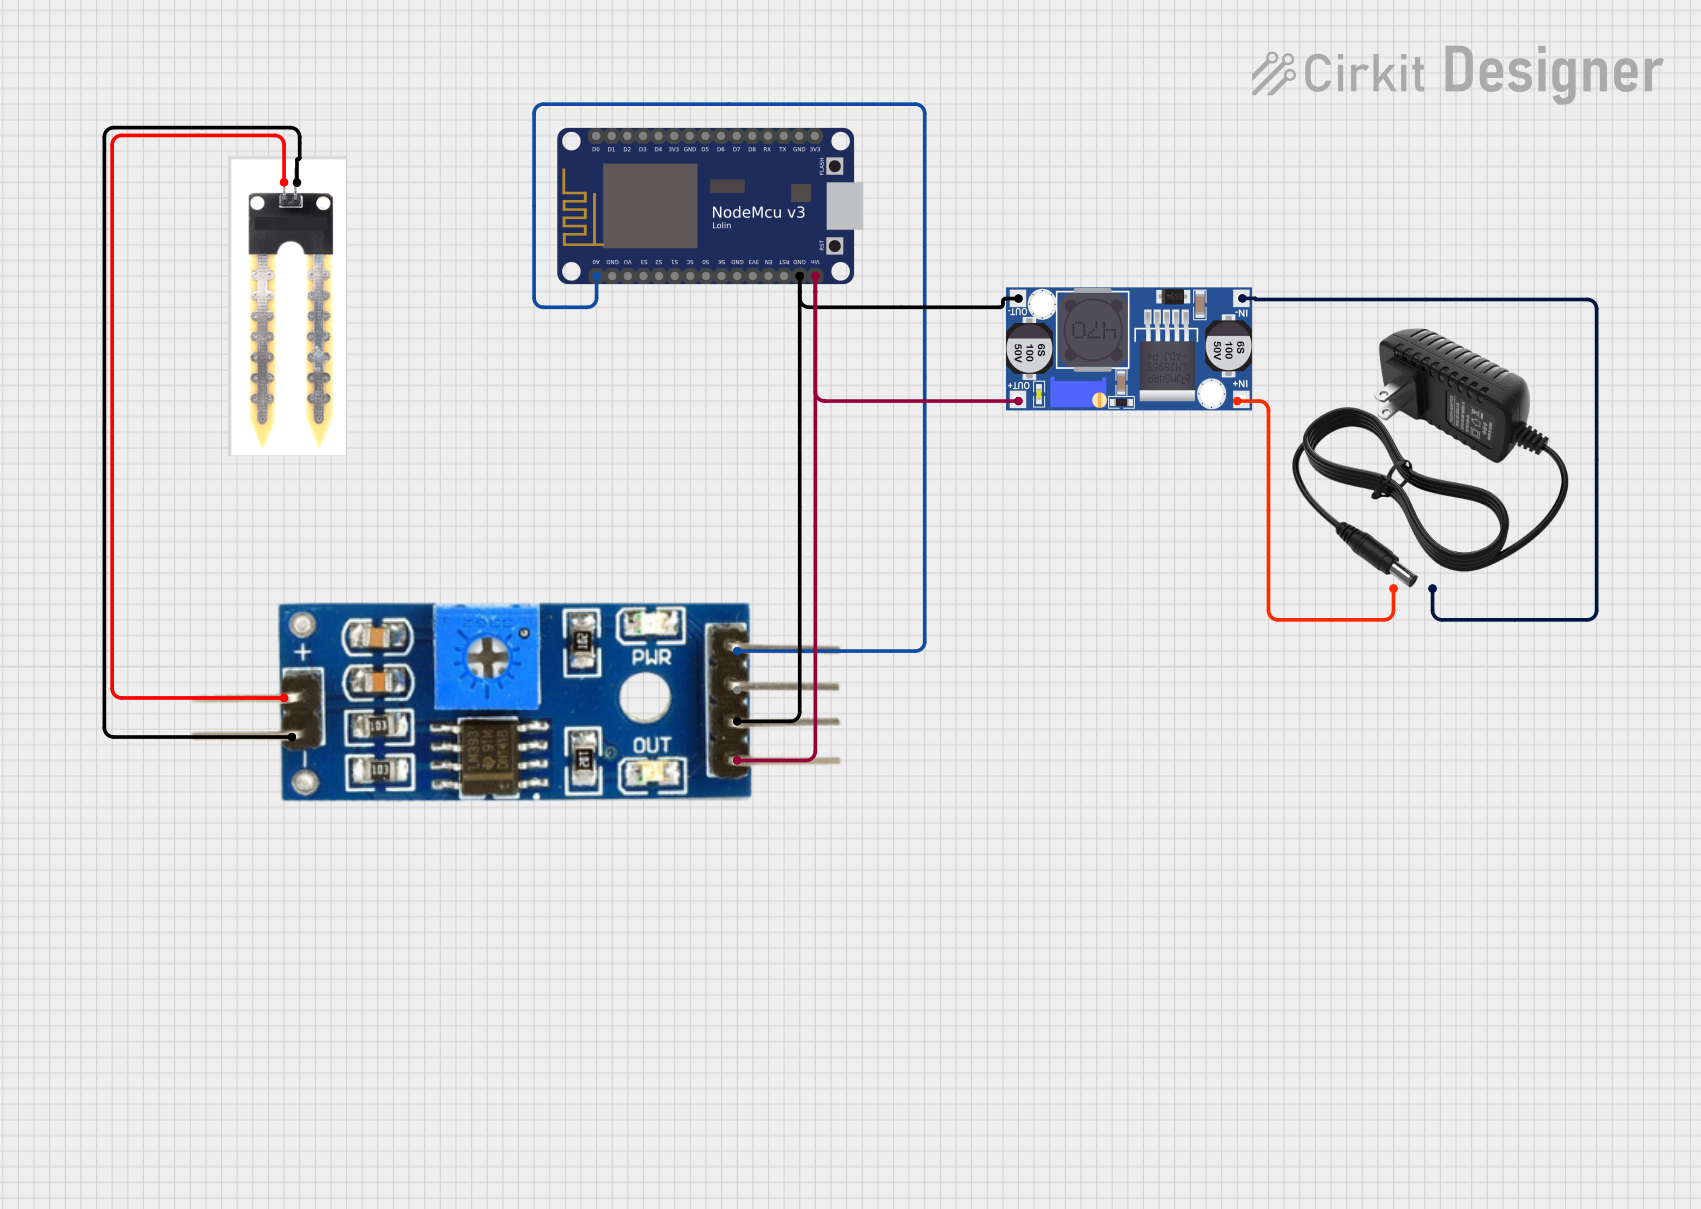
This circuit is a soil moisture monitoring system that uses a soil moisture sensor connected to a Soil Moisture Module, which in turn interfaces with a NodeMCU V3 ESP8266 microcontroller. The system is powered by a 12V power supply regulated through a buck converter, and it reads soil moisture levels, converting them to a percentage and transmitting the data via the microcontroller.
Arduino Nano-Based Smart Soil Monitoring System with Wi-Fi Connectivity
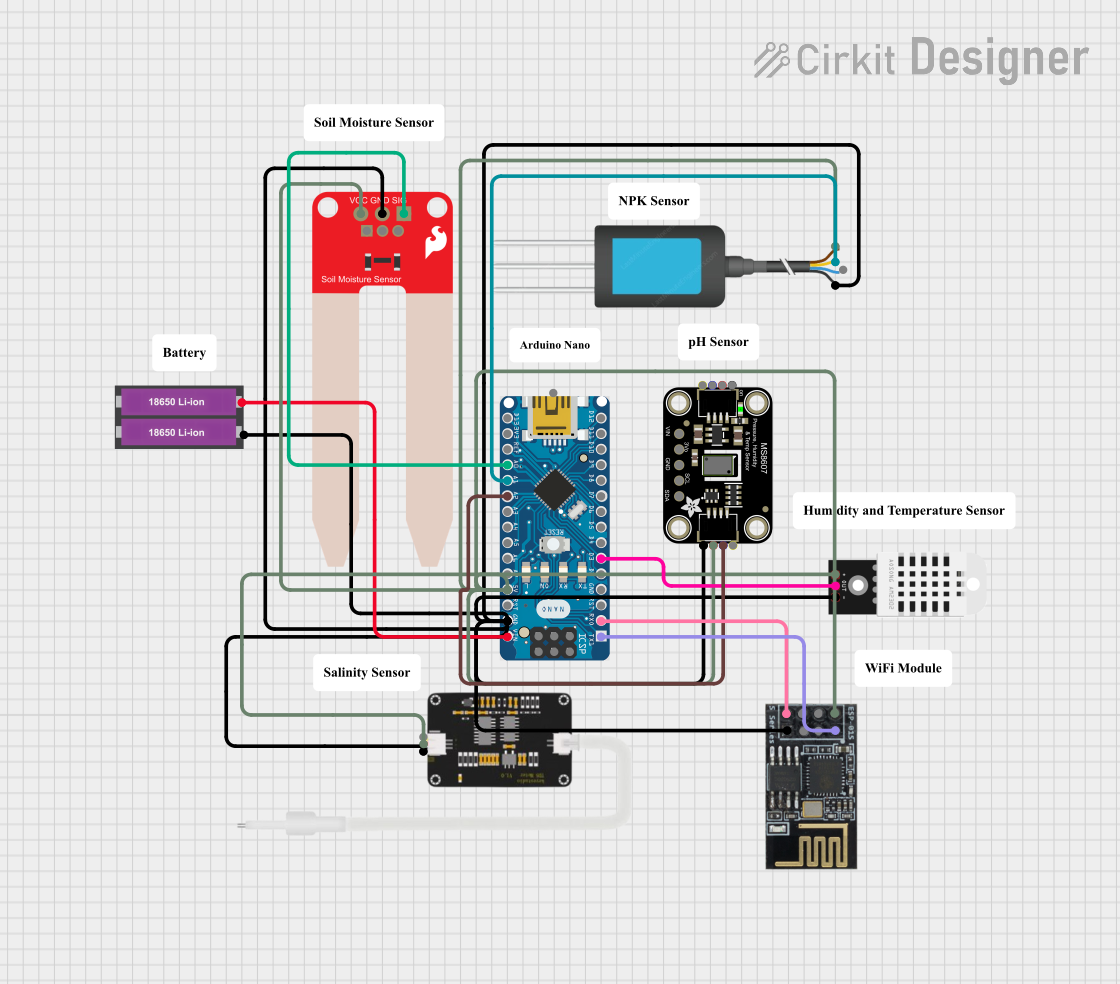
This circuit is a smart soil monitoring system that uses an Arduino Nano to collect data from various sensors, including a DHT22 for temperature and humidity, a SparkFun Soil Moisture Sensor, an NPK Soil Sensor, a TDS Sensor, and an Adafruit MS8607 PHT Sensor. The data is transmitted wirelessly via an ESP8266 WiFi module, and the system is powered by two 18650 Li-ion batteries.
Explore Projects Built with soil moisture sensor
Arduino UNO-Based Smart Soil Moisture Monitoring System with LCD Display and Automatic Water Pump Control
This circuit is an automated soil moisture monitoring and irrigation system. It uses an Arduino UNO to read data from a capacitive soil moisture sensor and display the moisture level on a 16x2 I2C LCD. Based on the moisture level, the Arduino controls three LEDs (green, yellow, red) to indicate the soil status and activates a relay to power a water pump for irrigation when needed.
Arduino-Controlled Soil Moisture Sensing and Water Pump System
This circuit is designed to monitor soil moisture levels using a SparkFun Soil Moisture Sensor connected to a Soil Moisture Module, which interfaces with an Arduino Nano microcontroller. The Arduino reads the analog moisture level and can control a water pump via a relay module based on the moisture data. The system is powered by an 18650 Li-Ion battery, and the relay ensures that the pump is activated only when the soil moisture falls below a certain threshold, as determined by the Arduino's programmed logic.
Wi-Fi Enabled Soil Moisture Monitoring System with NodeMCU and Soil Moisture Sensor
This circuit is a soil moisture monitoring system that uses a soil moisture sensor connected to a Soil Moisture Module, which in turn interfaces with a NodeMCU V3 ESP8266 microcontroller. The system is powered by a 12V power supply regulated through a buck converter, and it reads soil moisture levels, converting them to a percentage and transmitting the data via the microcontroller.
Arduino Nano-Based Smart Soil Monitoring System with Wi-Fi Connectivity
This circuit is a smart soil monitoring system that uses an Arduino Nano to collect data from various sensors, including a DHT22 for temperature and humidity, a SparkFun Soil Moisture Sensor, an NPK Soil Sensor, a TDS Sensor, and an Adafruit MS8607 PHT Sensor. The data is transmitted wirelessly via an ESP8266 WiFi module, and the system is powered by two 18650 Li-ion batteries.
Technical Specifications
Key Technical Details
| Parameter | Value |
|---|---|
| Operating Voltage | 3.3V - 5V |
| Output Voltage | 0V - 4.2V (analog) |
| Current Consumption | < 20mA |
| Interface | Analog |
| Dimensions | 60mm x 20mm x 5mm |
| Operating Temperature | -40°C to 85°C |
Pin Configuration and Descriptions
| Pin | Name | Description |
|---|---|---|
| 1 | VCC | Power supply (3.3V - 5V) |
| 2 | GND | Ground |
| 3 | AOUT | Analog output voltage proportional to moisture |
| 4 | DOUT | Digital output (high/low) based on threshold |
Usage Instructions
How to Use the Component in a Circuit
- Power Connection: Connect the VCC pin to the 3.3V or 5V power supply of your microcontroller (e.g., Arduino UNO). Connect the GND pin to the ground of the microcontroller.
- Analog Output: Connect the AOUT pin to an analog input pin on the microcontroller (e.g., A0 on Arduino UNO).
- Digital Output: Optionally, connect the DOUT pin to a digital input pin on the microcontroller if you want to use the digital threshold feature.
Important Considerations and Best Practices
- Calibration: Calibrate the sensor by placing it in dry and wet soil to determine the corresponding output voltage range.
- Placement: Insert the sensor probes into the soil at the desired depth. Ensure the probes are fully covered by soil for accurate readings.
- Power Supply: Use a stable power supply to avoid fluctuations in sensor readings.
- Corrosion Prevention: The sensor probes are prone to corrosion over time. Consider using corrosion-resistant probes for long-term applications.
Sample Arduino Code
// Soil Moisture Sensor Example Code
// This code reads the analog value from the soil moisture sensor
// and prints the moisture level to the Serial Monitor.

const int sensorPin = A0; // Analog input pin for the sensor
int sensorValue = 0;      // Variable to store the sensor value

void setup() {
  Serial.begin(9600); // Initialize serial communication at 9600 bps
}

void loop() {
  sensorValue = analogRead(sensorPin); // Read the analog value from the sensor
  Serial.print("Soil Moisture Level: ");
  Serial.println(sensorValue); // Print the sensor value to the Serial Monitor
  delay(1000); // Wait for 1 second before taking another reading
}
Troubleshooting and FAQs
Common Issues Users Might Face
- Inconsistent Readings: Fluctuating sensor values can be caused by unstable power supply or poor sensor placement.
- No Output: Ensure all connections are secure and the sensor is properly powered.
- Corrosion: Over time, the sensor probes may corrode, leading to inaccurate readings.
Solutions and Tips for Troubleshooting
- Check Connections: Verify that all connections are secure and correct.
- Stable Power Supply: Use a regulated power supply to ensure consistent sensor readings.
- Calibrate Regularly: Periodically calibrate the sensor to maintain accuracy.
- Replace Probes: If corrosion is detected, replace the sensor probes with new or corrosion-resistant ones.
By following this documentation, users can effectively integrate the Arduino Soil Moisture Sensor into their projects, ensuring accurate and reliable soil moisture measurements.