How to Use GC9A01: Examples, Pinouts, and Specs

Introduction
The GC9A01 is a versatile NPN bipolar junction transistor (BJT) that serves as a fundamental building block in various electronic circuits. It is designed for general-purpose applications and is widely used for amplification, switching, and signal processing tasks. Due to its reliability and cost-effectiveness, the GC9A01 is a popular choice among hobbyists and professionals alike.
Explore Projects Built with GC9A01
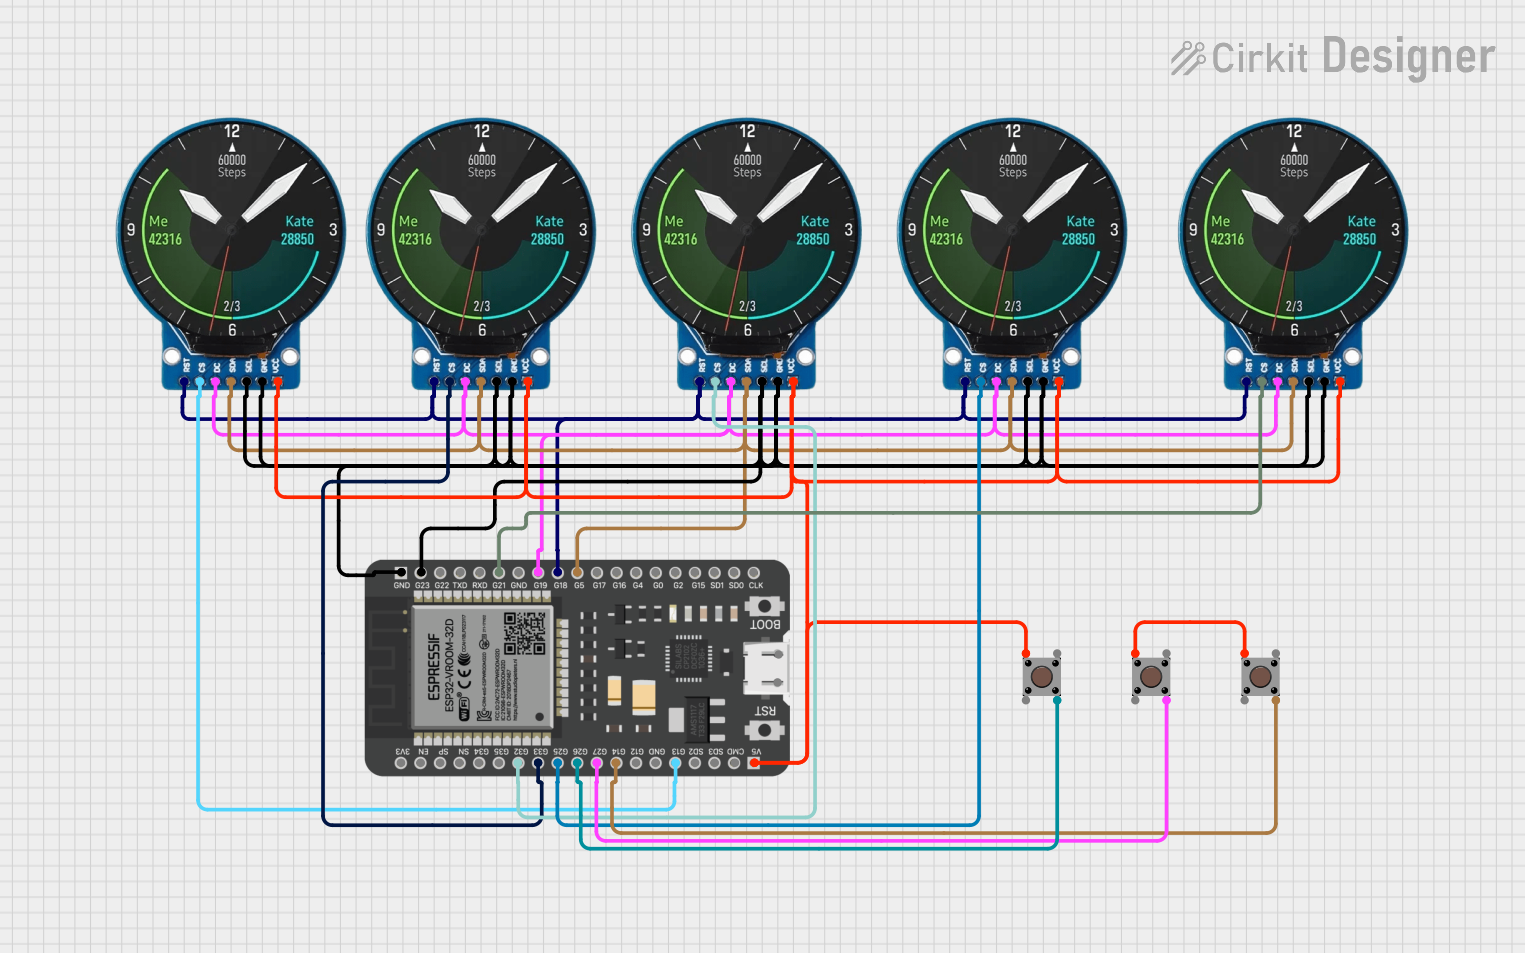
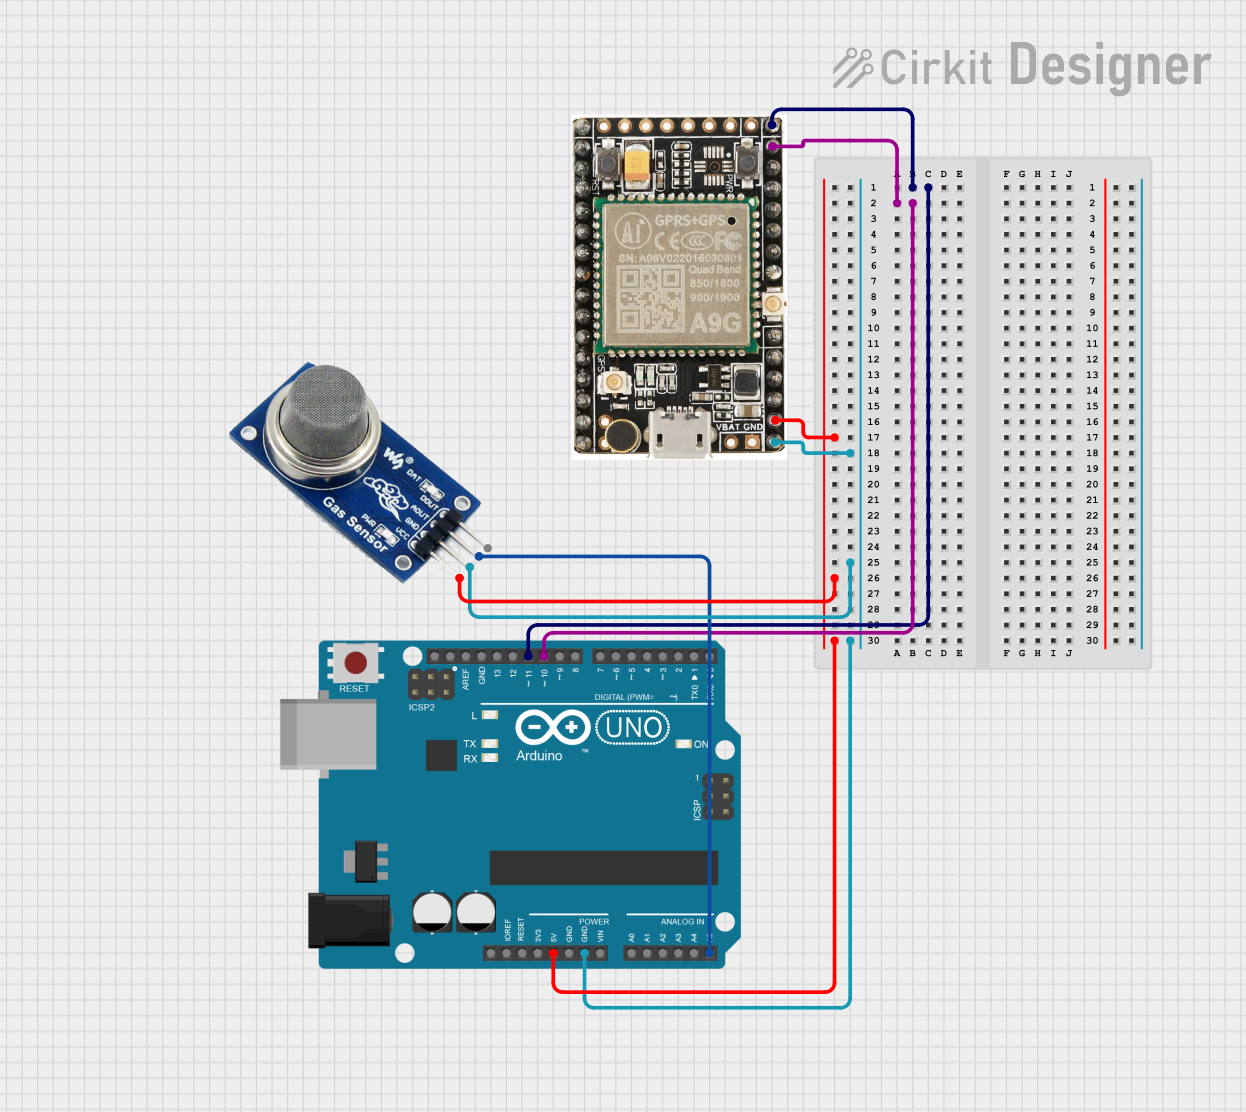

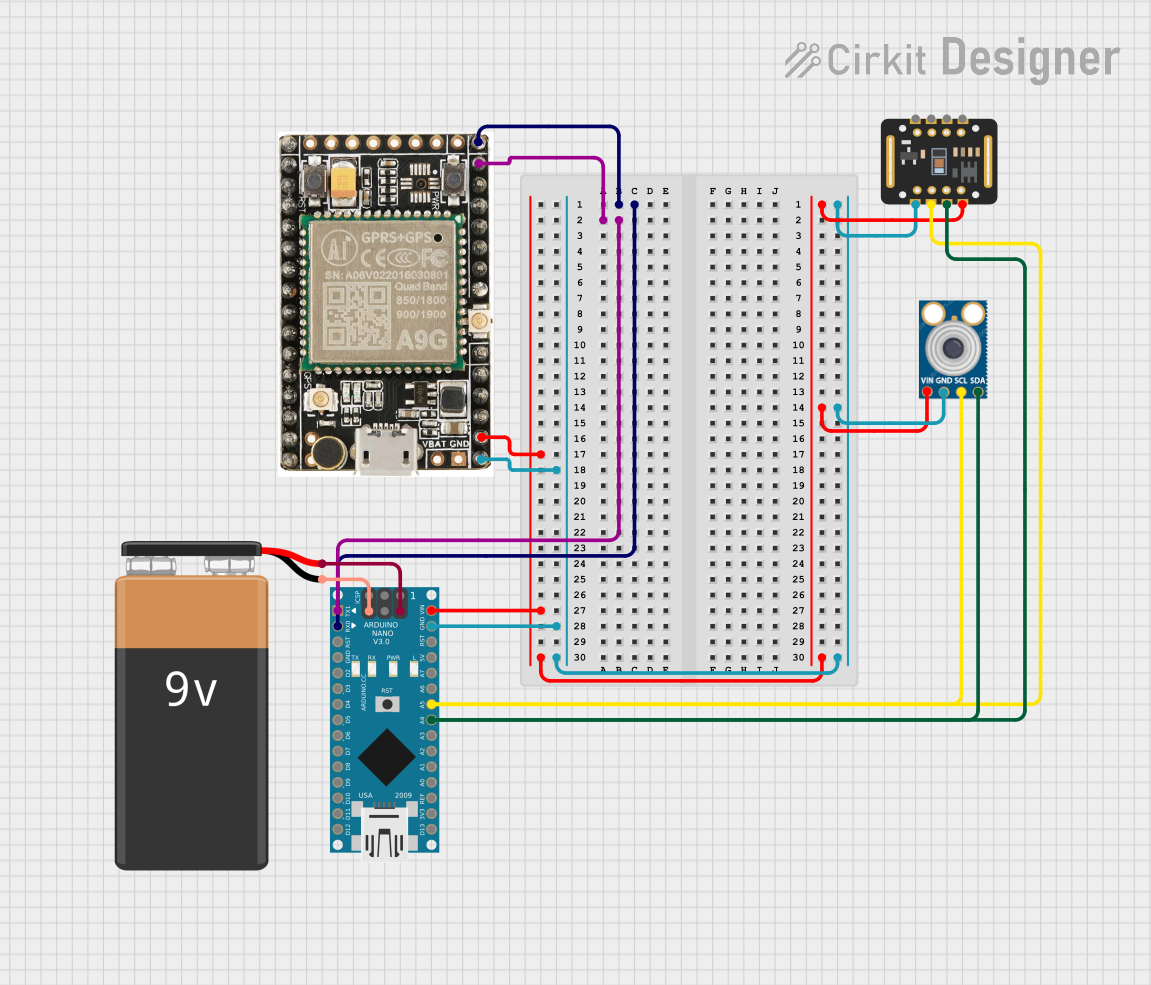
Explore Projects Built with GC9A01
Common Applications and Use Cases
- Signal amplification in audio circuits
- Switching operations in digital logic circuits
- Driving small motors or relays
- Use as a simple inverter or buffer in digital circuits
- Analog signal processing
Technical Specifications
Key Technical Details
- Type: NPN Bipolar Junction Transistor
- Maximum Collector-Emitter Voltage (Vce): 20V
- Maximum Collector-Base Voltage (Vcb): 30V
- Maximum Emitter-Base Voltage (Veb): 5V
- Maximum Collector Current (Ic): 100mA
- Power Dissipation (Pd): 625mW
- Transition Frequency (fT): 300MHz
Pin Configuration and Descriptions
| Pin Number | Name | Description |
|---|---|---|
| 1 | E | Emitter - Emits electrons into the base |
| 2 | B | Base - Controls the transistor's operation |
| 3 | C | Collector - Collects electrons from the emitter |
Usage Instructions
How to Use the GC9A01 in a Circuit
Biasing the Transistor: Ensure that the transistor is correctly biased by applying a small current to the base (B) to control the larger current between the collector (C) and emitter (E).
Amplification: For amplification, connect the signal to be amplified to the base and use the collector-emitter circuit as the output.
Switching: To use the GC9A01 as a switch, apply a sufficient base current to drive the transistor into saturation, allowing maximum current to flow from collector to emitter.
Important Considerations and Best Practices
- Always check the maximum voltage and current ratings to prevent damage.
- Use a current-limiting resistor at the base to protect the transistor and control the base current.
- When using as a switch, ensure the transistor is either fully on (saturated) or fully off (cut-off) to avoid unnecessary power dissipation.
- Heat sinks may be necessary for applications with high power dissipation.
Troubleshooting and FAQs
Common Issues Users Might Face
- Transistor Not Switching: Ensure that the base current is sufficient to saturate the transistor.
- Excessive Heat: Check for overcurrent or incorrect biasing that could lead to overheating.
- Unexpected Signal Distortion: Verify that the transistor is not operating in the non-linear region unless intended for specific applications.
Solutions and Tips for Troubleshooting
- Use a multimeter to check for proper voltage levels at the pins.
- Replace the transistor if you suspect it has been damaged due to overheating or overcurrent.
- Ensure that the base resistor value is calculated correctly for the desired operation mode.
FAQs
Q: Can the GC9A01 be used to drive power loads? A: The GC9A01 is suitable for small loads. For power loads, consider a power transistor or a Darlington pair for higher current capabilities.
Q: What is the function of the base resistor? A: The base resistor limits the base current, protecting the transistor from excessive current that could cause damage.
Q: How can I increase the current gain of the circuit? A: To increase current gain, consider using multiple transistors in a Darlington configuration or select a transistor with a higher beta value.
Q: Is the GC9A01 compatible with Arduino projects? A: Yes, the GC9A01 can be used with Arduino for controlling LEDs, small motors, or as a switch in digital circuits.
Example Arduino Code
// Example code to use GC9A01 as a switch to control an LED with Arduino UNO

const int basePin = 2; // Base pin connected to Arduino digital pin 2
const int ledPin =  13; // LED connected to digital pin 13

void setup() {
  pinMode(basePin, OUTPUT); // Set the transistor's base pin as an output
  pinMode(ledPin, OUTPUT);  // Set the LED pin as an output
}

void loop() {
  digitalWrite(basePin, HIGH); // Turn on the transistor (LED ON)
  delay(1000);                // Wait for a second
  digitalWrite(basePin, LOW);  // Turn off the transistor (LED OFF)
  delay(1000);                // Wait for a second
}
Note: Ensure that the LED has an appropriate current-limiting resistor to prevent damage. The base resistor should also be chosen to provide enough base current to saturate the transistor without exceeding its maximum ratings.