How to Use Transformer: Examples, Pinouts, and Specs
Introduction
A transformer is an electrical device that transfers electrical energy between two or more circuits through electromagnetic induction. It is primarily used to step up (increase) or step down (decrease) voltage levels in electrical systems. Transformers are essential in power distribution networks, enabling efficient transmission of electricity over long distances. They are also widely used in electronic devices, audio systems, and industrial equipment.
Explore Projects Built with Transformer

Explore Projects Built with Transformer
Common Applications and Use Cases
- Power distribution and transmission systems
- Voltage regulation in electronic circuits
- Isolation between circuits for safety
- Impedance matching in audio systems
- Step-up transformers in renewable energy systems (e.g., solar inverters)
- Step-down transformers in household appliances
Technical Specifications
Transformers come in various types and sizes, but the following are general technical specifications for a typical transformer:
Key Technical Details
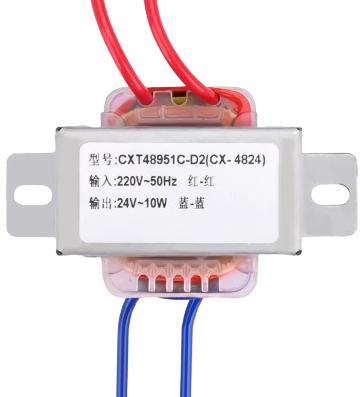
- Input Voltage (Primary): Varies depending on the application (e.g., 120V, 230V AC)
- Output Voltage (Secondary): Configurable (e.g., 12V, 24V, or custom)
- Frequency: Typically 50Hz or 60Hz
- Power Rating: Ranges from milliwatts (small transformers) to megawatts (power transformers)
- Efficiency: Typically 95% or higher for large transformers
- Insulation Class: Determines the maximum operating temperature (e.g., Class A, B, F, H)
- Core Material: Usually laminated silicon steel or ferrite
Pin Configuration and Descriptions
The pin configuration of a transformer depends on its type (e.g., step-up, step-down, or isolation transformer). Below is a general example for a basic step-down transformer:
| Pin Number | Name | Description |
|---|---|---|
| 1 | Primary Input 1 | Connects to the live wire of the AC input voltage source |
| 2 | Primary Input 2 | Connects to the neutral wire of the AC input voltage source |
| 3 | Secondary Output 1 | Provides the first terminal of the stepped-down AC voltage |
| 4 | Secondary Output 2 | Provides the second terminal of the stepped-down AC voltage |
For center-tapped transformers, an additional pin (e.g., Pin 5) may be present for the center tap.
Usage Instructions
How to Use the Component in a Circuit
Determine Voltage Requirements:
- Identify the input voltage (primary) and the desired output voltage (secondary) for your application.
- Select a transformer with the appropriate voltage ratings and power capacity.
Connect the Primary Side:
- Connect the primary input pins (e.g., Pin 1 and Pin 2) to the AC voltage source.
- Ensure the input voltage matches the transformer's primary voltage rating.
Connect the Secondary Side:
- Connect the secondary output pins (e.g., Pin 3 and Pin 4) to the load or rectifier circuit.
- If using a center-tapped transformer, connect the center tap to the appropriate circuit point.
Safety Precautions:
- Always ensure proper insulation and grounding to prevent electrical hazards.
- Avoid overloading the transformer beyond its power rating.
Important Considerations and Best Practices
- Core Saturation: Avoid operating the transformer at frequencies lower than its rated frequency to prevent core saturation.
- Heat Dissipation: Ensure adequate ventilation or cooling to prevent overheating during operation.
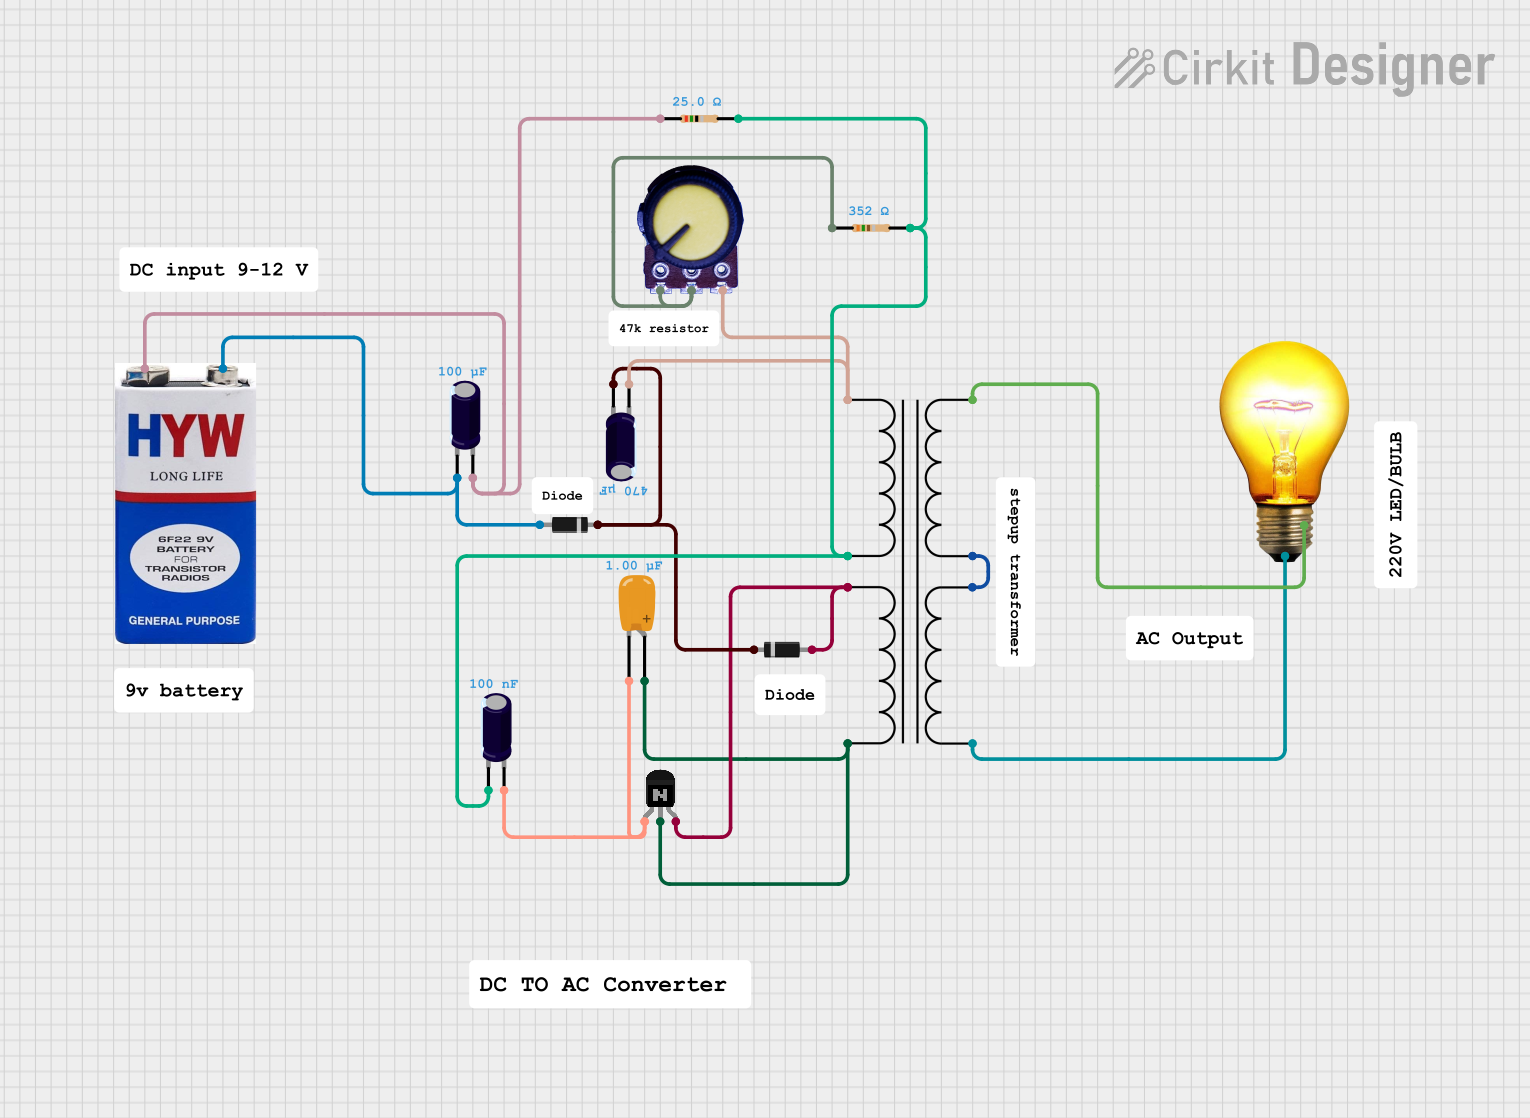
- Isolation: Use isolation transformers for safety-critical applications to separate the primary and secondary circuits.
- Testing: Verify the input and output voltages with a multimeter before connecting the load.
Example: Using a Transformer with an Arduino UNO
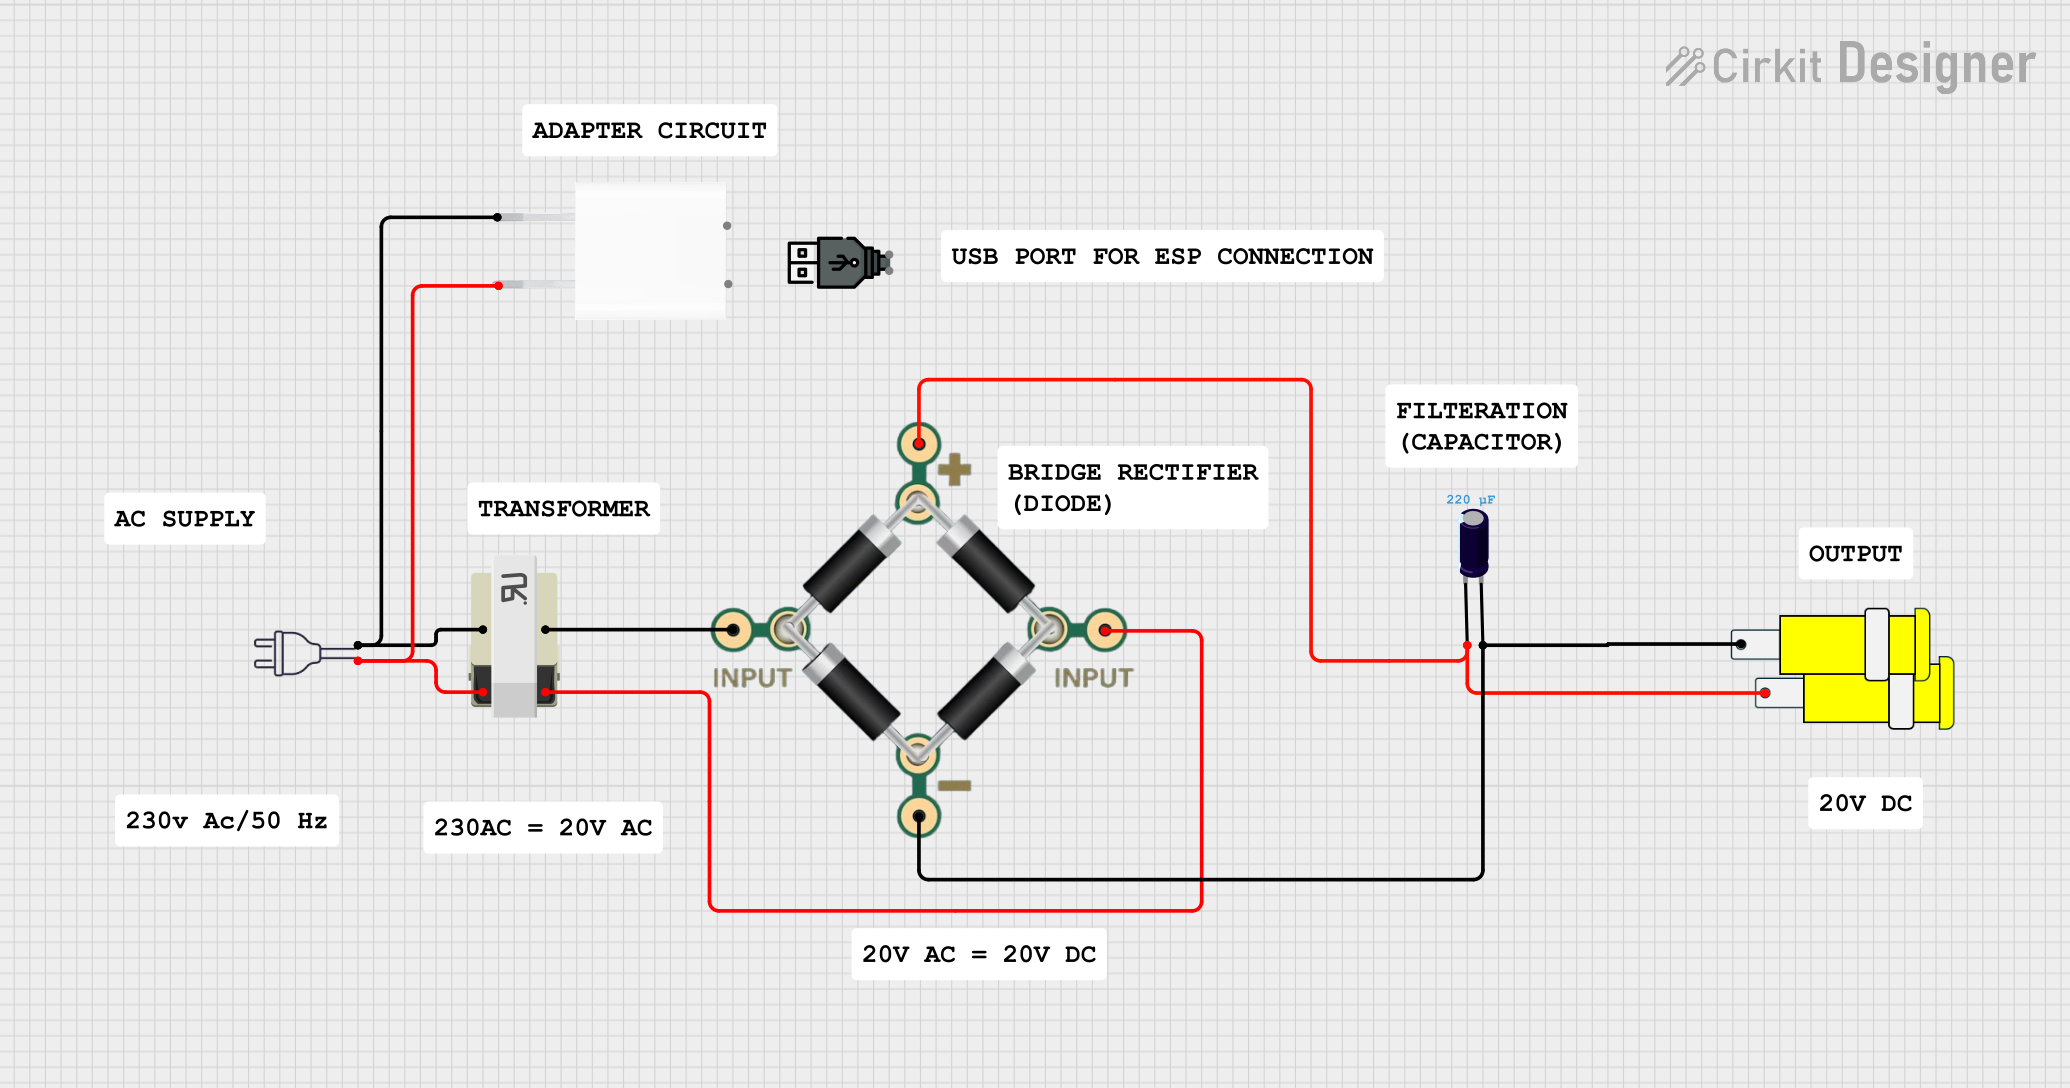
If you are using a transformer to power an Arduino UNO, you will typically need a rectifier and voltage regulator to convert the AC output of the transformer into a stable DC voltage. Below is an example circuit and Arduino code:
Circuit Description
- Use a step-down transformer to reduce the AC mains voltage (e.g., 230V to 12V AC).
- Connect the transformer's secondary output to a bridge rectifier to convert AC to DC.
- Use a voltage regulator (e.g., 7805) to provide a stable 5V DC output for the Arduino UNO.
Arduino Code Example
// Example code to blink an LED connected to pin 13 of the Arduino UNO
// Ensure the transformer output is properly rectified and regulated to 5V DC
// before connecting it to the Arduino's power input.

void setup() {
  pinMode(13, OUTPUT); // Set pin 13 as an output pin
}

void loop() {
  digitalWrite(13, HIGH); // Turn the LED on
  delay(1000);            // Wait for 1 second
  digitalWrite(13, LOW);  // Turn the LED off
  delay(1000);            // Wait for 1 second
}
Troubleshooting and FAQs
Common Issues Users Might Face
No Output Voltage:
- Cause: Incorrect wiring or open circuit in the primary or secondary winding.
- Solution: Verify the connections and check the continuity of the windings with a multimeter.
Overheating:
- Cause: Overloading the transformer or poor ventilation.
- Solution: Reduce the load or improve cooling around the transformer.
Humming Noise:
- Cause: Loose laminations in the core or high inrush current.
- Solution: Tighten the core laminations or use a soft-start circuit to limit inrush current.
Voltage Drop Under Load:
- Cause: Transformer is undersized for the load.
- Solution: Use a transformer with a higher power rating.
Solutions and Tips for Troubleshooting
- Always measure the input and output voltages with a multimeter to ensure proper operation.
- Use a fuse on the primary side to protect the transformer from overcurrent conditions.
- If the transformer is not functioning as expected, check for physical damage, such as burnt windings or a damaged core.
By following these guidelines, you can effectively use a transformer in your projects and troubleshoot common issues.