How to Use 5V 3A DC: Examples, Pinouts, and Specs
Introduction
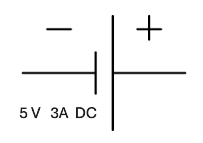
The 5V 3A DC power supply is a reliable and efficient source of direct current (DC) power, delivering a stable 5 volts with a maximum current output of 3 amperes. This component is widely used in powering electronic devices, microcontrollers, sensors, and small motors. Its compact design and high current capacity make it ideal for applications requiring consistent and robust power delivery.
Explore Projects Built with 5V 3A DC


Explore Projects Built with 5V 3A DC
Common Applications and Use Cases
- Powering microcontrollers such as Arduino, Raspberry Pi, and ESP32
- Supplying power to sensors, actuators, and small DC motors
- Charging USB-powered devices
- Providing power for LED strips and other low-voltage lighting systems
- General-purpose use in prototyping and DIY electronics projects
Technical Specifications
The following table outlines the key technical details of the 5V 3A DC power supply:
| Parameter | Specification |
|---|---|
| Output Voltage | 5V DC |
| Maximum Output Current | 3A |
| Input Voltage Range | Typically 100-240V AC |
| Output Power | 15W |
| Efficiency | ≥85% (typical) |
| Connector Type | Barrel jack, USB, or screw terminals (varies by model) |
| Protection Features | Overcurrent, overvoltage, and short-circuit protection |
Pin Configuration and Descriptions
The pin configuration depends on the type of connector used. Below is a general description for common connector types:
Barrel Jack Connector
| Pin | Description |
|---|---|
| Center | Positive (+5V) |
| Outer | Ground (GND) |
Screw Terminal Connector
| Pin | Description |
|---|---|
| V+ | Positive (+5V) |
| V- | Ground (GND) |
USB Connector (if applicable)
| Pin | Description |
|---|---|
| VBUS | Positive (+5V) |
| GND | Ground (GND) |
Usage Instructions
How to Use the Component in a Circuit
- Verify Voltage and Current Requirements: Ensure that the device or circuit you are powering operates at 5V and does not exceed a current draw of 3A.
- Connect the Power Supply:
- For a barrel jack connector, insert the plug into the corresponding socket on your device.
- For screw terminals, connect the V+ terminal to the positive input of your circuit and the V- terminal to ground.
- For USB-powered devices, simply plug the USB connector into the device.
- Power On: Plug the power supply into an AC outlet and switch it on (if applicable).
Important Considerations and Best Practices
- Check Polarity: Always verify the polarity of the connections to avoid damaging your circuit.
- Avoid Overloading: Do not connect devices that draw more than 3A, as this may trigger the overcurrent protection or damage the power supply.
- Ventilation: Ensure proper ventilation around the power supply to prevent overheating.
- Use a Multimeter: Before connecting to sensitive electronics, use a multimeter to confirm the output voltage is stable at 5V.
Example: Using with an Arduino UNO
The 5V 3A DC power supply can be used to power an Arduino UNO via its barrel jack or the VIN and GND pins. Below is an example of connecting the power supply to an Arduino UNO and running a simple LED blink program.
Circuit Connection
- Connect the positive output of the power supply to the VIN pin of the Arduino.
- Connect the ground output of the power supply to the GND pin of the Arduino.
Arduino Code
// Simple LED Blink Program for Arduino UNO
// This program blinks the onboard LED connected to pin 13.

void setup() {
  pinMode(13, OUTPUT); // Set pin 13 as an output pin
}

void loop() {
  digitalWrite(13, HIGH); // Turn the LED on
  delay(1000);            // Wait for 1 second
  digitalWrite(13, LOW);  // Turn the LED off
  delay(1000);            // Wait for 1 second
}
Troubleshooting and FAQs
Common Issues and Solutions
No Output Voltage:
- Cause: The power supply is not properly connected to the AC outlet.
- Solution: Check the AC connection and ensure the power switch (if present) is turned on.
Device Not Powering On:
- Cause: Incorrect polarity or loose connections.
- Solution: Verify the polarity and ensure all connections are secure.
Overheating:
- Cause: The power supply is overloaded or lacks proper ventilation.
- Solution: Reduce the load to within the 3A limit and ensure adequate airflow around the power supply.
Voltage Fluctuations:
- Cause: Poor-quality power supply or unstable AC input.
- Solution: Use a higher-quality power supply or a voltage regulator for critical applications.
FAQs
Q: Can I use this power supply to charge a smartphone?
A: Yes, if the power supply has a USB output, it can charge smartphones that require 5V. However, ensure the device does not exceed the 3A current limit.
Q: Is this power supply suitable for powering a Raspberry Pi?
A: Yes, the 5V 3A power supply is ideal for powering Raspberry Pi models that require 5V and up to 3A.
Q: What happens if I connect a device that draws more than 3A?
A: The power supply's overcurrent protection will activate, shutting down the output to prevent damage.
Q: Can I use this power supply outdoors?
A: Only if the power supply is specifically rated for outdoor use. Otherwise, it should be used indoors in a dry environment.