How to Use Adafruit RS232 Pal: Examples, Pinouts, and Specs
Introduction
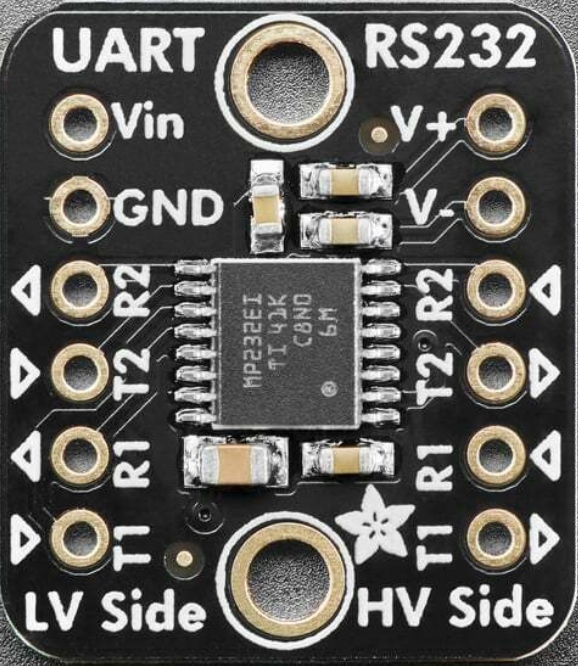
The Adafruit RS232 Pal (Part ID: 5987) is a compact RS232 interface converter designed to facilitate seamless communication between microcontrollers and RS232 devices. It features built-in level shifting and signal conditioning, making it an ideal solution for interfacing modern 3.3V or 5V logic systems with legacy RS232 hardware. This module simplifies the process of integrating RS232 communication into your projects, eliminating the need for complex circuitry.
Explore Projects Built with Adafruit RS232 Pal

Explore Projects Built with Adafruit RS232 Pal
Common Applications and Use Cases
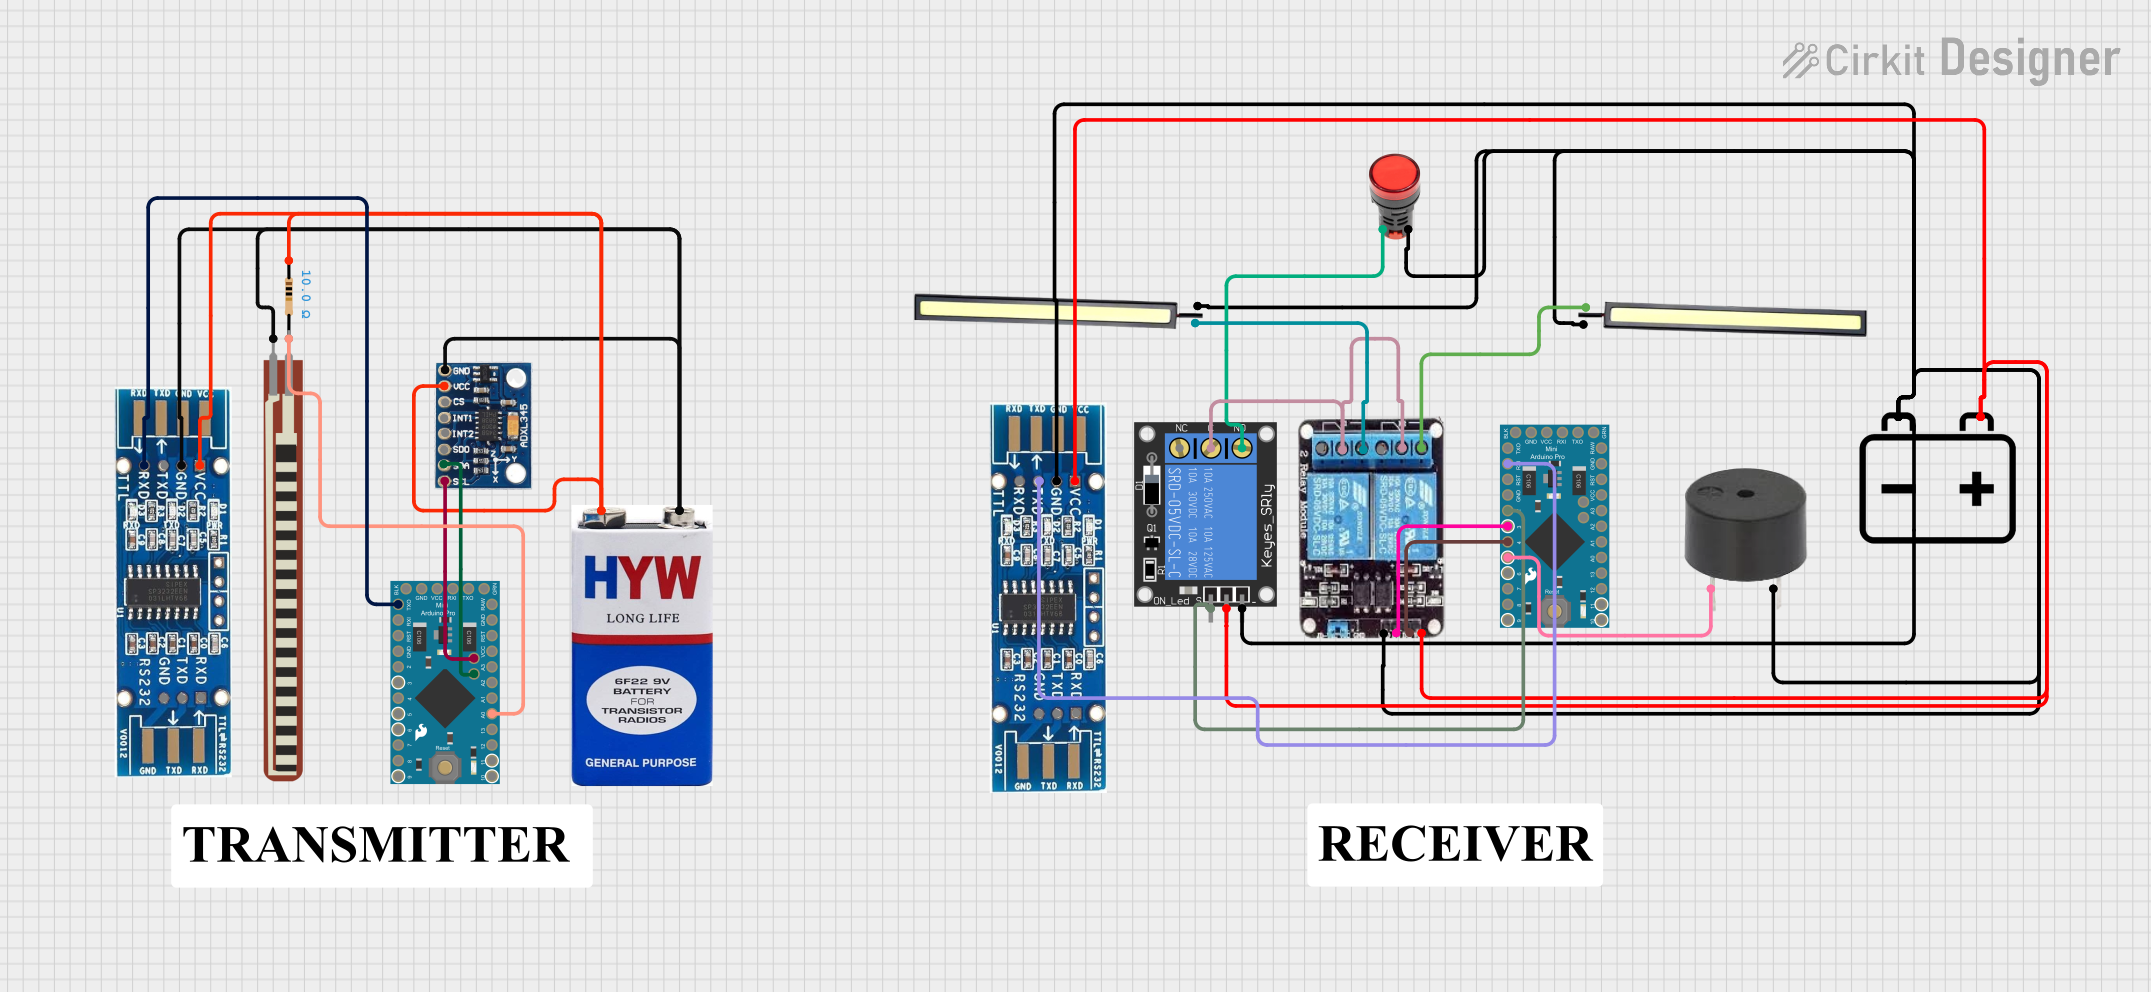
- Connecting microcontrollers (e.g., Arduino, Raspberry Pi) to RS232 devices such as modems, printers, or industrial equipment.
- Debugging and monitoring RS232 communication.
- Interfacing with legacy hardware in embedded systems.
- Serial communication in robotics and automation projects.
Technical Specifications
The Adafruit RS232 Pal is designed to provide reliable and efficient RS232 communication. Below are its key technical details:
Key Technical Details
| Parameter | Value |
|---|---|
| Operating Voltage | 3.3V or 5V (selectable) |
| RS232 Voltage Levels | ±12V (standard RS232 levels) |
| Logic Voltage Levels | 3.3V or 5V |
| Baud Rate Support | Up to 250 kbps |
| Dimensions | 1.3" x 0.7" (33mm x 18mm) |
| Operating Temperature | -40°C to 85°C |
Pin Configuration and Descriptions
The Adafruit RS232 Pal features a simple pinout for easy integration into your projects. Below is the pin configuration:
| Pin Name | Description |
|---|---|
| VCC | Power input (3.3V or 5V, depending on your microcontroller logic level). |
| GND | Ground connection. |
| TX | Transmit data from the microcontroller to the RS232 device. |
| RX | Receive data from the RS232 device to the microcontroller. |
| RTS | Request to Send (optional, for hardware flow control). |
| CTS | Clear to Send (optional, for hardware flow control). |
Usage Instructions
The Adafruit RS232 Pal is straightforward to use in your projects. Follow the steps below to integrate it into your circuit:
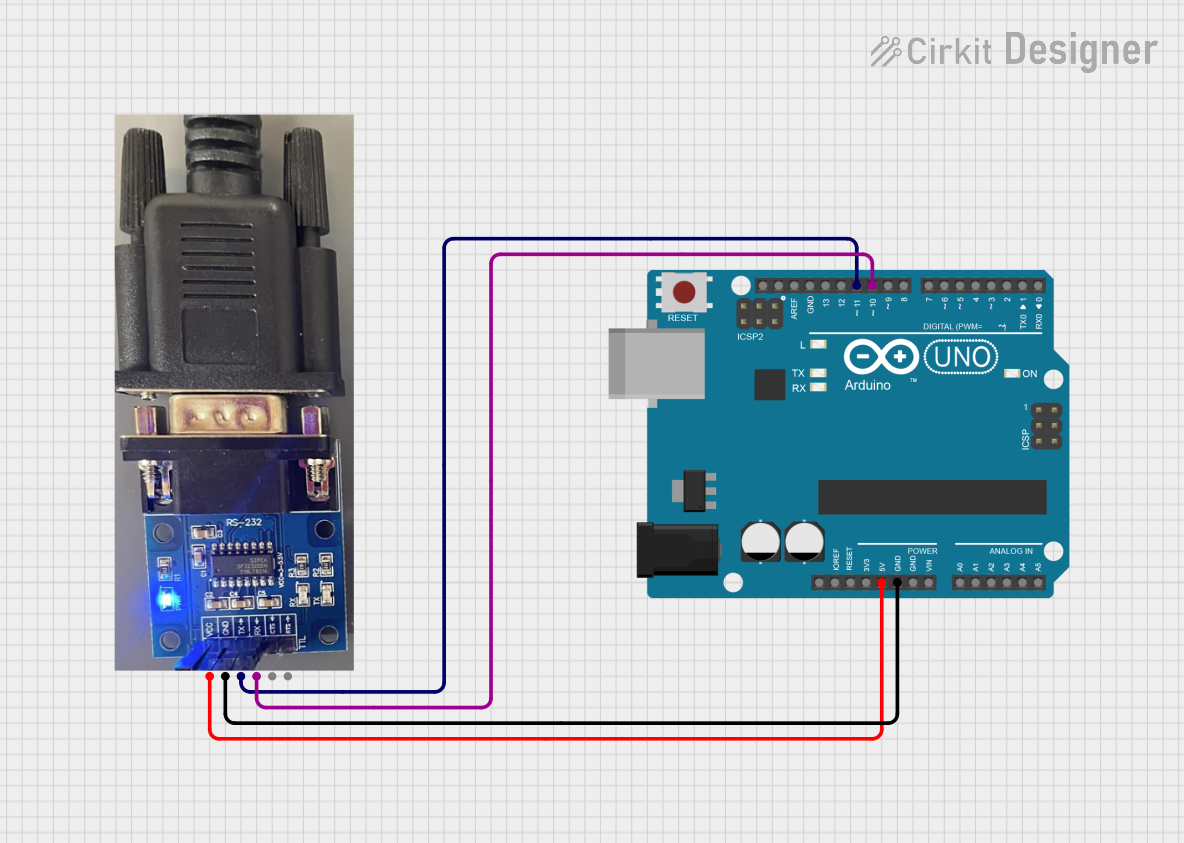
Step 1: Wiring the Module
- Power the Module: Connect the
VCCpin to the 3.3V or 5V power supply of your microcontroller. Ensure the voltage matches your microcontroller's logic level. - Ground Connection: Connect the
GNDpin to the ground of your microcontroller. - Data Connections:
- Connect the
TXpin of the RS232 Pal to theRXpin of your microcontroller. - Connect the
RXpin of the RS232 Pal to theTXpin of your microcontroller.
- Connect the
- Optional Flow Control: If your RS232 device requires hardware flow control, connect the
RTSandCTSpins accordingly.
Step 2: Configuring the Microcontroller
- Set the baud rate and serial communication parameters (e.g., data bits, stop bits, parity) to match the RS232 device's requirements.
- Use the appropriate serial communication library for your microcontroller (e.g.,
Serialfor Arduino).
Example: Using with Arduino UNO
Below is an example of how to use the Adafruit RS232 Pal with an Arduino UNO to send and receive data:
// Example: Sending and receiving data using Adafruit RS232 Pal with Arduino UNO

void setup() {
  Serial.begin(9600); // Initialize serial communication with the RS232 device
  Serial.println("RS232 Pal Test Initialized"); // Send a test message
}

void loop() {
  // Check if data is available from the RS232 device
  if (Serial.available() > 0) {
    char receivedChar = Serial.read(); // Read a character from the RS232 device
    Serial.print("Received: ");
    Serial.println(receivedChar); // Print the received character to the Serial Monitor
  }

  // Send a test message to the RS232 device every 2 seconds
  Serial.println("Hello RS232 Device!");
  delay(2000); // Wait for 2 seconds
}
Best Practices
- Ensure the RS232 Pal's
VCCvoltage matches your microcontroller's logic level (3.3V or 5V). - Use short, high-quality cables for RS232 connections to minimize signal degradation.
- If using hardware flow control, verify that the RS232 device supports it and configure the
RTSandCTSpins accordingly.
Troubleshooting and FAQs
Common Issues and Solutions
No Communication Between Microcontroller and RS232 Device:
- Verify that the
TXandRXpins are correctly connected (crossed:TXtoRXandRXtoTX). - Check the baud rate and serial communication settings (e.g., parity, stop bits) to ensure they match the RS232 device's requirements.
- Ensure the RS232 Pal is powered correctly (3.3V or 5V on
VCC).
- Verify that the
Data Corruption or Noise:
- Use shielded cables for RS232 connections to reduce electromagnetic interference.
- Ensure the cable length is within the recommended range for RS232 communication (typically less than 15 meters).
RS232 Device Not Responding:
- Confirm that the RS232 device is powered and operational.
- If using hardware flow control, ensure the
RTSandCTSpins are properly connected and configured.
FAQs
Q: Can I use the Adafruit RS232 Pal with a Raspberry Pi?
A: Yes, the RS232 Pal is compatible with Raspberry Pi. Connect the TX, RX, VCC, and GND pins to the corresponding GPIO pins on the Raspberry Pi. Ensure the VCC voltage is set to 3.3V.
Q: Does the RS232 Pal support software flow control (XON/XOFF)?
A: The RS232 Pal primarily supports hardware flow control via the RTS and CTS pins. Software flow control must be implemented in your microcontroller's firmware.
Q: What is the maximum baud rate supported by the RS232 Pal?
A: The RS232 Pal supports baud rates up to 250 kbps, which is sufficient for most RS232 applications.
By following this documentation, you can effectively integrate the Adafruit RS232 Pal into your projects and establish reliable RS232 communication.