Cirkit Designer Logo
Cirkit Designer
Your all-in-one circuit design IDE
Home / 
Component Documentation

How to Use TPS62827 Buck Converter: Examples, Pinouts, and Specs

Image of TPS62827 Buck Converter
Cirkit Designer LogoDesign with TPS62827 Buck Converter in Cirkit Designer

Introduction

The TPS62827 is a highly efficient synchronous step-down DC-DC converter from Texas Instruments, designed to provide stable power to electronic devices. It is particularly well-suited for battery-powered applications due to its high efficiency and low quiescent current. This buck converter can be used in a variety of applications, including portable electronics, wireless peripherals, and IoT devices.

Explore Projects Built with TPS62827 Buck Converter

Use Cirkit Designer to design, explore, and prototype these projects online. Some projects support real-time simulation. Click "Open Project" to start designing instantly!
Multi-Stage Voltage Regulation and Indicator LED Circuit
Image of Subramanyak_Power_Circuit: A project utilizing TPS62827 Buck Converter in a practical application
This circuit is designed for power management, featuring buck and boost converters for voltage adjustment, and linear regulators for stable voltage output. It includes LEDs for status indication, and terminal blocks for external connections.
Cirkit Designer LogoOpen Project in Cirkit Designer
Battery-Powered UPS with Step-Down Buck Converter and BMS
Image of Mini ups: A project utilizing TPS62827 Buck Converter in a practical application
This circuit is a power management system that steps down a 240V AC input to a lower DC voltage using a buck converter, which then powers a 40W UPS. The UPS is controlled by a rocker switch and is backed up by a battery management system (BMS) connected to three 3.7V batteries in series, ensuring continuous power supply.
Cirkit Designer LogoOpen Project in Cirkit Designer
Battery-Powered Arduino UNO and ESP-8266 Smart Controller with LCD and RTC
Image of Ogie Diagram: A project utilizing TPS62827 Buck Converter in a practical application
This circuit is a power management and control system that uses a 12V power supply and a 18650 Li-ion battery pack to provide a stable 5V output through a step-down buck converter. It includes an Arduino UNO, an ESP-8266 controller, a DS1307 RTC module, and a 20x4 I2C LCD display for monitoring and control purposes. The ULN2003A breakout board is used for driving higher current loads.
Cirkit Designer LogoOpen Project in Cirkit Designer
Battery-Powered Boost Converter with USB Type-C and BMS
Image of Weird Case: A project utilizing TPS62827 Buck Converter in a practical application
This circuit is a power management and conversion system that includes a boost converter, battery management system (BMS), and various MOSFETs and passive components. It is designed to regulate and boost the voltage from a 2000mAh battery, providing stable power output through a USB Type C interface. The circuit also includes protection and switching mechanisms to ensure safe and efficient power delivery.
Cirkit Designer LogoOpen Project in Cirkit Designer

Explore Projects Built with TPS62827 Buck Converter

Use Cirkit Designer to design, explore, and prototype these projects online. Some projects support real-time simulation. Click "Open Project" to start designing instantly!
Image of Subramanyak_Power_Circuit: A project utilizing TPS62827 Buck Converter in a practical application
Multi-Stage Voltage Regulation and Indicator LED Circuit
This circuit is designed for power management, featuring buck and boost converters for voltage adjustment, and linear regulators for stable voltage output. It includes LEDs for status indication, and terminal blocks for external connections.
Cirkit Designer LogoOpen Project in Cirkit Designer
Image of Mini ups: A project utilizing TPS62827 Buck Converter in a practical application
Battery-Powered UPS with Step-Down Buck Converter and BMS
This circuit is a power management system that steps down a 240V AC input to a lower DC voltage using a buck converter, which then powers a 40W UPS. The UPS is controlled by a rocker switch and is backed up by a battery management system (BMS) connected to three 3.7V batteries in series, ensuring continuous power supply.
Cirkit Designer LogoOpen Project in Cirkit Designer
Image of Ogie Diagram: A project utilizing TPS62827 Buck Converter in a practical application
Battery-Powered Arduino UNO and ESP-8266 Smart Controller with LCD and RTC
This circuit is a power management and control system that uses a 12V power supply and a 18650 Li-ion battery pack to provide a stable 5V output through a step-down buck converter. It includes an Arduino UNO, an ESP-8266 controller, a DS1307 RTC module, and a 20x4 I2C LCD display for monitoring and control purposes. The ULN2003A breakout board is used for driving higher current loads.
Cirkit Designer LogoOpen Project in Cirkit Designer
Image of Weird Case: A project utilizing TPS62827 Buck Converter in a practical application
Battery-Powered Boost Converter with USB Type-C and BMS
This circuit is a power management and conversion system that includes a boost converter, battery management system (BMS), and various MOSFETs and passive components. It is designed to regulate and boost the voltage from a 2000mAh battery, providing stable power output through a USB Type C interface. The circuit also includes protection and switching mechanisms to ensure safe and efficient power delivery.
Cirkit Designer LogoOpen Project in Cirkit Designer

Technical Specifications

Key Technical Details

  • Input Voltage Range: 2.4V to 5.5V
  • Output Voltage Range: 0.6V to VIN
  • Maximum Output Current: 2A
  • Switching Frequency: 1.8MHz (typical)
  • Quiescent Current: 1.5µA (typical)
  • Efficiency: Up to 95%
  • Operating Temperature Range: -40°C to 125°C

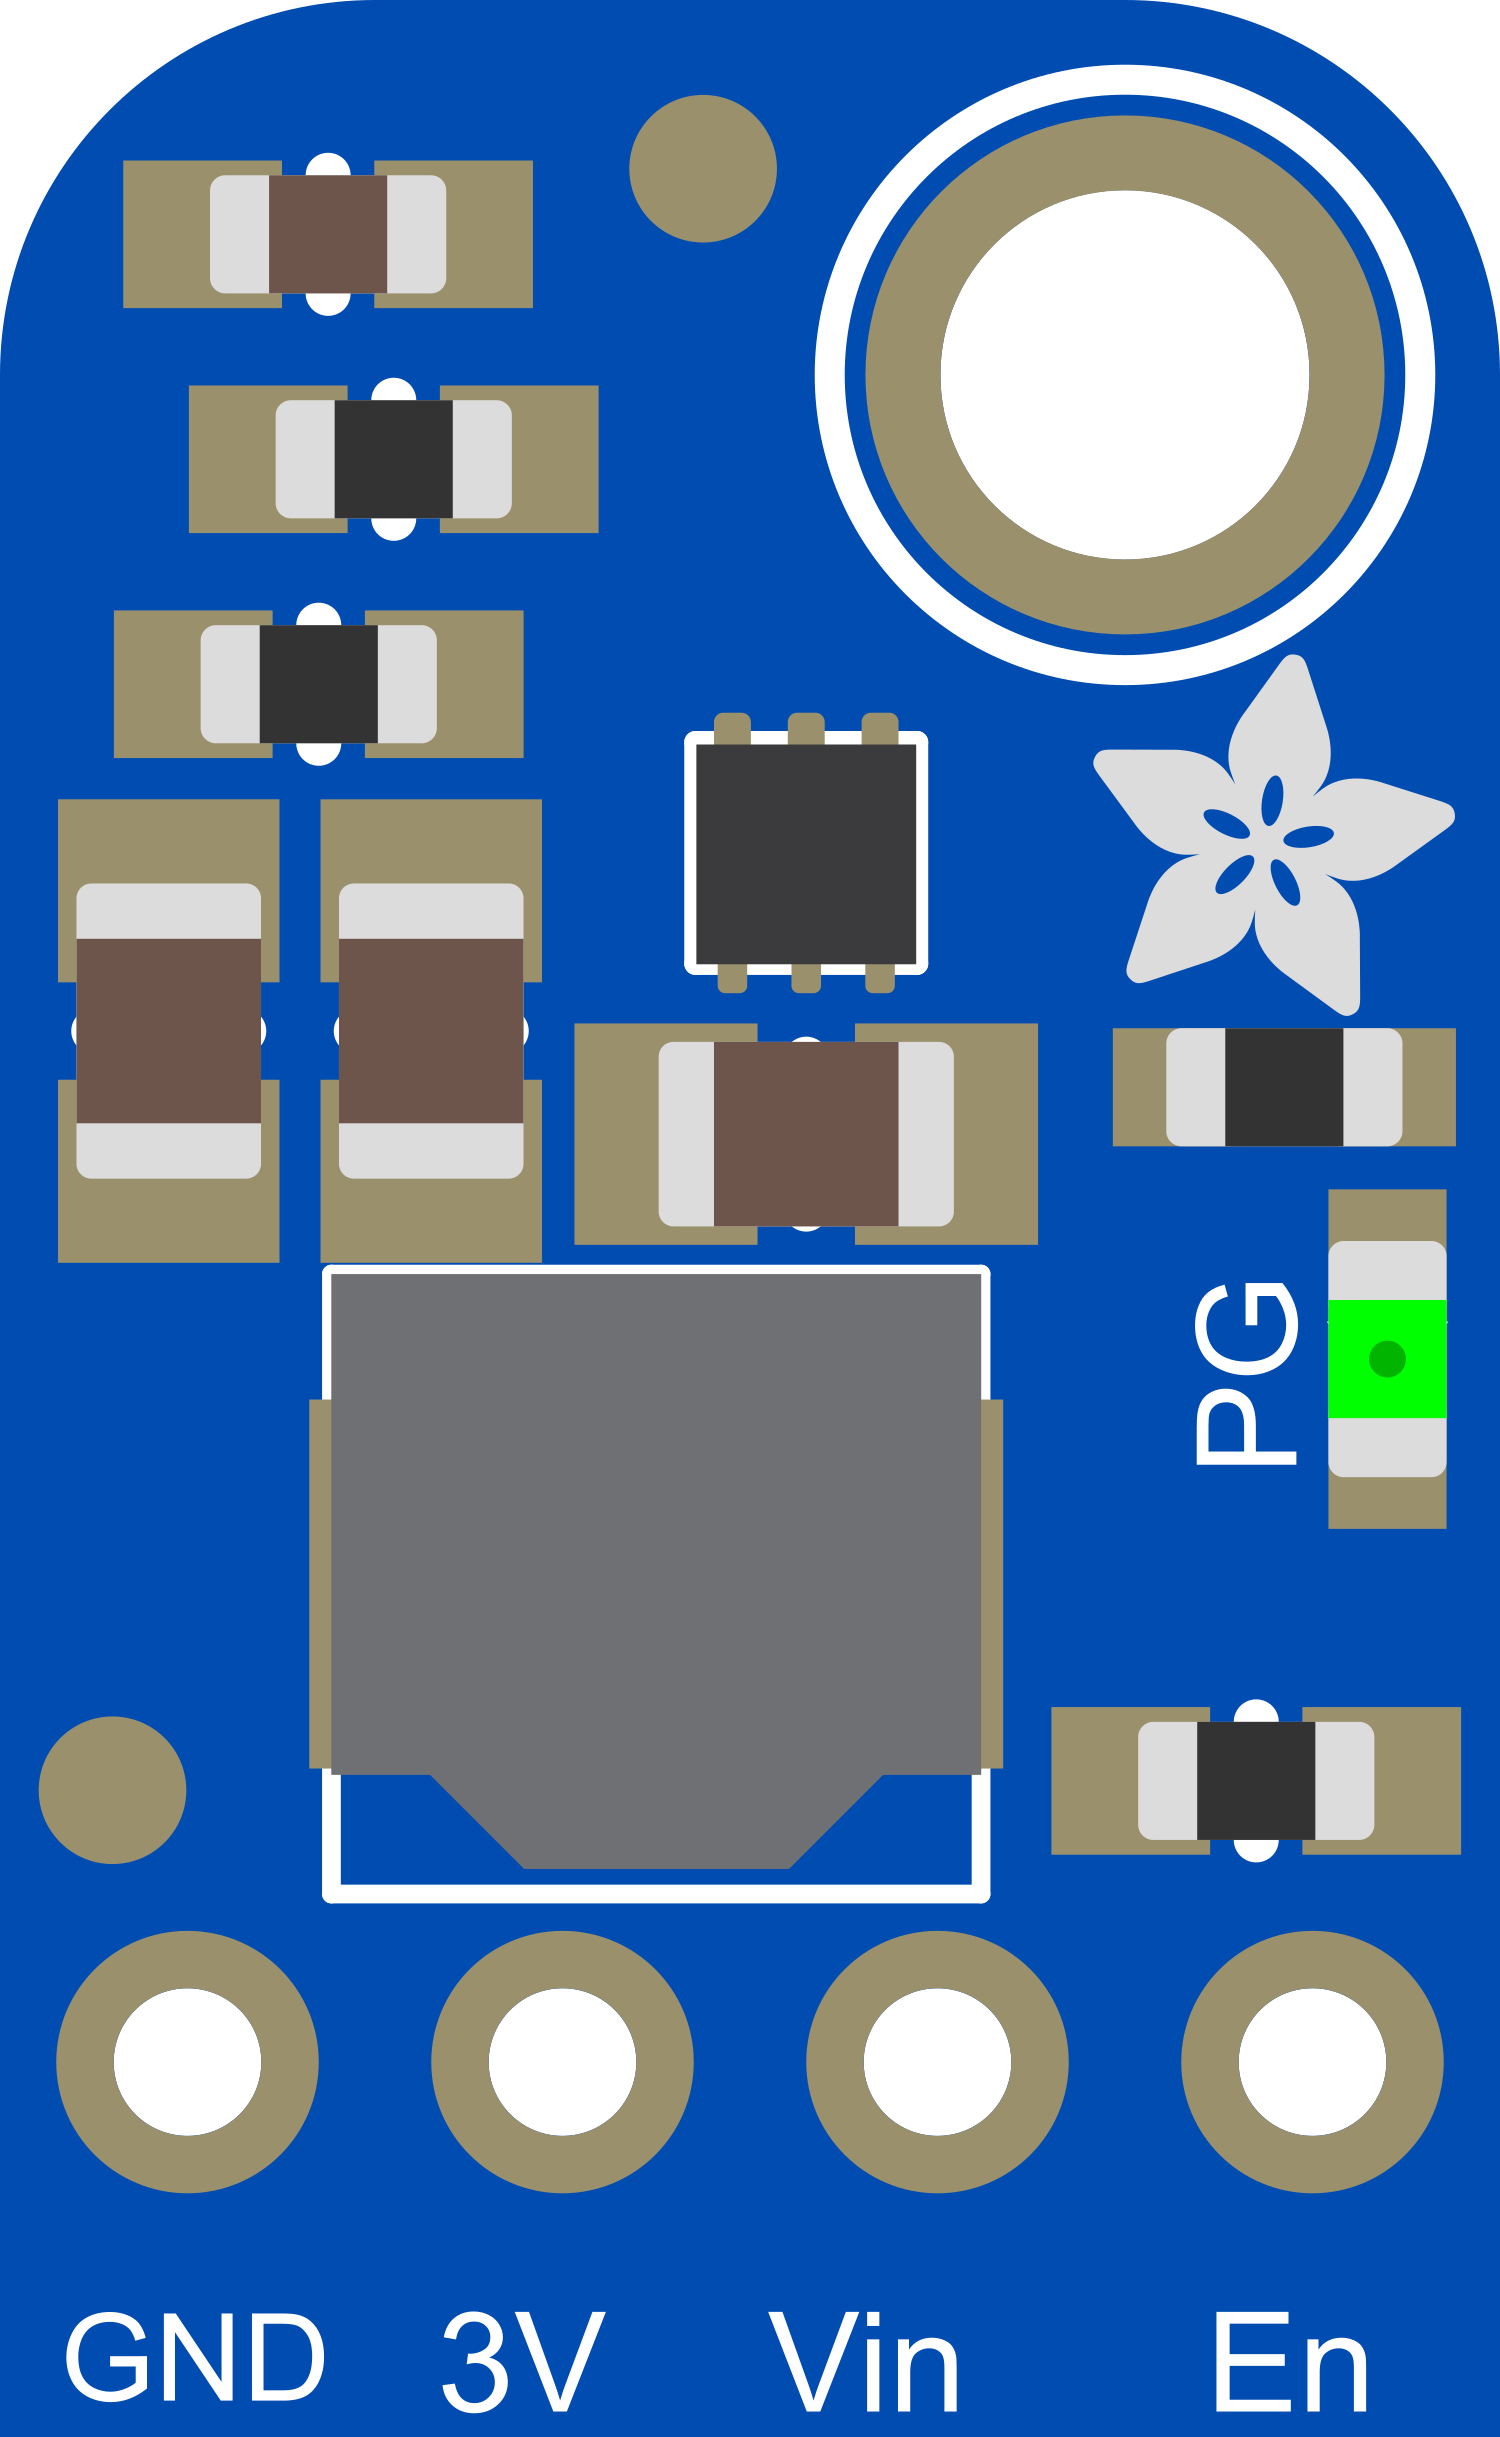
Pin Configuration and Descriptions

Pin Number Name Description
1 VIN Input voltage supply. Connect to the source of the input power.
2 GND Ground. Connect to the system ground.
3 SW Switch node. Connect to the inductor.
4 FB Feedback input. Connect to the output voltage divider.
5 EN Enable pin. Drive high to turn on the converter, low to turn it off.
6 VOUT Output voltage. Connect to the load.

Usage Instructions

How to Use the Component in a Circuit

  1. Input Supply: Connect a voltage source within the specified input voltage range to the VIN pin.
  2. Ground Connection: Connect the GND pin to the system ground.
  3. Inductor Connection: Connect an appropriate inductor to the SW pin. The inductor value is determined by the desired output current and switching frequency.
  4. Feedback Network: Connect a voltage divider from VOUT to FB to set the output voltage. The values of the resistors in the divider will determine the output voltage as per the feedback voltage specification.
  5. Enable Pin: Connect the EN pin to a logic high level to enable the converter. If you wish to control the enable function programmatically, connect it to a GPIO pin on a microcontroller.
  6. Output Capacitor: Connect a capacitor from VOUT to GND to filter the output and improve stability.

Important Considerations and Best Practices

  • Ensure that all components, especially the inductor and capacitors, are rated for the desired output current and voltage.
  • Place the input and output capacitors as close to the TPS62827 pins as possible to minimize noise and improve stability.
  • Use a multilayer PCB with a dedicated ground plane for better thermal performance and noise immunity.
  • If the converter is used in a noise-sensitive application, a ferrite bead can be added in series with the VIN pin to reduce input noise.

Troubleshooting and FAQs

Common Issues

  • Output Voltage is Too Low or Too High: Check the feedback voltage divider resistors for correct values and tolerances.
  • Converter Does Not Start: Ensure the EN pin is driven high and that the input voltage is within the specified range.
  • Excessive Noise on Output: Verify the layout of the input and output capacitors, and check if the inductor is properly rated.

Solutions and Tips for Troubleshooting

  • Double-check all connections and component values.
  • Measure the voltage at the EN pin to ensure it is above the enable threshold.
  • Use an oscilloscope to check for stable operation at the SW pin.
  • If the device is overheating, consider improving the thermal design or reducing the load.

FAQs

Q: Can the TPS62827 be used with an input voltage higher than 5.5V? A: No, exceeding the maximum input voltage can damage the converter.

Q: Is it necessary to use an external diode with the TPS62827? A: No, the TPS62827 has integrated synchronous rectification, so an external diode is not required.

Q: How do I choose the correct inductor value? A: The inductor value depends on the desired output current and switching frequency. Refer to the TPS62827 datasheet for guidance on inductor selection.

Q: What is the purpose of the feedback network? A: The feedback network sets the output voltage by providing a reference to the internal error amplifier.

Example Connection to an Arduino UNO

// Example code to control the TPS62827 enable pin using an Arduino UNO

const int enablePin = 7; // Connect the EN pin of TPS62827 to digital pin 7

void setup() {
  pinMode(enablePin, OUTPUT); // Set the enable pin as an output
}

void loop() {
  digitalWrite(enablePin, HIGH); // Turn on the TPS62827
  delay(5000);                  // Wait for 5 seconds
  digitalWrite(enablePin, LOW);  // Turn off the TPS62827
  delay(5000);                  // Wait for 5 seconds
}

This example demonstrates how to turn the TPS62827 on and off using an Arduino UNO. The enable pin (EN) of the TPS62827 is controlled by a digital output pin on the Arduino. When the enable pin is driven high, the buck converter is turned on, and when it is driven low, the converter is turned off. This can be useful for power-saving modes in battery-operated devices.