How to Use AC Bulb: Examples, Pinouts, and Specs

Introduction
An AC Bulb is a common electrical component that emits light when an alternating current (AC) passes through its filament. These bulbs are widely used in residential, commercial, and industrial settings for illumination purposes. They come in various shapes, sizes, and power ratings, suitable for different applications ranging from desk lamps to street lights.
Explore Projects Built with AC Bulb
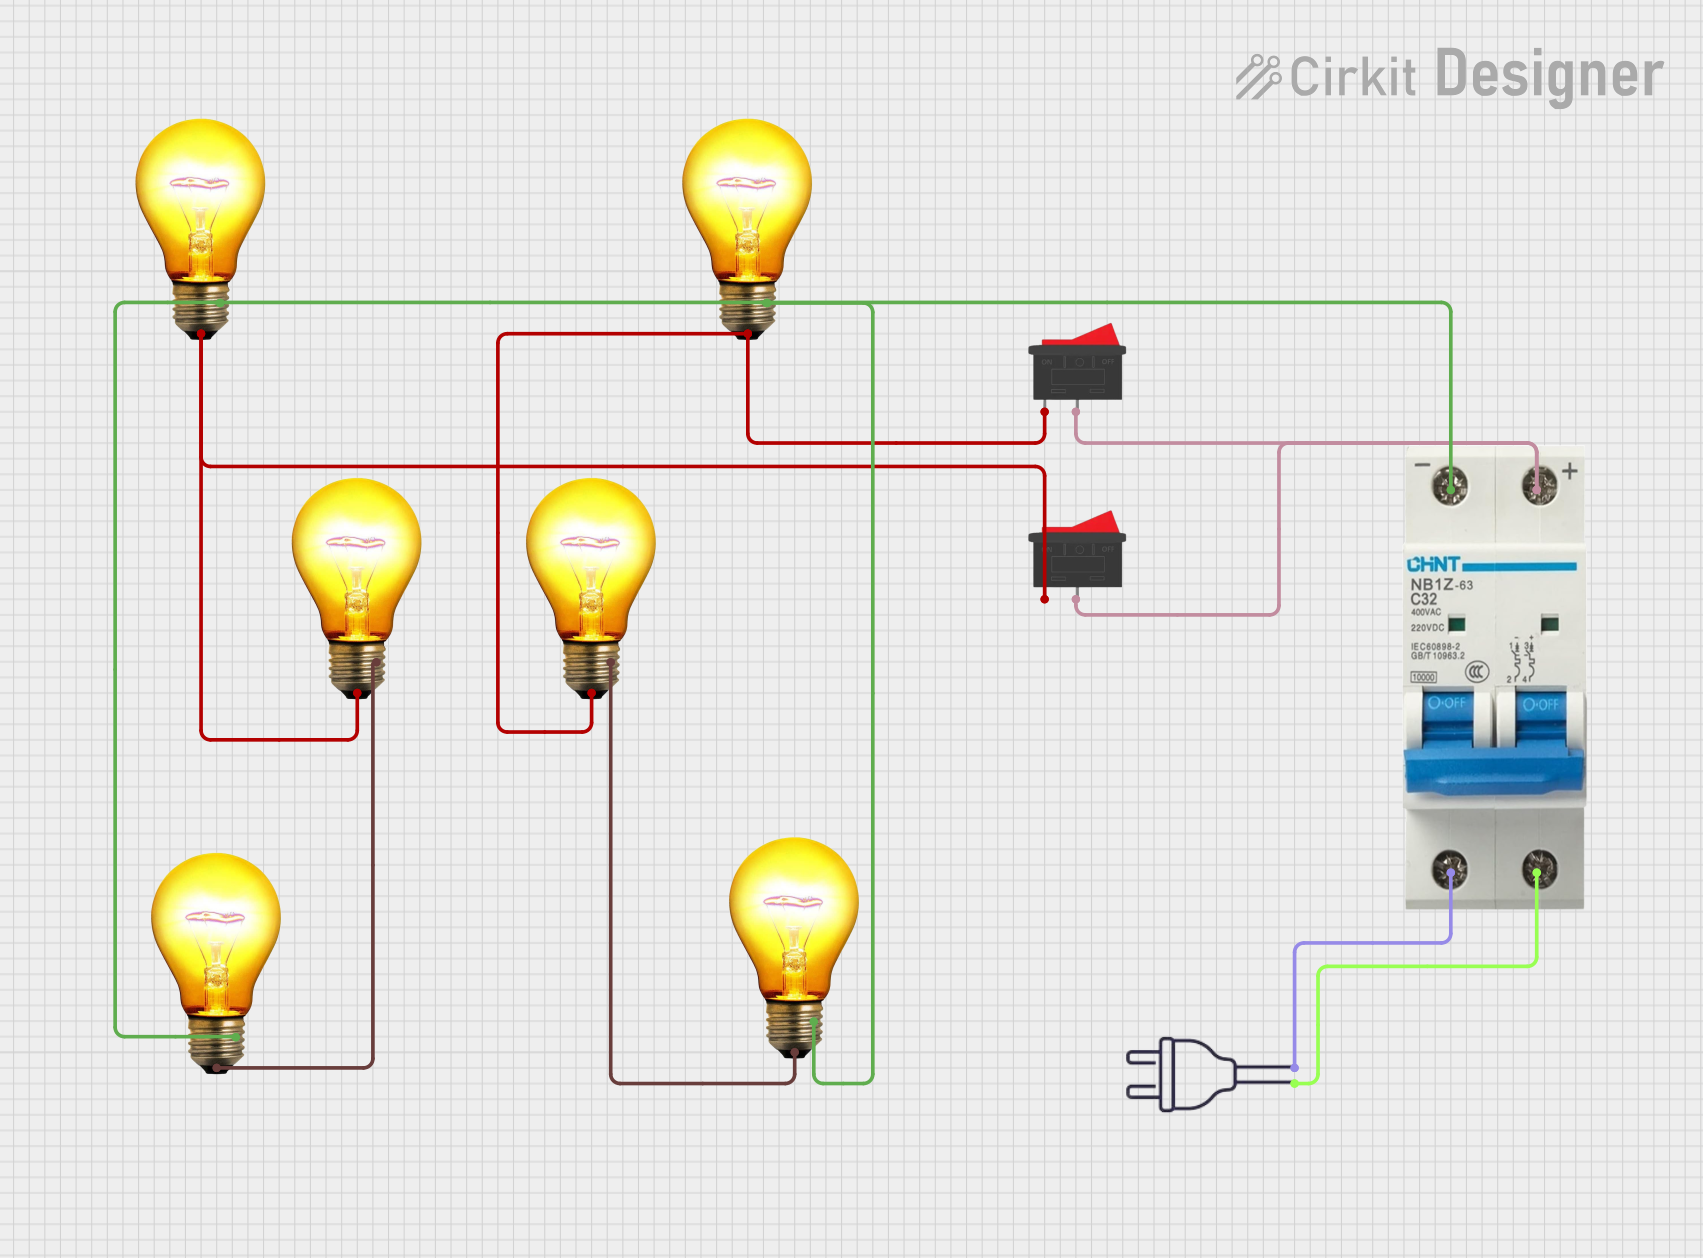
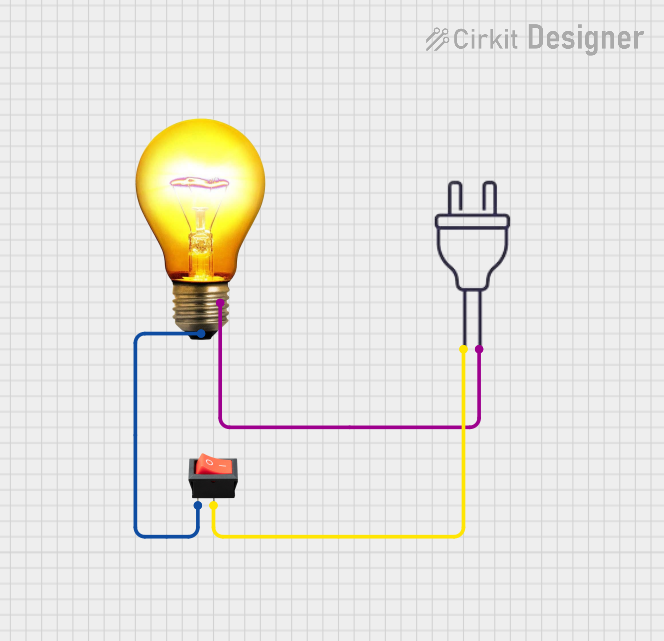
Explore Projects Built with AC Bulb
Technical Specifications
General Characteristics
- Type: Incandescent, Halogen, CFL (Compact Fluorescent Lamp), or LED (Light Emitting Diode)
- Voltage Rating: Typically 110-120V or 220-240V (depending on the region)
- Power Rating: Ranges from less than 1 Watt to over 100 Watts
- Base Type: Screw (E26, E27, etc.), Bayonet (B22), Pin type, and others
- Luminous Efficacy: Varies by bulb type (e.g., 10-17 lm/W for incandescent, up to 100 lm/W for LED)
- Lifespan: Varies by bulb type (e.g., 1,000 hours for incandescent, up to 50,000 hours for LED)
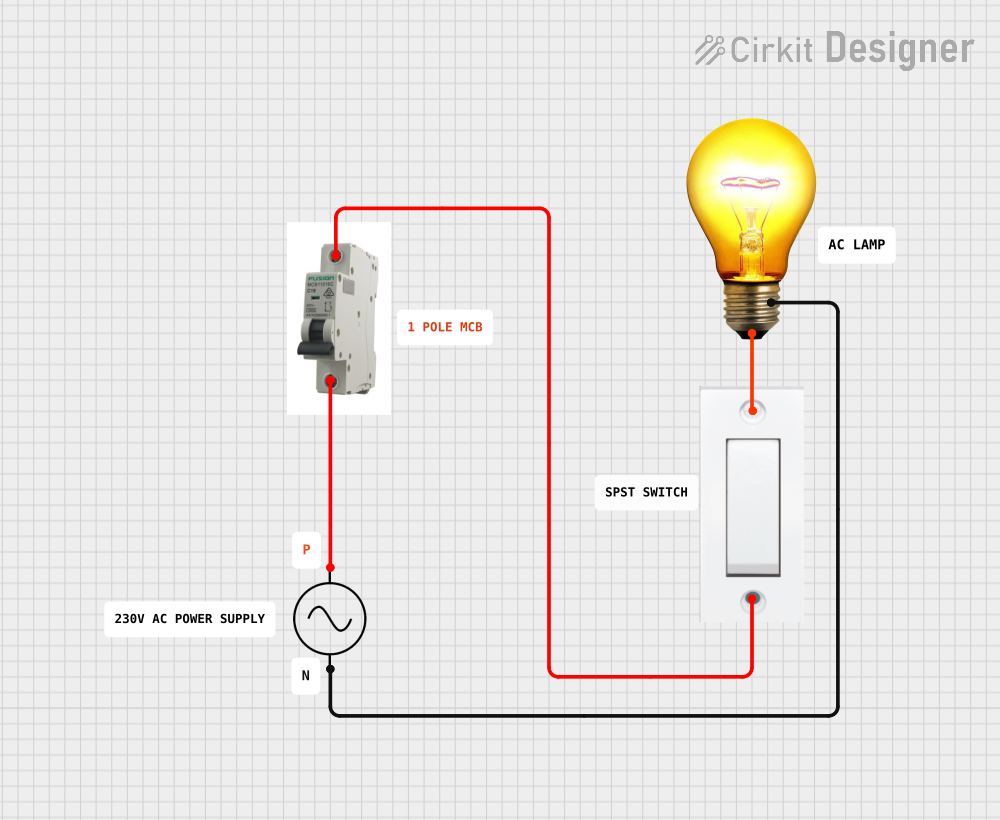
Pin Configuration and Descriptions
Since AC bulbs typically have a screw or bayonet base, they do not have a pin configuration in the same way that electronic components like integrated circuits do. Instead, they have contacts that connect to the AC power supply:
| Contact Type | Description |
|---|---|
| Live (Phase) | Connects to the live wire of the AC supply |
| Neutral | Connects to the neutral wire of the AC supply |
Usage Instructions
Installing an AC Bulb
- Safety First: Ensure the power to the socket is turned off before installing the bulb.
- Bulb Handling: Handle the bulb by its base to avoid getting oils from your skin on the glass, which can shorten its lifespan.
- Correct Base: Match the bulb base with the socket type (screw or bayonet).
- Inserting the Bulb:
- For screw base: Insert the bulb into the socket and turn it clockwise until it is snug.
- For bayonet base: Insert the bulb into the socket, push down slightly, and turn it clockwise until it locks into place.
- Power On: Turn on the power and switch on the light to test the bulb.
Important Considerations and Best Practices
- Voltage Match: Ensure the bulb's voltage rating matches the supply voltage.
- Dimmer Compatibility: If using a dimmer switch, ensure the bulb is dimmable and compatible with the dimmer.
- Outdoor Use: For outdoor applications, ensure the bulb is rated for outdoor use.
- Heat Sensitivity: Some bulbs, like LEDs, are sensitive to heat; ensure adequate ventilation around the bulb.
Troubleshooting and FAQs
Common Issues
- Bulb Does Not Light Up:
- Check if the power supply to the socket is on.
- Ensure the bulb is properly installed in the socket.
- Verify that the bulb is not burned out by testing it in a different socket.
- Flickering Light:
- Tighten the bulb in its socket.
- Check for loose wiring in the fixture or switch.
- If using a dimmer, ensure it is compatible with the bulb type.
FAQs
Q: Can I use a higher wattage bulb than what my fixture specifies? A: No, you should always use a bulb with a wattage equal to or less than what is specified for the fixture to prevent overheating.
Q: Are AC bulbs dimmable? A: Not all AC bulbs are dimmable. Check the bulb's specifications to ensure it is compatible with dimmer switches.
Q: How do I dispose of used AC bulbs? A: Incandescent bulbs can be disposed of in regular trash. CFLs and certain other types should be recycled due to the presence of small amounts of hazardous materials.
Q: Why does my LED bulb not last as long as advertised? A: The lifespan of an LED bulb can be affected by factors such as voltage fluctuations, high ambient temperatures, and enclosed fixtures that do not provide adequate heat dissipation.
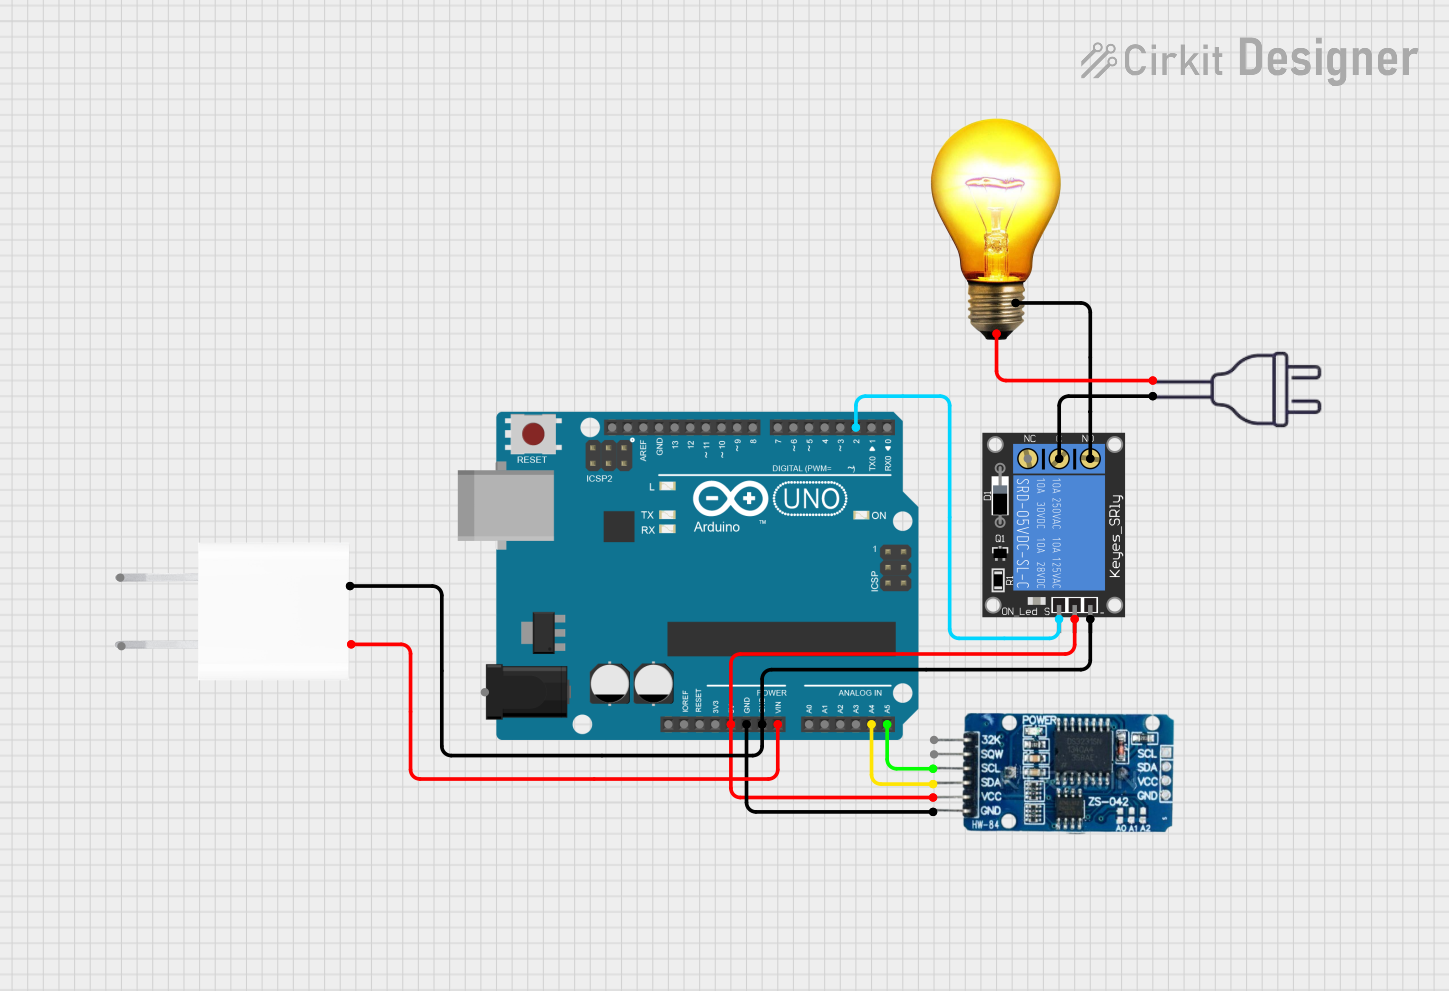
Example Arduino UNO Code for AC Bulb Control
While an Arduino UNO operates on DC power and cannot directly control an AC bulb, it can be used to control a relay that switches AC power to the bulb. Below is an example code snippet for turning an AC bulb on and off using a relay module connected to an Arduino UNO.
// Define the relay control pin
const int relayPin = 2;

void setup() {
  // Set the relay pin as an output
  pinMode(relayPin, OUTPUT);
}

void loop() {
  // Turn on the AC bulb by setting the relay to HIGH
  digitalWrite(relayPin, HIGH);
  delay(5000); // Keep the bulb on for 5 seconds

  // Turn off the AC bulb by setting the relay to LOW
  digitalWrite(relayPin, LOW);
  delay(5000); // Keep the bulb off for 5 seconds
}
Note: This code assumes the use of a normally open (NO) relay. When the relayPin is set to HIGH, the relay closes the circuit, allowing AC power to flow to the bulb. When set to LOW, the relay opens the circuit, cutting off power to the bulb. Always ensure that the relay used is rated for the AC voltage and current required by the bulb.