The 12V Battery Pack (Manufacturer: Arduino, Part ID: UNO) is a versatile power source designed to provide a nominal voltage of 12 volts. It is available in both rechargeable and non-rechargeable variants, making it suitable for a wide range of applications. This battery pack is commonly used to power electronic devices, circuits, and microcontroller-based projects, including Arduino boards. Its compact design and reliable performance make it an essential component for portable and stationary systems.
Explore Projects Built with 12V Battery Pack
Use Cirkit Designer to design, explore, and prototype these projects online. Some projects support real-time simulation. Click "Open Project" to start designing instantly!
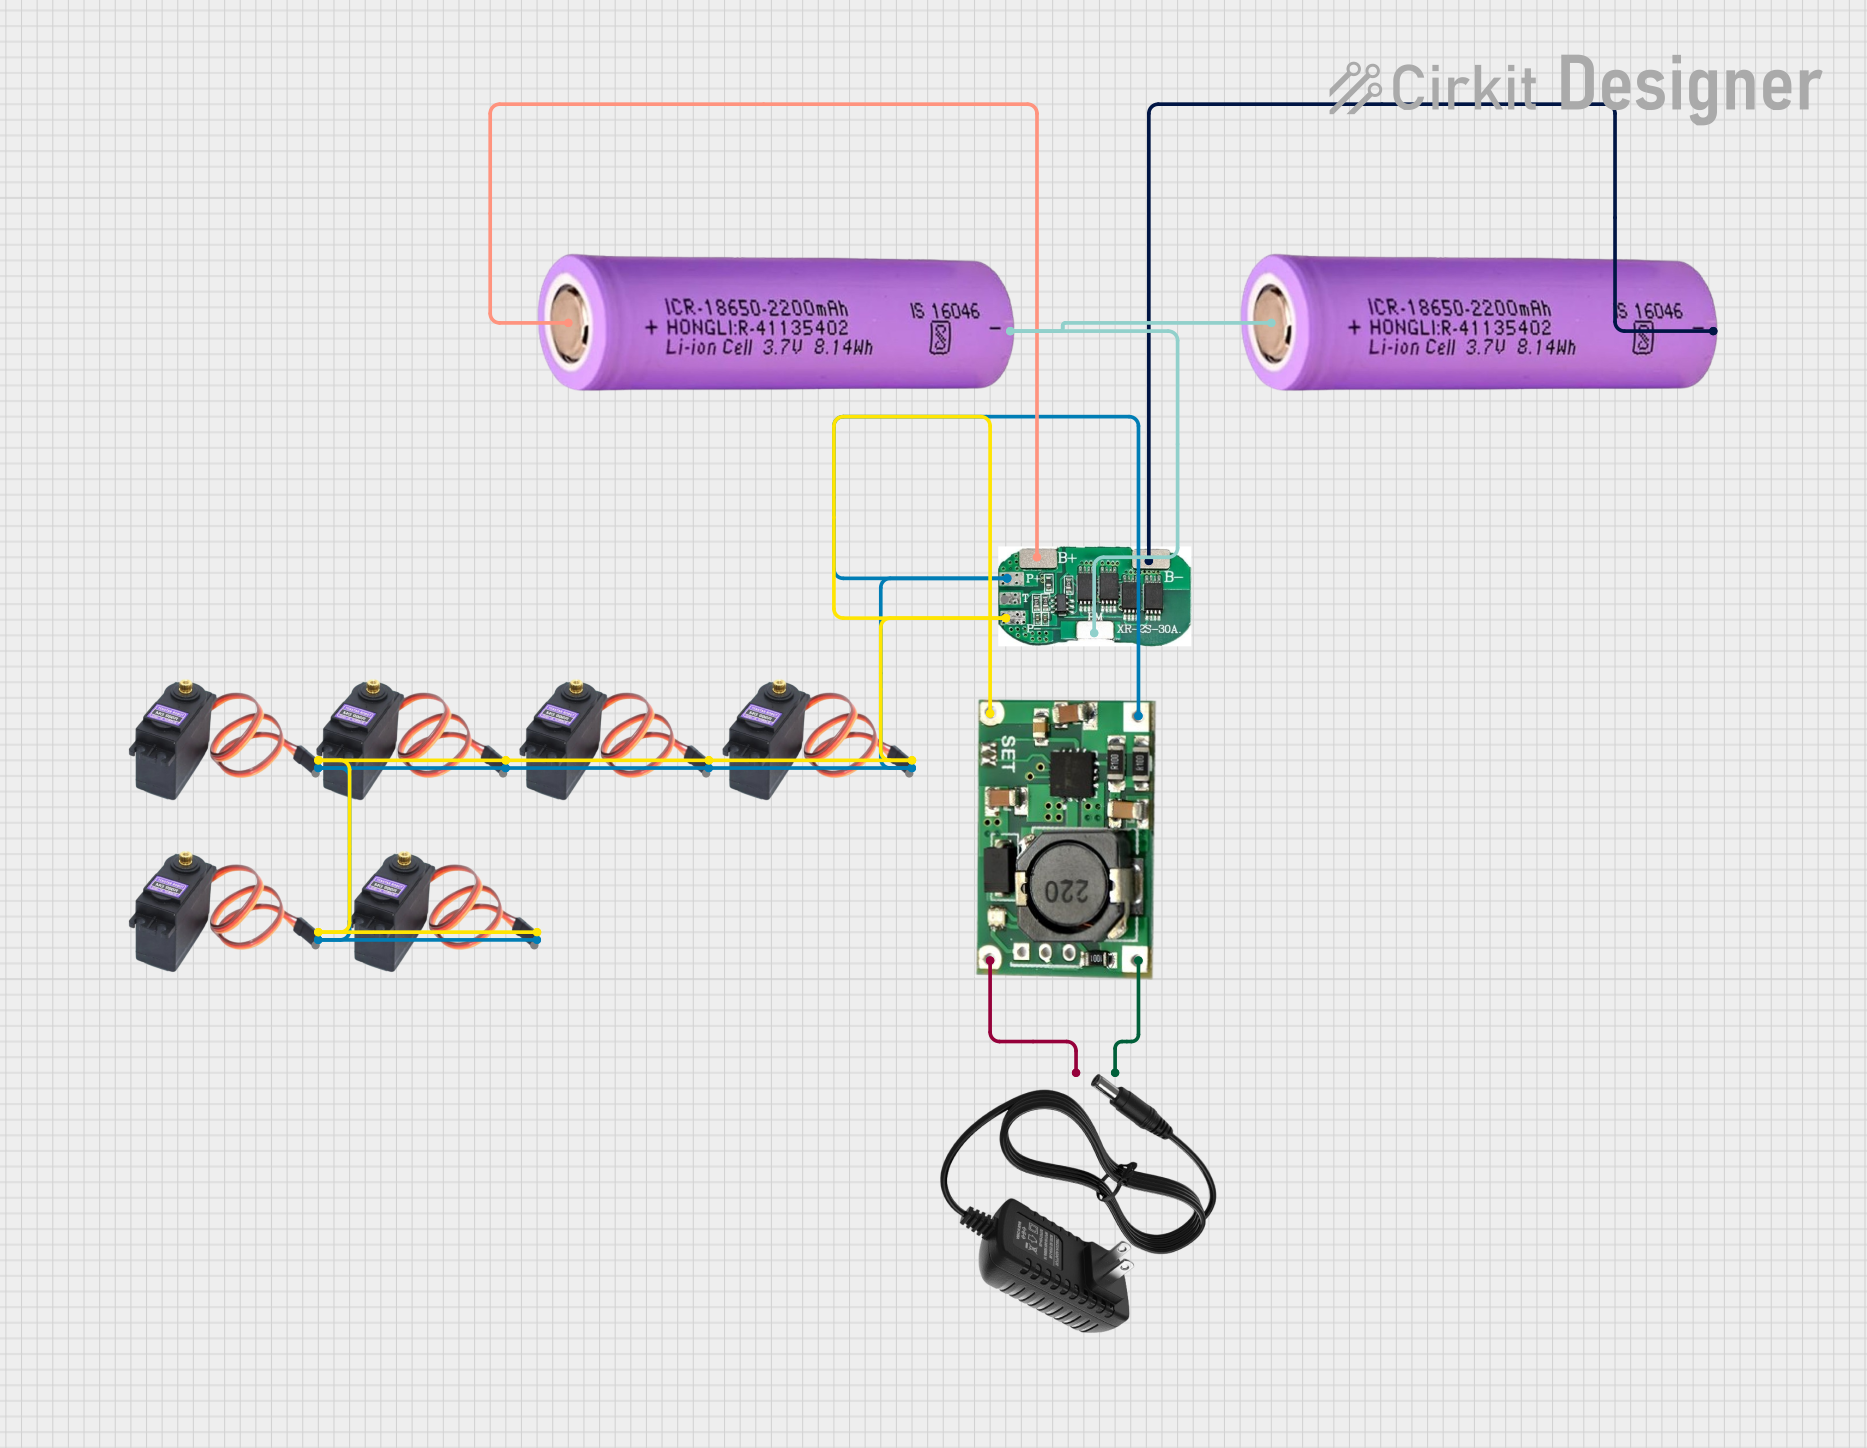
This circuit is a battery management and charging system for a 2S lithium-ion battery pack, which powers multiple MG996R servos. The TP5100 module charges the battery pack from a 12V power supply, while the 2S 30A BMS ensures safe operation and distribution of power to the servos.
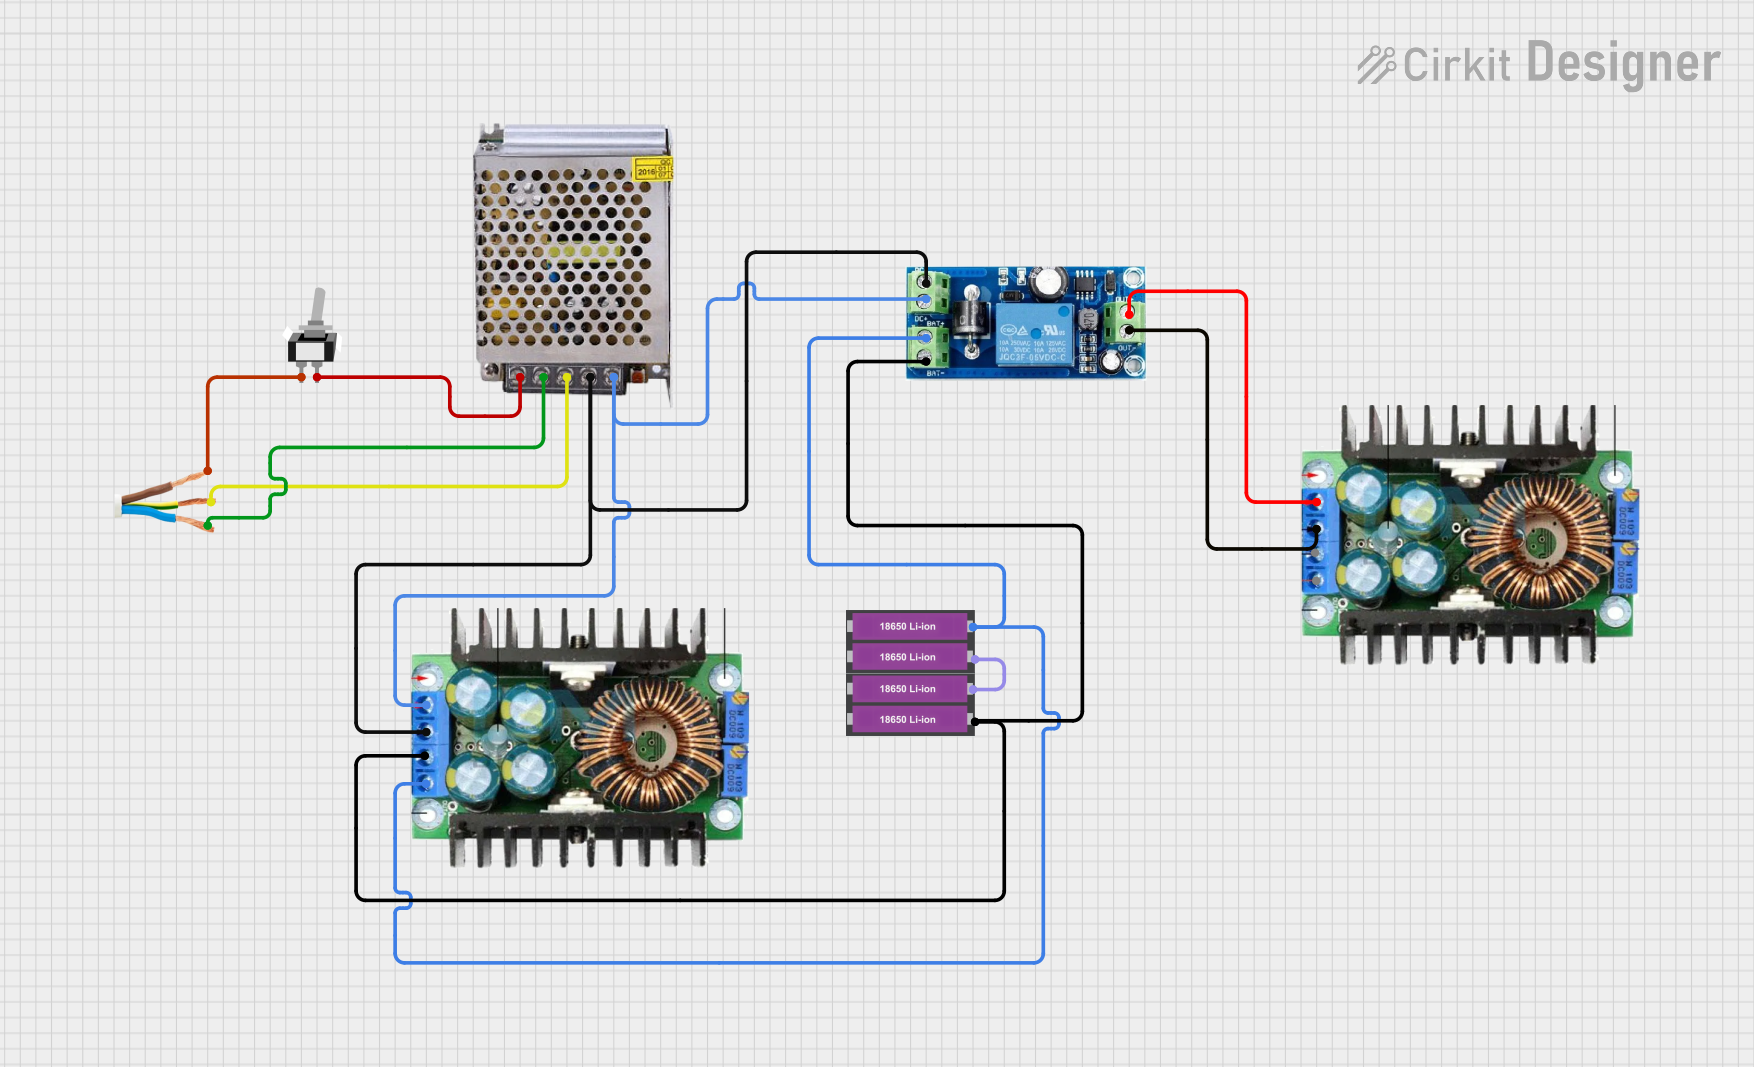
This circuit is designed to provide an uninterruptible power supply (UPS) system with a 12V DC output. It includes a 12V 5A power supply connected to an AC source through a toggle switch, which charges a pair of 18650 Li-ion batteries via a voltage regulator (XL4016). The UPS module ensures a continuous power supply to the load by switching between the power supply and the battery bank.
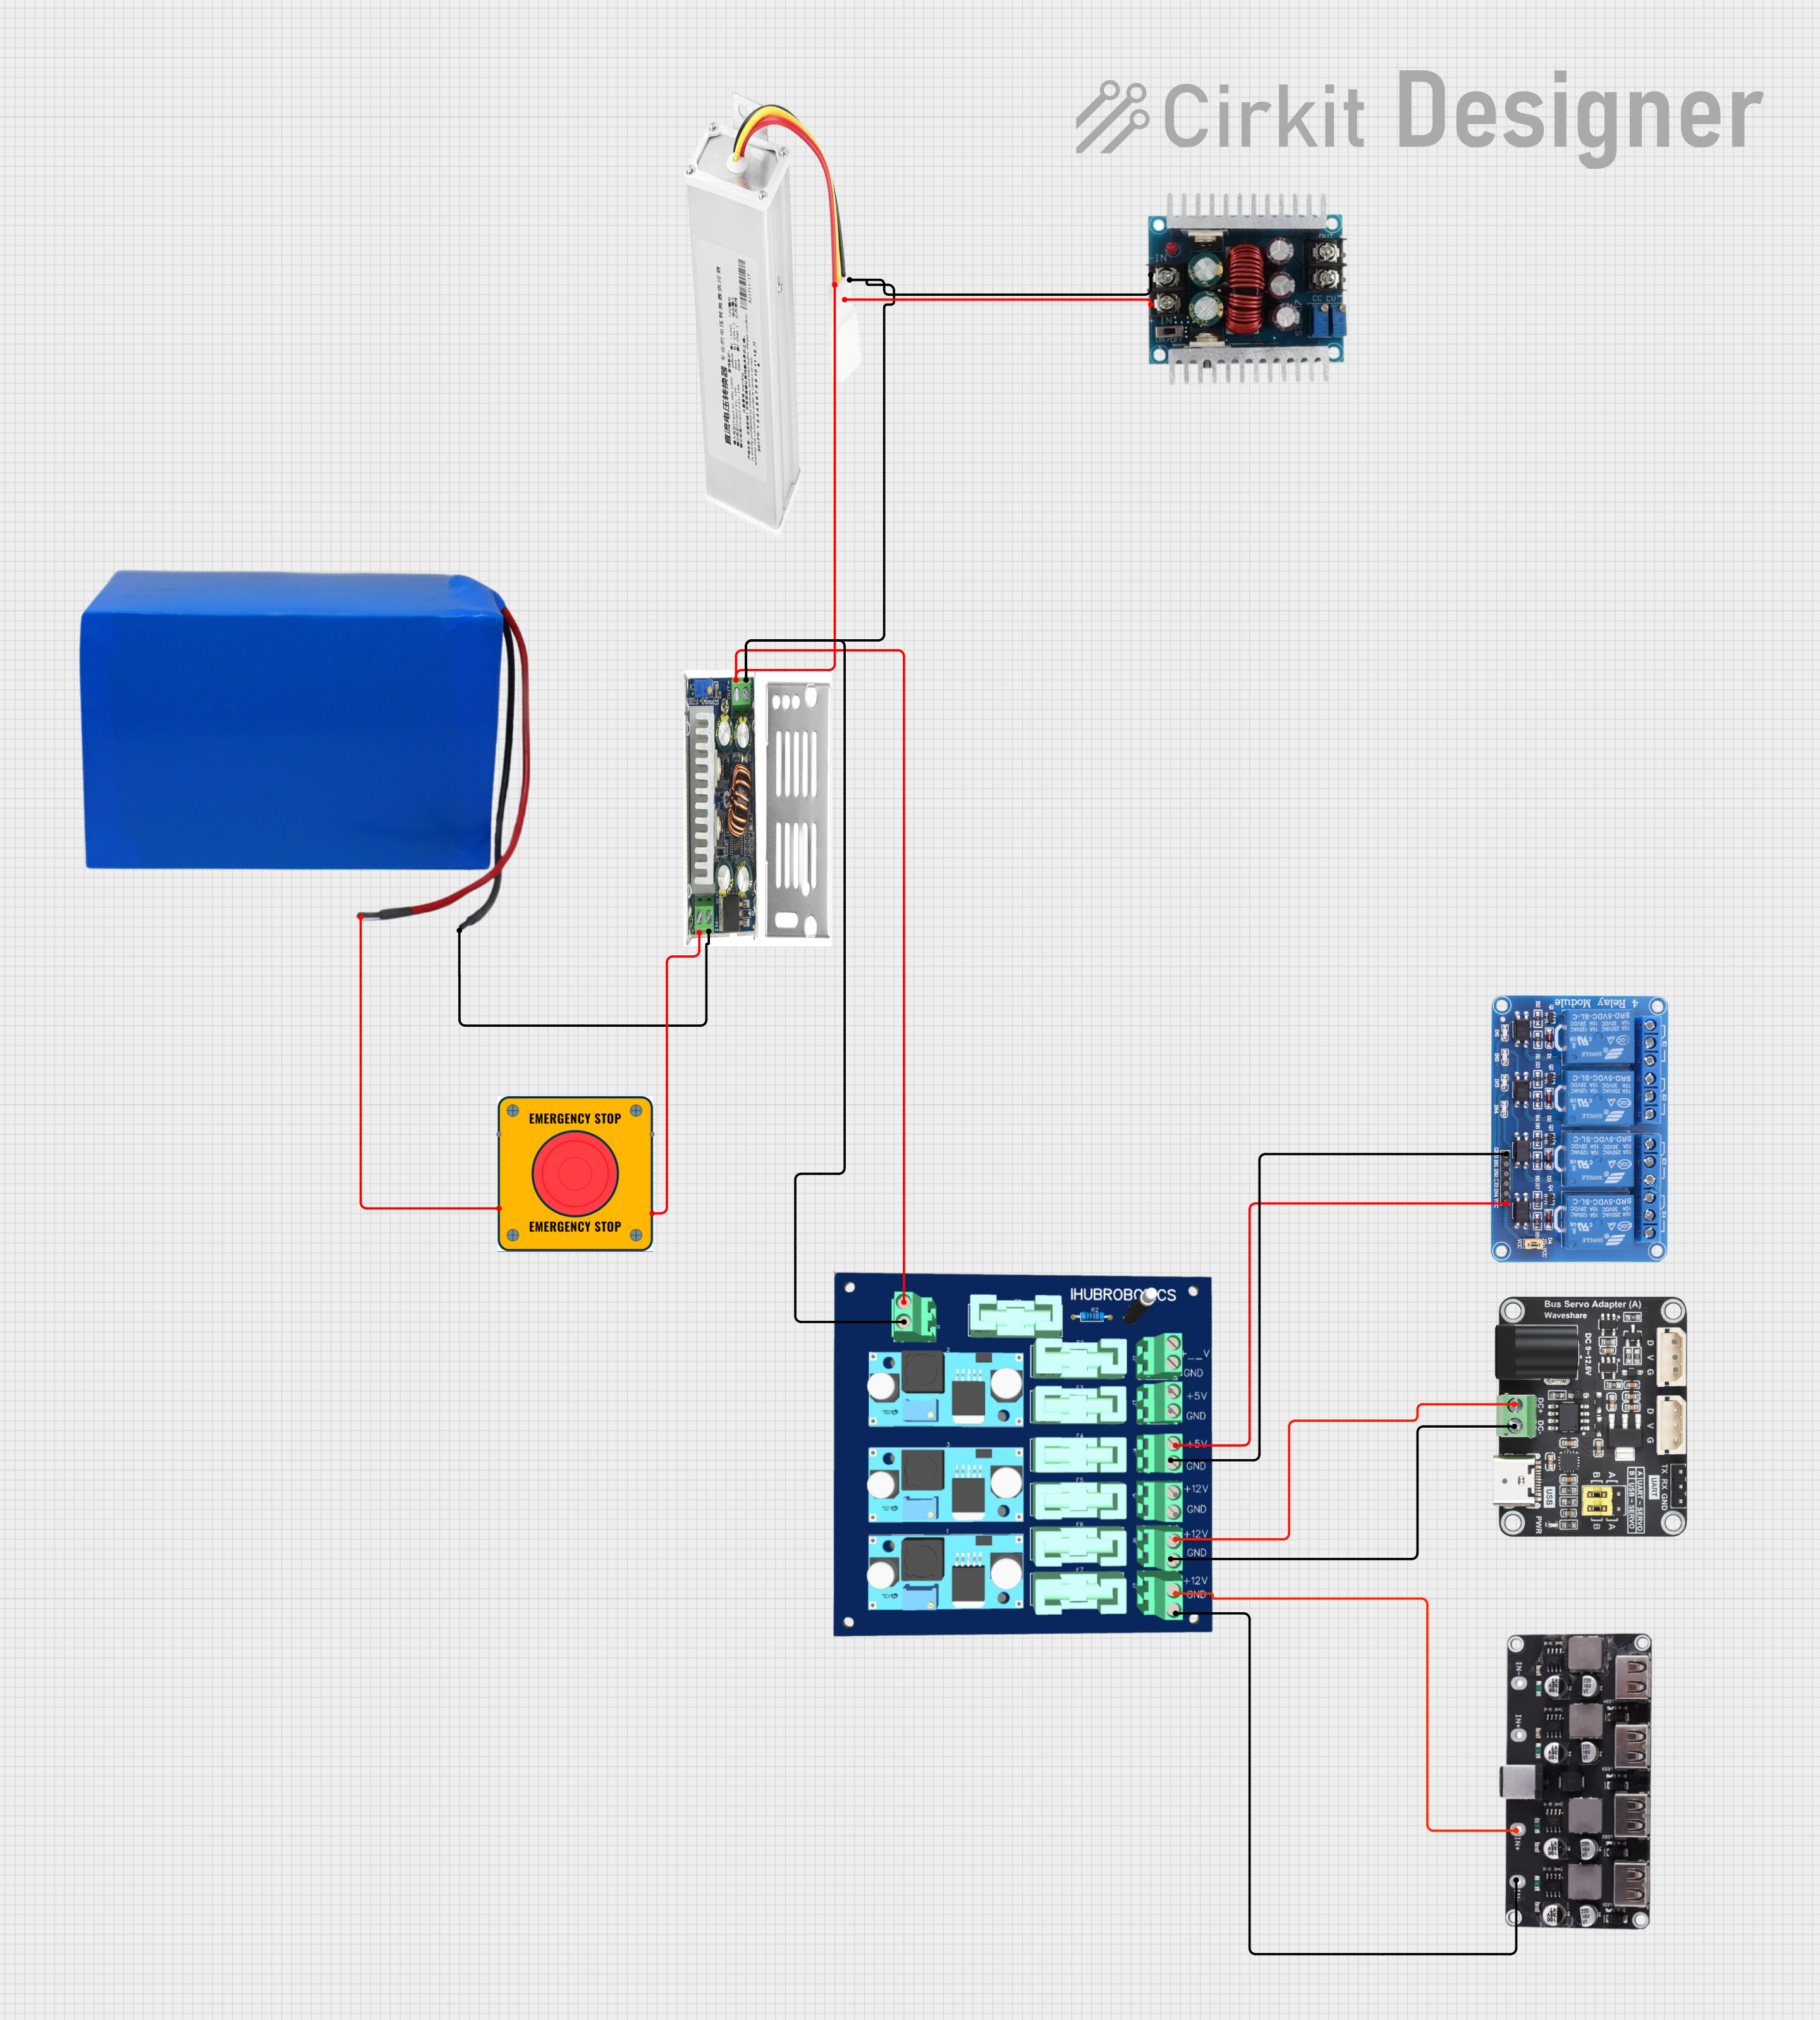
This circuit converts a 38.5V battery output to multiple lower voltage levels using a series of DC-DC converters and a power module. It includes an emergency stop switch for safety and distributes power to various components such as a relay module, USB ports, and a bus servo adaptor.
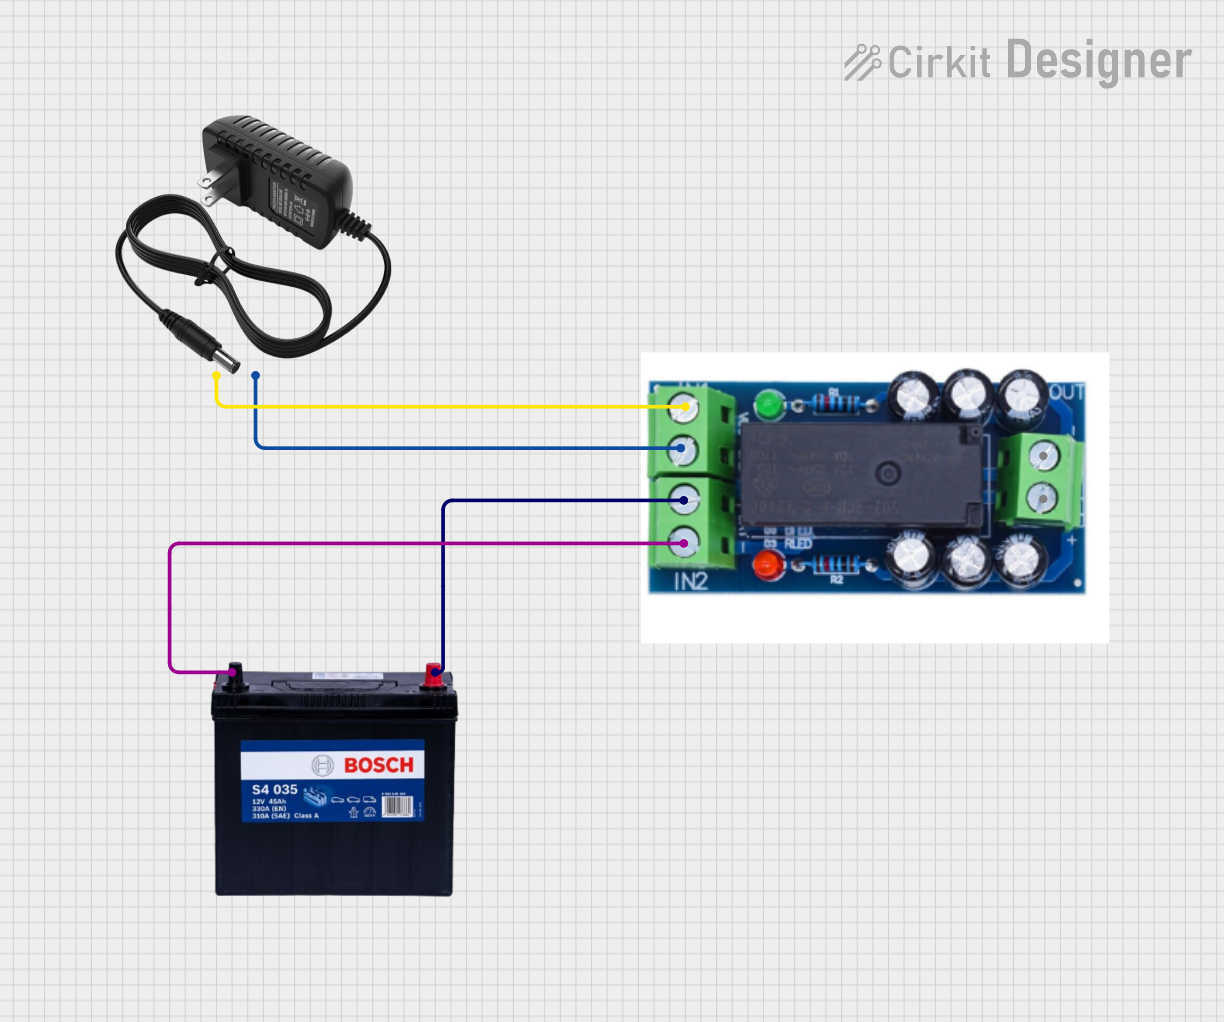
This circuit is designed to provide a backup power solution using a 12V 200Ah battery and a 12V power supply, with the HX-M350 module managing the switching between these power sources. The HX-M350 module automatically switches to the battery power when the main 12V power supply fails or is unavailable, ensuring uninterrupted power to the load. There is no microcontroller or additional control logic involved, indicating that the switching mechanism is likely handled entirely by the HX-M350 module itself.
Powering Arduino-based projects and other microcontrollers
Robotics and automation systems
Portable electronic devices
Backup power supplies for small circuits
DIY electronics and prototyping
Technical Specifications
The following table outlines the key technical details of the 12V Battery Pack:
Parameter
Specification
Nominal Voltage
12V
Capacity
Varies (e.g., 1000mAh, 2000mAh, etc.)
Chemistry
Lithium-ion, Lead-acid, or NiMH
Rechargeable
Yes (for rechargeable variants)
Maximum Discharge Current
Depends on model (e.g., 1A to 10A)
Operating Temperature
-20°C to 60°C
Dimensions
Varies by model
Weight
Varies by model
Pin Configuration and Descriptions
The 12V Battery Pack typically has two terminals for connection:
Pin/Terminal
Description
Positive (+)
Connects to the positive side of the circuit
Negative (-)
Connects to the ground or negative side of the circuit
Note: Some battery packs may include additional features such as built-in protection circuits or connectors. Refer to the specific model's datasheet for more details.
Usage Instructions
How to Use the 12V Battery Pack in a Circuit
Identify the Terminals: Locate the positive (+) and negative (-) terminals on the battery pack.
Connect to the Circuit:
Connect the positive terminal to the positive input of your circuit.
Connect the negative terminal to the ground or negative input of your circuit.
Use Proper Connectors: Use appropriate connectors or wires to ensure a secure and reliable connection.
Monitor Voltage: Regularly check the battery voltage to ensure it remains within the operating range of your circuit.
Important Considerations and Best Practices
Polarity: Always ensure correct polarity when connecting the battery to avoid damage to the circuit.
Current Rating: Verify that the battery's maximum discharge current meets the requirements of your circuit.
Charging (for Rechargeable Batteries):
Use a compatible charger designed for the specific battery chemistry (e.g., Li-ion, NiMH).
Avoid overcharging or deep discharging the battery to prolong its lifespan.
Safety: Do not short-circuit the terminals, expose the battery to extreme temperatures, or puncture the casing.
Storage: Store the battery in a cool, dry place when not in use.
Example: Connecting a 12V Battery Pack to an Arduino UNO
The 12V Battery Pack can be used to power an Arduino UNO via the VIN pin. Below is an example circuit and code:
Circuit Connection
Connect the positive terminal of the battery pack to the VIN pin on the Arduino UNO.
Connect the negative terminal of the battery pack to the GND pin on the Arduino UNO.
Example Code
// Example code to blink an LED using an Arduino UNO powered by a 12V Battery Pack

const int ledPin = 13; // Pin connected to the built-in LED on the Arduino UNO

void setup() {
  pinMode(ledPin, OUTPUT); // Set the LED pin as an output
}

void loop() {
  digitalWrite(ledPin, HIGH); // Turn the LED on
  delay(1000); // Wait for 1 second
  digitalWrite(ledPin, LOW); // Turn the LED off
  delay(1000); // Wait for 1 second
}
Note: Ensure the Arduino UNO's onboard voltage regulator is functioning properly to step down the 12V input to the required 5V operating voltage.
Troubleshooting and FAQs
Common Issues and Solutions
Battery Not Powering the Circuit:
Cause: Incorrect polarity or loose connections.
Solution: Double-check the connections and ensure proper polarity.
Battery Drains Quickly:
Cause: High current draw or an old/degraded battery.
Solution: Use a battery with a higher capacity or replace the battery if it is old.
Overheating:
Cause: Excessive current draw or short circuit.
Solution: Ensure the circuit's current requirements are within the battery's discharge rating. Check for short circuits.
Arduino UNO Not Powering On:
Cause: Insufficient voltage or faulty connections.
Solution: Verify the battery voltage is at least 7V (minimum for VIN pin) and check all connections.
FAQs
Q: Can I use a 12V Battery Pack to power other Arduino boards?
A: Yes, most Arduino boards with a VIN pin can be powered by a 12V Battery Pack. Ensure the board's voltage regulator supports 12V input.
Q: How do I know if my battery is rechargeable?
A: Check the label or datasheet of the battery. Rechargeable batteries are typically marked as "rechargeable" and specify the charging voltage/current.
Q: Can I connect multiple 12V Battery Packs in series or parallel?
A: Yes, but ensure proper balancing and protection circuits are used to avoid overvoltage or uneven discharge.
Q: What is the typical lifespan of a 12V Battery Pack?
A: The lifespan depends on the battery chemistry and usage. For example, Li-ion batteries typically last 300-500 charge cycles.
By following this documentation, you can effectively use the 12V Battery Pack in your projects while ensuring safety and optimal performance.


 Open Project in Cirkit Designer