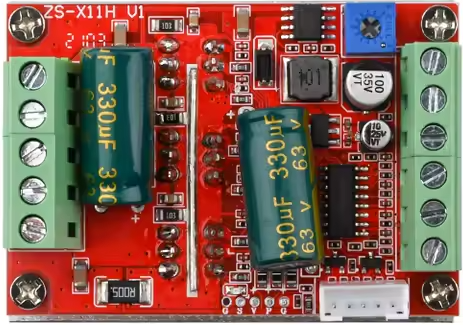
The ZS-X11h is a versatile electronic component designed for signal processing and control applications. Manufactured by China NoName, this component is widely used in circuits requiring efficient data handling and communication. Its multiple input and output channels make it suitable for a variety of use cases, including industrial automation, robotics, and IoT devices.
Explore Projects Built with ZS-X11h
Use Cirkit Designer to design, explore, and prototype these projects online. Some projects support real-time simulation. Click "Open Project" to start designing instantly!
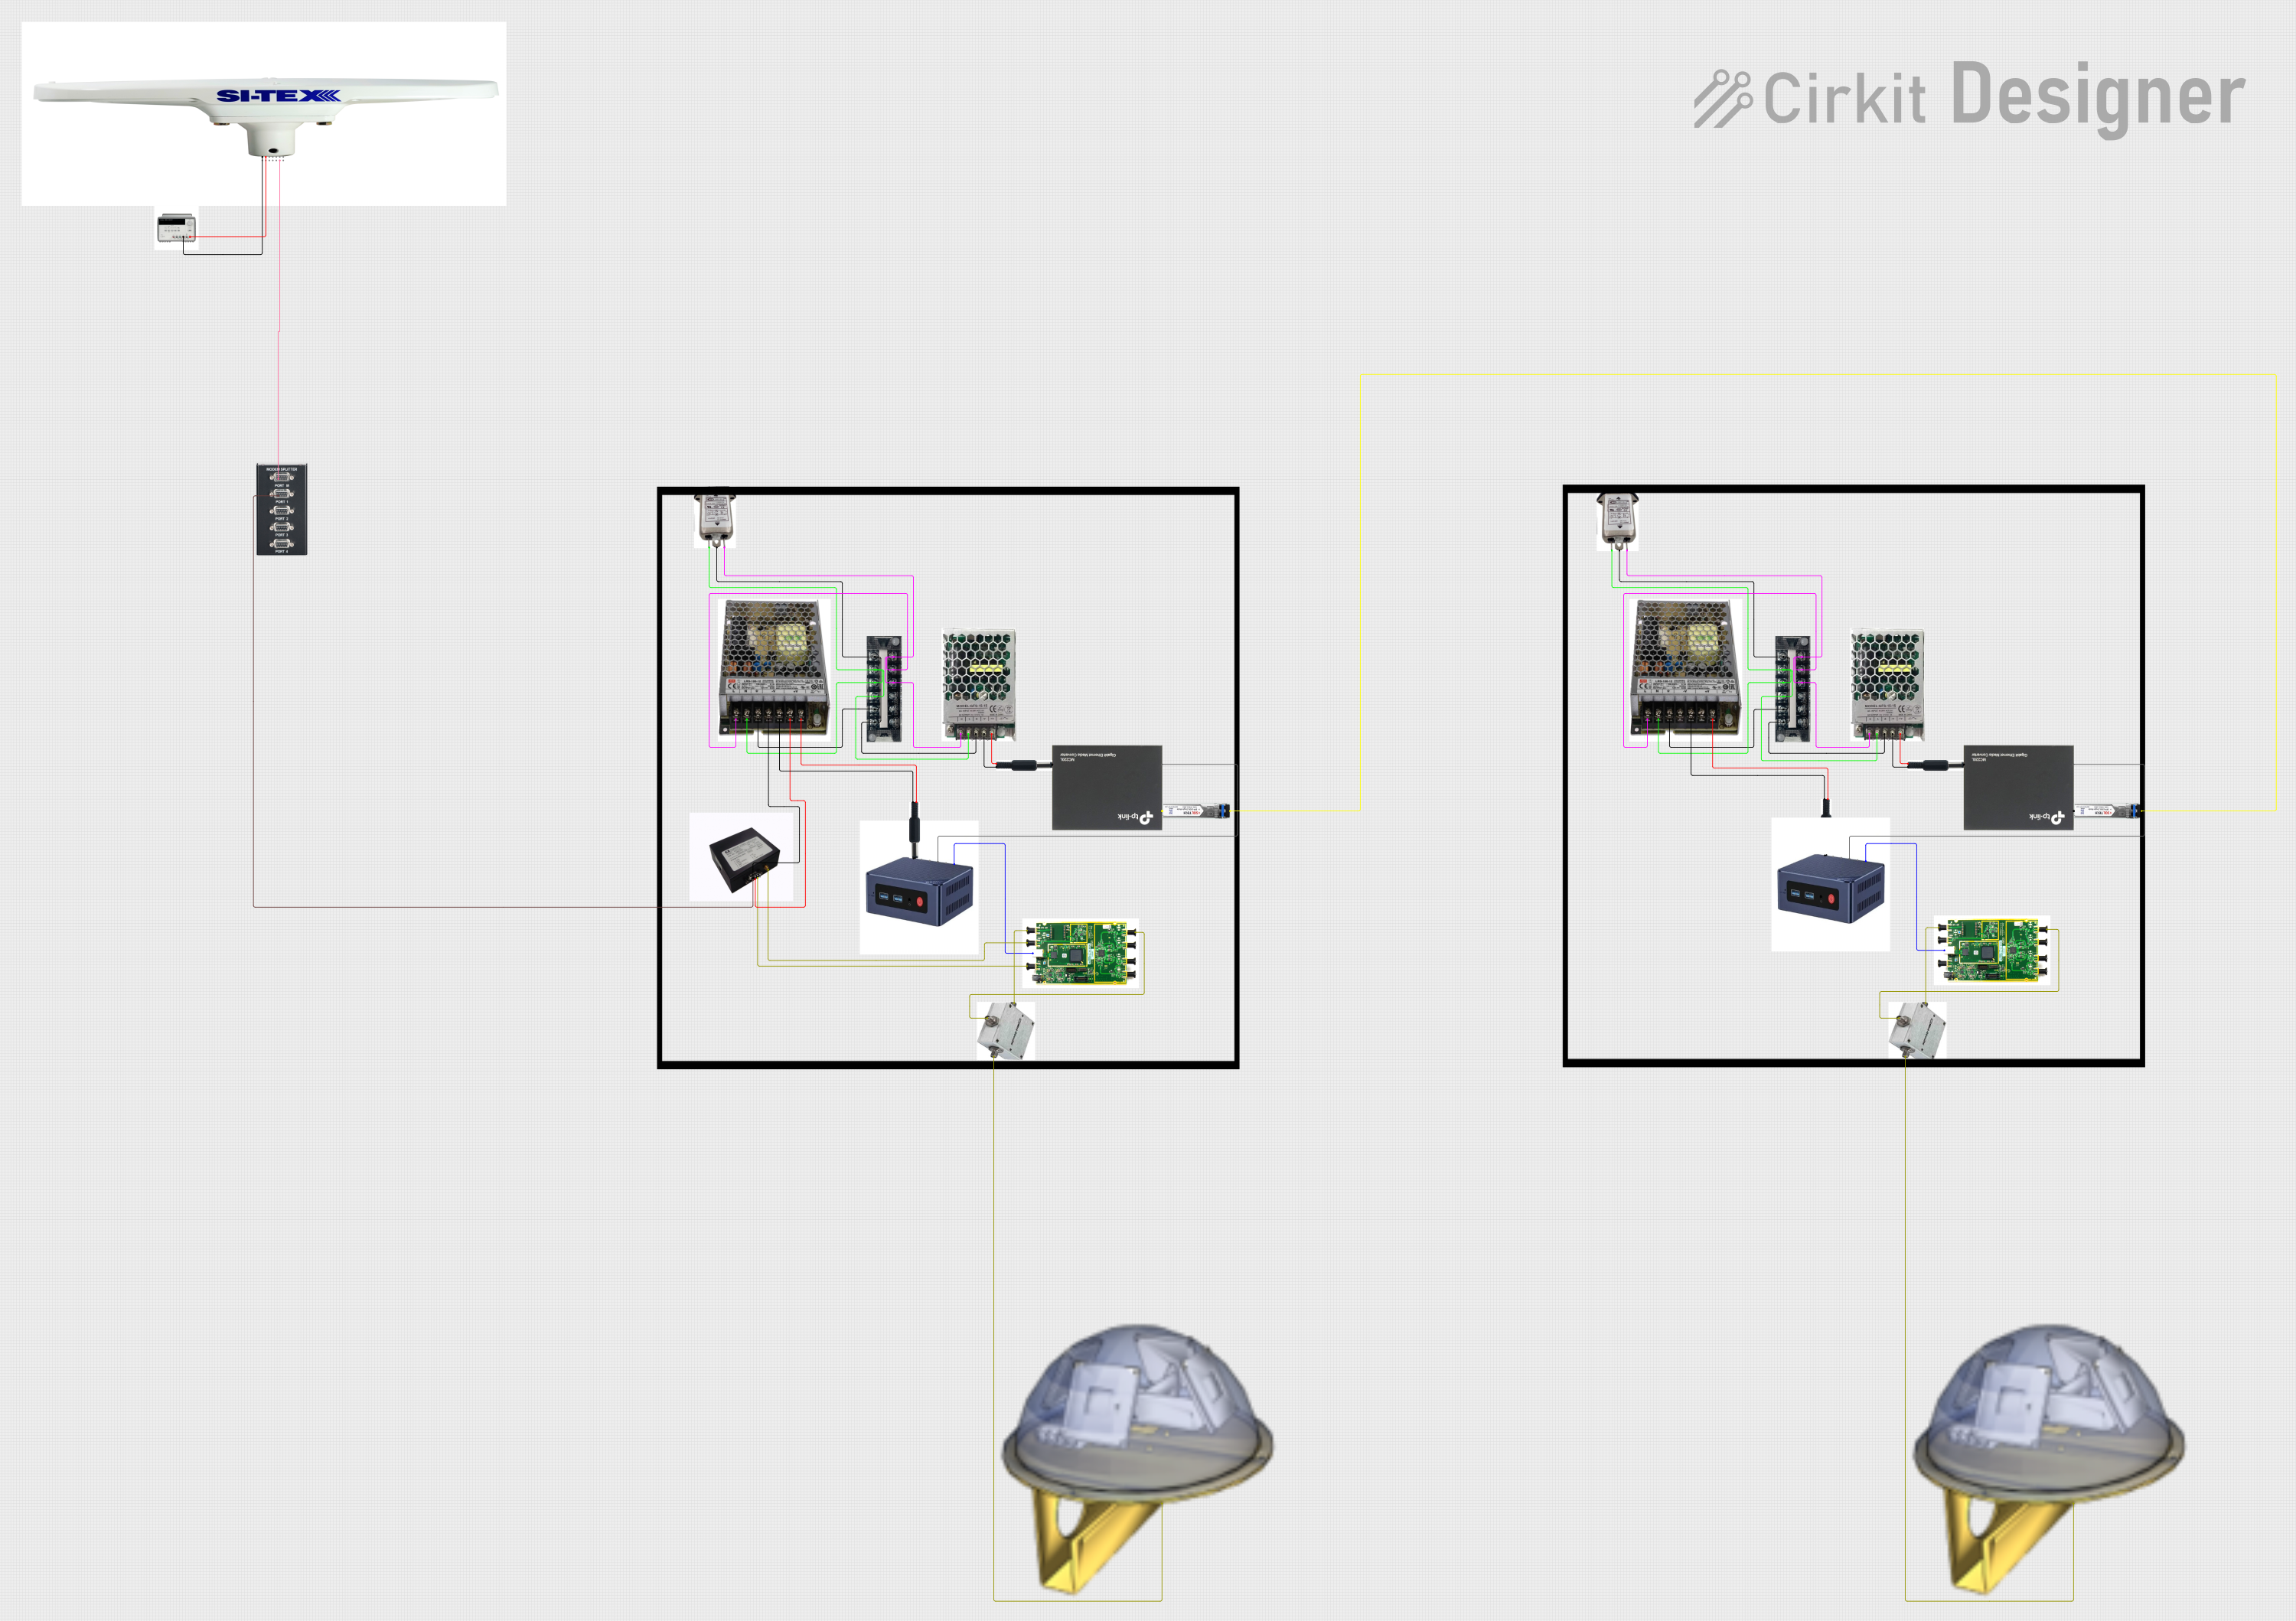
This circuit appears to be a complex system involving power supply management, GPS and timing synchronization, and data communication. It includes a SI-TEX G1 Satellite Compass for GPS data, an XHTF1021 Atomic Rubidium Clock for precise timing, and Ettus USRP B200 units for software-defined radio communication. Power is supplied through various SMPS units and distributed via terminal blocks and DC jacks. Data communication is facilitated by Beelink MINI S12 N95 computers, RS232 splitters, and a 1000BASE-T Media Converter for network connectivity. RF Directional Couplers are used to interface antennas with the USRP units, and the entire system is likely contained within cases for protection and organization.
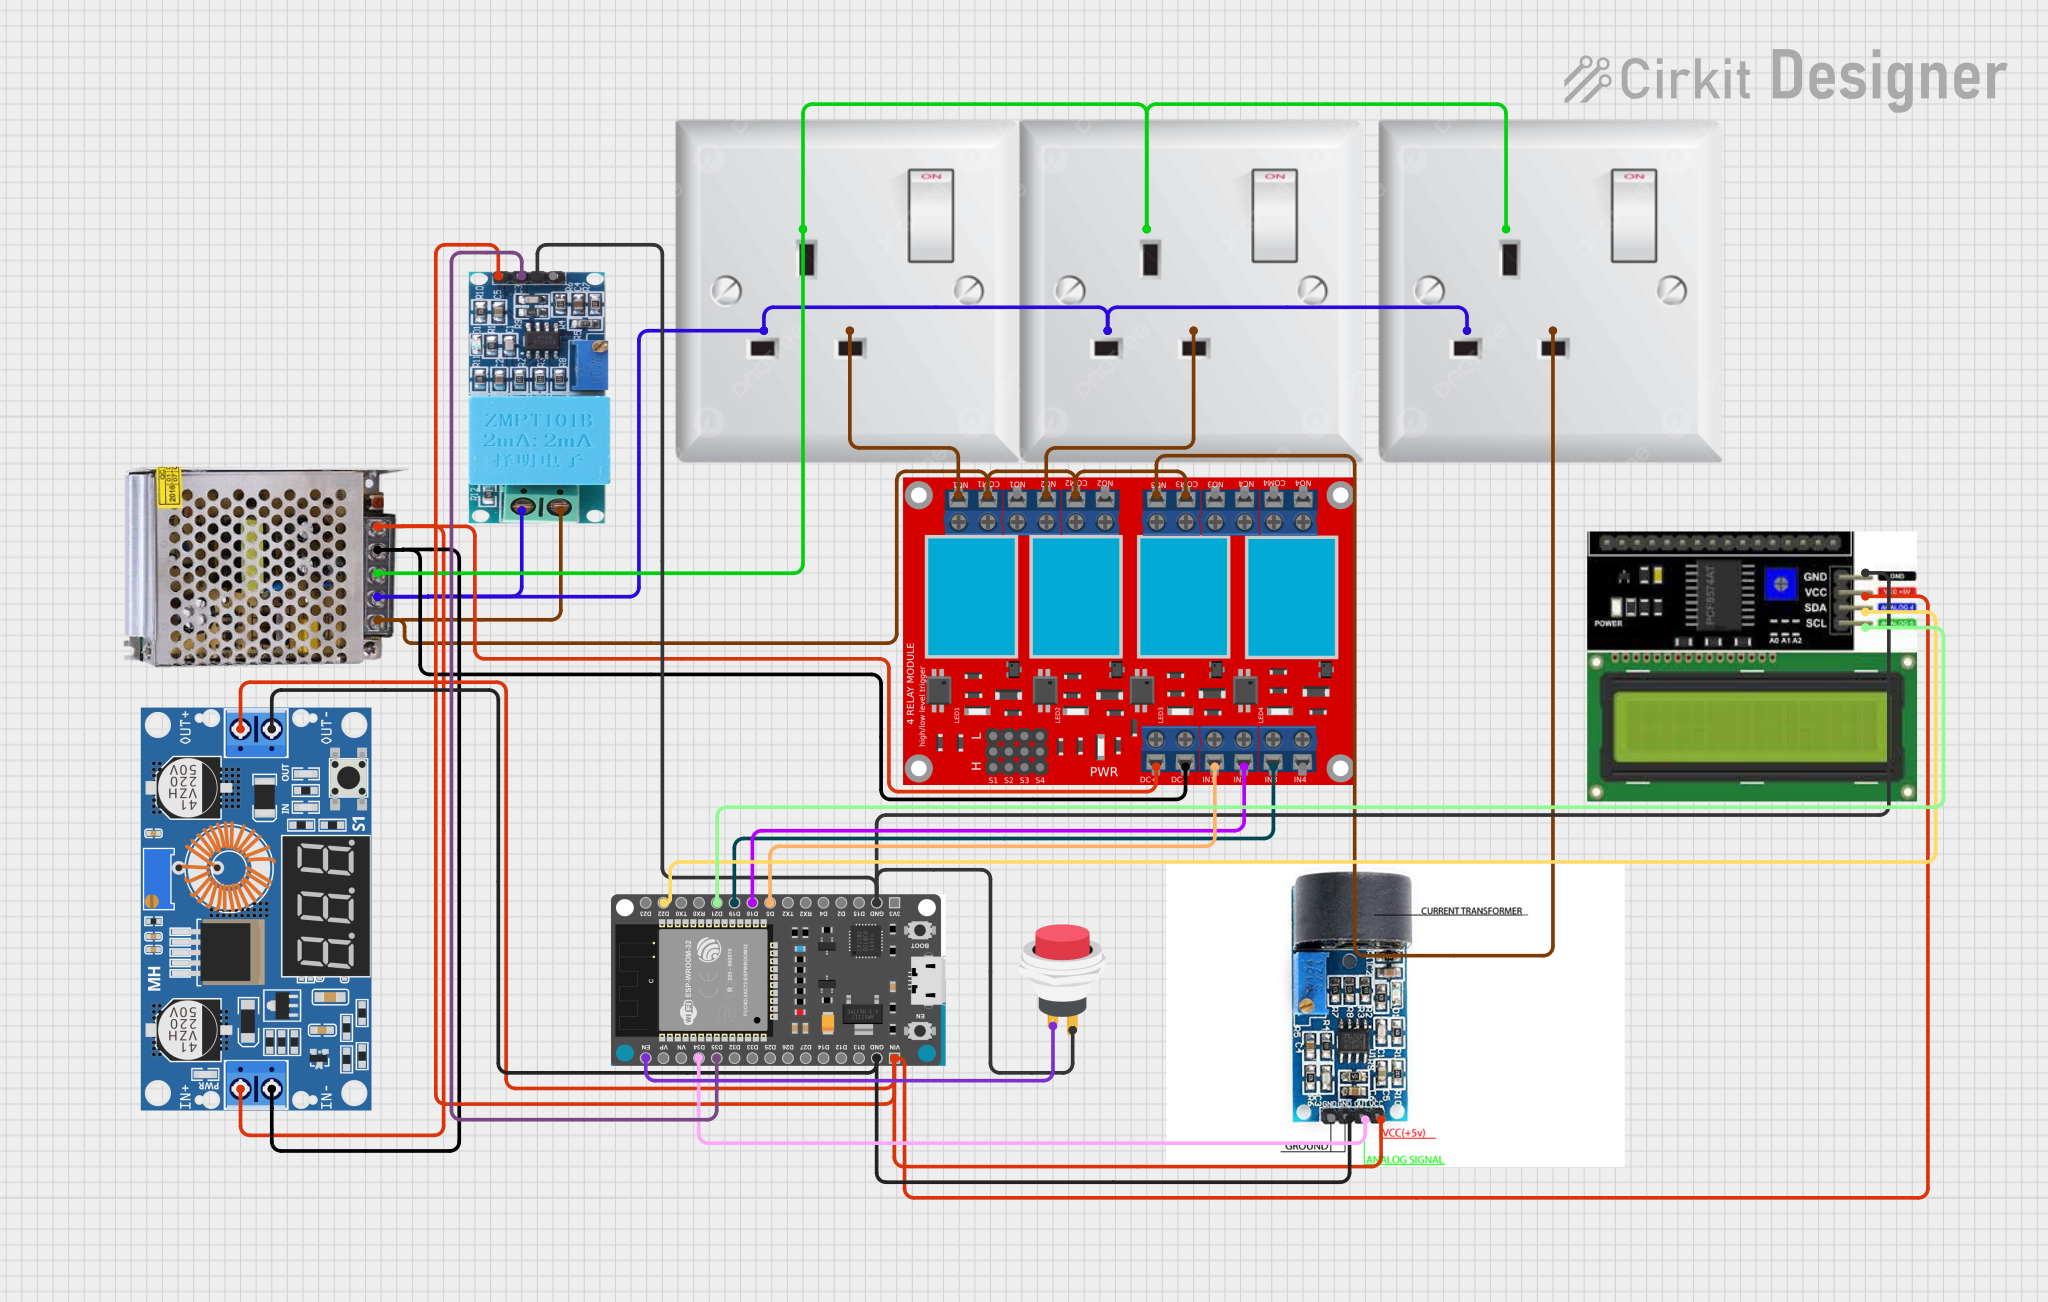
This circuit is designed to monitor AC voltage and current using ZMPT101B and ZMCT103C sensors, respectively, with an ESP32 microcontroller processing the sensor outputs. The XL4015 step-down module regulates the power supply to provide a stable voltage to the sensors, the ESP32, and an LCD I2C display. The ESP32 controls a 4-channel relay module for switching AC loads, and the system's operation can be interacted with via the LCD display and a push switch.
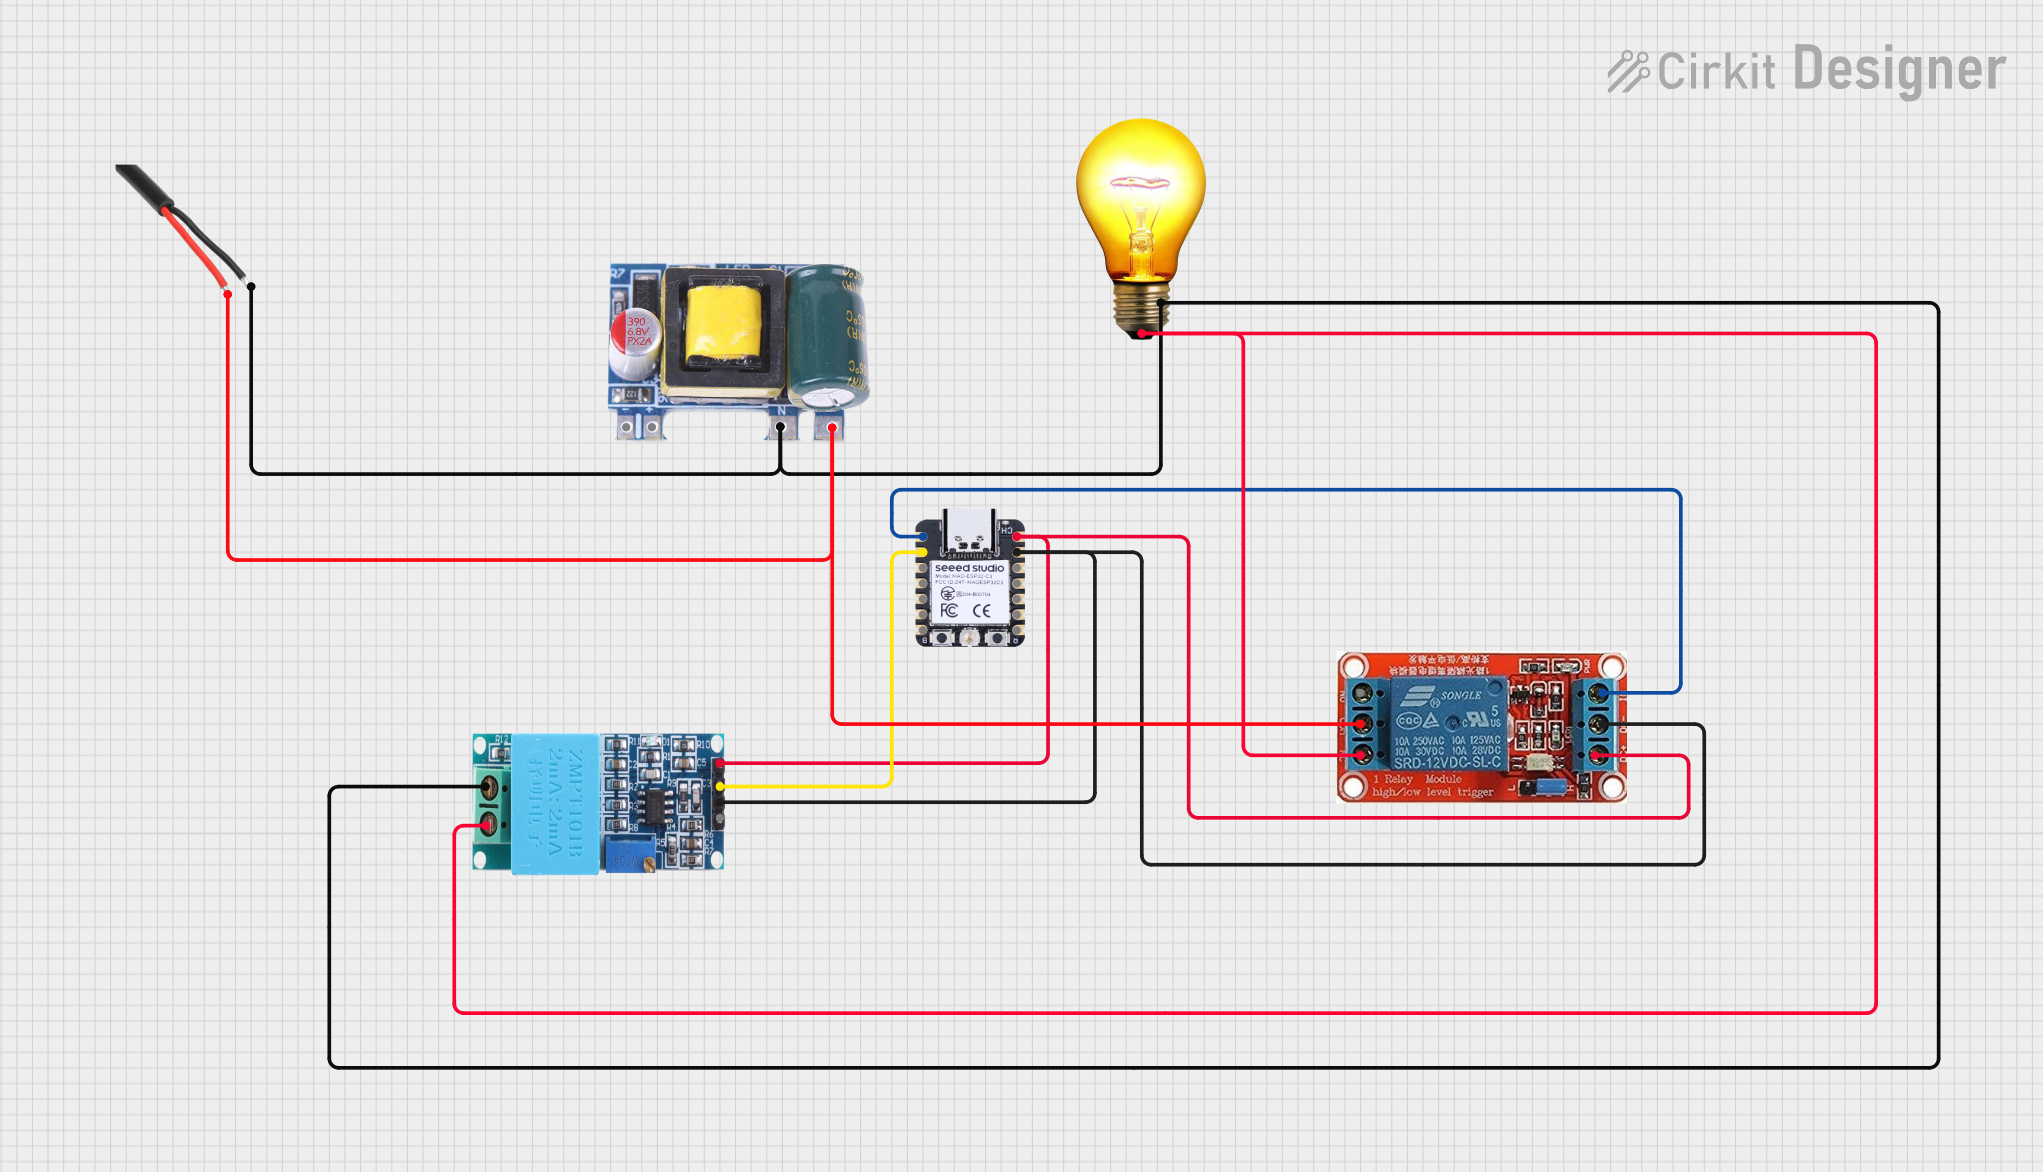
This circuit appears to be a smart AC power control system. The XIAO ESP32C3 microcontroller is used to monitor AC voltage through the ZMPT101B module and to control a 12v Relay, which in turn switches an AC Bulb on or off. The Mini AC-DC module provides the 5V power required by the microcontroller and the relay, while the AC Wire provides the AC power to the system.
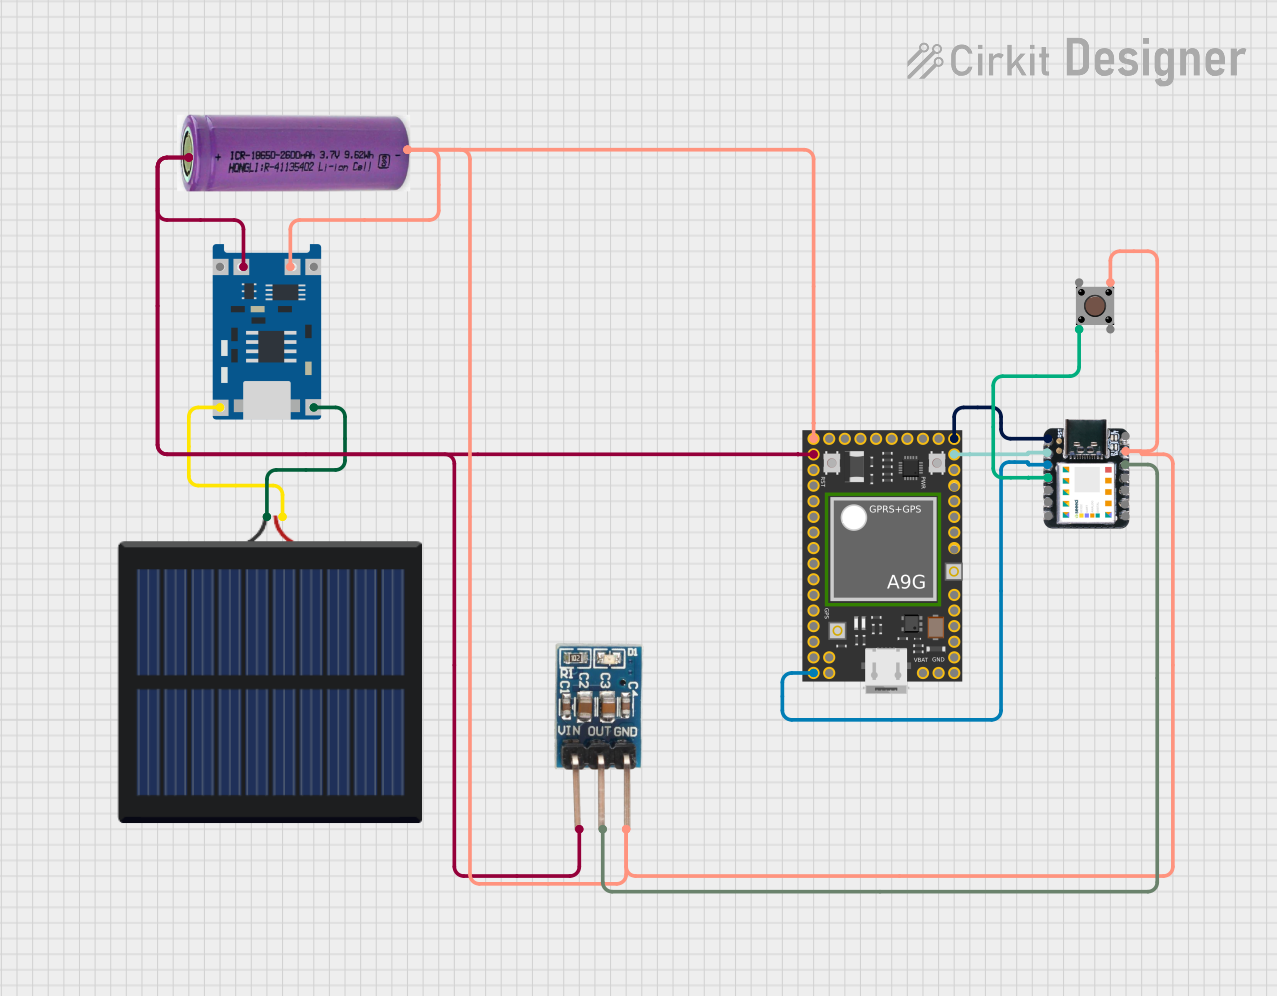
This circuit features an Ai Thinker A9G development board for GSM/GPRS and GPS/BDS connectivity, interfaced with a Seeeduino XIAO microcontroller for control and data processing. A solar cell, coupled with a TP4056 charging module, charges a 3.3V battery, which powers the system through a 3.3V regulator ensuring stable operation. The circuit likely serves for remote data communication and location tracking, with the capability to be powered by renewable energy and interfaced with additional sensors or input devices via the Seeeduino XIAO.
General-purpose interfacing in electronic circuits
Technical Specifications
The ZS-X11h is engineered to provide reliable performance in a wide range of applications. Below are its key technical specifications:
Parameter
Value
Operating Voltage
3.3V to 5V
Maximum Current
50mA
Communication Protocol
Serial (UART)
Input Channels
4
Output Channels
4
Operating Temperature
-20°C to 85°C
Dimensions
25mm x 15mm x 5mm
Pin Configuration
The ZS-X11h features a straightforward pin layout for easy integration into circuits. Below is the pin configuration:
Pin Number
Pin Name
Description
1
VCC
Power supply input (3.3V to 5V)
2
GND
Ground
3
TX
Transmit data (UART output)
4
RX
Receive data (UART input)
5
IN1
Input channel 1
6
IN2
Input channel 2
7
OUT1
Output channel 1
8
OUT2
Output channel 2
Usage Instructions
The ZS-X11h is simple to use and can be integrated into a variety of circuits. Below are the steps and best practices for using this component:
Steps to Use
Power the Component: Connect the VCC pin to a 3.3V or 5V power source and the GND pin to the ground of your circuit.
Connect Communication Lines: Use the TX and RX pins to establish UART communication with a microcontroller or other devices.
Utilize Input Channels: Connect your input signals to the IN1 and IN2 pins. Ensure the input voltage levels are within the operating range.
Use Output Channels: Connect the OUT1 and OUT2 pins to the desired output devices or circuits.
Important Considerations
Ensure the operating voltage does not exceed 5V to prevent damage to the component.
Use appropriate pull-up or pull-down resistors on input pins if required by your circuit design.
Keep the component away from high-temperature environments exceeding 85°C.
Example: Connecting ZS-X11h to an Arduino UNO
The ZS-X11h can be easily interfaced with an Arduino UNO for signal processing. Below is an example code snippet:
// Example code to interface ZS-X11h with Arduino UNO
// This code demonstrates UART communication and basic input/output handling

#define IN1_PIN 2  // Define Arduino pin connected to ZS-X11h IN1
#define IN2_PIN 3  // Define Arduino pin connected to ZS-X11h IN2
#define OUT1_PIN 4 // Define Arduino pin connected to ZS-X11h OUT1
#define OUT2_PIN 5 // Define Arduino pin connected to ZS-X11h OUT2

void setup() {
  Serial.begin(9600); // Initialize UART communication at 9600 baud rate
  pinMode(IN1_PIN, INPUT);  // Set IN1 as input
  pinMode(IN2_PIN, INPUT);  // Set IN2 as input
  pinMode(OUT1_PIN, OUTPUT); // Set OUT1 as output
  pinMode(OUT2_PIN, OUTPUT); // Set OUT2 as output
}

void loop() {
  // Read input signals from ZS-X11h
  int in1State = digitalRead(IN1_PIN);
  int in2State = digitalRead(IN2_PIN);

  // Print input states to the Serial Monitor
  Serial.print("IN1: ");
  Serial.print(in1State);
  Serial.print(" | IN2: ");
  Serial.println(in2State);

  // Control outputs based on input states
  digitalWrite(OUT1_PIN, in1State); // Mirror IN1 state to OUT1
  digitalWrite(OUT2_PIN, in2State); // Mirror IN2 state to OUT2

  delay(500); // Add a delay for stability
}
Troubleshooting and FAQs
Common Issues
No Response from the Component
Cause: Incorrect power supply or loose connections.
Solution: Verify that the VCC and GND pins are properly connected and the voltage is within the specified range.
UART Communication Fails
Cause: Incorrect baud rate or wiring.
Solution: Ensure the baud rate in your code matches the ZS-X11h's default (9600). Check TX and RX connections.
Input Signals Not Detected
Cause: Input voltage levels are out of range.
Solution: Confirm that the input signals are within the operating voltage range (0V to 5V).
Output Channels Not Working
Cause: Incorrect wiring or damaged component.
Solution: Verify the connections to the output pins and ensure the component is not damaged.
FAQs
Q: Can the ZS-X11h operate at 12V?
A: No, the ZS-X11h operates within a voltage range of 3.3V to 5V. Exceeding this range may damage the component.
Q: Is the ZS-X11h compatible with 3.3V logic devices?
A: Yes, the ZS-X11h is compatible with both 3.3V and 5V logic levels.
Q: Can I use all input and output channels simultaneously?
A: Yes, all input and output channels can be used simultaneously, provided the total current does not exceed the maximum rating of 50mA.
Q: Does the ZS-X11h require external pull-up resistors?
A: It depends on your circuit design. For stable operation, you may need to add pull-up or pull-down resistors to the input pins.

 Open Project in Cirkit Designer