Cirkit Designer Logo
Cirkit Designer
Your all-in-one circuit design IDE
Home / 
Component Documentation

How to Use SenseAir S8 CO2 Sensor: Examples, Pinouts, and Specs

Image of SenseAir S8 CO2 Sensor
Cirkit Designer LogoDesign with SenseAir S8 CO2 Sensor in Cirkit Designer

Introduction

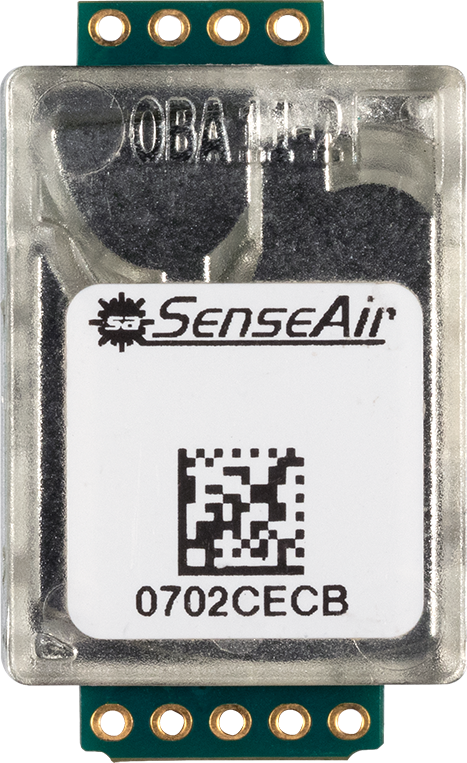
The SenseAir S8 CO2 Sensor is a compact and reliable sensor designed to measure the concentration of carbon dioxide (CO2) in the air. This sensor is widely used in HVAC systems, indoor air quality monitoring, and other applications where monitoring CO2 levels is essential for health and energy efficiency. Its non-dispersive infrared (NDIR) technology ensures long-term stability and calibration-free operation.

Explore Projects Built with SenseAir S8 CO2 Sensor

Use Cirkit Designer to design, explore, and prototype these projects online. Some projects support real-time simulation. Click "Open Project" to start designing instantly!
ESP8266-Controlled CO2 Monitoring System with Multi-Color LED Indicators and Buzzer Alarm
Image of Copy of PROYECTO MICA MONITOREO INALAMBRICO DE LA CALIDAD DEL AIRE: A project utilizing SenseAir S8 CO2 Sensor in a practical application
This circuit is designed to monitor CO2 levels in an environment using a SenseAir S8 CO2 sensor, with an ESP-8266 microcontroller handling data processing and communication. The ESP-8266 controls three LEDs (red, yellow, green) and a buzzer as indicators of CO2 concentration levels, and it is programmed to send CO2 data to a ThingSpeak server for remote monitoring. A push switch is connected to the reset pin of the ESP-8266 for manual resetting of the microcontroller.
Cirkit Designer LogoOpen Project in Cirkit Designer
Arduino Pro Mini Based CO2 Monitoring System with LoRa Wireless Transmission
Image of Caboma : A project utilizing SenseAir S8 CO2 Sensor in a practical application
This circuit is designed for CO2 monitoring and wireless data transmission. It uses an Arduino Pro Mini to read CO2 levels from a SenseAir S8 CO2 sensor and transmit the data via a LoRa Ra-02 SX1278 module. A step-up boost power converter is used to adjust the voltage for the Arduino and sensor, powered by an 18650 battery.
Cirkit Designer LogoOpen Project in Cirkit Designer
ESP32-Based IoT Indoor Air Quality Monitoring System with OLED Display and RGB LED
Image of air quality: A project utilizing SenseAir S8 CO2 Sensor in a practical application
This IoT indoor air quality monitoring circuit uses an ESP32 microcontroller to read data from a DHT22 temperature and humidity sensor, an MQ-7 carbon monoxide sensor, and a PM2.5 air quality sensor. The collected data is displayed on a 128x64 OLED display, and an RGB LED and PWM fan are controlled based on the air quality readings to indicate and manage air quality levels.
Cirkit Designer LogoOpen Project in Cirkit Designer
Arduino UNO Based Multi-Gas Detector
Image of AIRMS: A project utilizing SenseAir S8 CO2 Sensor in a practical application
This circuit is designed for environmental monitoring, featuring an Arduino UNO microcontroller interfaced with three different gas sensors: MQ-7 for carbon monoxide (CO) detection, MQ131 for ozone (O3) measurement, and MQ-135 for general air quality assessment. The sensors are powered by the Arduino's 5V output and their analog signals are read through the Arduino's analog input pins A0, A1, and A2 respectively. The embedded code reads the analog values from the sensors and outputs the readings via the serial interface, allowing for real-time monitoring of the gases.
Cirkit Designer LogoOpen Project in Cirkit Designer

Explore Projects Built with SenseAir S8 CO2 Sensor

Use Cirkit Designer to design, explore, and prototype these projects online. Some projects support real-time simulation. Click "Open Project" to start designing instantly!
Image of Copy of PROYECTO MICA MONITOREO INALAMBRICO DE LA CALIDAD DEL AIRE: A project utilizing SenseAir S8 CO2 Sensor in a practical application
ESP8266-Controlled CO2 Monitoring System with Multi-Color LED Indicators and Buzzer Alarm
This circuit is designed to monitor CO2 levels in an environment using a SenseAir S8 CO2 sensor, with an ESP-8266 microcontroller handling data processing and communication. The ESP-8266 controls three LEDs (red, yellow, green) and a buzzer as indicators of CO2 concentration levels, and it is programmed to send CO2 data to a ThingSpeak server for remote monitoring. A push switch is connected to the reset pin of the ESP-8266 for manual resetting of the microcontroller.
Cirkit Designer LogoOpen Project in Cirkit Designer
Image of Caboma : A project utilizing SenseAir S8 CO2 Sensor in a practical application
Arduino Pro Mini Based CO2 Monitoring System with LoRa Wireless Transmission
This circuit is designed for CO2 monitoring and wireless data transmission. It uses an Arduino Pro Mini to read CO2 levels from a SenseAir S8 CO2 sensor and transmit the data via a LoRa Ra-02 SX1278 module. A step-up boost power converter is used to adjust the voltage for the Arduino and sensor, powered by an 18650 battery.
Cirkit Designer LogoOpen Project in Cirkit Designer
Image of air quality: A project utilizing SenseAir S8 CO2 Sensor in a practical application
ESP32-Based IoT Indoor Air Quality Monitoring System with OLED Display and RGB LED
This IoT indoor air quality monitoring circuit uses an ESP32 microcontroller to read data from a DHT22 temperature and humidity sensor, an MQ-7 carbon monoxide sensor, and a PM2.5 air quality sensor. The collected data is displayed on a 128x64 OLED display, and an RGB LED and PWM fan are controlled based on the air quality readings to indicate and manage air quality levels.
Cirkit Designer LogoOpen Project in Cirkit Designer
Image of AIRMS: A project utilizing SenseAir S8 CO2 Sensor in a practical application
Arduino UNO Based Multi-Gas Detector
This circuit is designed for environmental monitoring, featuring an Arduino UNO microcontroller interfaced with three different gas sensors: MQ-7 for carbon monoxide (CO) detection, MQ131 for ozone (O3) measurement, and MQ-135 for general air quality assessment. The sensors are powered by the Arduino's 5V output and their analog signals are read through the Arduino's analog input pins A0, A1, and A2 respectively. The embedded code reads the analog values from the sensors and outputs the readings via the serial interface, allowing for real-time monitoring of the gases.
Cirkit Designer LogoOpen Project in Cirkit Designer

Technical Specifications

Key Technical Details

  • Measurement Range: 400 to 2000 ppm CO2
  • Accuracy: ±40 ppm ±3% of reading
  • Operating Voltage: 4.5 to 5.25 VDC
  • Average Current Consumption: 33 mA
  • Peak Current Consumption: 150 mA (during measurement)
  • Interface: UART (serial)
  • Warm-up Time: < 30 seconds
  • Operating Temperature Range: 0 to 50°C
  • Dimensions: 51 x 57 x 14 mm

Pin Configuration and Descriptions

Pin Number Name Description
1 VDD Supply Voltage (4.5 to 5.25 VDC)
2 GND Ground
3 TX Transmitting pin for UART communication
4 RX Receiving pin for UART communication

Usage Instructions

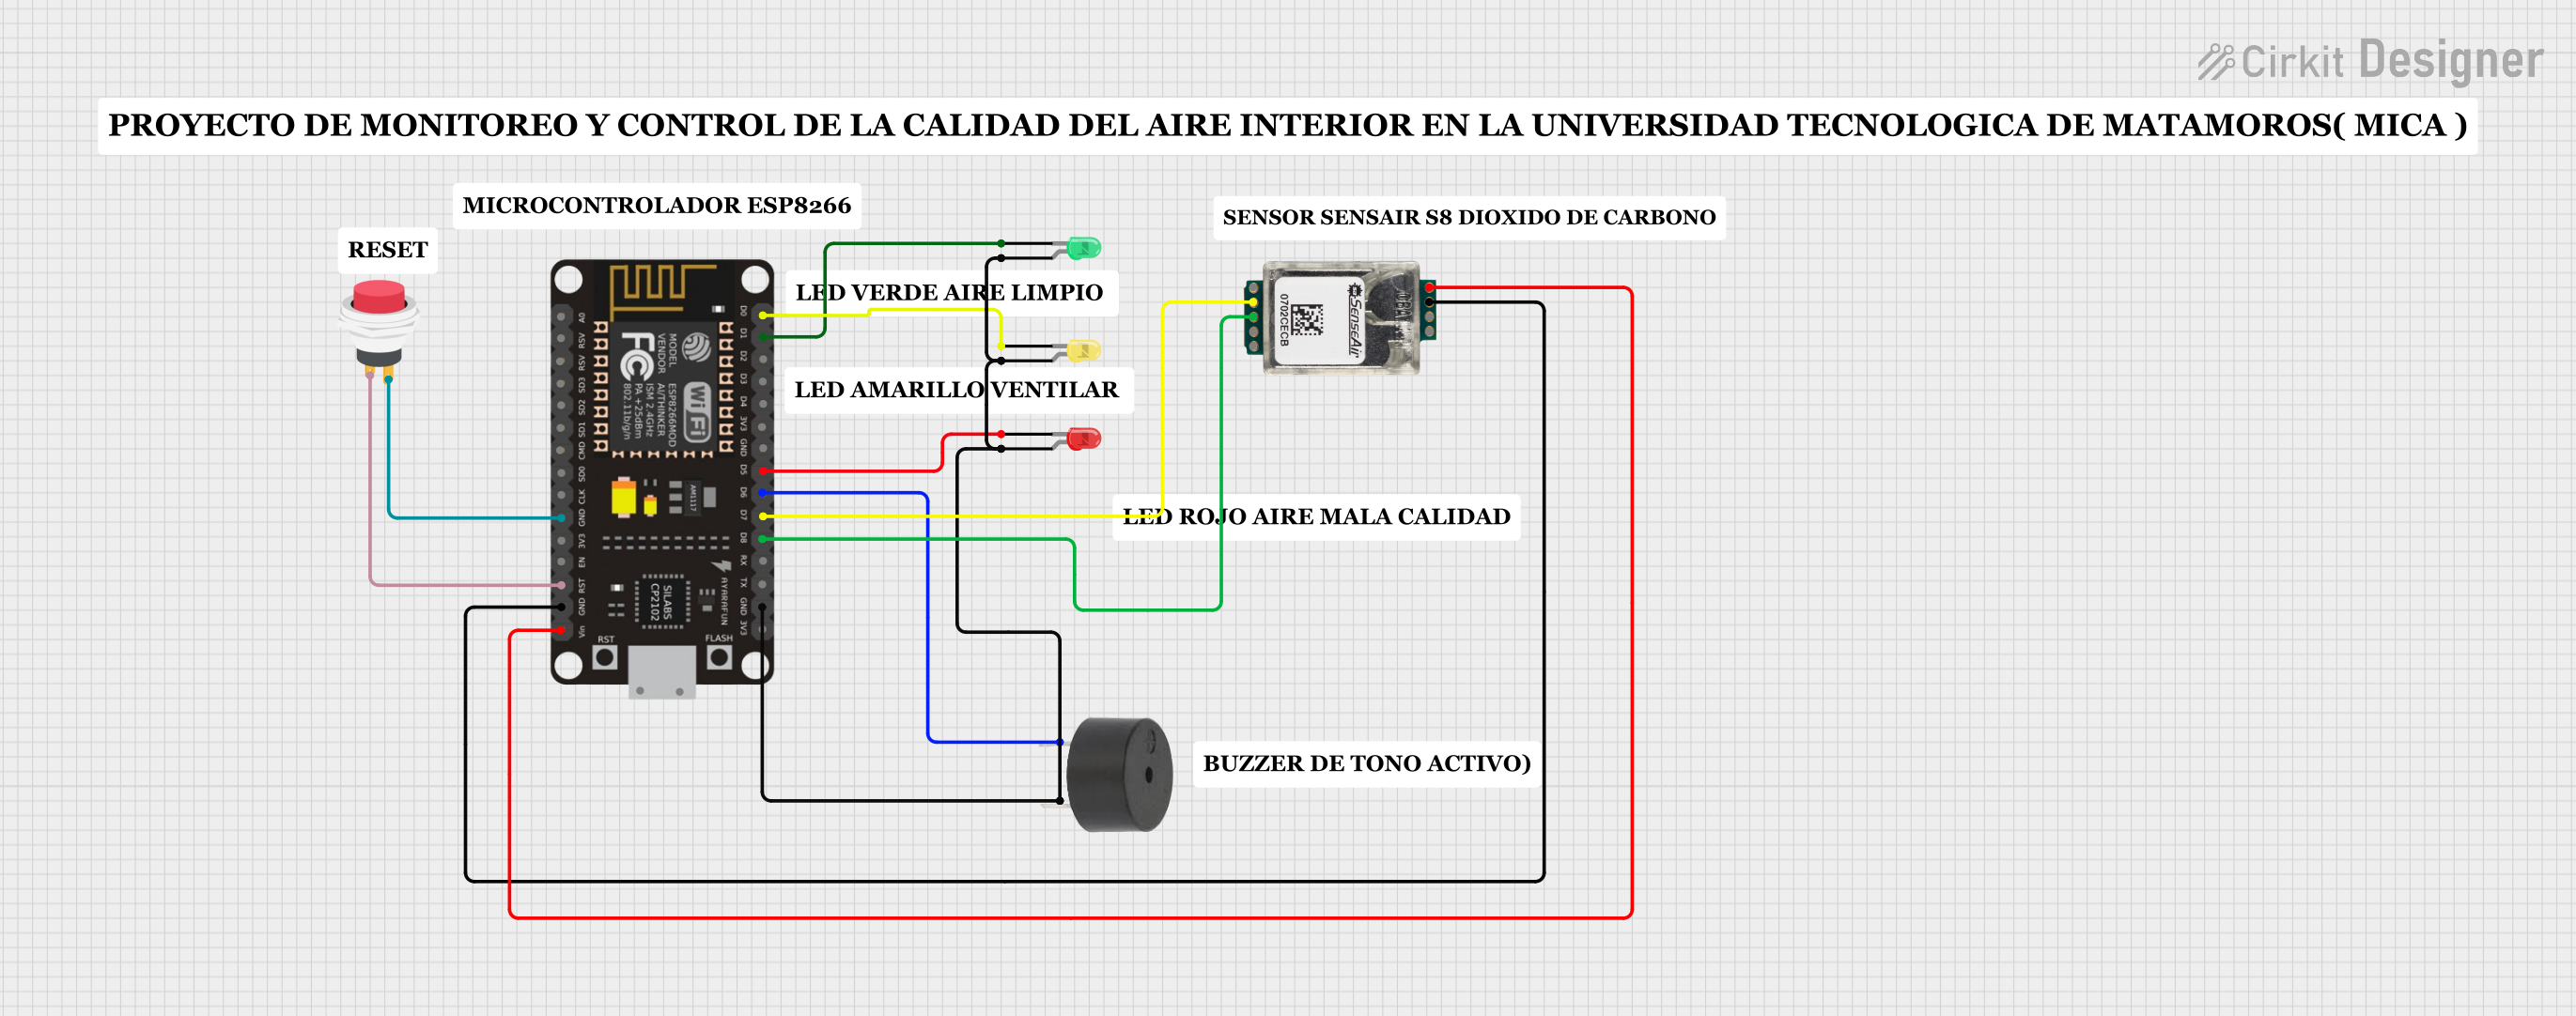
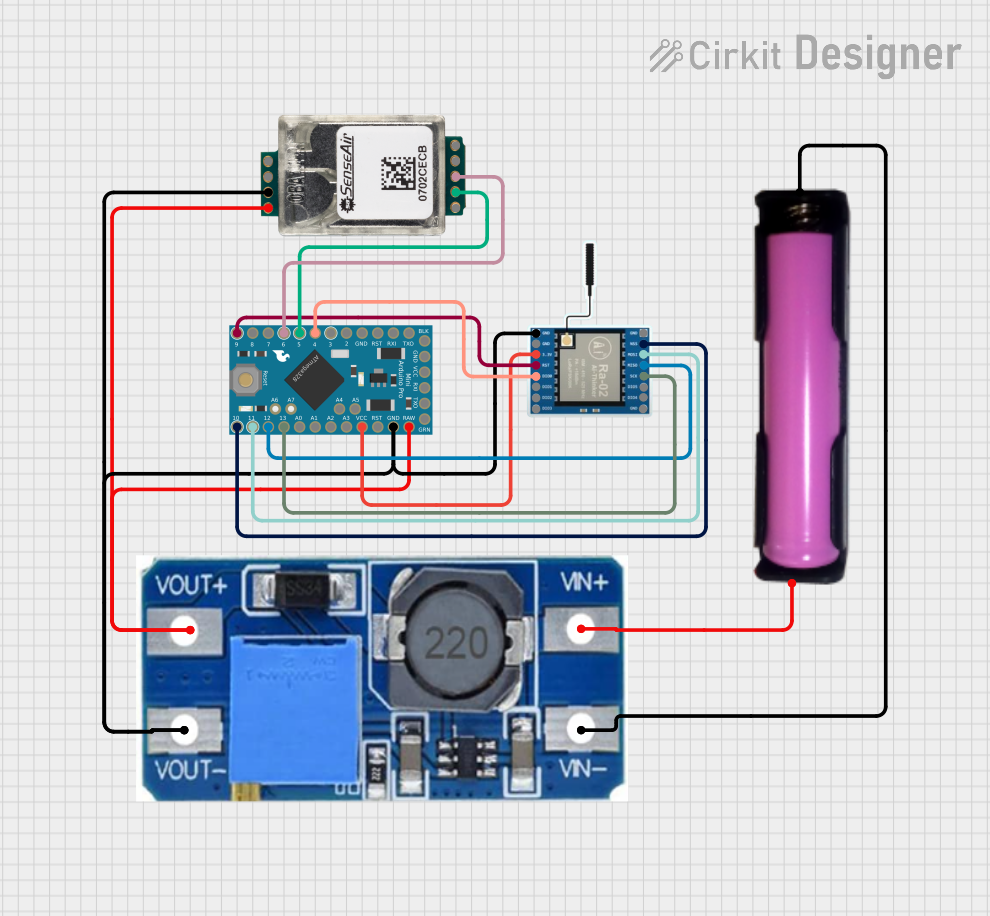
Integration with a Circuit

To use the SenseAir S8 CO2 Sensor in a circuit:

  1. Connect the VDD pin to a 5V power supply.
  2. Connect the GND pin to the ground of the power supply.
  3. Connect the TX and RX pins to a microcontroller or computer capable of UART communication.

Best Practices

  • Ensure that the sensor is placed in an area with good air circulation.
  • Avoid placing the sensor near CO2 sources to prevent false readings.
  • Allow the sensor to warm up for at least 30 seconds before taking measurements.
  • Use a stable power supply to prevent measurement inaccuracies.

Example Code for Arduino UNO

#include <SoftwareSerial.h>

SoftwareSerial mySerial(10, 11); // RX, TX

void setup() {
  // Start the built-in serial port, for debugging
  Serial.begin(9600);
  // Start the software serial port, to communicate with the S8
  mySerial.begin(9600);
}

void loop() {
  if (mySerial.available()) {
    // Read the incoming byte from the S8 sensor
    byte incomingByte = mySerial.read();
    // Display the incoming byte in the Serial Monitor
    Serial.print("Received: ");
    Serial.println(incomingByte, HEX);
  }
  
  // Send a command to the S8 sensor to get CO2 concentration
  // The command must be sent according to the sensor's datasheet
  // For example, to request a reading, you might send a specific byte sequence
  // Refer to the sensor's datasheet for the correct command sequence
  
  // Delay between readings
  delay(2000);
}

Note: The above code is a simple example to demonstrate UART communication with the SenseAir S8 sensor. For actual CO2 concentration readings, refer to the sensor's datasheet for the correct command sequence and data parsing.

Troubleshooting and FAQs

Common Issues

  • Sensor not responding: Ensure that the wiring is correct and the power supply is stable.
  • Inaccurate readings: Check for sources of CO2 near the sensor and ensure proper calibration if necessary.
  • No data on UART: Verify the baud rate and that the TX/RX connections are correct.

FAQs

Q: How often should the sensor be calibrated? A: The SenseAir S8 is designed to be maintenance-free and should not require regular calibration.

Q: Can the sensor measure CO2 levels outside the specified range? A: The sensor is optimized for the specified range of 400 to 2000 ppm. Measurements outside this range may not be accurate.

Q: Is the sensor affected by humidity? A: The SenseAir S8 has built-in compensation for humidity, but extreme conditions may affect readings.

For further assistance, consult the manufacturer's detailed datasheet and technical support resources.