Cirkit Designer
Your all-in-one circuit design IDE
Home /
Component Documentation
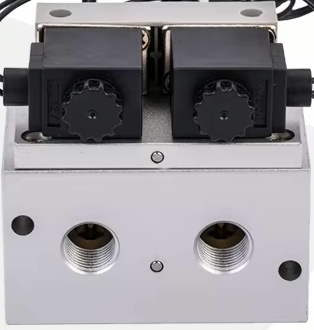
How to Use 4/2 way solenoid valve: Examples, Pinouts, and Specs
Introduction
The 4/2 Way Solenoid Valve is an electromechanical device designed to control the flow of fluids or air in pneumatic and hydraulic systems. This valve features four ports and two positions, enabling it to direct the flow between two different outputs based on the activation of the solenoid.
Explore Projects Built with 4/2 way solenoid valve
Raspberry Pi 4B Automated Irrigation System with IR Sensor and Solenoid Valve
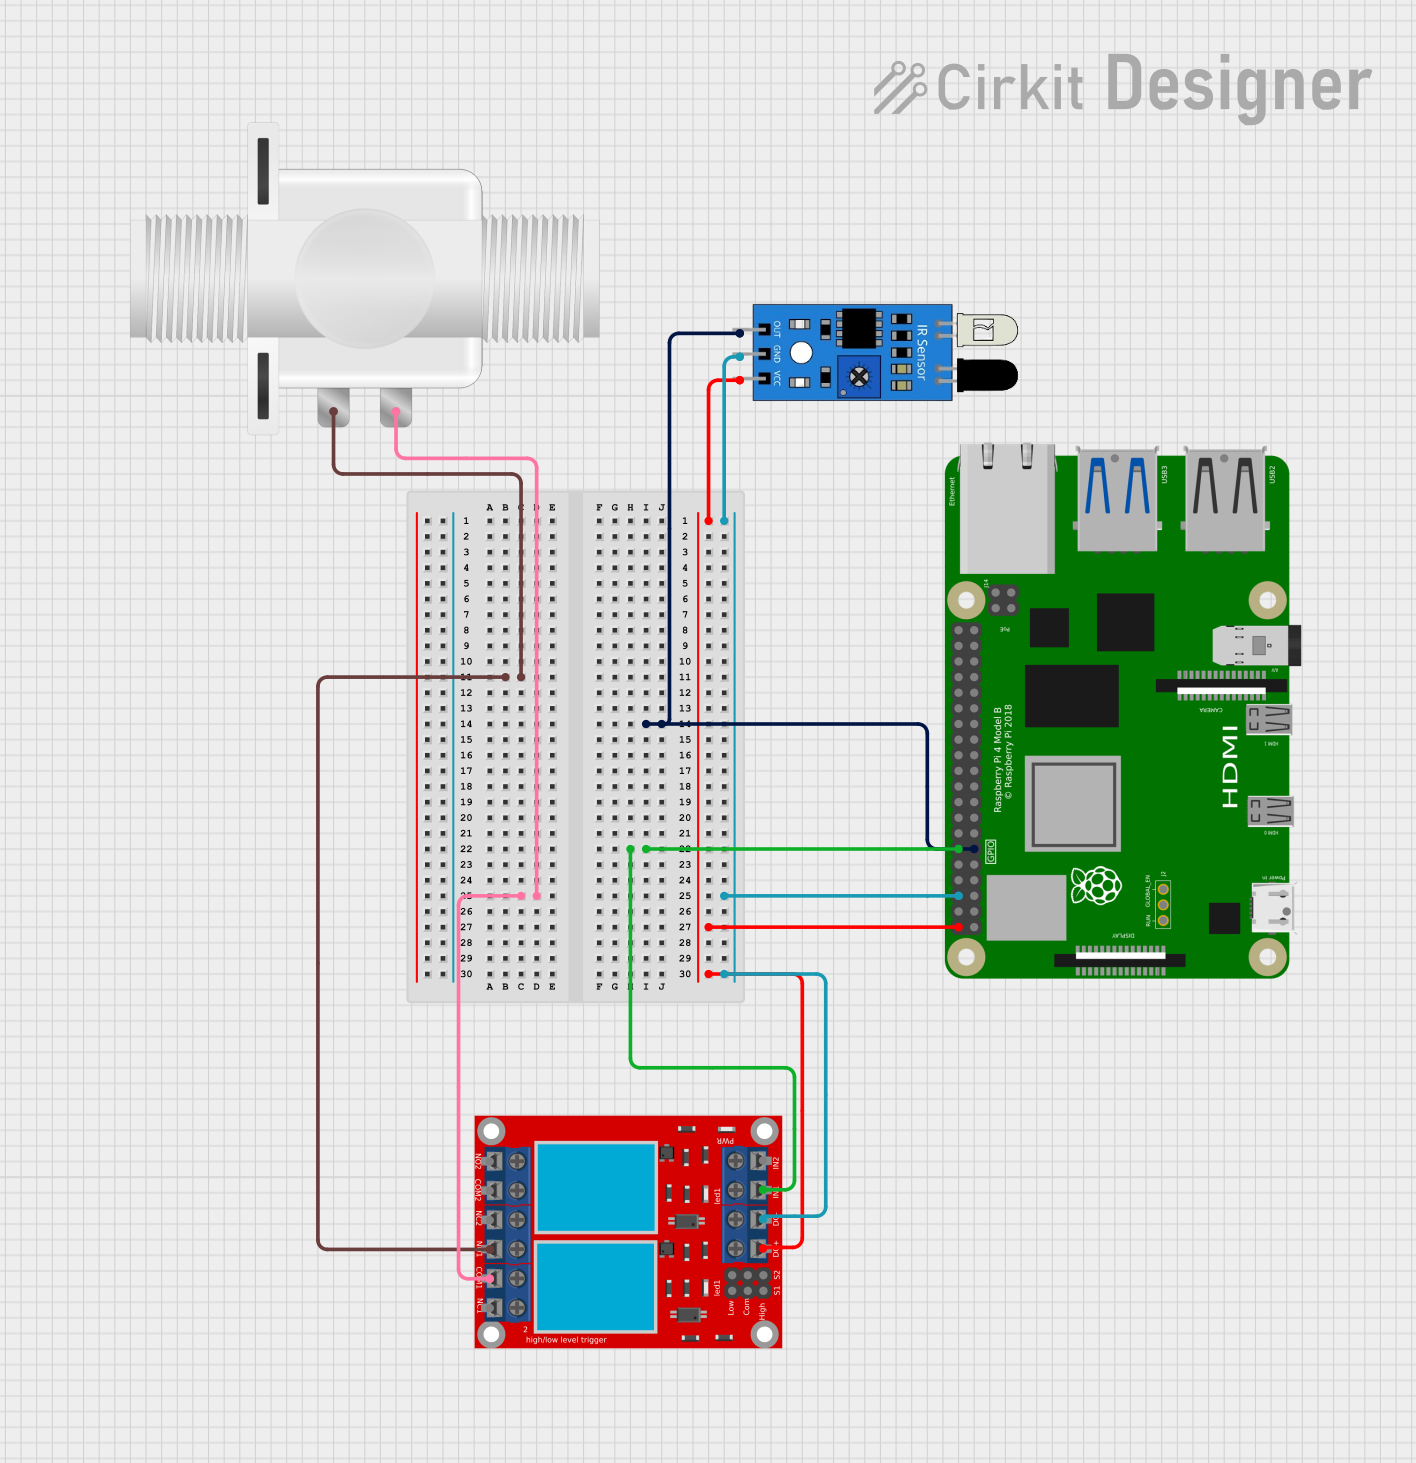
This circuit uses a Raspberry Pi 4B to control a solenoid valve via a 2-channel relay module. An IR sensor connected to the Raspberry Pi detects an event, which triggers the relay to activate the solenoid valve.
Wi-Fi Controlled Solenoid Valve and Servo Motor System
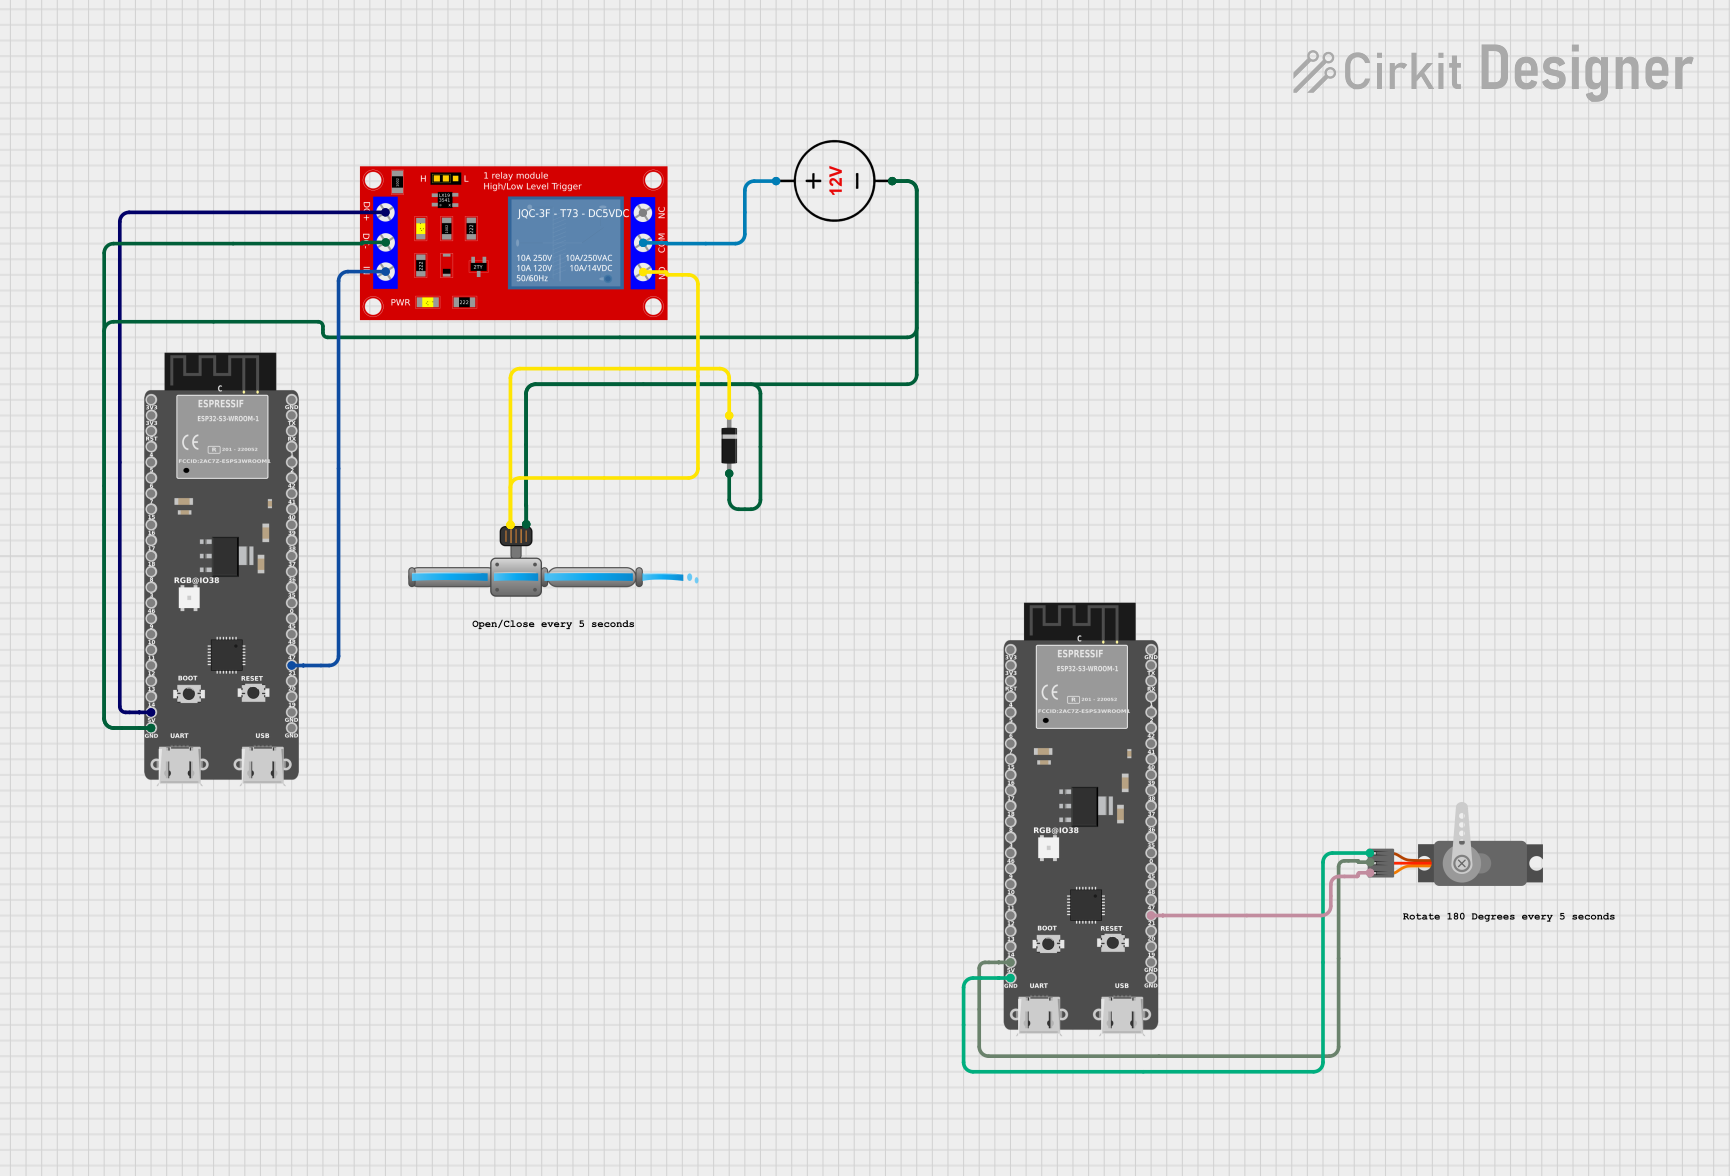
This circuit utilizes an ESP32-S3 microcontroller to control a solenoid irrigation valve and a servo motor. The solenoid valve is activated through a relay module, allowing it to open and close every 5 seconds, while the servo motor is smoothly rotated between 0 and 180 degrees. Both components are powered and controlled via GPIO pins on the ESP32-S3.
ESP32-Controlled Solenoid Valve with Relay Switching
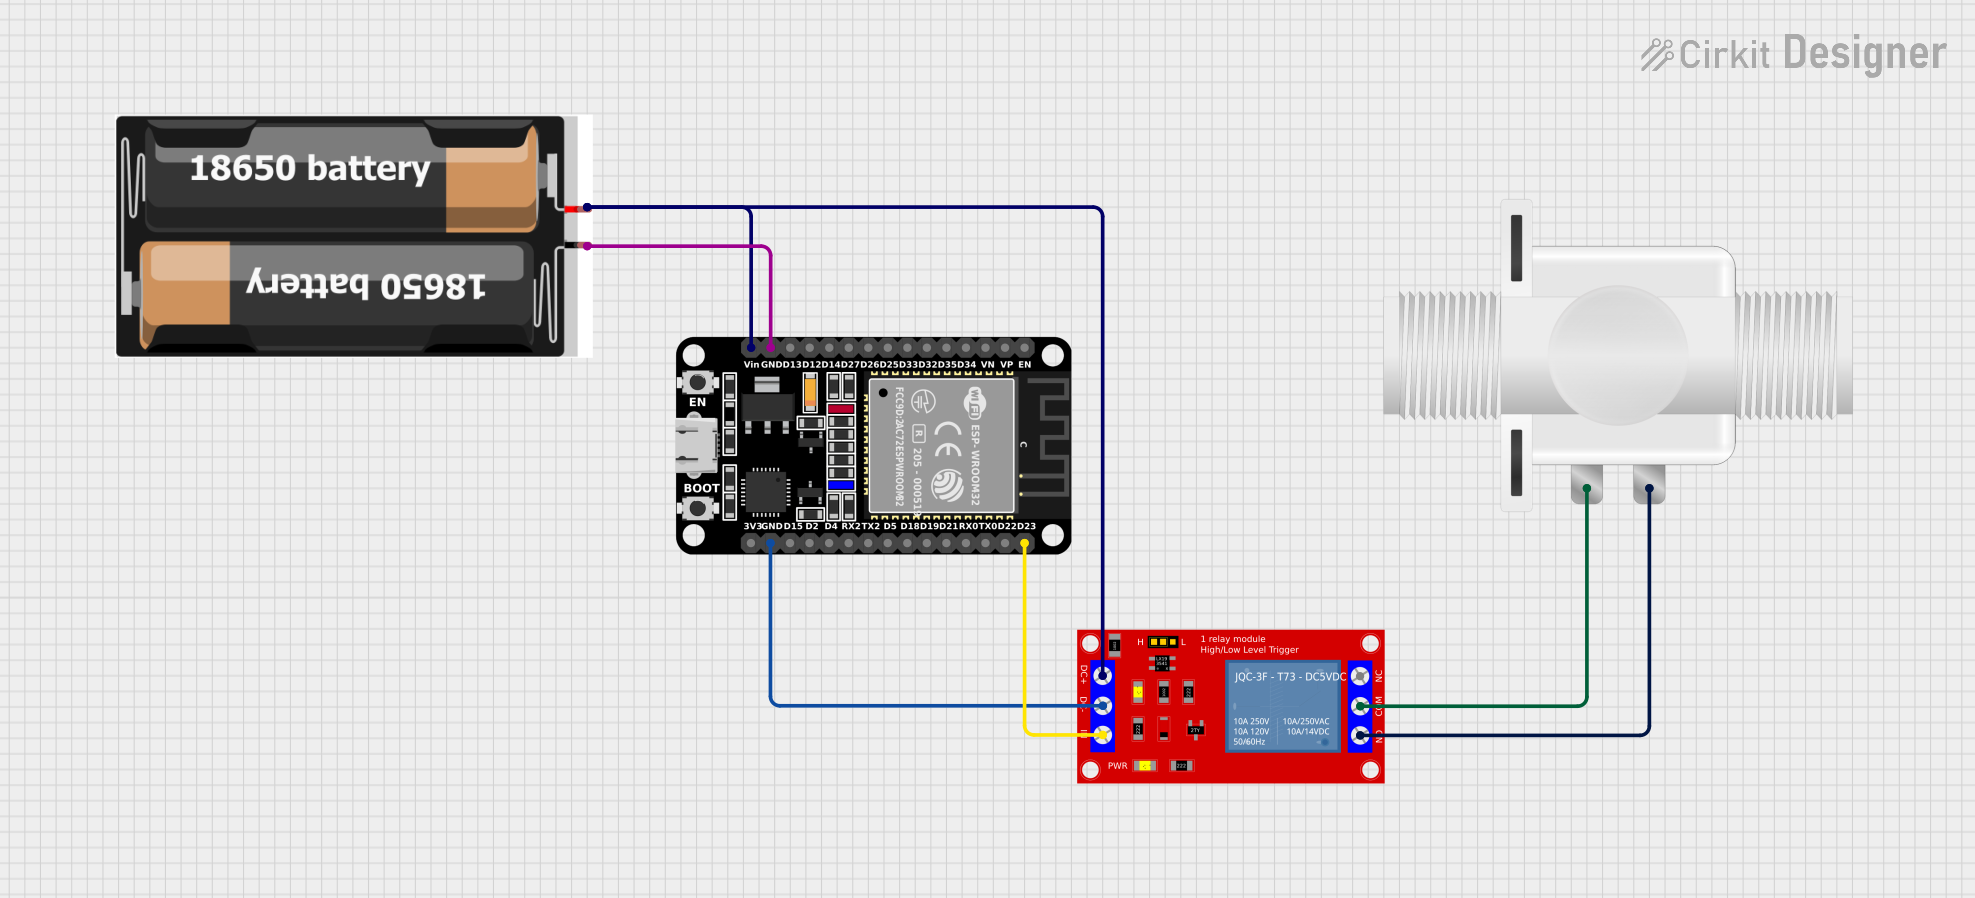
This circuit is designed to control a plastic solenoid valve using an ESP32 microcontroller. The ESP32 uses a digital output to switch a relay module, which provides or cuts off power to the valve. The entire system is powered by a pair of 18650 batteries.
Arduino-Controlled RFM95 Pneumatic Solenoid Valve System
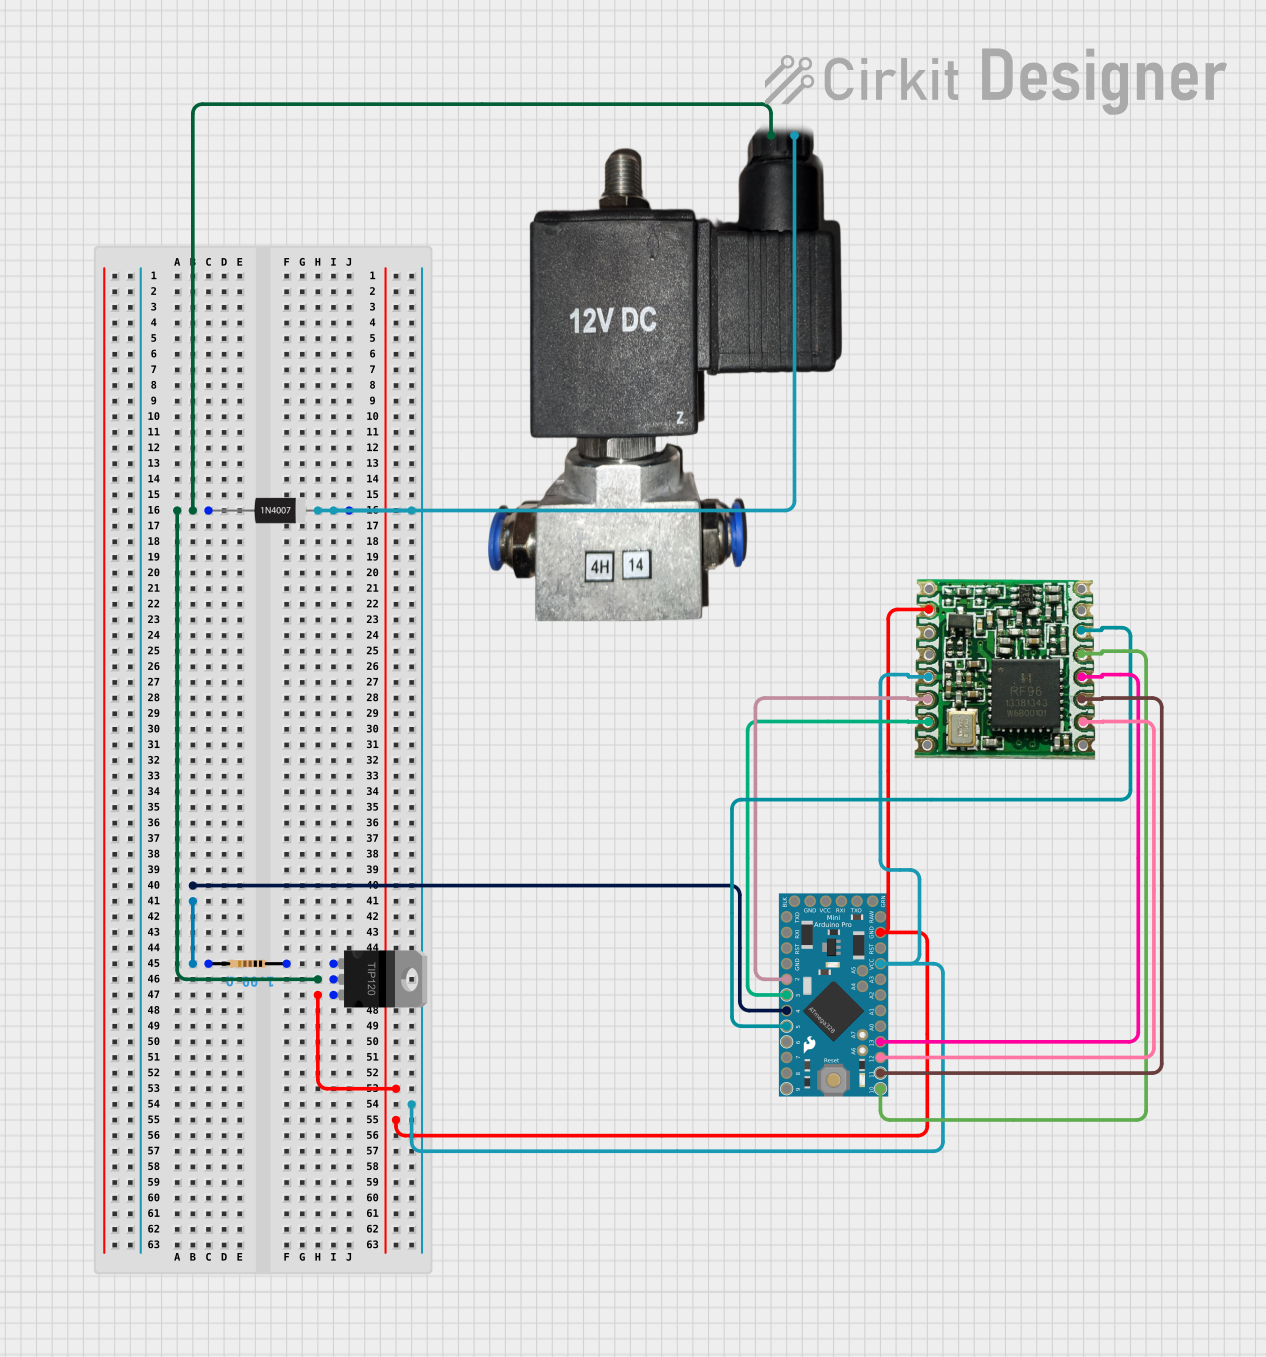
This circuit controls a 12v pneumatic solenoid valve using an Arduino Pro Mini microcontroller. The Arduino toggles the solenoid valve on and off with a 1-second interval, as programmed in the embedded code. A TIP120 Darlington transistor is used to switch the higher current required by the solenoid, and a 1N4007 diode provides back EMF protection. Additionally, an RFM95 module is interfaced with the Arduino for potential wireless communication capabilities.
Explore Projects Built with 4/2 way solenoid valve
Raspberry Pi 4B Automated Irrigation System with IR Sensor and Solenoid Valve
This circuit uses a Raspberry Pi 4B to control a solenoid valve via a 2-channel relay module. An IR sensor connected to the Raspberry Pi detects an event, which triggers the relay to activate the solenoid valve.
Wi-Fi Controlled Solenoid Valve and Servo Motor System
This circuit utilizes an ESP32-S3 microcontroller to control a solenoid irrigation valve and a servo motor. The solenoid valve is activated through a relay module, allowing it to open and close every 5 seconds, while the servo motor is smoothly rotated between 0 and 180 degrees. Both components are powered and controlled via GPIO pins on the ESP32-S3.
ESP32-Controlled Solenoid Valve with Relay Switching
This circuit is designed to control a plastic solenoid valve using an ESP32 microcontroller. The ESP32 uses a digital output to switch a relay module, which provides or cuts off power to the valve. The entire system is powered by a pair of 18650 batteries.
Arduino-Controlled RFM95 Pneumatic Solenoid Valve System
This circuit controls a 12v pneumatic solenoid valve using an Arduino Pro Mini microcontroller. The Arduino toggles the solenoid valve on and off with a 1-second interval, as programmed in the embedded code. A TIP120 Darlington transistor is used to switch the higher current required by the solenoid, and a 1N4007 diode provides back EMF protection. Additionally, an RFM95 module is interfaced with the Arduino for potential wireless communication capabilities.
Common Applications and Use Cases
- Pneumatic Systems: Used in applications such as air cylinders, actuators, and automation systems.
- Hydraulic Systems: Controls the flow of hydraulic fluid in machinery and equipment.
- Robotics: Utilized in robotic arms and other automated systems for precise control of movement.
- Industrial Automation: Employed in assembly lines and manufacturing processes to manage fluid power.
Technical Specifications
Key Technical Details
| Specification | Value |
|---|---|
| Voltage Rating | 12V DC |
| Current Rating | 0.5A |
| Power Rating | 6W |
| Operating Pressure | 0-0.8 MPa |
| Temperature Range | -5°C to 50°C |
Pin Configuration and Descriptions
| Pin Number | Description |
|---|---|
| 1 | Solenoid Coil (+) |
| 2 | Solenoid Coil (-) |
| 3 | Port A (Input) |
| 4 | Port B (Output 1) |
| 5 | Port C (Output 2) |
| 6 | Exhaust Port |
Usage Instructions
How to Use the Component in a Circuit
Wiring the Solenoid Valve:
- Connect the solenoid coil pins (1 and 2) to a suitable power source (12V DC).
- Connect the input port (3) to the fluid or air source.
- Connect the output ports (4 and 5) to the respective actuators or devices you wish to control.
- Ensure the exhaust port (6) is vented properly to avoid pressure buildup.
Controlling the Valve:
- Use a relay or a transistor to control the solenoid activation from a microcontroller (e.g., Arduino).
- When the solenoid is energized, it will switch the flow from one output to the other.
Important Considerations and Best Practices
- Power Supply: Ensure that the power supply matches the voltage and current ratings of the solenoid valve.
- Fluid Compatibility: Verify that the fluid or air being used is compatible with the materials of the valve.
- Mounting: Securely mount the valve to prevent vibrations that may affect performance.
- Testing: Before full operation, test the valve in a controlled environment to ensure proper functionality.
Troubleshooting and FAQs
Common Issues Users Might Face
Valve Not Activating:
- Check the power supply connections and ensure the voltage is correct.
- Verify that the control signal is reaching the solenoid.
Fluid Leakage:
- Inspect the connections and seals for any signs of wear or damage.
- Ensure that the valve is properly mounted and not subjected to excessive force.
Inconsistent Operation:
- Check for any obstructions in the ports or internal mechanisms.
- Ensure that the power supply is stable and not fluctuating.
Solutions and Tips for Troubleshooting
- Use a multimeter to check the voltage at the solenoid terminals.
- If the valve is not responding, try replacing the control relay or transistor.
- Regularly maintain the valve by cleaning and inspecting for wear to prolong its lifespan.
Example Arduino Code
Here is a simple example of how to control the 4/2 way solenoid valve using an Arduino UNO:
// Define pin numbers
const int solenoidPin = 9; // Pin connected to the solenoid control

void setup() {
  pinMode(solenoidPin, OUTPUT); // Set the solenoid pin as output
}

void loop() {
  // Activate the solenoid
  digitalWrite(solenoidPin, HIGH); // Turn on the solenoid
  delay(1000); // Keep it on for 1 second

  // Deactivate the solenoid
  digitalWrite(solenoidPin, LOW); // Turn off the solenoid
  delay(1000); // Keep it off for 1 second
}
This code will toggle the solenoid valve on and off every second. Make sure to connect the solenoid control pin to a relay or transistor to handle the current required by the solenoid.