How to Use Programmable Temperature Controller: Examples, Pinouts, and Specs
Introduction
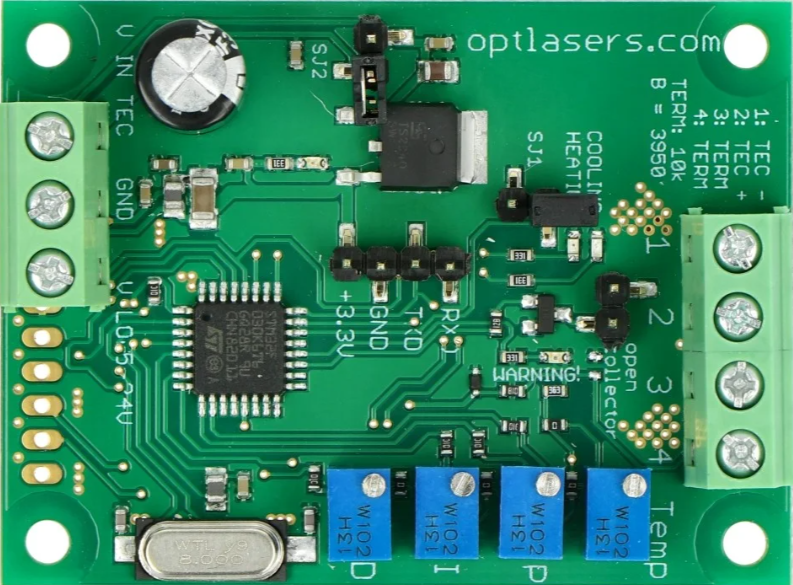
The Programmable Temperature Controller (Manufacturer: Opt Lasers, Part ID: 5904422303877) is a versatile device designed to automatically regulate temperature by controlling heating or cooling systems. It operates based on user-defined parameters and schedules, making it ideal for applications requiring precise thermal management.
This component is widely used in:
- Industrial automation for maintaining optimal operating temperatures.
- HVAC systems for efficient climate control.
- Laboratory equipment for precise thermal regulation.
- 3D printers and laser systems to prevent overheating.
- Food storage and processing to ensure safety and quality.
Explore Projects Built with Programmable Temperature Controller

Explore Projects Built with Programmable Temperature Controller
Technical Specifications
The following table outlines the key technical details of the Programmable Temperature Controller:
| Parameter | Value |
|---|---|
| Operating Voltage | 12V to 24V DC |
| Maximum Current | 10A |
| Temperature Range | -40°C to 120°C (-40°F to 248°F) |
| Temperature Accuracy | ±0.5°C |
| Control Output | Relay (NO/NC), PWM, or Analog |
| Sensor Compatibility | NTC thermistor, PT100, or K-type |
| Display | 7-segment LED or LCD |
| Communication Interface | UART, I2C, or RS485 |
| Dimensions | 75mm x 50mm x 30mm |
| Mounting Type | Panel-mounted |
Pin Configuration and Descriptions
The pinout for the Programmable Temperature Controller is as follows:
| Pin Number | Label | Description |
|---|---|---|
| 1 | VCC | Power supply input (12V to 24V DC). |
| 2 | GND | Ground connection. |
| 3 | TEMP_IN | Temperature sensor input (e.g., NTC, PT100). |
| 4 | RELAY_NO | Normally open relay output for heating/cooling. |
| 5 | RELAY_NC | Normally closed relay output for heating/cooling. |
| 6 | PWM_OUT | PWM output for proportional control. |
| 7 | UART_TX | UART transmit pin for communication. |
| 8 | UART_RX | UART receive pin for communication. |
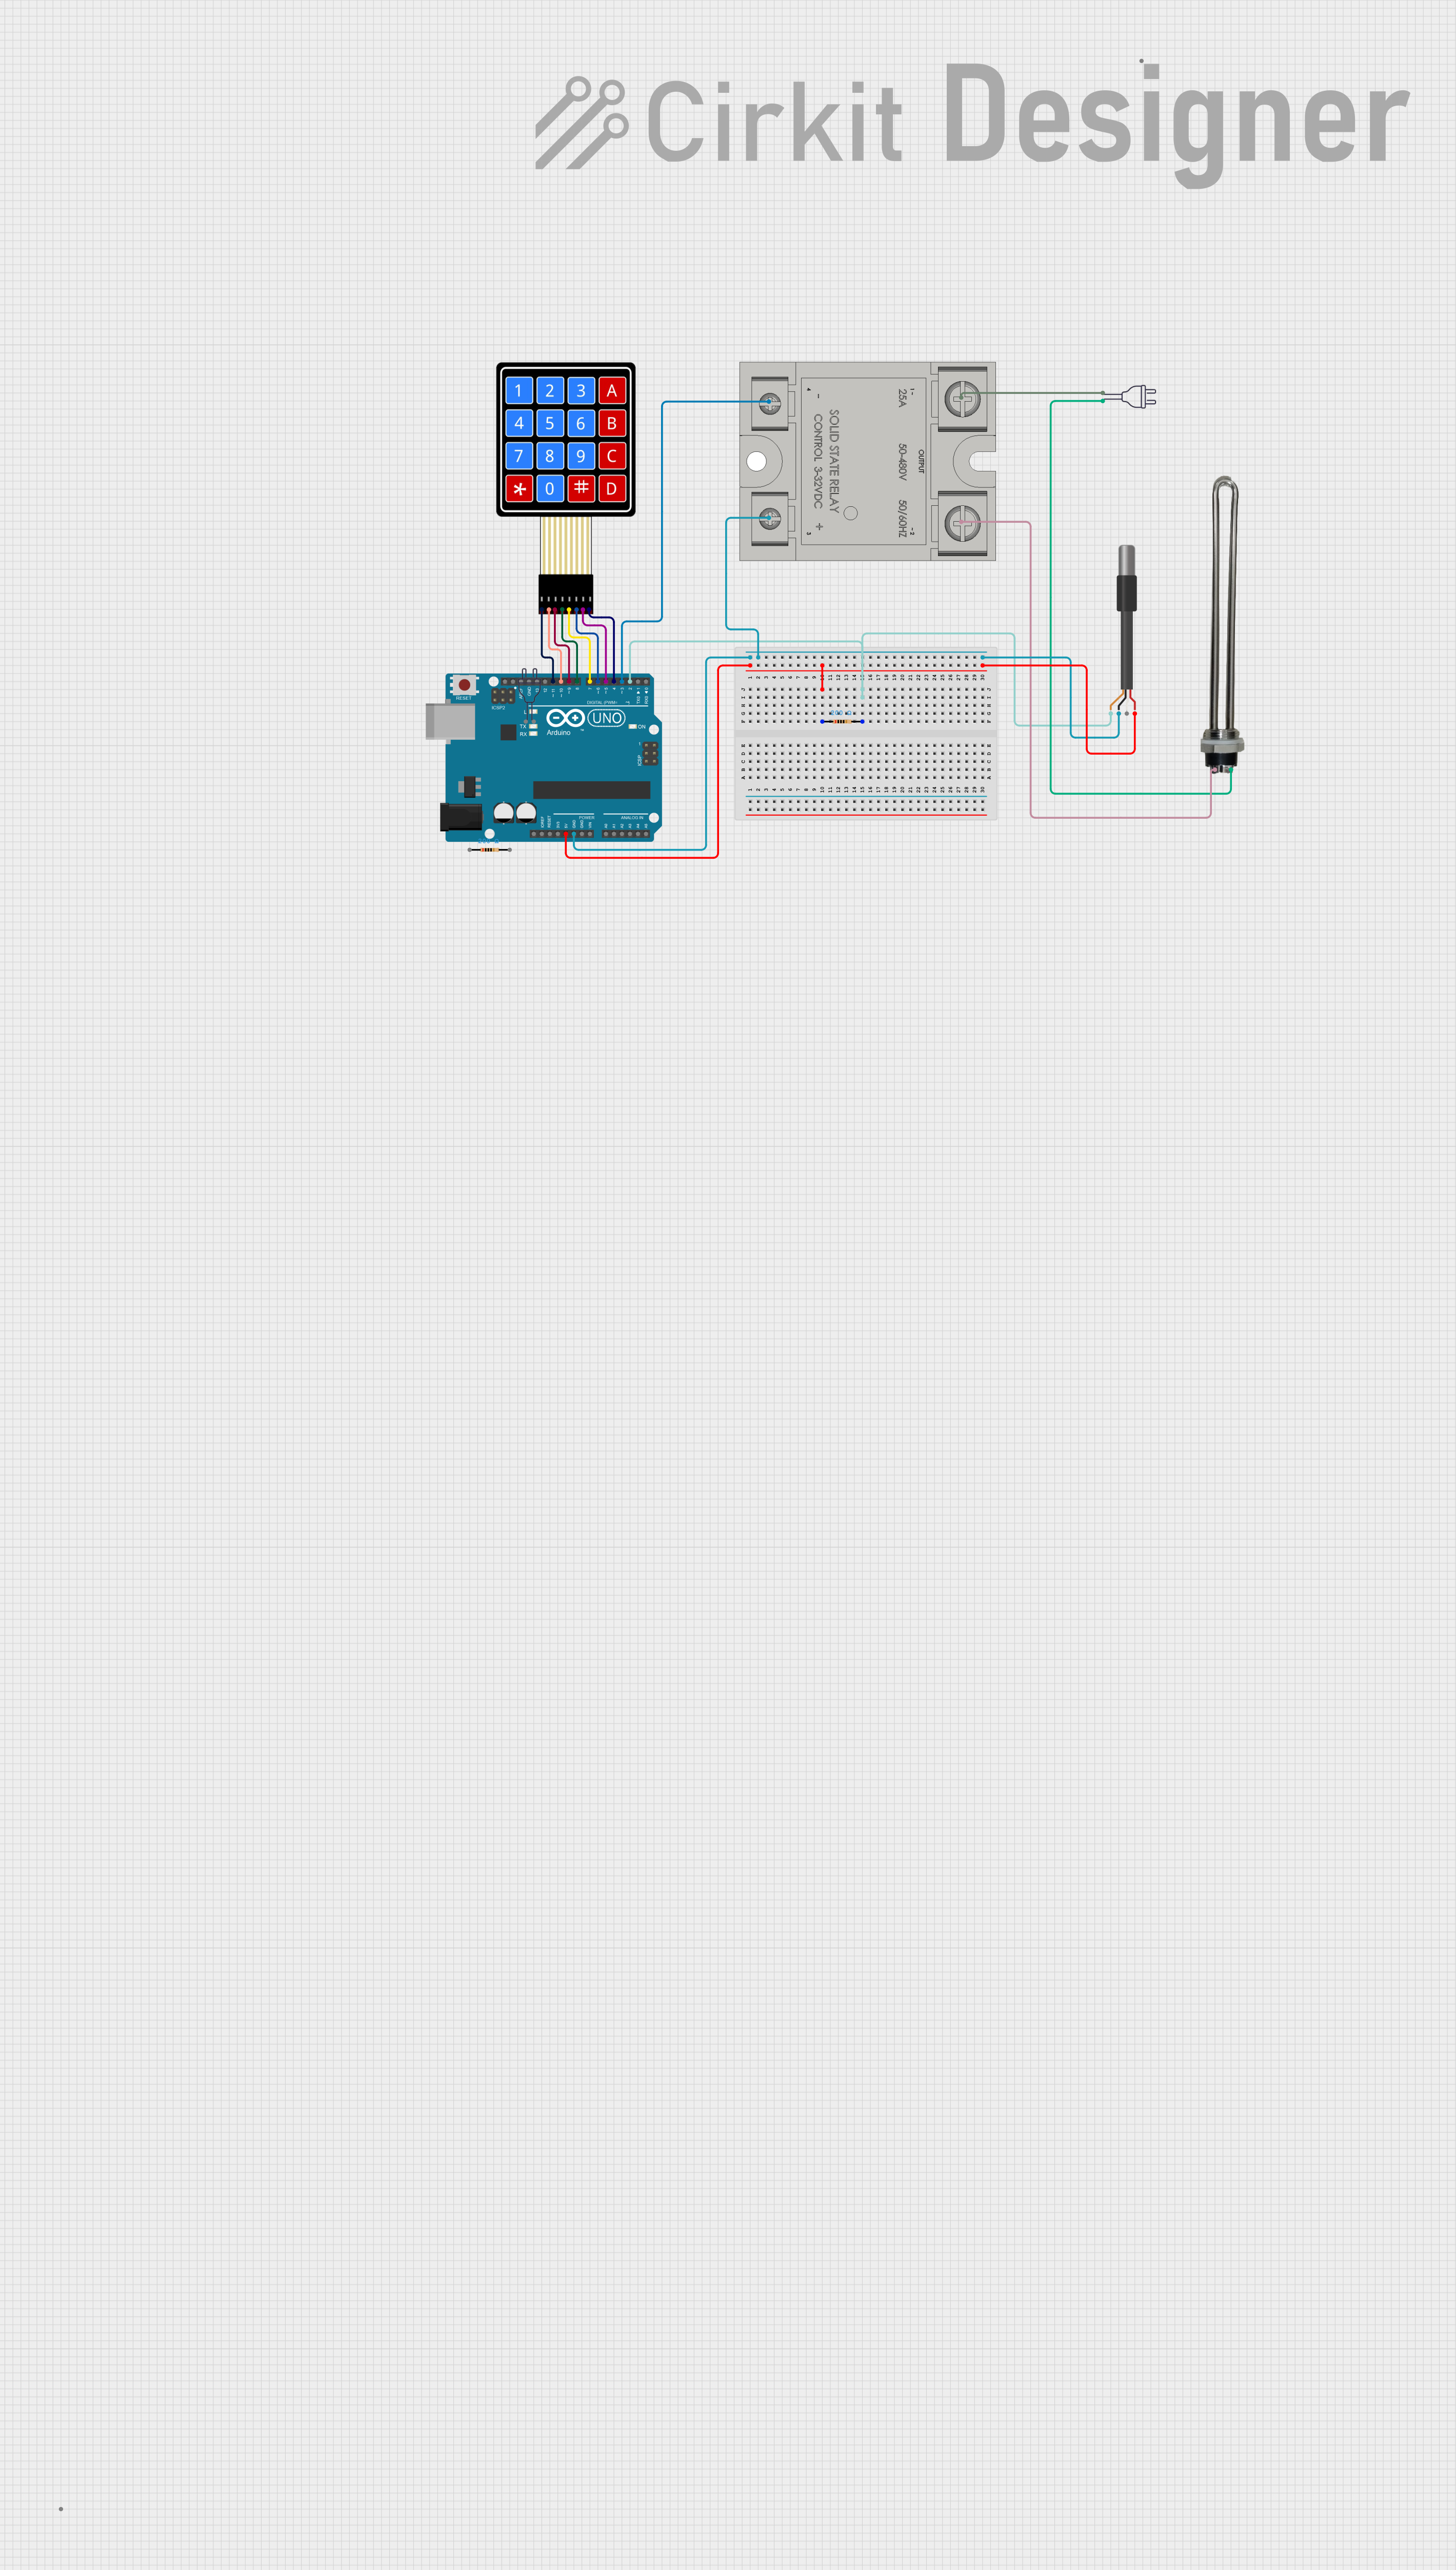
Usage Instructions
How to Use the Component in a Circuit
- Power Supply: Connect the VCC pin to a 12V-24V DC power source and the GND pin to ground.
- Sensor Connection: Attach a compatible temperature sensor (e.g., NTC thermistor) to the TEMP_IN pin.
- Output Connection:
- For relay control, connect the heating or cooling device to the RELAY_NO or RELAY_NC pins.
- For proportional control, use the PWM_OUT pin to drive a fan or heater.
- Communication: If required, connect the UART_TX and UART_RX pins to a microcontroller or PC for monitoring and configuration.
Important Considerations and Best Practices
- Ensure the power supply voltage matches the specified range (12V-24V DC).
- Use a compatible temperature sensor for accurate readings.
- Avoid placing the controller in environments with excessive moisture or dust.
- For high-current loads, use an external relay or contactor to prevent damage to the internal relay.
- Calibrate the temperature sensor periodically for optimal performance.
Example: Connecting to an Arduino UNO
The Programmable Temperature Controller can be interfaced with an Arduino UNO for advanced control and monitoring. Below is an example code snippet:
// Example: Reading temperature data from the controller via UART
#include <SoftwareSerial.h>

// Define RX and TX pins for communication with the controller
SoftwareSerial tempController(10, 11); // RX = pin 10, TX = pin 11

void setup() {
  Serial.begin(9600); // Initialize serial monitor
  tempController.begin(9600); // Initialize communication with the controller

  Serial.println("Programmable Temperature Controller Initialized");
}

void loop() {
  // Check if data is available from the controller
  if (tempController.available()) {
    String tempData = tempController.readStringUntil('\n'); // Read temperature data
    Serial.print("Temperature: ");
    Serial.println(tempData); // Display temperature on the serial monitor
  }

  delay(1000); // Wait for 1 second before the next read
}
Note: Ensure the UART_TX and UART_RX pins of the controller are connected to the appropriate pins on the Arduino UNO.
Troubleshooting and FAQs
Common Issues and Solutions
No Power to the Controller
- Cause: Incorrect power supply voltage or loose connections.
- Solution: Verify the power supply voltage is within the 12V-24V range and check all connections.
Inaccurate Temperature Readings
- Cause: Faulty or incompatible temperature sensor.
- Solution: Use a compatible sensor (e.g., NTC thermistor, PT100) and ensure proper calibration.
Relay Not Activating
- Cause: Load exceeds the relay's current rating or incorrect wiring.
- Solution: Use an external relay for high-current loads and double-check the wiring.
Communication Failure
- Cause: Incorrect UART settings or wiring.
- Solution: Ensure the baud rate matches (default: 9600) and verify the TX/RX connections.
FAQs
Q1: Can I use this controller with a 5V power supply?
A1: No, the controller requires a 12V-24V DC power supply for proper operation.
Q2: What type of devices can I control with this component?
A2: You can control heating elements, cooling fans, air conditioners, and other temperature-sensitive devices.
Q3: How do I reset the controller to factory settings?
A3: Refer to the manufacturer's manual for the reset procedure, typically involving a specific button combination.
Q4: Can I use multiple sensors with this controller?
A4: No, this controller supports a single temperature sensor input. For multiple sensors, consider using a multiplexer or a more advanced controller.
By following this documentation, users can effectively integrate and operate the Programmable Temperature Controller in their projects.