How to Use PAM8406 5V Digital Audio Amplifier : Examples, Pinouts, and Specs
Introduction
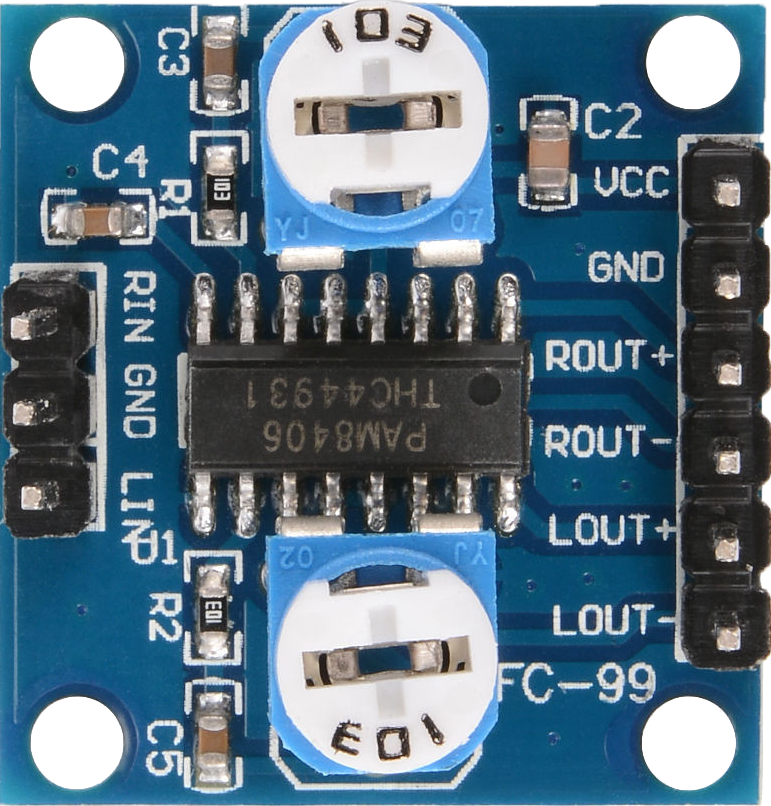
The PAM8406 is a 5V digital audio amplifier capable of delivering up to 10W of power per channel. It is a class-D amplifier known for its high efficiency and low heat generation, making it ideal for portable and compact audio applications. The PAM8406 is commonly used in DIY audio projects, portable speakers, and sound systems where space and power consumption are critical considerations.
Explore Projects Built with PAM8406 5V Digital Audio Amplifier


Explore Projects Built with PAM8406 5V Digital Audio Amplifier
Common Applications and Use Cases
- Portable Bluetooth speakers
- DIY audio projects
- Battery-powered sound systems
- Desktop computer speakers
- Educational electronics projects
Technical Specifications
Key Technical Details
- Supply Voltage: 5V DC
- Output Power: Up to 10W per channel (at 4Ω load)
- Efficiency: >90% (at 85% power)
- Channels: 2 (stereo)
- Amplifier Type: Class-D
- Signal-to-Noise Ratio (SNR): 90 dB
- Total Harmonic Distortion (THD): <0.1%
- Operating Temperature: -20°C to 85°C
Pin Configuration and Descriptions
| Pin Number | Pin Name | Description |
|---|---|---|
| 1 | VDD | Power supply voltage (5V) |
| 2 | IN1- | Negative input for channel 1 |
| 3 | IN1+ | Positive input for channel 1 |
| 4 | GND | Ground |
| 5 | OUT1- | Negative output for channel 1 |
| 6 | OUT1+ | Positive output for channel 1 |
| 7 | OUT2+ | Positive output for channel 2 |
| 8 | OUT2- | Negative output for channel 2 |
| 9 | GND | Ground |
| 10 | IN2+ | Positive input for channel 2 |
| 11 | IN2- | Negative input for channel 2 |
| 12 | VDD | Power supply voltage (5V) |
Usage Instructions
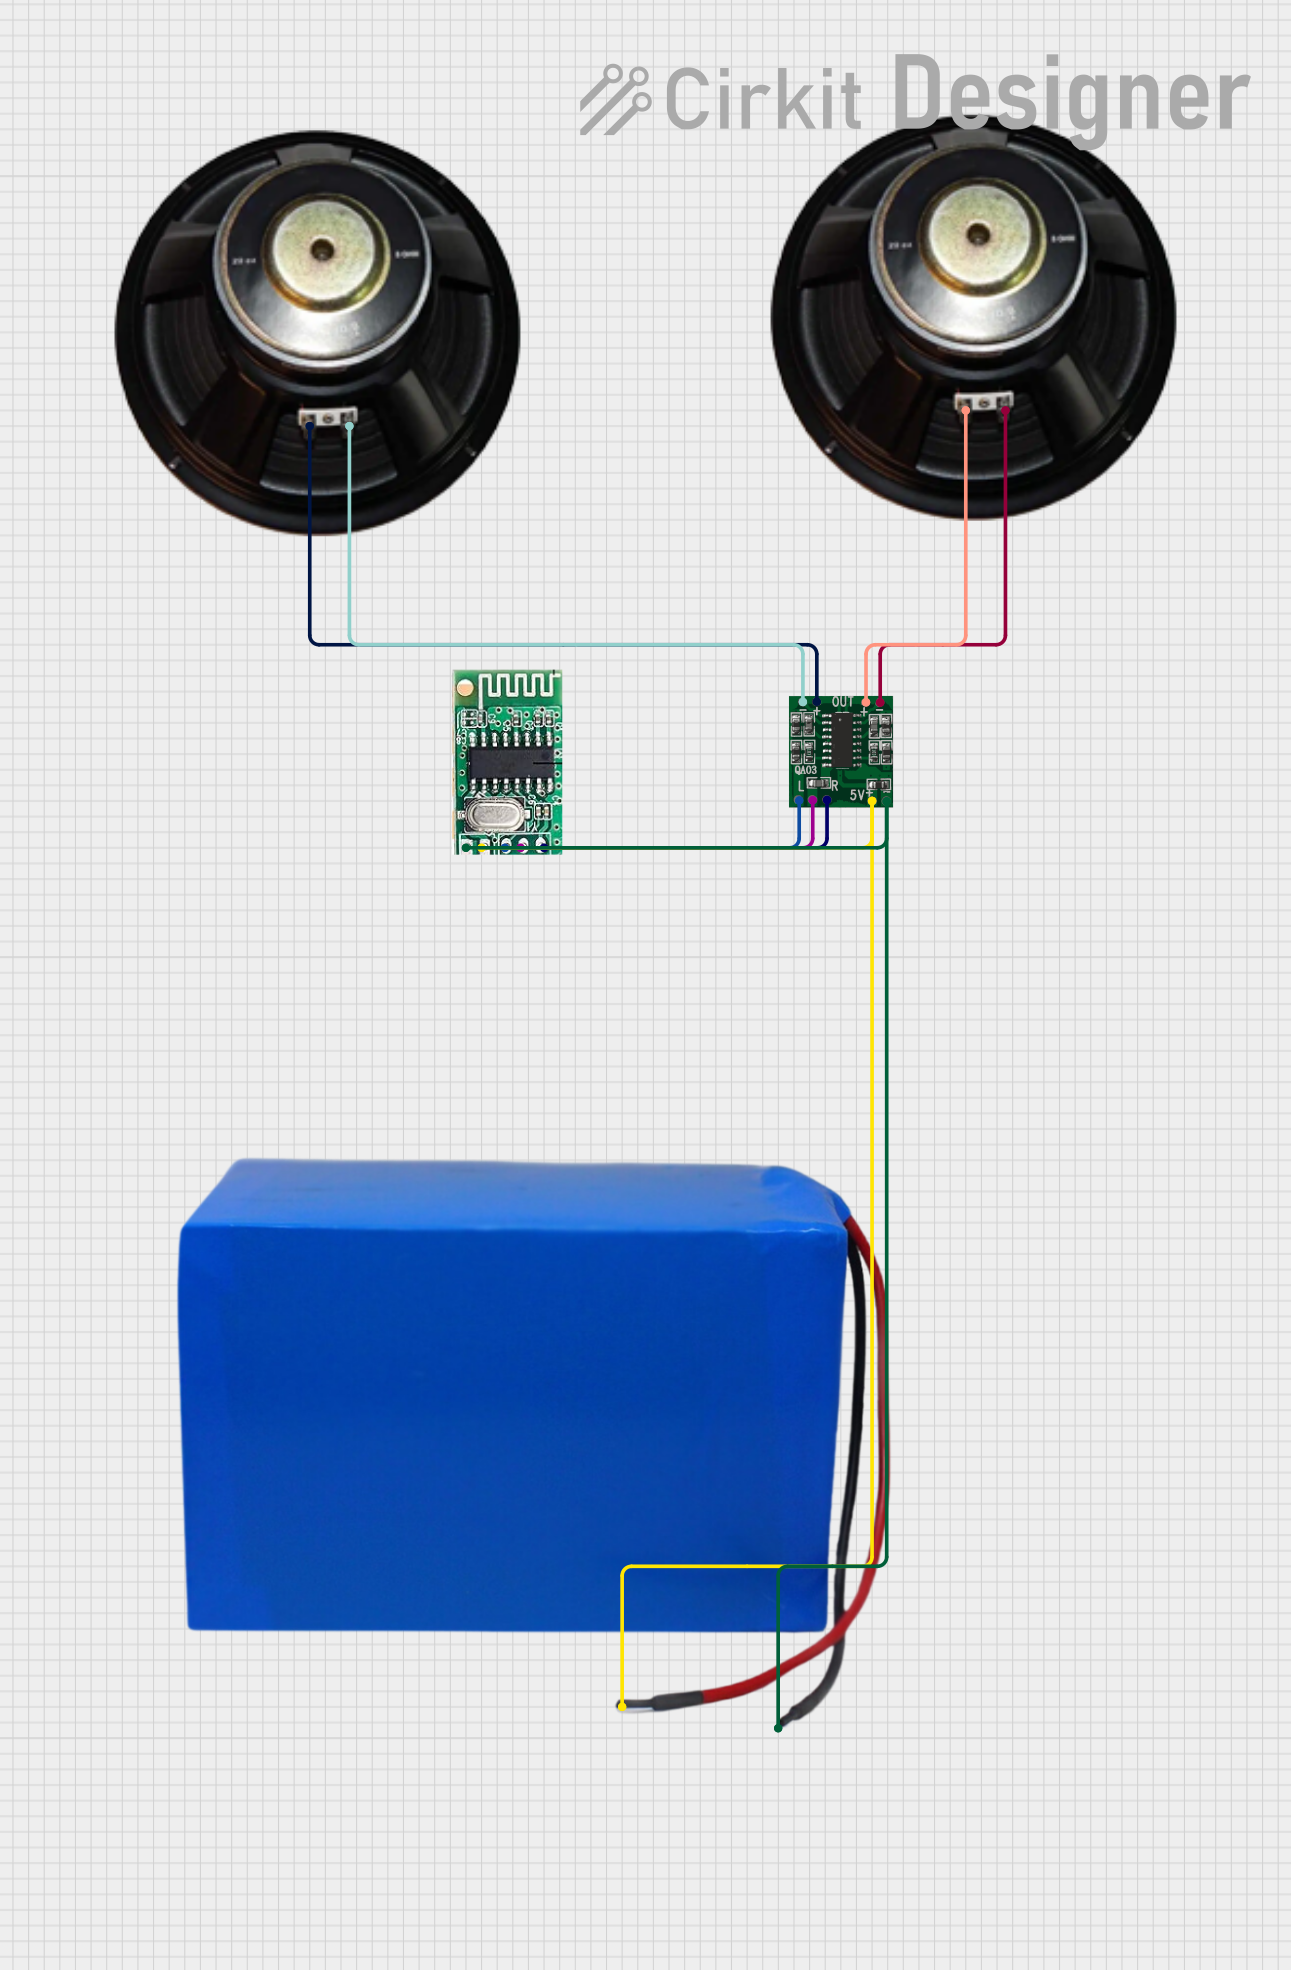
How to Use the Component in a Circuit
Power Supply: Connect a 5V power supply to the VDD and GND pins. Ensure that the power supply can deliver sufficient current for the desired output power.
Input Signal: Connect the audio input source to the IN1+ and IN1- for channel 1, and IN2+ and IN2- for channel 2. These inputs are typically connected to a pre-amplified audio source.
Output Connection: Connect the speakers to the OUT1+ and OUT1- for channel 1, and OUT2+ and OUT2- for channel 2. Ensure that the speakers' impedance matches the amplifier's requirements (typically 4Ω).
Grounding: Ensure that all ground connections are secure and have a common reference point to minimize noise and interference.
Important Considerations and Best Practices
- Use a decoupling capacitor close to the power supply pins to filter out voltage spikes and noise.
- Keep audio input and output wires as short as possible to reduce the risk of interference.
- Use proper heat sinking if operating the amplifier at high output levels for extended periods.
- Avoid short-circuiting the output as it may damage the amplifier.
Troubleshooting and FAQs
Common Issues Users Might Face
- No Sound Output: Check the power supply and connections. Ensure the input signal is present and correctly connected.
- Distorted Sound: Verify that the input signal level is not too high, causing clipping. Also, check for proper speaker impedance matching.
- Overheating: Ensure adequate ventilation and heat sinking if necessary. Reduce output power if the amplifier is continuously running hot.
Solutions and Tips for Troubleshooting
- Low Volume: Increase the input signal level or check if the power supply is delivering 5V as expected.
- Intermittent Sound: Inspect all connections for loose wires or poor solder joints.
- Noise in Audio: Use shielded cables for inputs and keep power lines away from audio signal paths.
FAQs
Q: Can I use a supply voltage higher than 5V? A: No, the PAM8406 is designed for a 5V supply. Using a higher voltage may damage the component.
Q: What type of speakers can I use with the PAM8406? A: You can use any speakers with an impedance of 4Ω or higher, but the optimal power output is achieved with 4Ω speakers.
Q: Can the PAM8406 be used with a mono signal? A: Yes, you can input a mono signal to both channels or use only one channel for a mono output.
Q: Is it necessary to use a heatsink with the PAM8406? A: It depends on the output power and operating conditions. For high power output or enclosed spaces, a heatsink is recommended.
Example Arduino UNO Connection and Code
The PAM8406 can be used with an Arduino UNO to create a simple audio system. Below is an example of how to connect the PAM8406 to an Arduino UNO and a sample code snippet to generate a tone.
Connection Diagram
- Arduino 5V to PAM8406 VDD
- Arduino GND to PAM8406 GND
- Arduino Digital Pin 9 to PAM8406 IN1+ (through a 1kΩ resistor)
- PAM8406 IN1- to GND
- Connect speakers to OUT1+ and OUT1-
Sample Code
int speakerPin = 9; // Define the speaker output pin

void setup() {
  pinMode(speakerPin, OUTPUT); // Set the speaker pin as an output
}

void loop() {
  tone(speakerPin, 440); // Play a 440Hz tone on the speaker
  delay(1000);           // Delay for 1 second
  noTone(speakerPin);    // Stop the tone
  delay(1000);           // Delay for 1 second
}
Note: This code will generate a 440Hz tone (A4 note) that alternates on and off every second. The PAM8406 will amplify this signal and output it through the connected speakers. Ensure that the volume level is safe for your speakers to avoid damage.