How to Use Micro SD Card Module: Examples, Pinouts, and Specs
Introduction
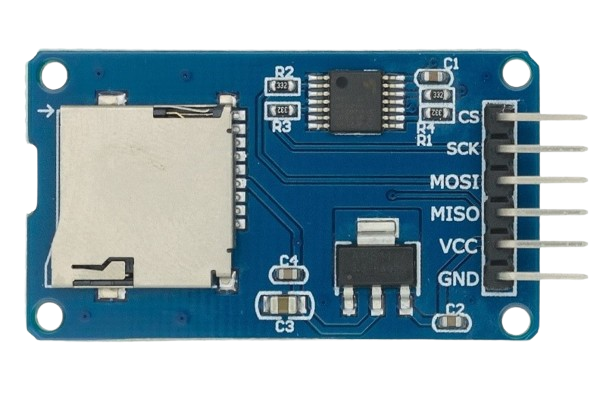
The Micro SD Card Module is a compact and convenient device that allows microcontrollers, such as the Arduino, to read from and write to Micro SD cards. These cards are widely used for data storage in portable devices due to their small size and high capacity. The module is commonly used in applications such as data logging, MP3 players, and portable data storage.
Explore Projects Built with Micro SD Card Module
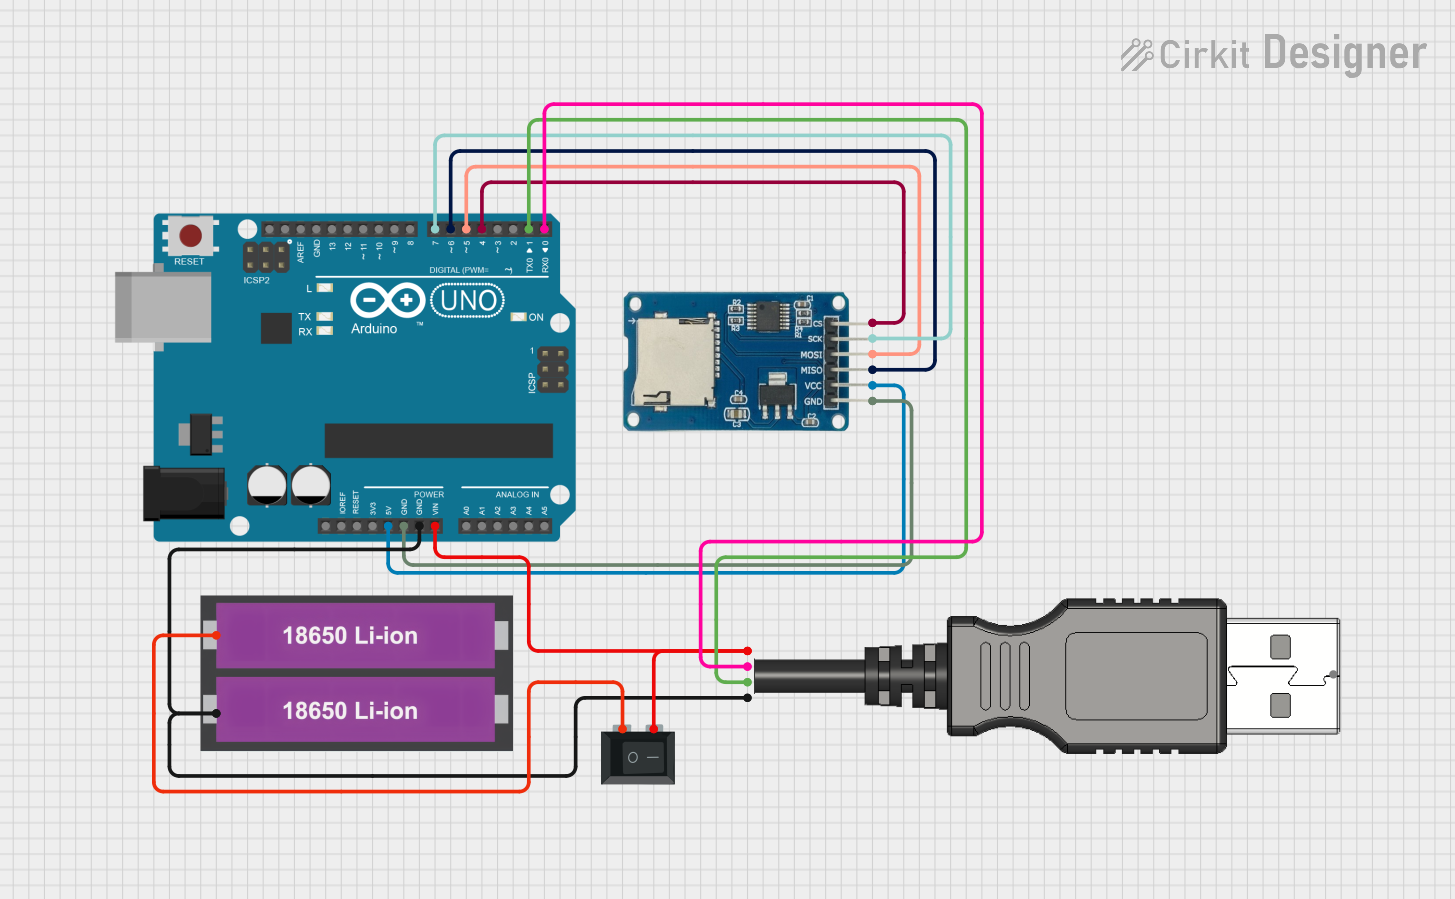

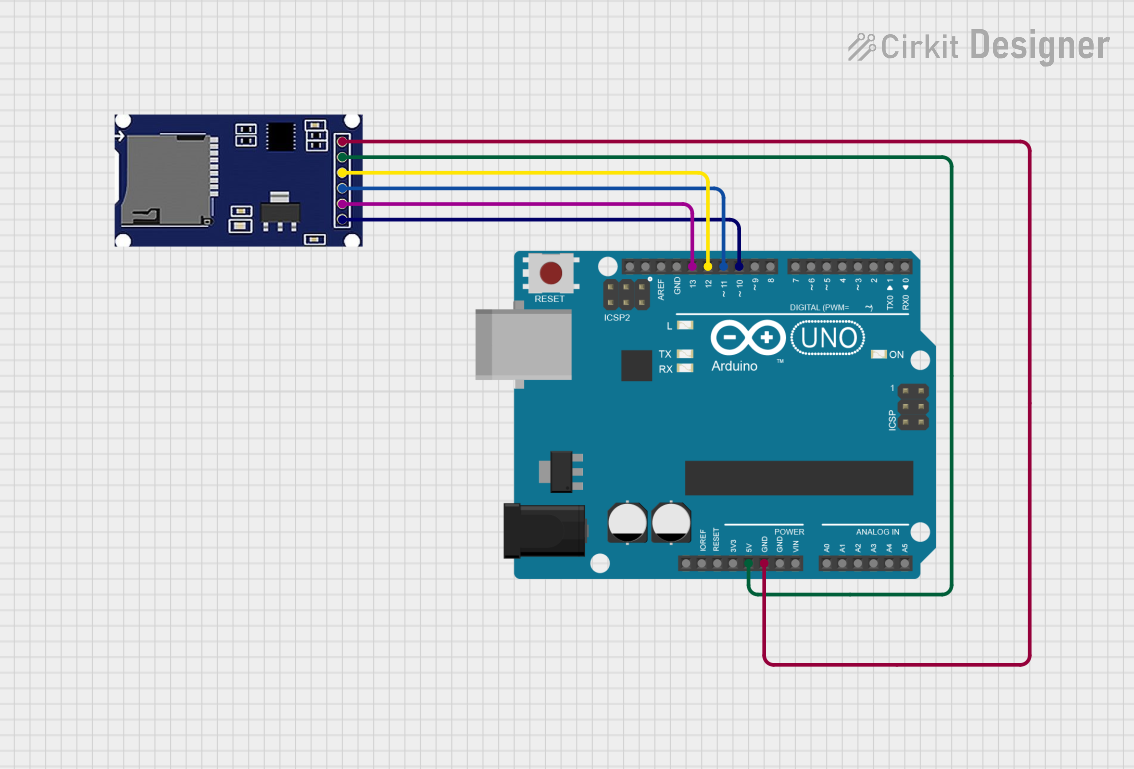
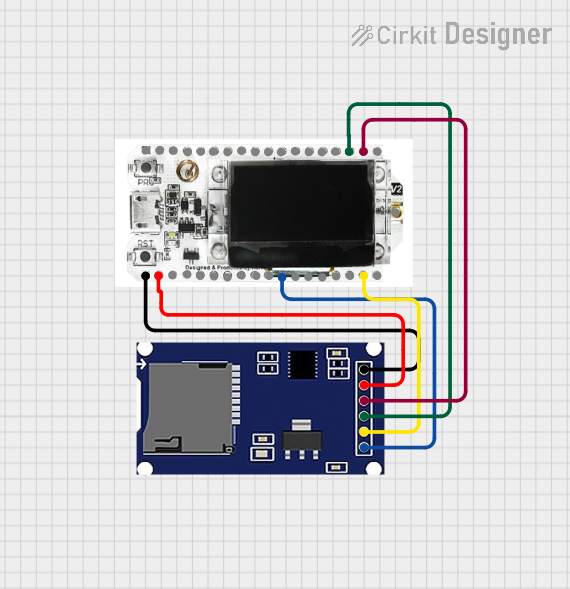
Explore Projects Built with Micro SD Card Module
Technical Specifications
Key Technical Details
- Supply Voltage: 3.3V to 5V
- Logic Level: 3.3V (5V tolerant inputs)
- Communication Interface: SPI
- Supported Card Types: Micro SD, Micro SDHC (high capacity, up to 32GB)
- Dimensions: Typically around 18mm x 17mm
Pin Configuration and Descriptions
| Pin Name | Description |
|---|---|
| CS | Chip Select, active low |
| SCK | Serial Clock, connects to SPI clock |
| MOSI | Master Out Slave In, SPI data input |
| MISO | Master In Slave Out, SPI data output |
| VCC | Supply voltage (3.3V to 5V) |
| GND | Ground |
Usage Instructions
Interfacing with Arduino
Connecting the Module:
- Connect the module's VCC to the Arduino's 5V pin.
- Connect GND to the Arduino's ground.
- Connect CS to a digital pin (e.g., D10) for chip select.
- Connect SCK to the Arduino's SCK (D13).
- Connect MOSI to the Arduino's MOSI (D11).
- Connect MISO to the Arduino's MISO (D12).
Library Installation:
- Install the
SDlibrary in the Arduino IDE by going toSketch > Include Library > Manage Libraries...and searching for "SD".
- Install the
Initialization:
- Initialize the SD card and check for errors.
Reading and Writing:
- Use the functions provided by the
SDlibrary to read from and write to files on the SD card.
- Use the functions provided by the
Example Arduino Sketch
#include <SPI.h>
#include <SD.h>

const int chipSelect = 10; // Chip select pin for the SD card module

void setup() {
  Serial.begin(9600);
  while (!Serial) {
    ; // Wait for serial port to connect.
  }

  Serial.print("Initializing SD card...");

  // Ensure that the chip select pin is set as an output
  pinMode(chipSelect, OUTPUT);

  // Check for the presence of the SD card
  if (!SD.begin(chipSelect)) {
    Serial.println("Card failed, or not present");
    // Don't continue if the initialization fails
    while (1);
  }
  Serial.println("Card initialized.");
}

void loop() {
  // Open a new file to write to it
  File dataFile = SD.open("datalog.txt", FILE_WRITE);

  // If the file is available, write to it
  if (dataFile) {
    dataFile.println("Data log entry");
    dataFile.close();
    Serial.println("Data written to file");
  } else {
    // If the file isn't open, report an error
    Serial.println("Error opening datalog.txt");
  }

  // Wait a bit before writing new data
  delay(3000);
}
Important Considerations and Best Practices
- Power Supply: Ensure that the module is powered with a stable 3.3V to 5V supply.
- Logic Levels: If using a 5V microcontroller, ensure that the module's inputs are 5V tolerant.
- File System: Format the Micro SD card with the FAT16 or FAT32 file system before use.
- File Names: Use 8.3 filename format for compatibility (e.g.,
filename.txt). - Safe Removal: Before removing the SD card, ensure that all read/write operations are complete to avoid data corruption.
Troubleshooting and FAQs
Common Issues
- Card Not Detected: Ensure that the card is inserted correctly and the pins are properly connected.
- Read/Write Errors: Check if the SD card is formatted correctly and not locked.
- Corrupted Data: Use the
flush()method after writing to ensure data is properly written to the card.
Solutions and Tips
- Reformat the SD Card: If the card is not recognized, try reformatting it on a computer.
- Check Connections: Loose or incorrect wiring can cause various issues; double-check all connections.
- Use Quality Power Supply: Power fluctuations can cause instability; use a regulated power supply.
FAQs
Q: Can I use a Micro SD card larger than 32GB? A: The module typically supports cards up to 32GB formatted with FAT16 or FAT32. Larger cards may require different formatting and are not guaranteed to work.
Q: How do I ensure my data is written to the card?
A: After writing data, use the file.flush() or file.close() methods to ensure all data is saved to the card.
Q: Can I use multiple SD card modules on the same Arduino? A: Yes, you can use multiple modules by assigning different chip select (CS) pins for each one. However, you can only communicate with one card at a time.
Q: What should I do if I get a 'Card failed' or 'Card not present' message? A: Check the card and connections. If the issue persists, try using another SD card to determine if the card is faulty.