How to Use 480 x 320 DFR0428 Touchscreen: Examples, Pinouts, and Specs
Introduction
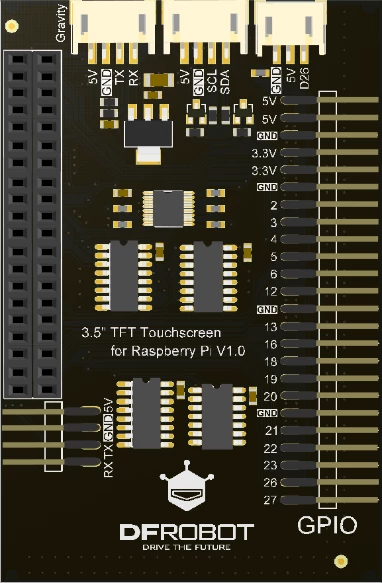
The 480 x 320 DFR0428 Touchscreen, manufactured by DF Robot, is a high-resolution touchscreen display designed for interactive applications. With a resolution of 480 x 320 pixels, this component provides a clear and vibrant display, making it ideal for projects requiring graphical interfaces. The touchscreen functionality allows users to interact directly with the display, enabling intuitive control for embedded systems, DIY electronics, and prototyping.
Explore Projects Built with 480 x 320 DFR0428 Touchscreen


Explore Projects Built with 480 x 320 DFR0428 Touchscreen
Common Applications
- Graphical user interfaces (GUIs) for embedded systems
- DIY electronics projects
- Home automation control panels
- Educational tools and interactive displays
- Portable monitoring systems
Technical Specifications
The following table outlines the key technical details of the DFR0428 touchscreen:
| Specification | Value |
|---|---|
| Manufacturer | DF Robot |
| Part ID | 0428 |
| Display Resolution | 480 x 320 pixels |
| Display Type | TFT LCD |
| Touchscreen Type | Resistive |
| Operating Voltage | 3.3V / 5V |
| Communication Interface | SPI |
| Backlight Control | PWM |
| Dimensions | 85mm x 55mm x 12mm |
| Operating Temperature | -20°C to 70°C |
Pin Configuration
The DFR0428 touchscreen has a standard pin header for easy integration. Below is the pin configuration:
| Pin | Name | Description |
|---|---|---|
| 1 | VCC | Power supply input (3.3V or 5V) |
| 2 | GND | Ground connection |
| 3 | CS | Chip Select for SPI communication |
| 4 | RESET | Reset pin for the display |
| 5 | DC | Data/Command control pin |
| 6 | MOSI | Master Out Slave In (SPI data input) |
| 7 | SCK | Serial Clock for SPI |
| 8 | LED | Backlight control (PWM input for brightness control) |
| 9 | T_IRQ | Touchscreen interrupt output |
| 10 | T_CS | Touchscreen Chip Select |
Usage Instructions
Connecting the DFR0428 Touchscreen
To use the DFR0428 touchscreen in a circuit, follow these steps:
- Power Supply: Connect the
VCCpin to a 3.3V or 5V power source and theGNDpin to ground. - SPI Communication: Connect the
CS,MOSI, andSCKpins to the corresponding SPI pins on your microcontroller. - Touchscreen Control: Use the
T_CSandT_IRQpins to manage the touchscreen functionality. - Backlight Control: Optionally, connect the
LEDpin to a PWM-capable pin on your microcontroller to adjust the backlight brightness.
Example: Using with Arduino UNO
Below is an example of how to connect and program the DFR0428 touchscreen with an Arduino UNO:
Wiring Diagram
| DFR0428 Pin | Arduino UNO Pin |
|---|---|
| VCC | 5V |
| GND | GND |
| CS | Pin 10 |
| RESET | Pin 9 |
| DC | Pin 8 |
| MOSI | Pin 11 |
| SCK | Pin 13 |
| LED | Pin 6 (PWM) |
| T_IRQ | Pin 2 |
| T_CS | Pin 4 |
Arduino Code Example
#include <Adafruit_GFX.h>      // Graphics library for the display
#include <Adafruit_TFTLCD.h>  // TFT LCD library
#include <TouchScreen.h>      // Touchscreen library

// Define pin connections
#define LCD_CS A3  // Chip Select
#define LCD_CD A2  // Command/Data
#define LCD_WR A1  // Write
#define LCD_RD A0  // Read
#define LCD_RESET A4 // Reset

// Touchscreen pins
#define YP A3  // Must be an analog pin
#define XM A2  // Must be an analog pin
#define YM 9   // Can be a digital pin
#define XP 8   // Can be a digital pin

// Initialize display and touchscreen
Adafruit_TFTLCD tft(LCD_CS, LCD_CD, LCD_WR, LCD_RD, LCD_RESET);
TouchScreen ts = TouchScreen(XP, YP, XM, YM, 300);

void setup() {
  tft.begin(0x9341);  // Initialize with the display driver ID
  tft.setRotation(1); // Set display orientation
  tft.fillScreen(0xFFFF); // Clear screen with white color
  tft.setTextColor(0x0000); // Set text color to black
  tft.setTextSize(2);
  tft.setCursor(10, 10);
  tft.println("DFR0428 Touchscreen");
}

void loop() {
  // Check for touch input
  TSPoint p = ts.getPoint();
  if (p.z > ts.pressureThreshhold) {
    // Map touch coordinates to screen coordinates
    int x = map(p.x, TS_MINX, TS_MAXX, 0, tft.width());
    int y = map(p.y, TS_MINY, TS_MAXY, 0, tft.height());
    tft.fillCircle(x, y, 3, 0x001F); // Draw a small blue dot at the touch point
  }
}
Important Considerations
- Ensure the power supply voltage matches the component's requirements (3.3V or 5V).
- Use appropriate libraries (e.g., Adafruit_GFX, Adafruit_TFTLCD) for seamless integration.
- Calibrate the touchscreen for accurate touch input mapping.
- Avoid exposing the display to extreme temperatures or moisture.
Troubleshooting and FAQs
Common Issues
Display Not Turning On
- Verify the power supply connections to
VCCandGND. - Check the
RESETpin connection and ensure it is not held low.
- Verify the power supply connections to
Touchscreen Not Responding
- Ensure the
T_CSandT_IRQpins are correctly connected. - Verify the touchscreen library is properly initialized in the code.
- Ensure the
Incorrect Touch Coordinates
- Calibrate the touchscreen using the library's calibration tools.
- Check for loose or incorrect wiring on the touchscreen pins.
Flickering or Dim Backlight
- Ensure the
LEDpin is connected to a stable PWM signal. - Verify the power supply voltage is sufficient.
- Ensure the
FAQs
Q: Can I use the DFR0428 touchscreen with a Raspberry Pi?
A: Yes, the DFR0428 touchscreen can be used with a Raspberry Pi. You will need to configure the SPI interface and install the appropriate libraries for the display and touchscreen.
Q: What is the maximum touch resolution?
A: The touchscreen resolution is determined by the analog-to-digital converter (ADC) of the microcontroller. Typically, it provides sufficient precision for most applications.
Q: Is the display sunlight-readable?
A: The DFR0428 touchscreen is not designed for direct sunlight readability. It is best used indoors or in shaded environments.
Q: Can I control the backlight brightness?
A: Yes, the backlight brightness can be controlled using a PWM signal on the LED pin.