How to Use Fever click: Examples, Pinouts, and Specs
Introduction
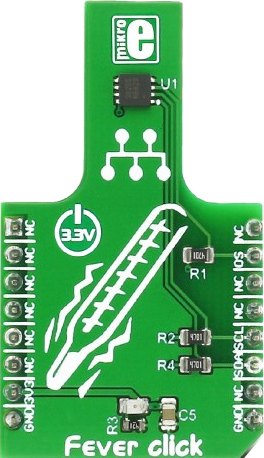
Fever click, manufactured by MIKROE (Part ID: MIKROE-2554), is a compact sensor module designed to measure body temperature using infrared (IR) technology. This non-invasive sensor is ideal for applications requiring quick and accurate temperature readings, such as medical devices, wearable health monitors, and smart home systems. Its small form factor and ease of integration make it a popular choice for developers and engineers.
Explore Projects Built with Fever click
Explore Projects Built with Fever click
Common Applications and Use Cases
- Medical thermometers for non-contact temperature measurement
- Wearable health monitoring devices
- Smart home systems for temperature tracking
- Industrial applications requiring surface temperature monitoring
- IoT devices for health and safety monitoring
Technical Specifications
The Fever click module is based on the MLX90614 infrared temperature sensor, which provides accurate temperature readings without physical contact. Below are the key technical details:
Key Technical Details
- Sensor Type: Infrared (IR) temperature sensor
- Temperature Range: -40°C to +85°C (ambient), -70°C to +380°C (object)
- Accuracy: ±0.5°C (typical, for object temperatures between 0°C and +50°C)
- Communication Interface: I2C and PWM
- Operating Voltage: 3.3V or 5V (selectable via onboard jumper)
- Current Consumption: ~1.5mA (typical)
- Dimensions: 28.6mm x 25.4mm
Pin Configuration and Descriptions
The Fever click module uses a standard mikroBUS™ socket for easy integration. Below is the pinout description:
| Pin | Name | Type | Description |
|---|---|---|---|
| 1 | AN | Analog Input | Not used (reserved for future use) |
| 2 | RST | Digital Input | Reset pin (active low) |
| 3 | CS | Digital Input | Not used (reserved for future use) |
| 4 | SCK | Digital Input | Not used (reserved for future use) |
| 5 | MISO | Digital Output | Not used (reserved for future use) |
| 6 | MOSI | Digital Input | Not used (reserved for future use) |
| 7 | PWM | Digital Output | Pulse-width modulation output for data |
| 8 | INT | Digital Output | Interrupt output (optional) |
| 9 | SDA | I2C Data | Serial data line for I2C communication |
| 10 | SCL | I2C Clock | Serial clock line for I2C communication |
| 11 | 3.3V | Power | 3.3V power supply |
| 12 | 5V | Power | 5V power supply |
| 13 | GND | Ground | Ground connection |
Usage Instructions
The Fever click module is designed for easy integration into circuits using the mikroBUS™ socket. It can communicate with microcontrollers via the I2C protocol or output data using PWM. Below are the steps to use the module:
How to Use the Component in a Circuit
- Power Supply: Connect the module to a 3.3V or 5V power source, depending on your system's requirements. Use the onboard jumper to select the appropriate voltage.
- I2C Communication: Connect the SDA and SCL pins to the corresponding I2C pins on your microcontroller.
- PWM Output (Optional): If using PWM, connect the PWM pin to a digital input pin on your microcontroller.
- Interrupts (Optional): If needed, connect the INT pin to a digital input pin on your microcontroller to handle interrupts.
- Programming: Use the appropriate library or code to read temperature data from the sensor.
Important Considerations and Best Practices
- Ensure the module is powered with the correct voltage (3.3V or 5V) to avoid damage.
- Avoid placing the sensor in direct sunlight or near heat sources, as this may affect accuracy.
- Use proper pull-up resistors on the I2C lines if they are not already included in your circuit.
- Keep the sensor clean and free from obstructions for accurate readings.
Example Code for Arduino UNO
Below is an example of how to use the Fever click module with an Arduino UNO via I2C:
#include <Wire.h>

// MLX90614 default I2C address
#define MLX90614_I2C_ADDR 0x5A

// MLX90614 register addresses
#define MLX90614_AMBIENT_TEMP 0x06
#define MLX90614_OBJECT_TEMP  0x07

// Function to read temperature from the sensor
float readTemperature(uint8_t reg) {
  Wire.beginTransmission(MLX90614_I2C_ADDR);
  Wire.write(reg); // Request data from the specified register
  Wire.endTransmission(false);

  Wire.requestFrom(MLX90614_I2C_ADDR, (uint8_t)3);
  uint16_t data = Wire.read(); // Read low byte
  data |= Wire.read() << 8;    // Read high byte
  Wire.read();                 // Read and discard PEC (Packet Error Code)

  return data * 0.02 - 273.15; // Convert to Celsius
}

void setup() {
  Wire.begin(); // Initialize I2C communication
  Serial.begin(9600); // Initialize serial communication
  Serial.println("Fever click example started");
}

void loop() {
  float ambientTemp = readTemperature(MLX90614_AMBIENT_TEMP);
  float objectTemp = readTemperature(MLX90614_OBJECT_TEMP);

  // Print the temperature readings to the Serial Monitor
  Serial.print("Ambient Temperature: ");
  Serial.print(ambientTemp);
  Serial.println(" °C");

  Serial.print("Object Temperature: ");
  Serial.print(objectTemp);
  Serial.println(" °C");

  delay(1000); // Wait 1 second before the next reading
}
Troubleshooting and FAQs
Common Issues and Solutions
No Data from the Sensor:
- Ensure the I2C connections (SDA and SCL) are properly connected.
- Verify that the correct I2C address (0x5A) is being used in the code.
- Check for proper pull-up resistors on the I2C lines.
Inaccurate Temperature Readings:
- Ensure the sensor is not exposed to direct sunlight or heat sources.
- Clean the sensor lens to remove any dirt or obstructions.
- Verify that the module is powered with the correct voltage.
Module Not Powering On:
- Check the power supply connections (3.3V or 5V and GND).
- Ensure the onboard voltage selection jumper is set correctly.
FAQs
Q: Can the Fever click module measure the temperature of liquids?
A: Yes, the module can measure the surface temperature of liquids, but it cannot measure internal temperatures.
Q: What is the maximum distance for accurate readings?
A: The sensor is most accurate at distances of 5-10 cm from the target object.
Q: Can I use the module with a 3.3V microcontroller?
A: Yes, the module supports both 3.3V and 5V operation. Use the onboard jumper to select the appropriate voltage.
Q: Is the module compatible with Raspberry Pi?
A: Yes, the module can be used with Raspberry Pi via the I2C interface.