How to Use Audio Converter & Amplifier : Examples, Pinouts, and Specs
Introduction
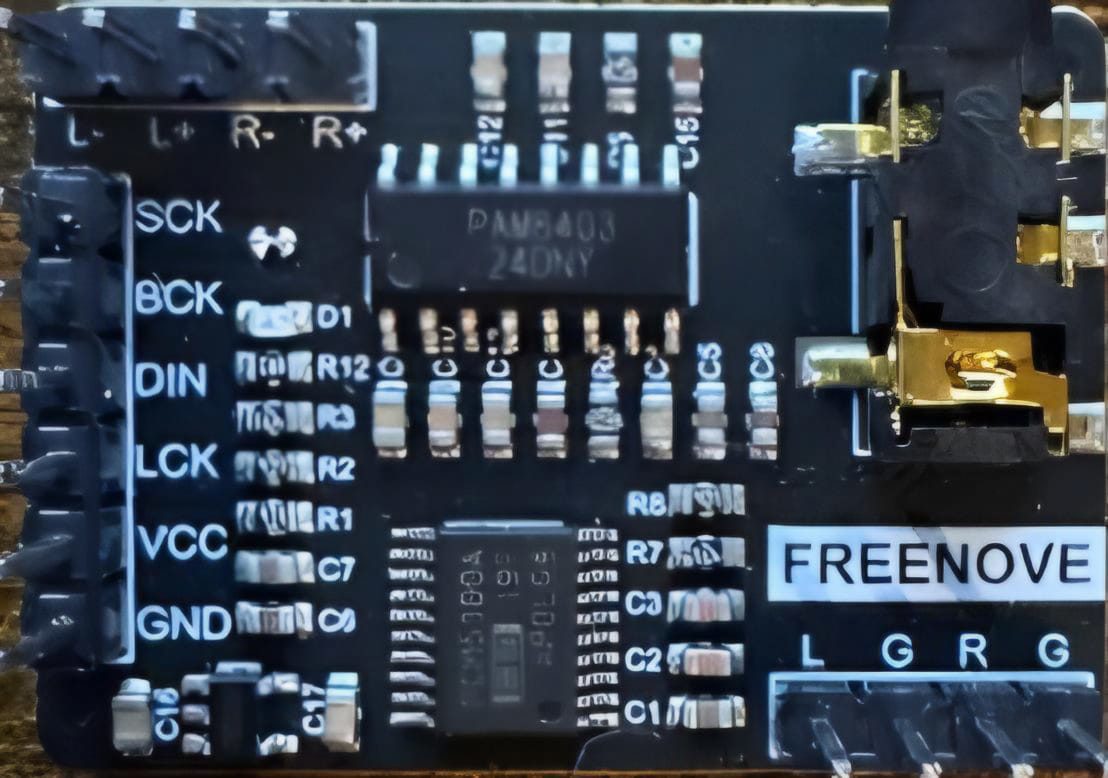
The FREENOVE Audio Converter & Amplifier (Part ID: Module) is a versatile electronic component designed to convert audio signals from one format to another while amplifying the signal. This dual functionality makes it ideal for applications requiring both signal conversion and amplification, such as audio playback systems, DIY speaker projects, and multimedia devices. The module enhances sound quality and volume, making it suitable for driving speakers or headphones.
Explore Projects Built with Audio Converter & Amplifier


Explore Projects Built with Audio Converter & Amplifier
Common Applications and Use Cases
- DIY audio systems and speaker projects
- Audio signal conversion for multimedia devices
- Amplification for headphones or small speakers
- Integration into Arduino-based audio projects
- Educational and prototyping purposes
Technical Specifications
The following table outlines the key technical details of the FREENOVE Audio Converter & Amplifier:
| Parameter | Specification |
|---|---|
| Input Voltage | 5V DC (via micro-USB or pin header) |
| Output Power | 3W per channel (stereo output) |
| Supported Input Format | Analog audio signal |
| Output Format | Amplified analog audio signal |
| Frequency Response | 20 Hz – 20 kHz |
| Signal-to-Noise Ratio | ≥ 90 dB |
| Amplifier Type | Class D |
| Dimensions | 30 mm x 25 mm x 10 mm |
Pin Configuration and Descriptions
The module features a simple pinout for easy integration into circuits. The table below describes each pin:
| Pin Name | Type | Description |
|---|---|---|
| VIN | Power Input | Connect to a 5V DC power source. |
| GND | Ground | Connect to the ground of the power supply. |
| L_IN | Audio Input | Left channel analog audio input. |
| R_IN | Audio Input | Right channel analog audio input. |
| L_OUT | Audio Output | Amplified left channel output for speakers/headphones. |
| R_OUT | Audio Output | Amplified right channel output for speakers/headphones. |
Usage Instructions
How to Use the Component in a Circuit
- Power the Module: Connect the
VINpin to a 5V DC power source and theGNDpin to ground. - Input Audio Signal: Feed the left and right analog audio signals into the
L_INandR_INpins, respectively. - Output Audio Signal: Connect the
L_OUTandR_OUTpins to the left and right speakers or headphones. - Adjust Volume: Use an external potentiometer or software-based control (if applicable) to adjust the input signal amplitude for desired output volume.
Important Considerations and Best Practices
- Power Supply: Ensure a stable 5V DC power source to avoid noise or distortion in the output signal.
- Speaker Impedance: Use speakers with an impedance of 4–8 ohms for optimal performance.
- Heat Dissipation: Although the module is efficient, ensure proper ventilation to prevent overheating during prolonged use.
- Signal Quality: Use shielded cables for audio input to minimize interference and maintain signal integrity.
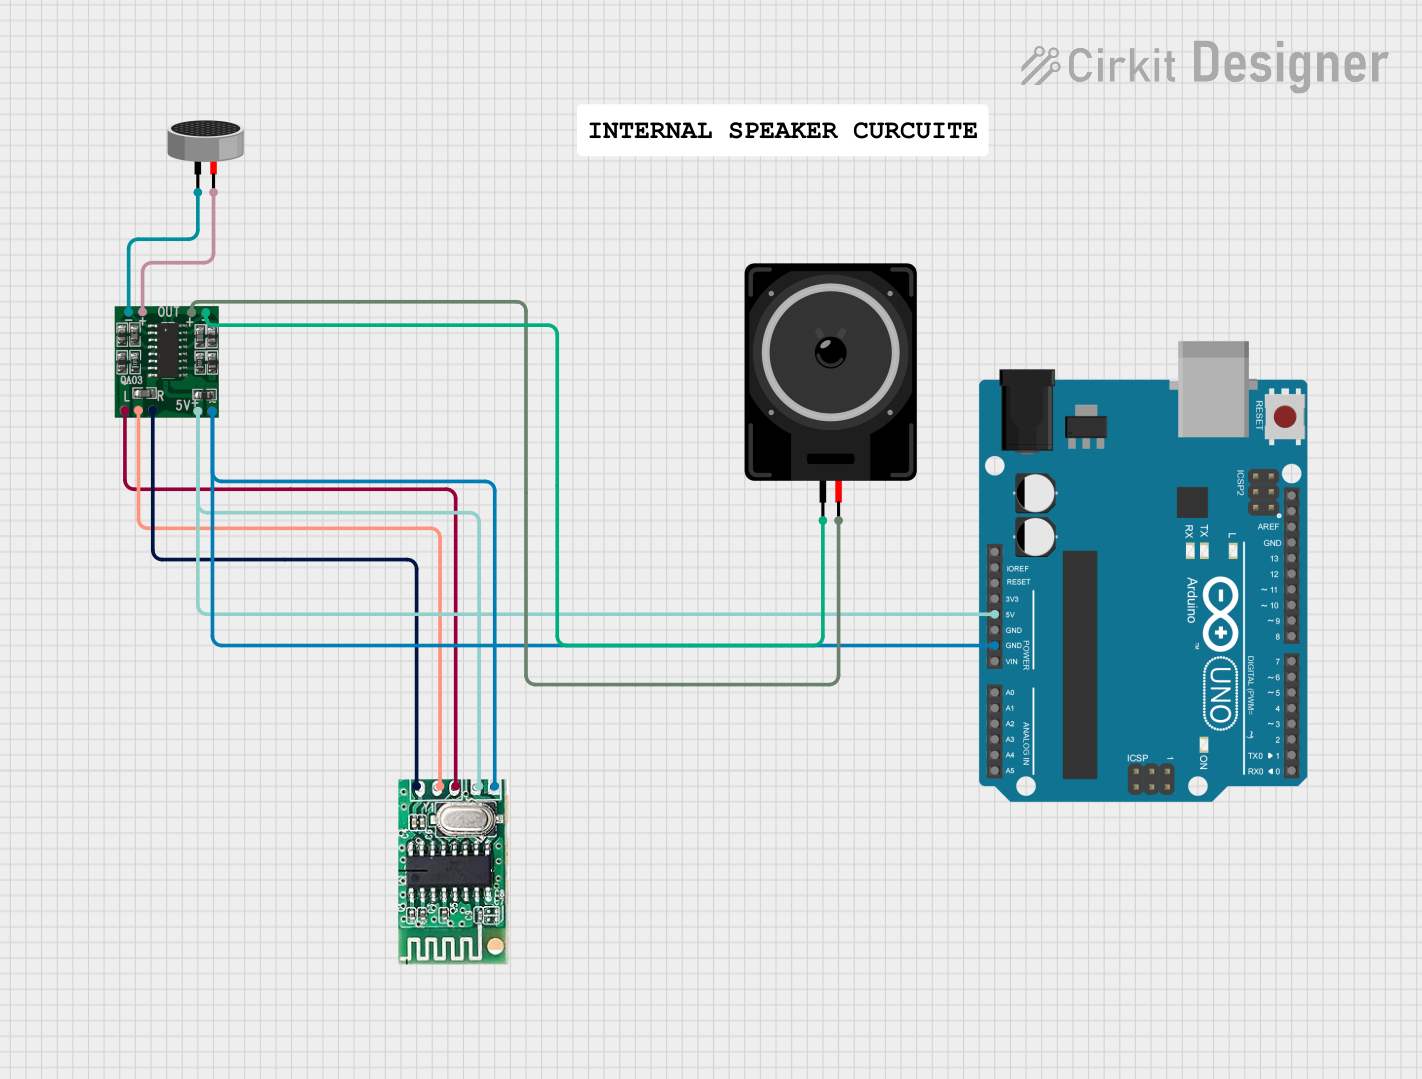
Example: Connecting to an Arduino UNO
The FREENOVE Audio Converter & Amplifier can be used with an Arduino UNO to process and amplify audio signals. Below is an example of how to generate a simple tone using the Arduino and output it through the module:
/*
  Example: Generating a tone with Arduino and amplifying it using the
  FREENOVE Audio Converter & Amplifier module.

  This code generates a 1 kHz tone on pin 9, which is connected to the
  L_IN or R_IN pin of the module. Ensure proper connections as described
  in the documentation.
*/

const int tonePin = 9; // Pin connected to the audio input (L_IN or R_IN)

void setup() {
  pinMode(tonePin, OUTPUT); // Set the pin as an output
}

void loop() {
  // Generate a 1 kHz tone
  tone(tonePin, 1000); // Frequency: 1000 Hz
  delay(1000);         // Play the tone for 1 second
  noTone(tonePin);     // Stop the tone
  delay(1000);         // Wait for 1 second before repeating
}
Connections:
- Connect Arduino pin 9 to the
L_INorR_INpin of the module. - Connect the module's
L_OUTorR_OUTpin to a speaker or headphone. - Power the module with a 5V DC source.
Troubleshooting and FAQs
Common Issues and Solutions
No Sound Output:
- Verify that the module is powered correctly (check the
VINandGNDconnections). - Ensure the input audio signal is present and properly connected to
L_INandR_IN. - Check the speaker or headphone connections to
L_OUTandR_OUT.
- Verify that the module is powered correctly (check the
Distorted Sound:
- Reduce the input signal amplitude to avoid overdriving the amplifier.
- Ensure the power supply is stable and free from noise.
- Use speakers with the recommended impedance (4–8 ohms).
Excessive Heat:
- Ensure proper ventilation around the module.
- Avoid operating the module at maximum power for extended periods.
FAQs
Q1: Can I use this module with a 3.3V power supply?
A1: No, the module requires a 5V DC power supply for proper operation.
Q2: Can I connect only one speaker instead of two?
A2: Yes, you can connect a single speaker to either the L_OUT or R_OUT pin, but for stereo output, both channels should be used.
Q3: Is the module compatible with digital audio signals?
A3: No, the module only supports analog audio signals as input.
Q4: Can I use this module to drive large speakers?
A4: The module is designed for small to medium-sized speakers (3W per channel). For larger speakers, consider using a higher-power amplifier.
By following this documentation, users can effectively integrate the FREENOVE Audio Converter & Amplifier into their projects and troubleshoot common issues with ease.