Introduction
The DS18B20 is a digital temperature sensor that provides accurate temperature readings over a wide range (-55°C to +125°C). It communicates using the 1-Wire protocol, which allows multiple sensors to be connected to a single data line. This makes it an excellent choice for applications requiring temperature monitoring in environments such as industrial systems, weather stations, and home automation.
Common Applications and Use Cases
- HVAC systems for temperature regulation
- Weather monitoring stations
- Industrial temperature monitoring
- Home automation and IoT projects
- Data logging systems
Technical Specifications
The DS18B20 is a versatile and robust sensor with the following key specifications:
Pin Configuration and Descriptions
The DS18B20 is available in a 3-pin TO-92 package. Below is the pinout:
Usage Instructions
How to Use the DS18B20 in a Circuit
Wiring the Sensor:
- Connect the GND pin to the ground of your circuit.
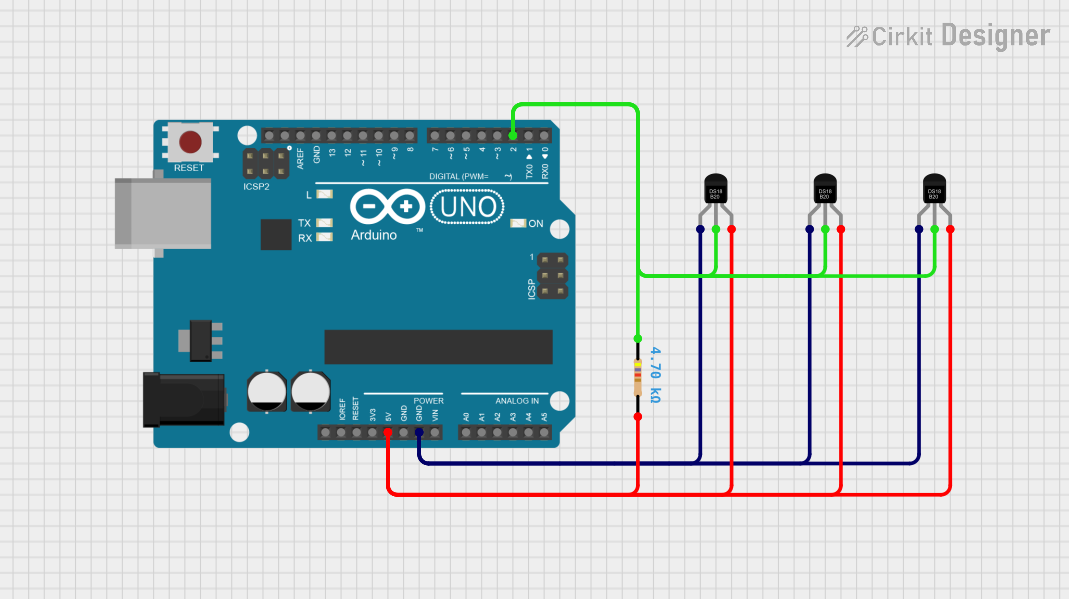
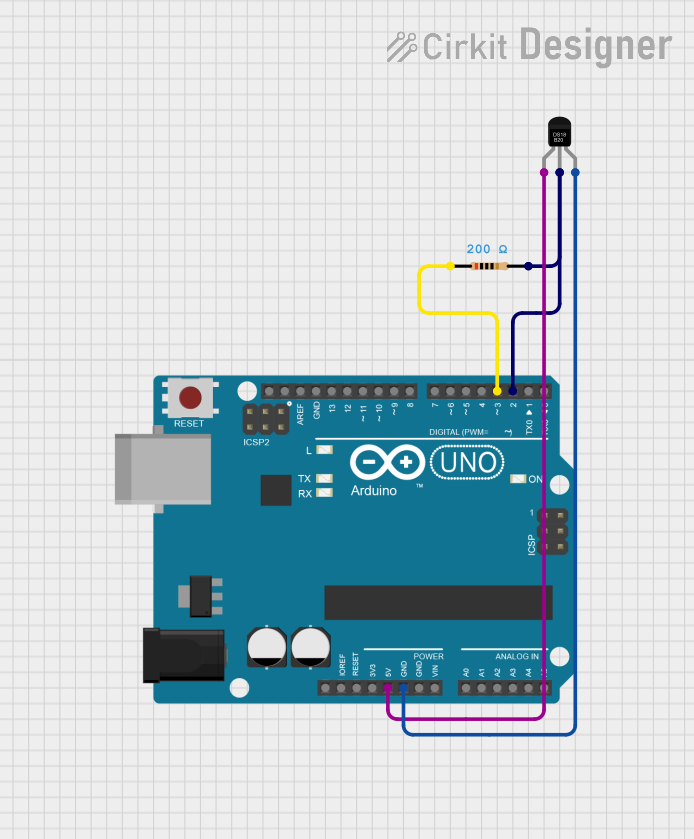
- Connect the DQ pin to a digital I/O pin on your microcontroller (e.g., Arduino).
- Connect the VDD pin to a 3.3V or 5V power supply. Alternatively, you can use parasite power mode by connecting a pull-up resistor (4.7kΩ) between the DQ pin and the power supply.
Pull-Up Resistor:
- A 4.7kΩ pull-up resistor is required on the DQ line to ensure proper communication.
Multiple Sensors:
- Multiple DS18B20 sensors can be connected to the same data line. Each sensor has a unique 64-bit serial code for identification.
Arduino Example Code
Below is an example of how to use the DS18B20 with an Arduino UNO:
#include <OneWire.h>
#include <DallasTemperature.h>

// Pin connected to the DS18B20 data line
#define ONE_WIRE_BUS 2

// Setup a oneWire instance to communicate with any 1-Wire devices
OneWire oneWire(ONE_WIRE_BUS);

// Pass the oneWire reference to DallasTemperature library
DallasTemperature sensors(&oneWire);

void setup() {
  Serial.begin(9600); // Initialize serial communication
  sensors.begin();    // Start the DS18B20 sensor
}

void loop() {
  sensors.requestTemperatures(); // Request temperature from sensor

  // Get temperature in Celsius
  float temperatureC = sensors.getTempCByIndex(0);

  // Print temperature to Serial Monitor
  Serial.print("Temperature: ");
  Serial.print(temperatureC);
  Serial.println(" °C");

  delay(1000); // Wait 1 second before next reading
}
Important Considerations and Best Practices
- Power Supply: Ensure the sensor operates within its voltage range (3.0V to 5.5V).
- Pull-Up Resistor: Always use a 4.7kΩ pull-up resistor on the data line for reliable communication.
- Cable Length: For long cable runs, use twisted-pair or shielded cables to reduce noise.
- Parasite Power Mode: If using parasite power mode, ensure the pull-up resistor is properly connected, and avoid long cable runs.
Troubleshooting and FAQs
Common Issues and Solutions
No Temperature Reading:
- Check the wiring and ensure the pull-up resistor is connected.
- Verify the sensor is powered correctly (3.0V to 5.5V).
- Ensure the correct data pin is defined in your code.
Incorrect Temperature Values:
- Verify the resolution setting in your code (default is 12-bit).
- Check for noise or interference on the data line.
Multiple Sensors Not Detected:
- Ensure each sensor is properly connected to the data line.
- Use the
getAddress() function in the DallasTemperature library to retrieve each sensor's unique address.
FAQs
Q: Can I use the DS18B20 with a Raspberry Pi?
A: Yes, the DS18B20 is compatible with Raspberry Pi. You can use libraries such as w1thermsensor to interface with the sensor.
Q: What is parasite power mode?
A: Parasite power mode allows the sensor to operate without a dedicated power supply by drawing power from the data line. This requires a pull-up resistor and is suitable for low-power applications.
Q: How many sensors can I connect to a single data line?
A: Theoretically, you can connect up to 100 sensors on a single data line, but this depends on factors like cable length and power supply.
Q: Can the DS18B20 measure negative temperatures?
A: Yes, the DS18B20 can measure temperatures as low as -55°C. Negative values are returned as signed integers in the library.
By following this documentation, you can effectively integrate the DS18B20 temperature sensor into your projects for accurate and reliable temperature monitoring.


 Open Project in Cirkit Designer