How to Use Grove Micro Switch : Examples, Pinouts, and Specs
Introduction
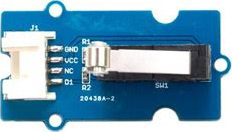
The Grove Micro Switch is a compact, low-profile switch designed to detect the physical presence or absence of an object. It operates as a mechanical input device, making it ideal for applications where physical interaction triggers an action. This switch is commonly used in robotics, automation, and DIY electronics projects. Its small size and reliable performance make it a versatile component for detecting mechanical events such as button presses, object collisions, or limit positions in moving systems.
Explore Projects Built with Grove Micro Switch

Explore Projects Built with Grove Micro Switch
Common Applications
- Robotics: Detecting collisions or end-of-travel positions for robotic arms.
- Automation: Triggering actions in conveyor belts or automated systems.
- DIY Projects: Creating interactive devices or mechanical triggers.
- Security Systems: Detecting door or window openings.
Technical Specifications
The Grove Micro Switch is designed for low-power, low-voltage applications and is compatible with most microcontrollers, including Arduino boards.
Key Specifications
| Parameter | Value |
|---|---|
| Operating Voltage | 3.3V to 5V |
| Maximum Current | 1A |
| Contact Resistance | ≤ 100 mΩ |
| Insulation Resistance | ≥ 100 MΩ |
| Mechanical Durability | 1,000,000 cycles |
| Operating Temperature | -25°C to +85°C |
| Dimensions | 20mm x 15mm x 10mm |
Pin Configuration
The Grove Micro Switch has three pins, as described in the table below:
| Pin Name | Description |
|---|---|
| GND | Ground pin, connects to the ground of the circuit. |
| VCC | Power supply pin, connects to 3.3V or 5V. |
| SIG | Signal pin, outputs HIGH or LOW based on the switch state. |
Usage Instructions
How to Use the Grove Micro Switch in a Circuit
Connect the Pins:
- Connect the
GNDpin of the switch to the ground of your circuit. - Connect the
VCCpin to a 3.3V or 5V power source, depending on your microcontroller. - Connect the
SIGpin to a digital input pin on your microcontroller.
- Connect the
Mount the Switch:
- Secure the switch in a position where it can detect the desired mechanical input (e.g., a button press or object collision).
Read the Signal:
- When the switch is pressed, the
SIGpin outputs a LOW signal (0V). - When the switch is released, the
SIGpin outputs a HIGH signal (3.3V or 5V).
- When the switch is pressed, the
Important Considerations
- Debouncing: Mechanical switches can produce noise or "bouncing" when pressed or released. Use software debouncing techniques to ensure stable readings.
- Voltage Compatibility: Ensure the operating voltage of the switch matches your microcontroller's input voltage.
- Mechanical Stress: Avoid applying excessive force to the switch to maintain its durability.
Example Code for Arduino UNO
The following code demonstrates how to use the Grove Micro Switch with an Arduino UNO. The code reads the state of the switch and turns on an LED when the switch is pressed.
// Define pin connections
const int switchPin = 2;  // Connect SIG pin of the switch to digital pin 2
const int ledPin = 13;    // Built-in LED on Arduino UNO

void setup() {
  pinMode(switchPin, INPUT);  // Set the switch pin as input
  pinMode(ledPin, OUTPUT);    // Set the LED pin as output
  digitalWrite(ledPin, LOW);  // Turn off the LED initially
  Serial.begin(9600);         // Initialize serial communication
}

void loop() {
  int switchState = digitalRead(switchPin);  // Read the state of the switch

  if (switchState == LOW) {
    // If the switch is pressed, turn on the LED
    digitalWrite(ledPin, HIGH);
    Serial.println("Switch Pressed");
  } else {
    // If the switch is not pressed, turn off the LED
    digitalWrite(ledPin, LOW);
    Serial.println("Switch Released");
  }

  delay(50);  // Small delay for stability
}
Troubleshooting and FAQs
Common Issues
Switch Not Responding:
- Cause: Incorrect wiring or loose connections.
- Solution: Double-check the connections to ensure the
GND,VCC, andSIGpins are properly connected.
Unstable Readings:
- Cause: Switch bouncing or electrical noise.
- Solution: Implement software debouncing in your code or add a small capacitor (e.g., 0.1µF) across the
SIGandGNDpins.
Switch Damaged:
- Cause: Excessive mechanical force or electrical overload.
- Solution: Replace the switch and ensure proper handling and voltage limits.
FAQs
Q: Can the Grove Micro Switch handle high currents?
A: No, the switch is designed for low-power applications and can handle a maximum current of 1A.
Q: Is the switch waterproof?
A: No, the Grove Micro Switch is not waterproof. Avoid exposing it to moisture or liquids.
Q: Can I use the switch with a Raspberry Pi?
A: Yes, the switch can be used with a Raspberry Pi. Connect the SIG pin to a GPIO pin and use a pull-up resistor if necessary.
Q: How do I debounce the switch in software?
A: You can use a simple delay or implement a debounce algorithm in your code to filter out noise from the switch.
This concludes the documentation for the Grove Micro Switch.