
How to Use 4 Point Terminal Block: Examples, Pinouts, and Specs
 Design with 4 Point Terminal Block in Cirkit Designer
Introduction
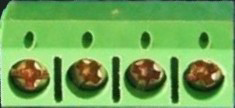
A 4 Point Terminal Block is a type of electrical connector designed to facilitate the secure and organized connection of multiple wires to a single point. It features four terminals, each capable of accommodating a wire, making it an essential component in electrical systems where multiple connections are required. Terminal blocks are widely used in control panels, junction boxes, industrial automation, and other applications where reliable and efficient wiring is critical.
Explore Projects Built with 4 Point Terminal Block
 Open Project in Cirkit Designer
 Open Project in Cirkit Designer
 Open Project in Cirkit Designer
 Open Project in Cirkit Designer
Explore Projects Built with 4 Point Terminal Block
Open Project in Cirkit DesignerOpen Project in Cirkit DesignerOpen Project in Cirkit DesignerOpen Project in Cirkit DesignerCommon Applications and Use Cases
- Control Panels: For organizing and connecting wires in industrial and commercial control systems.
- Junction Boxes: To distribute power or signals to multiple devices.
- Industrial Automation: For connecting sensors, actuators, and other devices in automated systems.
- Prototyping and Testing: To create temporary or semi-permanent connections in experimental setups.
- Power Distribution: For splitting power from a single source to multiple devices.
Technical Specifications
Key Technical Details
- Number of Terminals: 4
- Rated Voltage: Typically 300V (varies by model)
- Rated Current: Typically 10A to 30A (varies by model)
- Wire Size Compatibility: 22 AWG to 12 AWG (varies by model)
- Material: Insulating body made of polyamide or similar material; terminals made of brass or copper.
- Mounting Type: Screw mount or DIN rail mount (depending on the model)
- Operating Temperature: -40°C to 105°C (varies by model)
Pin Configuration and Descriptions
The 4 Point Terminal Block does not have traditional "pins" like an IC but instead features screw terminals for wire connections. Below is a description of the terminal layout:
| Terminal Number | Description |
|---|---|
| 1 | Connection point for wire 1 |
| 2 | Connection point for wire 2 |
| 3 | Connection point for wire 3 |
| 4 | Connection point for wire 4 |
Each terminal is equipped with a screw mechanism to securely fasten the wire in place.
Usage Instructions
How to Use the Component in a Circuit
Prepare the Wires:
- Strip the insulation from the ends of the wires to expose approximately 5-7 mm of conductor.
- Ensure the exposed conductor is clean and free of oxidation.
Connect the Wires:
- Loosen the screws on the terminal block using a screwdriver.
- Insert the exposed conductor of each wire into the corresponding terminal.
- Tighten the screws to secure the wires in place. Avoid overtightening, as this may damage the wire or terminal.
Mount the Terminal Block:
- If the terminal block is screw-mounted, use screws to attach it to a panel or enclosure.
- If it is DIN rail-mounted, snap it onto the DIN rail.
Verify Connections:
- Check that all wires are securely fastened and that there is no exposed conductor outside the terminal.
Important Considerations and Best Practices
- Wire Compatibility: Ensure the wire gauge is compatible with the terminal block specifications.
- Tightening Torque: Use the recommended torque for tightening screws to avoid damaging the terminal or wire.
- Insulation: Ensure that no part of the exposed conductor is touching adjacent terminals or other conductive surfaces.
- Environment: Use terminal blocks rated for the operating temperature and environmental conditions of your application.
- Labeling: Label the terminals or wires for easy identification during maintenance or troubleshooting.
Example: Connecting to an Arduino UNO
While a terminal block itself does not directly interface with an Arduino, it can be used to organize and distribute connections to sensors or actuators. Below is an example of how to use a terminal block to connect multiple LEDs to an Arduino UNO:
Circuit Setup
- Connect the positive leads of four LEDs to terminals 1, 2, 3, and 4 of the terminal block.
- Connect the negative leads of the LEDs to a common ground.
- Use jumper wires to connect the terminal block to the Arduino UNO.
Arduino Code
// Example code to control 4 LEDs connected via a 4 Point Terminal Block
const int ledPins[] = {2, 3, 4, 5}; // Arduino pins connected to the LEDs

void setup() {
  // Set all LED pins as output
  for (int i = 0; i < 4; i++) {
    pinMode(ledPins[i], OUTPUT);
  }
}

void loop() {
  // Turn LEDs on and off sequentially
  for (int i = 0; i < 4; i++) {
    digitalWrite(ledPins[i], HIGH); // Turn on LED
    delay(500);                     // Wait for 500ms
    digitalWrite(ledPins[i], LOW);  // Turn off LED
    delay(500);                     // Wait for 500ms
  }
}
Troubleshooting and FAQs
Common Issues and Solutions
Loose Connections:
- Issue: Wires are not securely fastened, leading to intermittent connections.
- Solution: Ensure screws are tightened properly and that the wire is fully inserted into the terminal.
Overheating:
- Issue: Terminal block becomes hot during operation.
- Solution: Check that the current does not exceed the rated capacity of the terminal block. Use wires of appropriate gauge.
Corrosion:
- Issue: Terminals show signs of corrosion, leading to poor conductivity.
- Solution: Use terminal blocks with corrosion-resistant materials and ensure the environment is dry and clean.
Short Circuits:
- Issue: Exposed conductors touch adjacent terminals or conductive surfaces.
- Solution: Ensure proper insulation and spacing between wires.
FAQs
Q1: Can I use a 4 Point Terminal Block for high-voltage applications?
A1: Yes, as long as the terminal block is rated for the voltage of your application. Always check the manufacturer's specifications.
Q2: How do I choose the right terminal block for my project?
A2: Consider factors such as the number of terminals, current and voltage ratings, wire gauge compatibility, and mounting type.
Q3: Can I connect more than one wire to a single terminal?
A3: It is not recommended unless the terminal block is specifically designed for multiple wires per terminal. Doing so may compromise the connection's reliability.
Q4: Are terminal blocks reusable?
A4: Yes, terminal blocks can be reused, but ensure that the screws and terminals are not damaged during disassembly.