How to Use photon 2: Examples, Pinouts, and Specs
Introduction
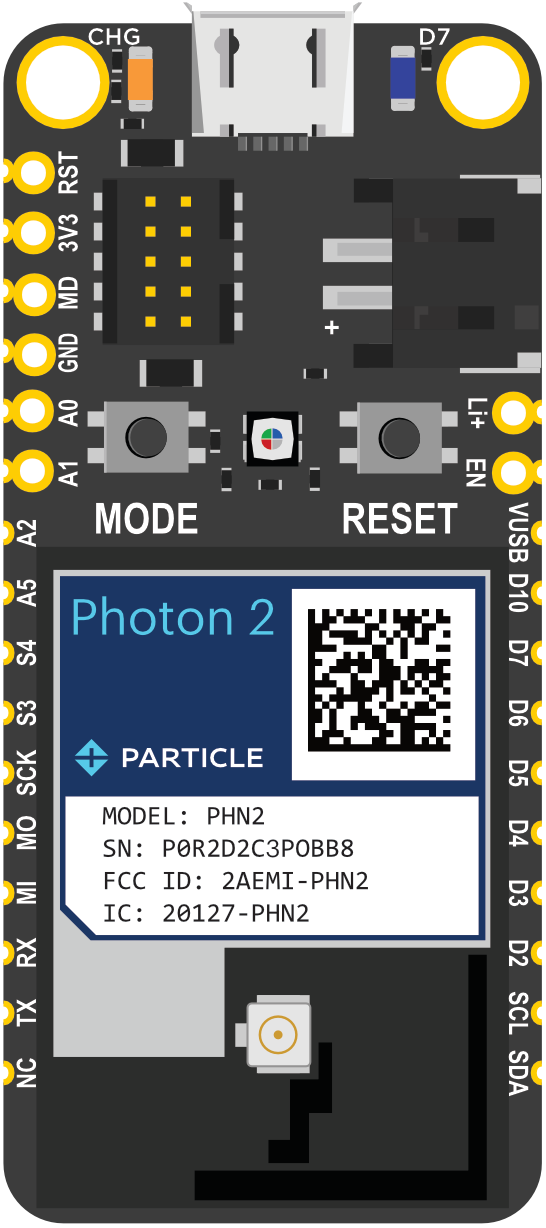
The Photon 2, manufactured by Particle, is a versatile Wi-Fi development kit designed for creating connected projects and products. It integrates a powerful microcontroller, a Wi-Fi module, and cloud connectivity, making it an ideal choice for Internet of Things (IoT) applications. Whether you are a hobbyist or a professional developer, the Photon 2 provides a robust platform for building and deploying connected devices.
Explore Projects Built with photon 2


Explore Projects Built with photon 2
Common Applications and Use Cases
- Home Automation: Control and monitor home appliances remotely.
- Industrial IoT: Collect and analyze data from industrial equipment.
- Wearable Devices: Develop smart wearable gadgets with internet connectivity.
- Environmental Monitoring: Track environmental parameters like temperature, humidity, and air quality.
- Smart Agriculture: Monitor and manage agricultural conditions and equipment.
Technical Specifications
Key Technical Details
| Specification | Value |
|---|---|
| Microcontroller | ARM Cortex-M4 |
| Clock Speed | 120 MHz |
| Flash Memory | 1 MB |
| RAM | 256 KB |
| Wi-Fi Module | 802.11 b/g/n |
| Operating Voltage | 3.3V |
| Input Voltage | 3.6V to 5.5V |
| Digital I/O Pins | 18 |
| Analog Input Pins | 8 |
| PWM Pins | 8 |
| Communication | UART, SPI, I2C |
| Cloud Connectivity | Particle Cloud, REST API, Webhooks |
Pin Configuration and Descriptions
| Pin Number | Pin Name | Description |
|---|---|---|
| 1 | VIN | Input voltage (3.6V to 5.5V) |
| 2 | GND | Ground |
| 3 | 3V3 | 3.3V output |
| 4 | A0 | Analog input 0 |
| 5 | A1 | Analog input 1 |
| 6 | A2 | Analog input 2 |
| 7 | A3 | Analog input 3 |
| 8 | A4 | Analog input 4 |
| 9 | A5 | Analog input 5 |
| 10 | D0 | Digital I/O 0 |
| 11 | D1 | Digital I/O 1 |
| 12 | D2 | Digital I/O 2 |
| 13 | D3 | Digital I/O 3 |
| 14 | D4 | Digital I/O 4 |
| 15 | D5 | Digital I/O 5 |
| 16 | D6 | Digital I/O 6 |
| 17 | D7 | Digital I/O 7 |
| 18 | RX | UART Receive |
| 19 | TX | UART Transmit |
| 20 | SCL | I2C Clock |
| 21 | SDA | I2C Data |
| 22 | WKP | Wake-up pin |
| 23 | RST | Reset |
Usage Instructions
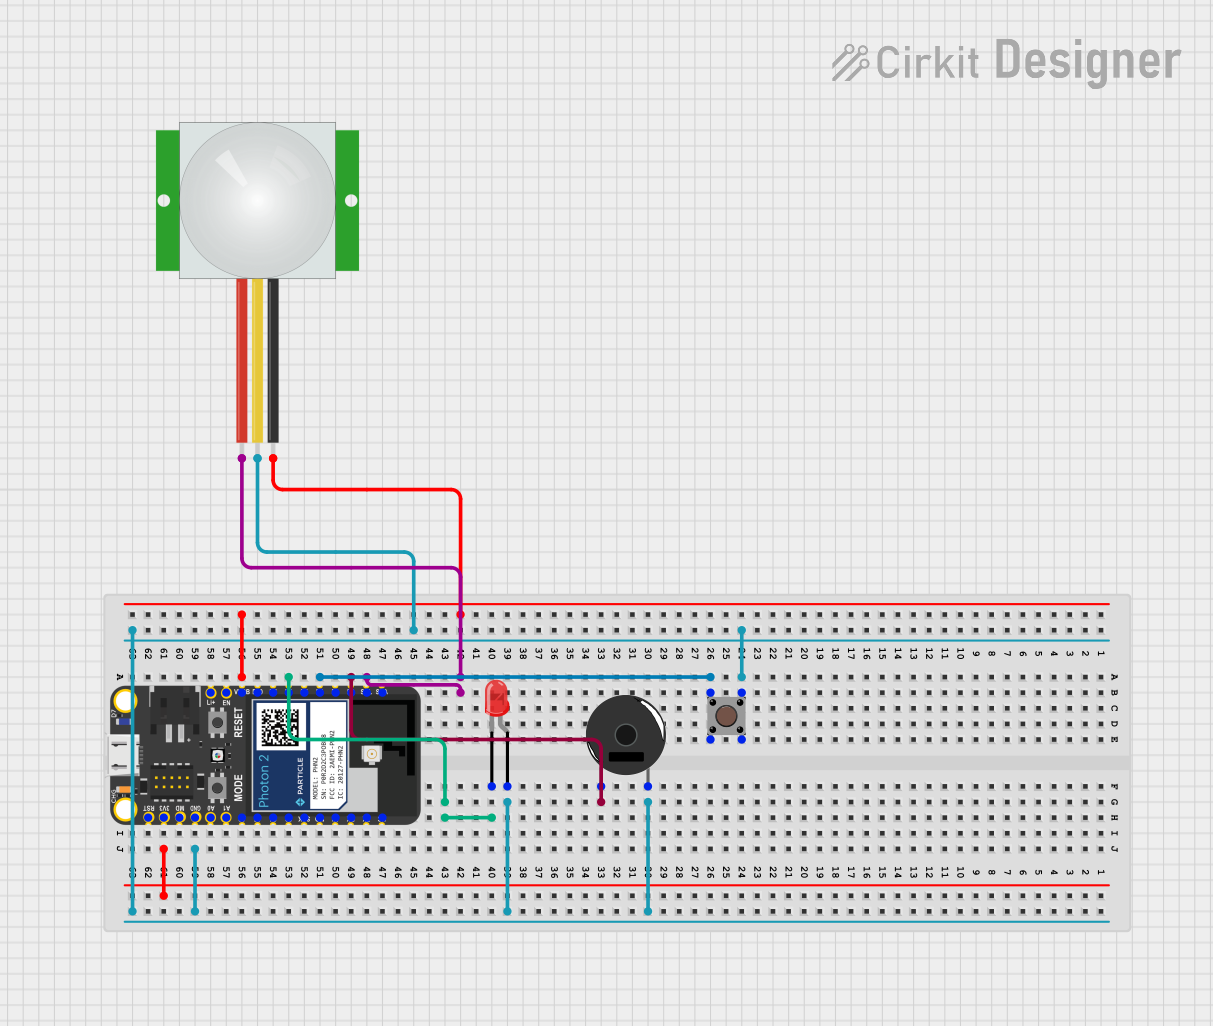
How to Use the Component in a Circuit
Powering the Photon 2:
- Connect the VIN pin to a power source (3.6V to 5.5V).
- Connect the GND pin to the ground of the power source.
Connecting to Wi-Fi:
- Use the Particle mobile app or Particle CLI to configure Wi-Fi credentials.
Programming the Photon 2:
- Use the Particle Web IDE, Particle Workbench, or Particle CLI to write and upload code.
Basic Circuit Example:
- Connect an LED to pin D0 with a current-limiting resistor.
- Connect the other end of the LED to GND.
Important Considerations and Best Practices
- Power Supply: Ensure a stable power supply within the specified voltage range to avoid damaging the Photon 2.
- Wi-Fi Signal: Place the Photon 2 within a good Wi-Fi signal range for reliable connectivity.
- Cloud Connectivity: Utilize Particle Cloud services for remote management and OTA updates.
- Pin Usage: Avoid exceeding the current limits of the I/O pins to prevent damage.
Example Code for Arduino UNO
// This example code demonstrates how to blink an LED connected to pin D0
// on the Photon 2. The LED will turn on for one second and off for one second.

void setup() {
    // Initialize pin D0 as an output
    pinMode(D0, OUTPUT);
}

void loop() {
    // Turn the LED on (HIGH is the voltage level)
    digitalWrite(D0, HIGH);
    // Wait for a second
    delay(1000);
    // Turn the LED off by making the voltage LOW
    digitalWrite(D0, LOW);
    // Wait for a second
    delay(1000);
}
Troubleshooting and FAQs
Common Issues Users Might Face
Wi-Fi Connection Issues:
- Solution: Ensure the Wi-Fi credentials are correct and the signal strength is adequate. Use the Particle mobile app to reconfigure Wi-Fi settings if needed.
Power Supply Problems:
- Solution: Verify that the input voltage is within the specified range (3.6V to 5.5V). Check for loose connections or faulty power sources.
Code Upload Failures:
- Solution: Ensure the Photon 2 is in DFU mode (blinking yellow) before uploading code via Particle CLI. Check USB connections and drivers.
Unresponsive Device:
- Solution: Perform a factory reset by holding the SETUP button and tapping the RESET button until the LED blinks white, then release the SETUP button.
Solutions and Tips for Troubleshooting
- Check Connections: Ensure all connections are secure and correctly oriented.
- Use Serial Monitor: Utilize the serial monitor for debugging and monitoring the device's status.
- Firmware Updates: Keep the device firmware updated to the latest version for improved performance and bug fixes.
- Community Support: Leverage the Particle community forums for additional support and troubleshooting tips.
By following this documentation, users can effectively utilize the Photon 2 for their IoT projects, ensuring reliable performance and seamless integration with various applications.