Cirkit Designer LogoCirkit DesignerYour all-in-one circuit design IDE Launch Cirkit Designer App

How to Use 12V Battery (Small Size): Examples, Pinouts, and Specs

Image of 12V Battery (Small Size)Design with 12V Battery (Small Size) in Cirkit Designer

Introduction

The 12V small size battery is a compact and rechargeable energy storage unit designed to provide a stable 12 volts DC output. This type of battery is commonly used in a variety of applications, including hobby electronics projects, portable power supplies, and as a backup power source for small electronic devices.

Explore Projects Built with 12V Battery (Small Size)

Use Cirkit Designer to design, explore, and prototype these projects online. Some projects support real-time simulation. Click "Open Project" to start designing instantly!
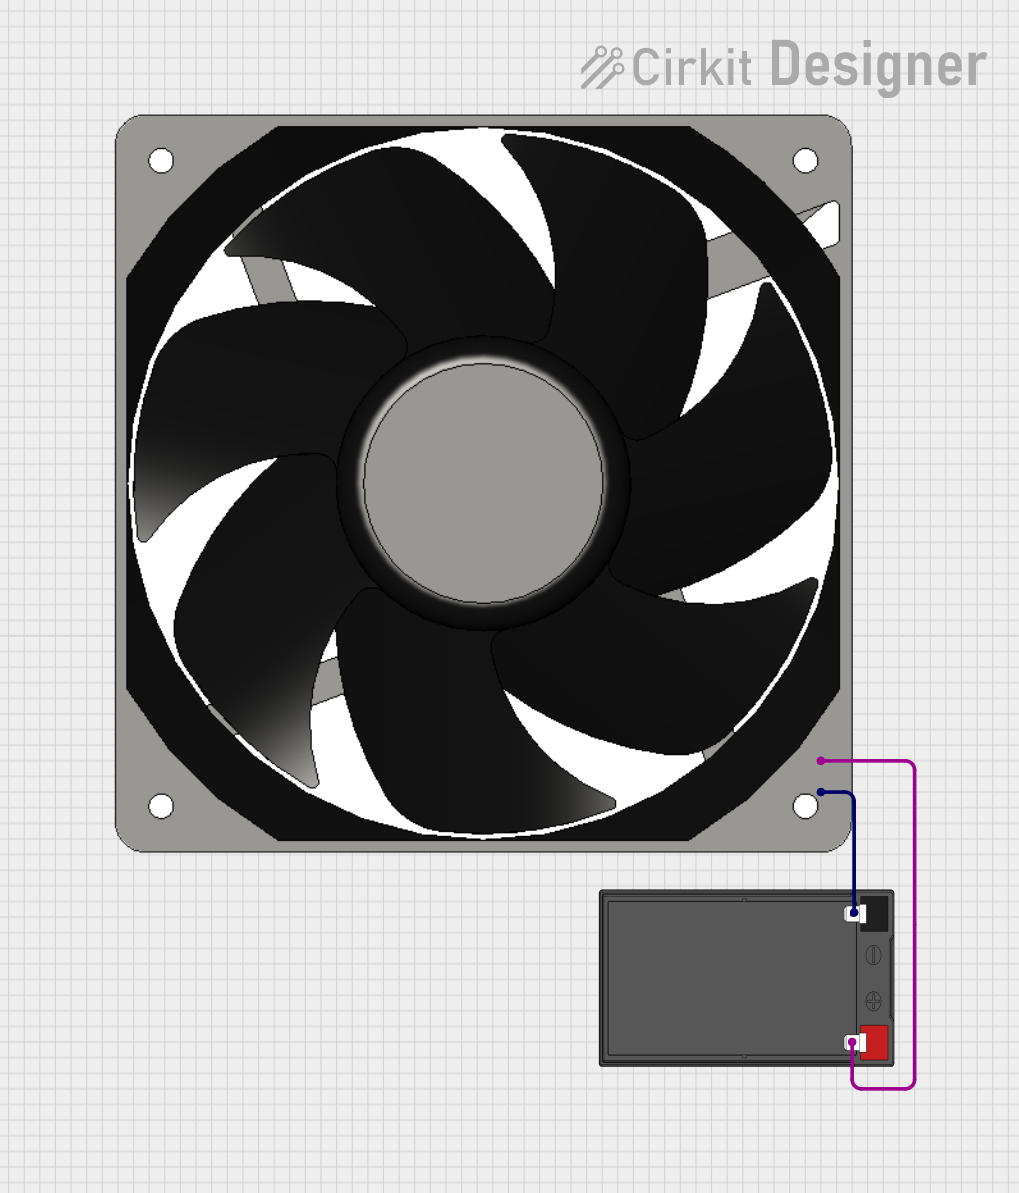
Image of 12V Battery-Powered Fan System: A project utilizing 12V Battery (Small Size) in a practical application
12V Battery-Powered Fan System

This circuit connects a 120mm 12V DC fan to a 12V 7Ah battery. The fan's positive and negative terminals are directly connected to the corresponding positive and negative terminals of the battery, allowing the fan to operate at its rated voltage.

Open Project in Cirkit Designer

Common Applications and Use Cases

Technical Specifications

Key Technical Details

Pin Configuration and Descriptions

Pin Description
+ Positive terminal for 12V output
- Negative terminal (ground)

Usage Instructions

How to Use the Component in a Circuit

  1. Connecting the Battery:

    • Ensure the battery is fully charged before use.
    • Connect the positive terminal of the battery to the positive rail of your circuit.
    • Connect the negative terminal to the ground rail of your circuit.
  2. Voltage Regulation:

    • If your circuit requires a regulated voltage, use a voltage regulator to maintain a consistent output.
  3. Charging the Battery:

    • Use a compatible charger for the battery chemistry.
    • Do not overcharge the battery; follow the manufacturer's recommendations.

Important Considerations and Best Practices

Troubleshooting and FAQs

Common Issues Users Might Face

Solutions and Tips for Troubleshooting

Example Code for Arduino UNO Connection

// Example code to monitor 12V battery voltage using Arduino UNO

const int batteryPin = A0; // Analog pin connected to battery voltage divider

void setup() {
  Serial.begin(9600); // Start serial communication at 9600 baud
}

void loop() {
  int sensorValue = analogRead(batteryPin); // Read the analog value
  float batteryVoltage = sensorValue * (12.0 / 1023.0); // Convert to battery voltage
  Serial.print("Battery Voltage: ");
  Serial.println(batteryVoltage); // Print the battery voltage to the Serial Monitor
  delay(1000); // Wait for 1 second before the next reading
}

Note: The above code assumes a voltage divider is used to step down the 12V to a safe level that can be read by the Arduino's analog input. Ensure the voltage divider is correctly calculated to prevent exceeding the maximum voltage rating of the Arduino's analog pins (typically 5V).

Remember to always follow safety precautions when working with batteries, especially when charging or handling damaged units. Dispose of batteries according to local regulations.