How to Use PIR sensor: Examples, Pinouts, and Specs
Introduction
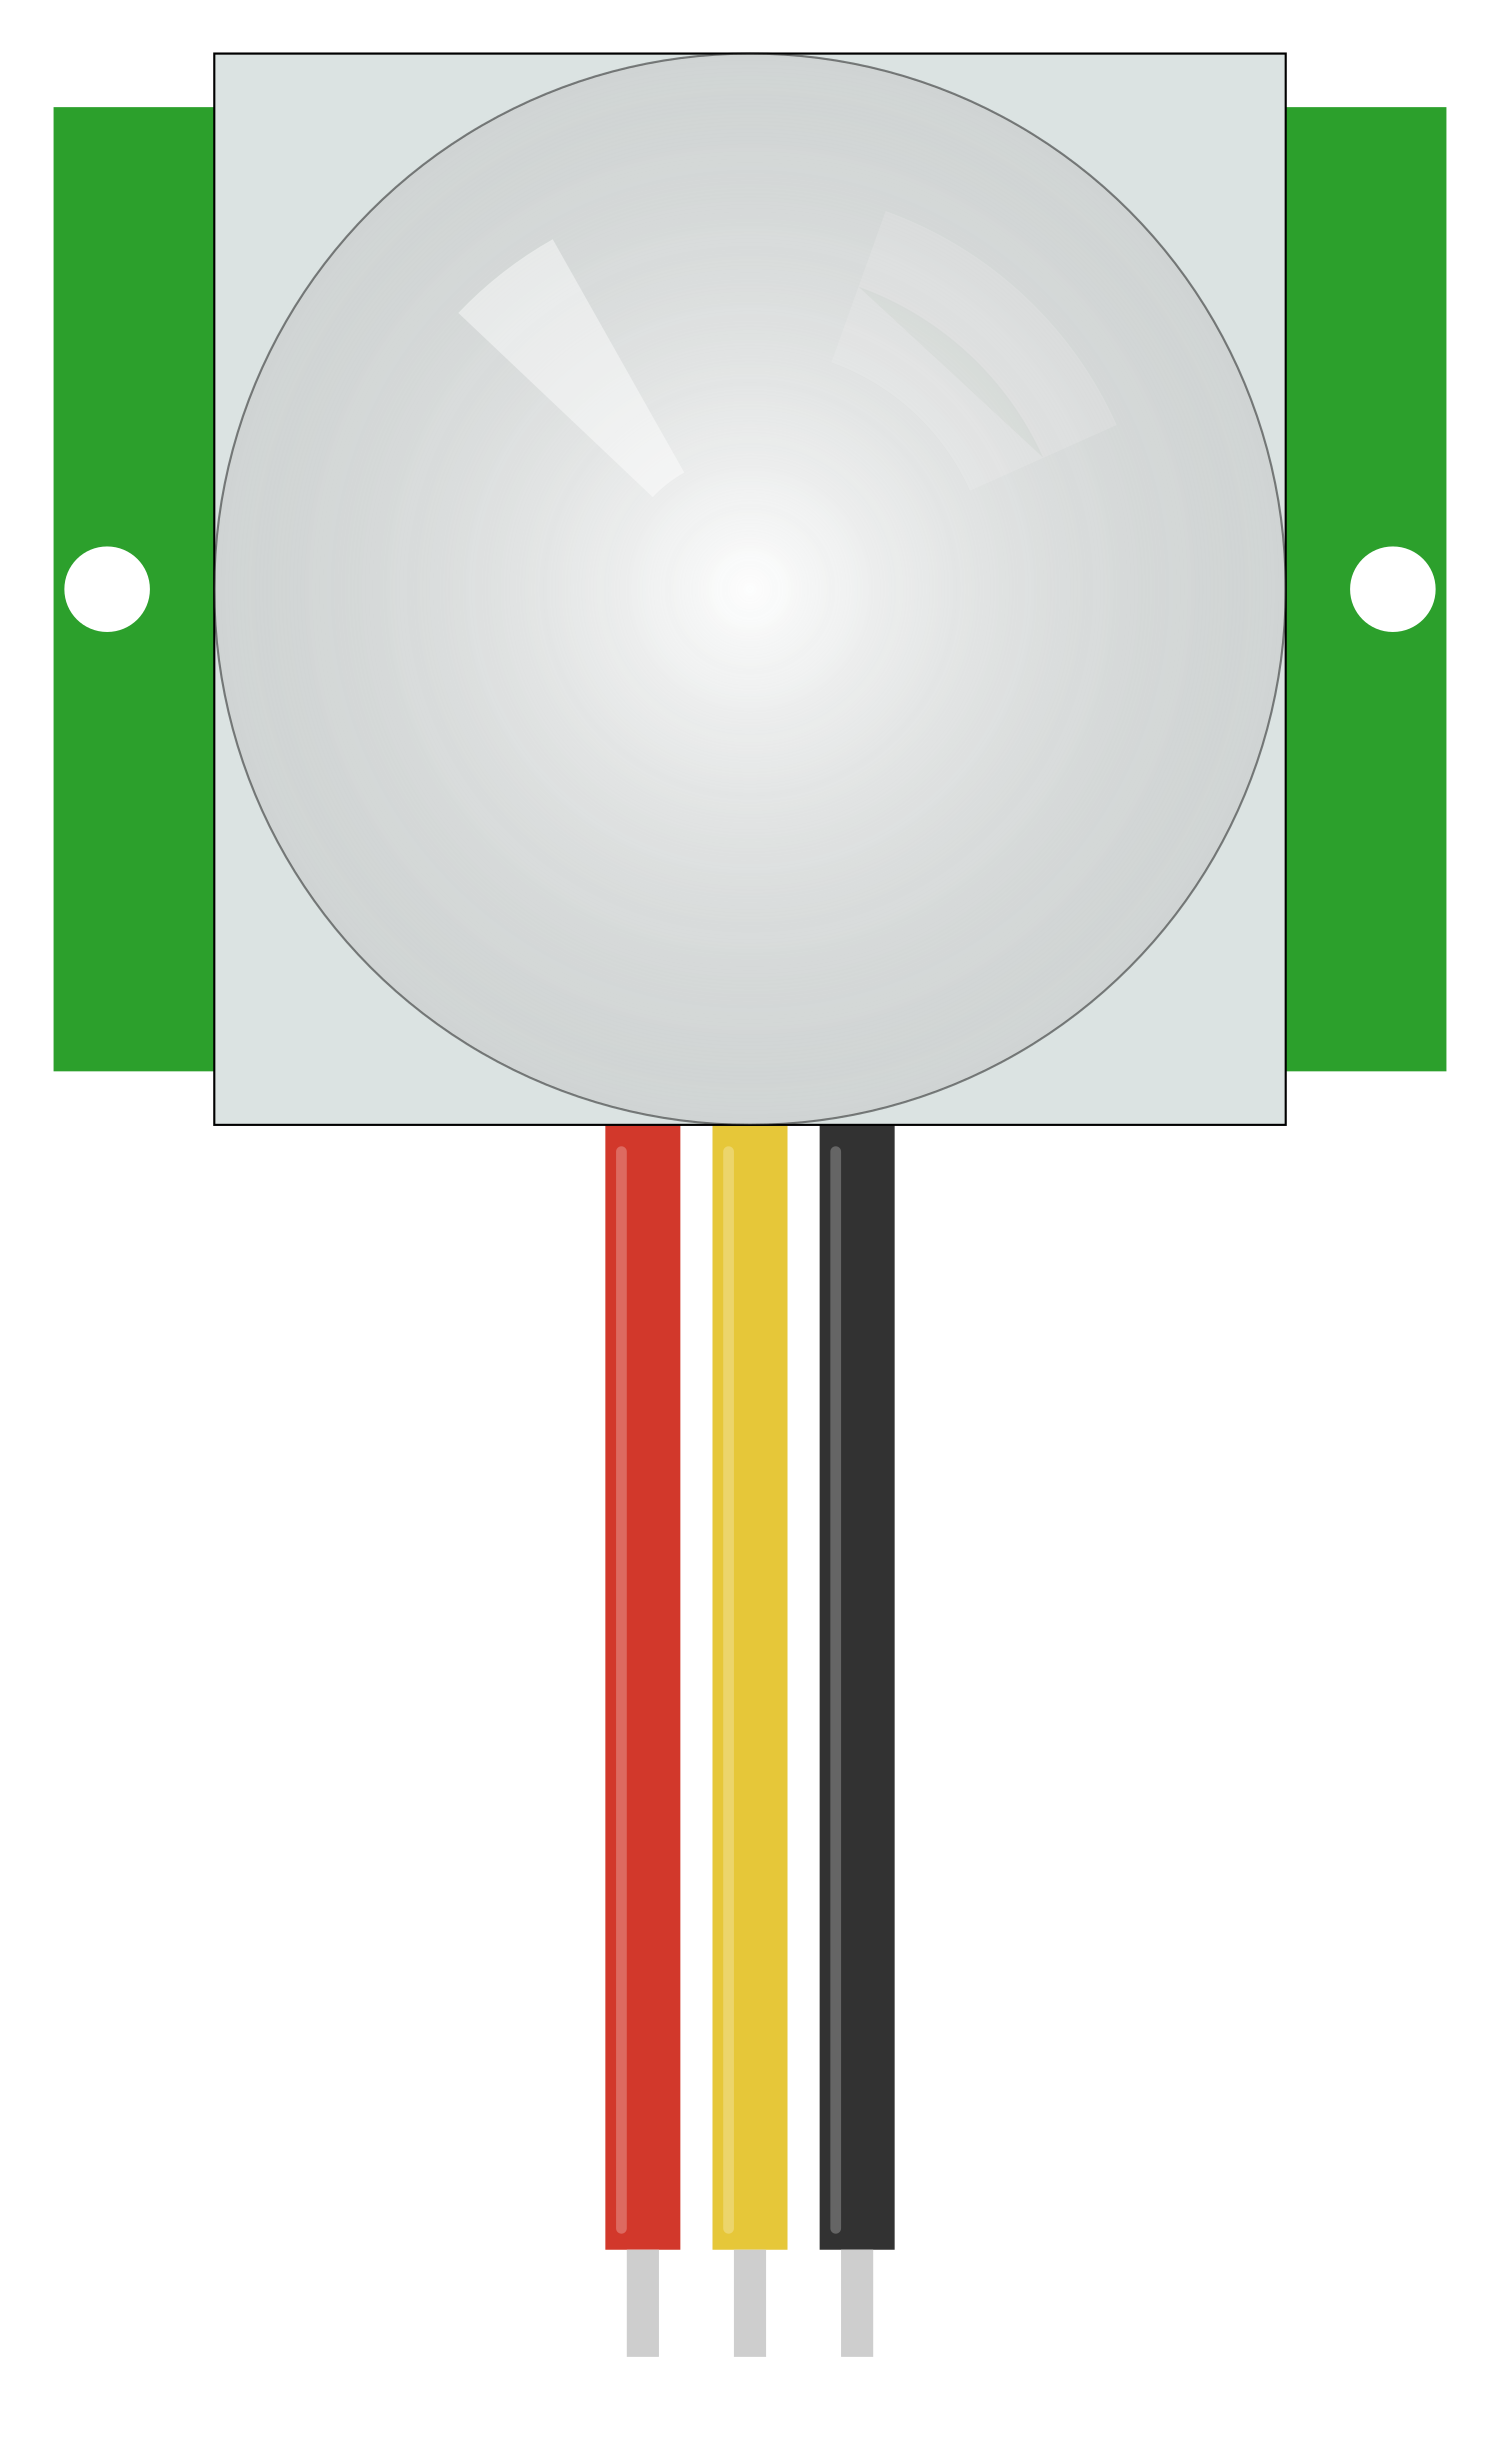
A Passive Infrared (PIR) sensor is an electronic device that measures infrared (IR) light radiating from objects within its field of view. They are most commonly used in motion detection systems, such as alarm systems, automatic lighting controls, and occupancy sensors in smart buildings.
Explore Projects Built with PIR sensor
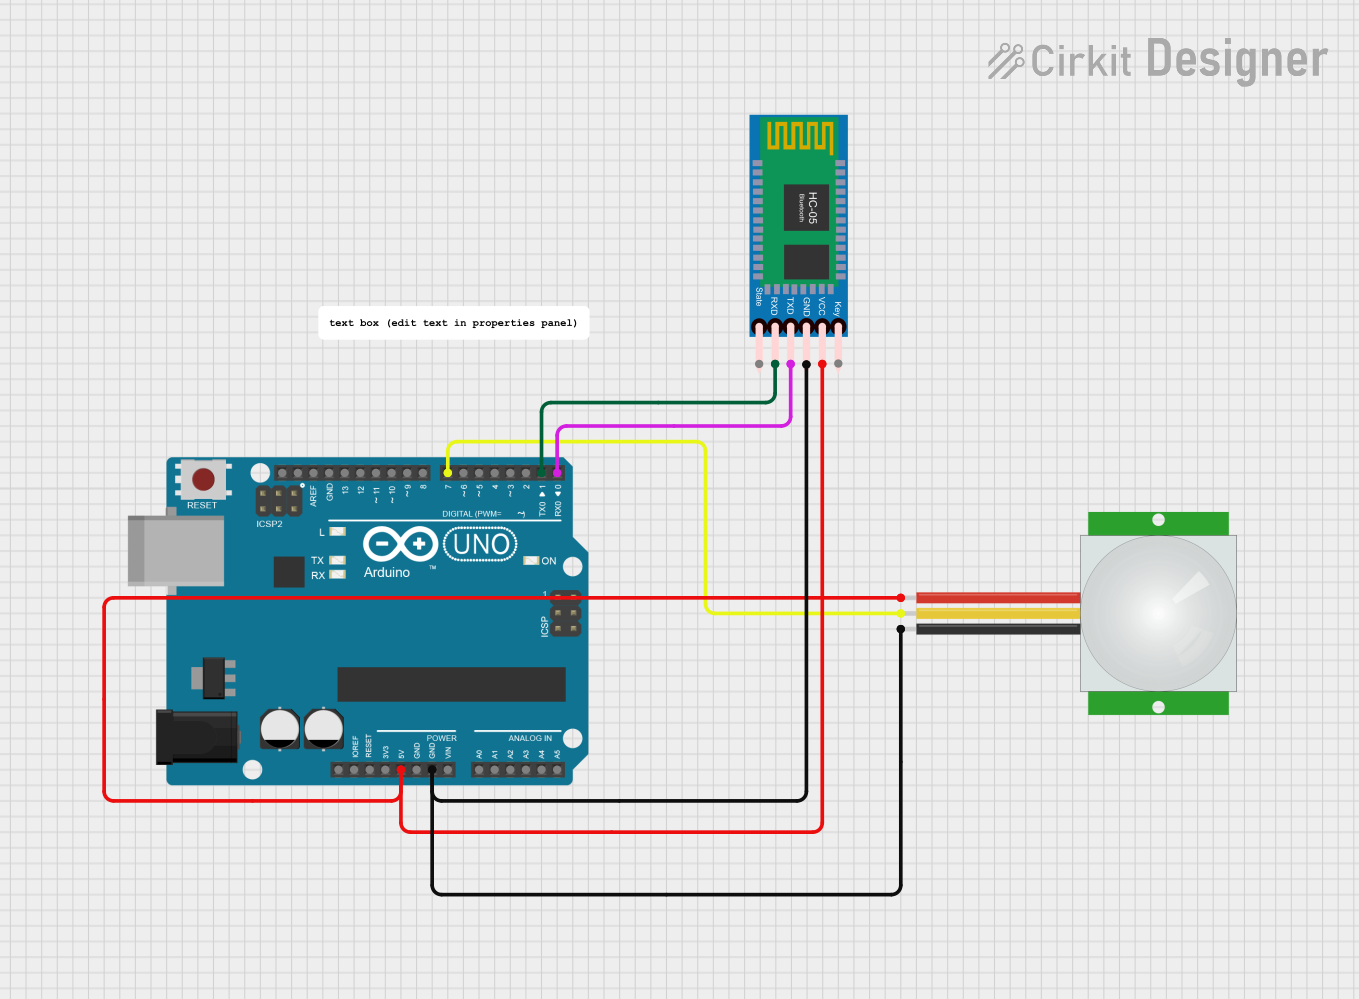

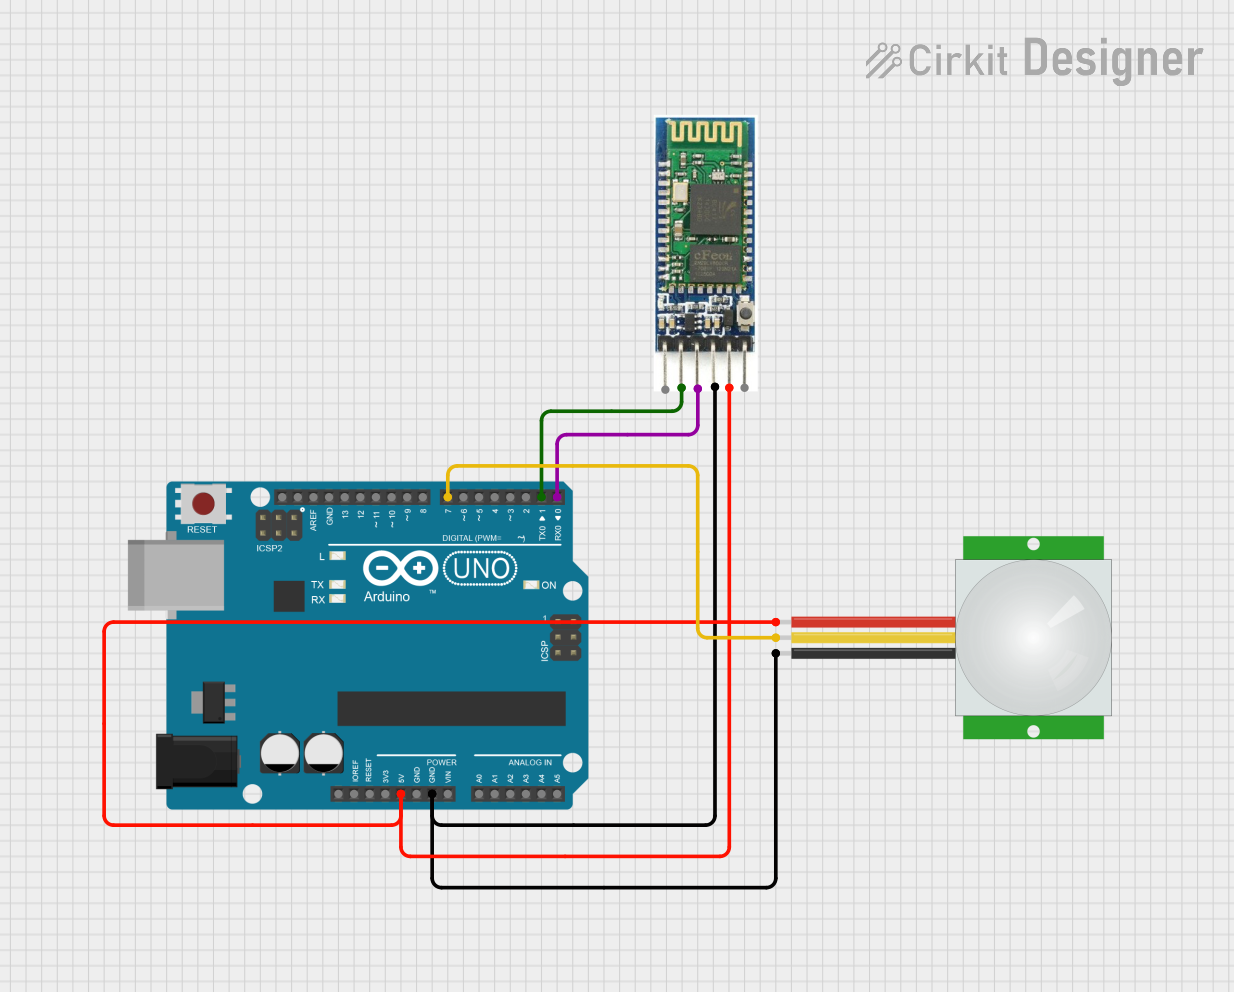
Explore Projects Built with PIR sensor
Common Applications and Use Cases
- Security systems
- Automatic lighting control
- Occupancy sensing for energy management
- Motion-activated surveillance cameras
- Interactive installations (e.g., exhibits, games)
Technical Specifications
Key Technical Details
- Voltage: Typically 3.3V to 5V
- Idle Current: <50uA
- Output Voltage: High/Low (3.3V/0V)
- Detection Range: Up to 7 meters
- Detection Angle: Up to 120 degrees
- Warm-Up Time: Approximately 20-60 seconds
Pin Configuration and Descriptions
| Pin Number | Name | Description |
|---|---|---|
| 1 | VCC | Power supply (3.3V to 5V) |
| 2 | OUT | Digital output signal (High/Low) |
| 3 | GND | Ground connection |
Usage Instructions
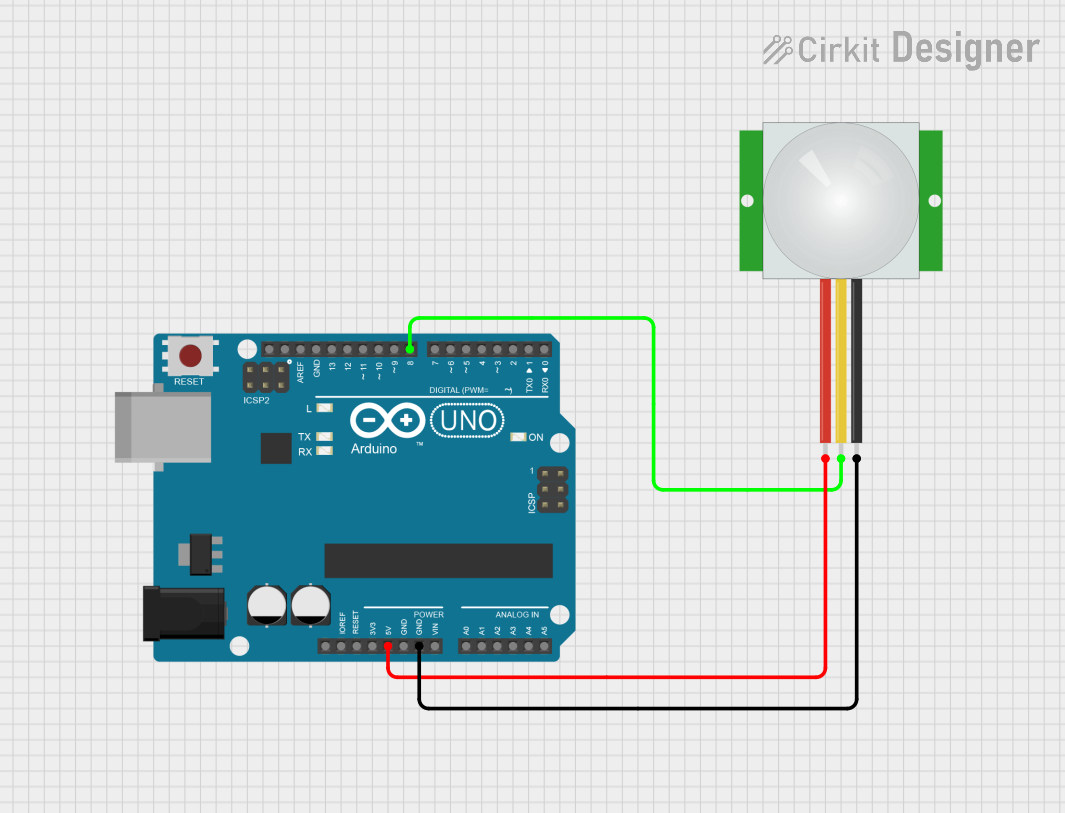
How to Use the PIR Sensor in a Circuit
- Connect the VCC pin to a 3.3V or 5V power supply.
- Connect the GND pin to the ground of the power supply.
- Connect the OUT pin to a digital input pin on a microcontroller, such as an Arduino.
Important Considerations and Best Practices
- Ensure that the PIR sensor is placed in a location where it can have a clear view of the area to be monitored.
- Avoid placing the sensor near heat sources or in direct sunlight, as this can trigger false alarms.
- Allow the sensor to warm up for the specified time to stabilize and calibrate its IR sensing.
Example Code for Arduino UNO
// Define the PIR sensor pin
int pirPin = 2; // Digital pin connected to the PIR sensor's output

// Variable for the PIR sensor status
int pirState = LOW;

void setup() {
  pinMode(pirPin, INPUT); // Initialize the PIR sensor pin as an input
  Serial.begin(9600);    // Start the serial communication
}

void loop() {
  pirState = digitalRead(pirPin); // Read the state of the PIR sensor
  if (pirState == HIGH) {
    // Motion detected
    Serial.println("Motion detected!");
    // Add custom code here to handle motion detection
  } else {
    // No motion detected
    Serial.println("No motion detected.");
  }
  delay(1000); // Wait for 1 second before reading again
}
Troubleshooting and FAQs
Common Issues Users Might Face
- False Alarms: The sensor may trigger without apparent motion. This can be due to environmental factors such as moving curtains, pets, or changes in temperature.
- No Response: If the sensor does not detect motion, ensure it is connected properly and has had time to warm up.
Solutions and Tips for Troubleshooting
- Adjust Sensitivity: Some PIR sensors have a potentiometer to adjust sensitivity. Experiment with these settings to optimize performance.
- Check Connections: Verify that all connections are secure and that the sensor is receiving the correct voltage.
- Allow Warm-Up Time: Give the sensor time to acclimate to the environment before expecting accurate readings.
FAQs
Q: Can the PIR sensor work through glass? A: No, PIR sensors typically cannot detect motion through glass as it blocks the infrared radiation.
Q: How long does the PIR sensor output stay high after detecting motion? A: This can vary between models, but it is often adjustable with a potentiometer or set by the manufacturer.
Q: Is it possible to adjust the detection range and angle? A: The detection angle is fixed by the sensor's design, but some models allow for range adjustment via a potentiometer.
Q: Can the PIR sensor be used outdoors? A: While some PIR sensors are designed for outdoor use, they must be adequately protected from the elements and may require a different setup to avoid false triggers.