How to Use VHM-314: Examples, Pinouts, and Specs

 Design with VHM-314 in Cirkit Designer
Introduction
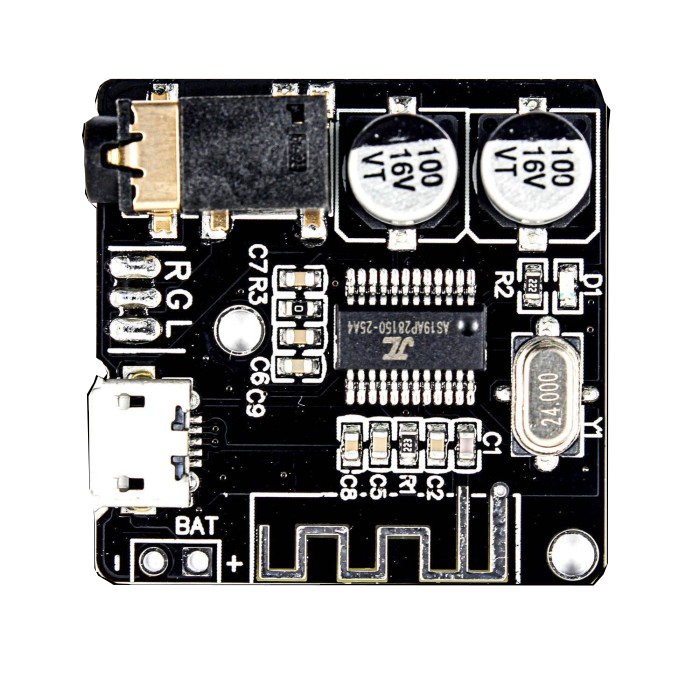
The VHM-314 is a high-performance voltage and current measurement module designed for precision applications. It features a compact design, high accuracy, and a wide measurement range, making it suitable for various electronic testing and monitoring tasks. This module is ideal for use in power supply testing, battery monitoring, and embedded system diagnostics. Its versatility and ease of integration make it a popular choice for both hobbyists and professionals.
Explore Projects Built with VHM-314

 Open Project in Cirkit Designer
 Open Project in Cirkit Designer
 Open Project in Cirkit Designer
 Open Project in Cirkit Designer
Explore Projects Built with VHM-314

 Open Project in Cirkit Designer
 Open Project in Cirkit Designer
 Open Project in Cirkit Designer
 Open Project in Cirkit Designer
Common Applications
- Power supply voltage and current monitoring
- Battery charge and discharge analysis
- Embedded system diagnostics
- Laboratory testing and prototyping
- Renewable energy system monitoring
Technical Specifications
The VHM-314 module is designed to provide accurate and reliable measurements. Below are its key technical specifications:
| Parameter | Value |
|---|---|
| Voltage Measurement Range | 0V to 100V DC |
| Current Measurement Range | 0A to 10A DC |
| Voltage Accuracy | ±0.5% |
| Current Accuracy | ±1% |
| Operating Voltage | 5V DC |
| Communication Interface | UART (9600 baud rate) |
| Dimensions | 50mm x 25mm x 15mm |
| Operating Temperature | -10°C to 60°C |
Pin Configuration
The VHM-314 module has a simple pinout for easy integration into circuits. Below is the pin configuration:
| Pin | Name | Description |
|---|---|---|
| 1 | VCC | Power supply input (5V DC) |
| 2 | GND | Ground connection |
| 3 | VIN+ | Positive voltage input for measurement |
| 4 | VIN- | Negative voltage input for measurement |
| 5 | IIN+ | Positive current input for measurement |
| 6 | IIN- | Negative current input for measurement |
| 7 | TX | UART transmit pin for data output |
| 8 | RX | UART receive pin for configuration (optional) |
Usage Instructions
How to Use the VHM-314 in a Circuit
- Power the Module: Connect the VCC pin to a 5V DC power source and the GND pin to the ground.
- Connect Measurement Inputs:
- For voltage measurement, connect the VIN+ and VIN- pins across the voltage source.
- For current measurement, connect the IIN+ and IIN- pins in series with the load.
- Data Communication:
- Use the TX pin to transmit measurement data to a microcontroller or PC via UART.
- Optionally, use the RX pin to configure the module (e.g., baud rate or measurement settings).
- Read Data: Use a UART-compatible device (e.g., Arduino UNO) to read the voltage and current data.
Important Considerations
- Ensure the input voltage and current do not exceed the module's maximum ratings (100V and 10A).
- Use proper wiring to minimize noise and ensure accurate measurements.
- If connecting to an Arduino UNO, use a logic level shifter if the Arduino operates at 3.3V logic levels.
Example Code for Arduino UNO
Below is an example Arduino sketch to read data from the VHM-314 module:
// Example code to read voltage and current data from the VHM-314 module
// Ensure the Arduino is connected to the VHM-314 TX pin (to Arduino RX pin)

#include <SoftwareSerial.h>

// Define RX and TX pins for SoftwareSerial
SoftwareSerial VHM314Serial(10, 11); // RX = Pin 10, TX = Pin 11 (not used here)

void setup() {
  Serial.begin(9600); // Initialize Serial Monitor at 9600 baud
  VHM314Serial.begin(9600); // Initialize VHM-314 communication at 9600 baud

  Serial.println("VHM-314 Voltage and Current Measurement");
}

void loop() {
  if (VHM314Serial.available()) {
    // Read data from the VHM-314 module
    String data = VHM314Serial.readStringUntil('\n');

    // Print the received data to the Serial Monitor
    Serial.println("Received Data: " + data);
  }

  delay(500); // Wait for 500ms before the next read
}
Notes:
- Connect the VHM-314 TX pin to the Arduino RX pin (pin 10 in this example).
- Ensure the baud rate matches the module's default setting (9600 baud).
Troubleshooting and FAQs
Common Issues and Solutions
No Data Output:
- Ensure the module is powered correctly (5V DC to VCC and GND).
- Verify the UART connection (TX pin of VHM-314 to RX pin of the microcontroller).
- Check the baud rate configuration (default is 9600).
Inaccurate Measurements:
- Ensure proper wiring and avoid loose connections.
- Verify that the input voltage and current are within the module's specified range.
- Minimize electrical noise by using shielded cables if necessary.
Module Overheating:
- Check that the current does not exceed 10A.
- Ensure adequate ventilation around the module.
FAQs
Q1: Can the VHM-314 measure AC voltage or current?
A1: No, the VHM-314 is designed for DC voltage and current measurements only.
Q2: How can I change the baud rate of the module?
A2: The baud rate can be configured via the RX pin using specific UART commands. Refer to the module's advanced configuration guide for details.
Q3: Is the module compatible with 3.3V logic devices?
A3: The VHM-314 operates at 5V logic levels. Use a logic level shifter for compatibility with 3.3V devices.
Q4: Can I use the module for continuous monitoring?
A4: Yes, the VHM-314 is suitable for continuous monitoring, provided the input parameters remain within the specified range.