How to Use Adjustable Step-Up/Step-Down Voltage Regulator S7V8A reg09b 0J7031: Examples, Pinouts, and Specs
Adjustable Step-Up/Step-Down Voltage Regulator S7V8A (Pololu S7V8A)
Introduction
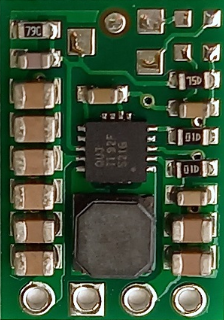
The Pololu Adjustable Step-Up/Step-Down Voltage Regulator S7V8A (part ID: S7V8A) is a versatile DC-DC converter designed to efficiently regulate input voltages to a stable output voltage. This regulator can both step up (boost) and step down (buck) the input voltage, making it ideal for applications where the input voltage may vary above or below the desired output voltage.
The S7V8A is compact, lightweight, and highly efficient, making it suitable for battery-powered devices, robotics, portable electronics, and other projects requiring a stable voltage supply. Its adjustable output voltage feature allows users to fine-tune the output to meet specific requirements.
Common Applications
- Powering microcontrollers (e.g., Arduino, Raspberry Pi) from batteries
- Stabilizing voltage in portable devices
- Robotics and motor control systems
- Renewable energy systems (e.g., solar-powered devices)
- General-purpose voltage regulation in electronics projects
Technical Specifications
The following table outlines the key technical details of the Pololu S7V8A regulator:
| Parameter | Value |
|---|---|
| Input Voltage Range | 2.7 V to 11.8 V |
| Output Voltage Range | Adjustable: 2.5 V to 8 V |
| Maximum Output Current | 1 A (typical, depending on input/output voltage and thermal conditions) |
| Efficiency | Up to 90% (varies with input/output voltage and load) |
| Quiescent Current | 0.1 mA to 1 mA (depending on load and input voltage) |
| Dimensions | 0.45" × 0.65" × 0.1" (11.4 mm × 16.5 mm × 3 mm) |
| Weight | 0.5 g |
| Operating Temperature | -40°C to +85°C |
Pin Configuration and Descriptions
The S7V8A regulator has six pins, as described in the table below:
| Pin Name | Pin Type | Description |
|---|---|---|
| VIN | Power Input | Input voltage pin (2.7 V to 11.8 V). Connect to the power source. |
| GND | Ground | Ground pin. Connect to the ground of the circuit. |
| VOUT | Power Output | Regulated output voltage pin (2.5 V to 8 V). Connect to the load. |
| SHDN | Control | Shutdown pin. Drive low to disable the regulator; leave floating or high to enable. |
| FB | Feedback | Feedback pin for adjusting the output voltage. Connect to a resistor divider. |
| NC | Not Connected | No internal connection. Leave unconnected. |
Usage Instructions
Connecting the S7V8A in a Circuit
Power Input (VIN and GND):
- Connect the VIN pin to the positive terminal of your power source (e.g., battery or power supply).
- Connect the GND pin to the ground of your power source and circuit.
Output Voltage (VOUT):
- Connect the VOUT pin to the positive terminal of your load (e.g., microcontroller, sensor, or motor).
- Ensure the load does not exceed the regulator's maximum output current (1 A).
Adjusting the Output Voltage:
- Use a resistor divider connected to the FB pin to set the desired output voltage.
- Refer to the formula in the Pololu S7V8A datasheet to calculate the resistor values for your target voltage.
Shutdown Control (SHDN):
- To enable the regulator, leave the SHDN pin floating or connect it to a high logic level.
- To disable the regulator, connect the SHDN pin to ground.
Important Considerations
- Ensure the input voltage is within the specified range (2.7 V to 11.8 V).
- Use appropriate capacitors on the input and output for stable operation (e.g., 10 µF ceramic capacitors).
- Avoid shorting the output to ground, as this may damage the regulator.
- For optimal efficiency, minimize the length of wires connecting the regulator to the power source and load.
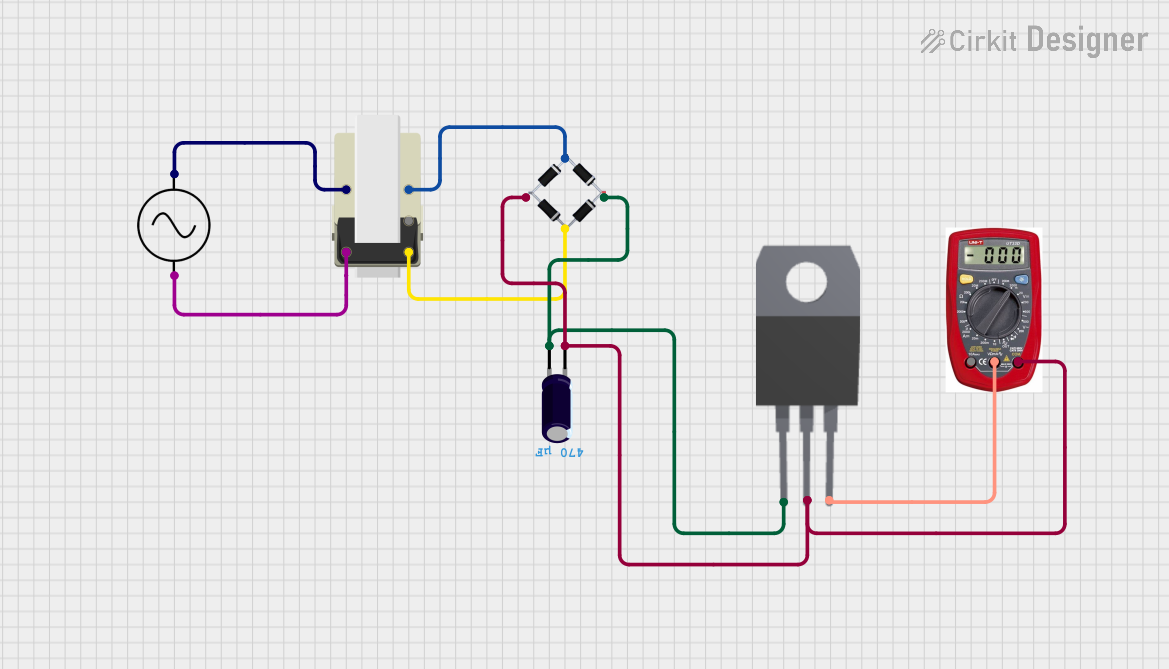
Example: Using the S7V8A with an Arduino UNO
The following example demonstrates how to use the S7V8A to power an Arduino UNO from a 3.7 V lithium-ion battery. The output voltage is set to 5 V to match the Arduino's operating voltage.
Circuit Diagram
- Connect the battery's positive terminal to the VIN pin of the S7V8A.
- Connect the battery's ground to the GND pin of the S7V8A.
- Connect the VOUT pin of the S7V8A to the Arduino's 5V pin.
- Connect the GND pin of the S7V8A to the Arduino's GND pin.
Arduino Code Example
The following code reads the input voltage from an analog pin and displays it on the serial monitor. This can be used to monitor the battery voltage.
// Define the analog pin connected to the battery voltage divider
const int batteryPin = A0;

// Define the voltage divider ratio (adjust based on your resistor values)
const float voltageDividerRatio = 2.0;

void setup() {
  Serial.begin(9600); // Initialize serial communication at 9600 baud
}

void loop() {
  int sensorValue = analogRead(batteryPin); // Read the analog input
  float batteryVoltage = (sensorValue * 5.0 / 1023.0) * voltageDividerRatio;

  // Print the battery voltage to the serial monitor
  Serial.print("Battery Voltage: ");
  Serial.print(batteryVoltage);
  Serial.println(" V");

  delay(1000); // Wait for 1 second before the next reading
}
Troubleshooting and FAQs
Common Issues and Solutions
Regulator Overheating:
- Cause: Excessive load current or insufficient ventilation.
- Solution: Reduce the load current or improve airflow around the regulator.
Output Voltage Not Stable:
- Cause: Insufficient input/output capacitors or incorrect resistor values on the FB pin.
- Solution: Add appropriate capacitors (e.g., 10 µF ceramic) and verify the resistor values.
No Output Voltage:
- Cause: SHDN pin is grounded or input voltage is too low.
- Solution: Ensure the SHDN pin is high or floating and verify the input voltage.
Low Efficiency:
- Cause: Input voltage is too close to the output voltage.
- Solution: Use an input voltage that is sufficiently higher or lower than the output voltage.
FAQs
Q1: Can I use the S7V8A to power a Raspberry Pi?
A1: Yes, but ensure the input voltage and current requirements of the Raspberry Pi are within the regulator's specifications.
Q2: What happens if the input voltage exceeds 11.8 V?
A2: Exceeding the maximum input voltage may damage the regulator. Use a voltage limiter or protection circuit if necessary.
Q3: Can I use the S7V8A with a solar panel?
A3: Yes, the S7V8A can regulate the variable output of a solar panel, provided the input voltage stays within the specified range.
This documentation provides a comprehensive guide to using the Pololu Adjustable Step-Up/Step-Down Voltage Regulator S7V8A. For additional details, refer to the official Pololu datasheet and application notes.
Explore Projects Built with Adjustable Step-Up/Step-Down Voltage Regulator S7V8A reg09b 0J7031


Explore Projects Built with Adjustable Step-Up/Step-Down Voltage Regulator S7V8A reg09b 0J7031