How to Use TB74/TB74B Bill Acceptor: Examples, Pinouts, and Specs
Introduction
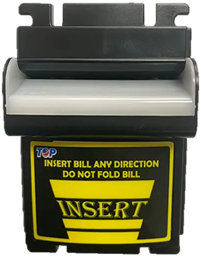
The TB74/TB74B Bill Acceptor is a reliable and efficient electronic component designed for use in vending machines, kiosks, arcade systems, and other automated payment systems. This device is capable of recognizing and validating various denominations of banknotes with high accuracy. It is equipped with advanced sensors and firmware to ensure secure and fast transactions, making it an essential component for cash-handling applications.
Explore Projects Built with TB74/TB74B Bill Acceptor
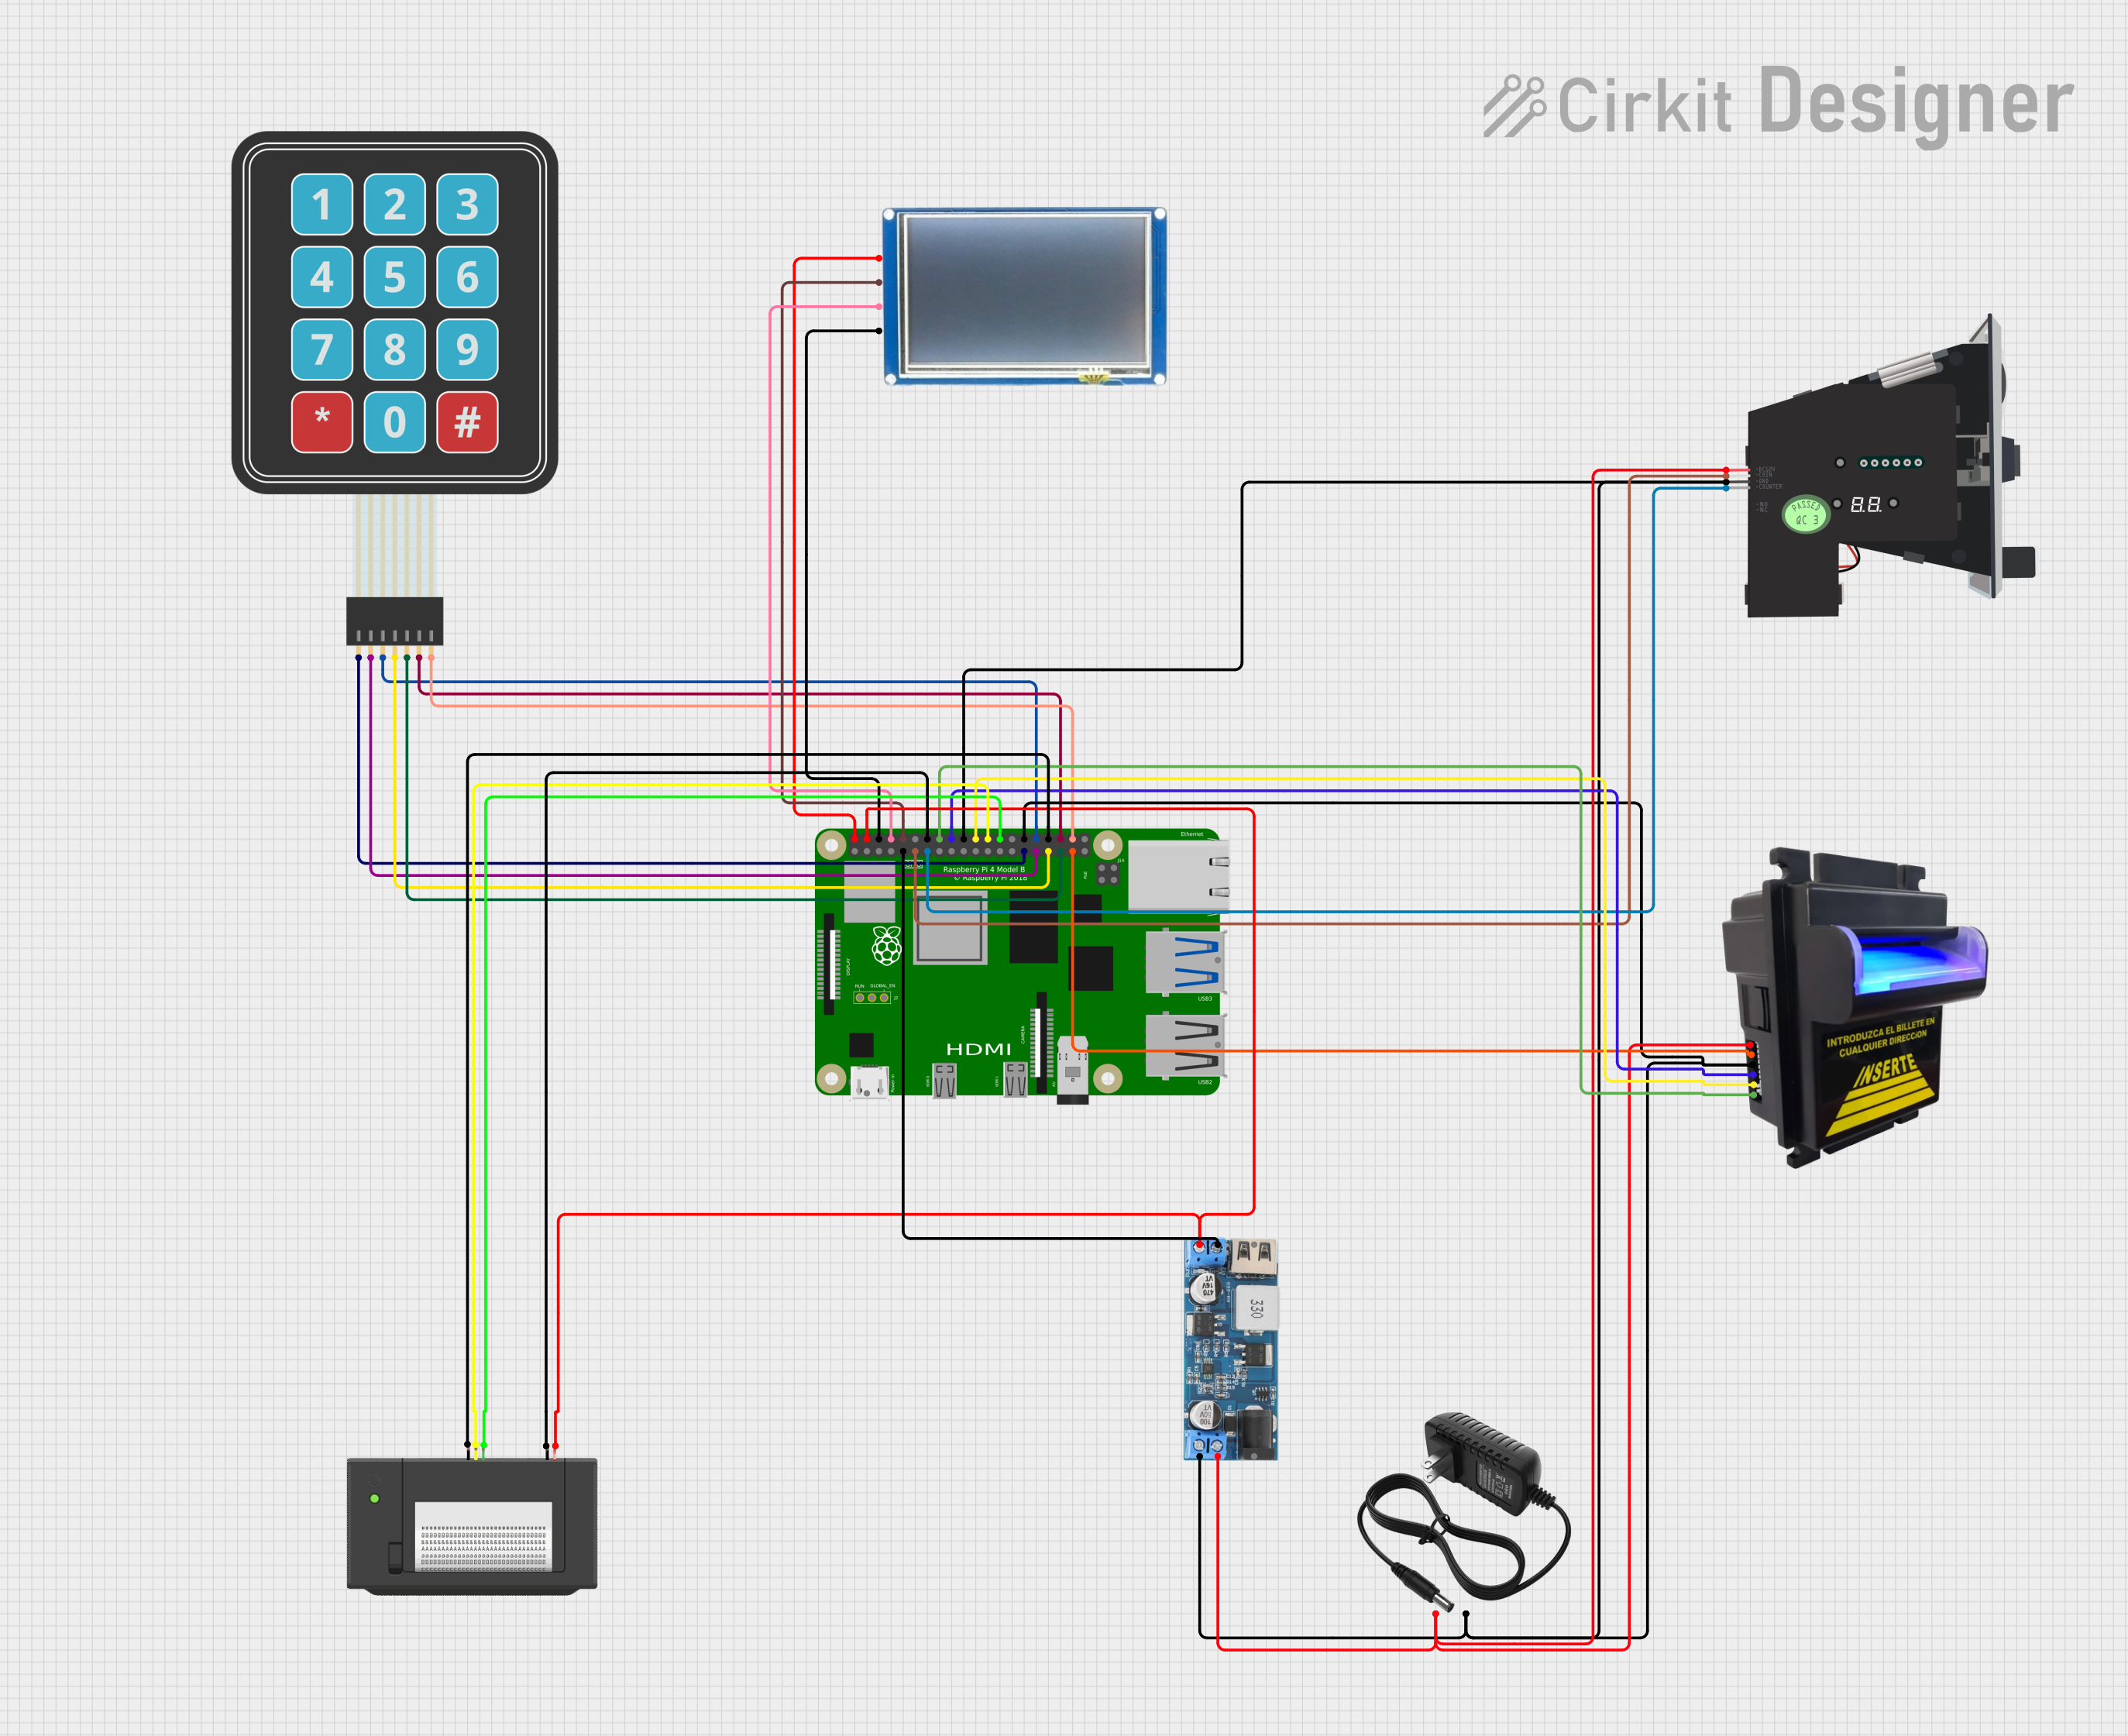
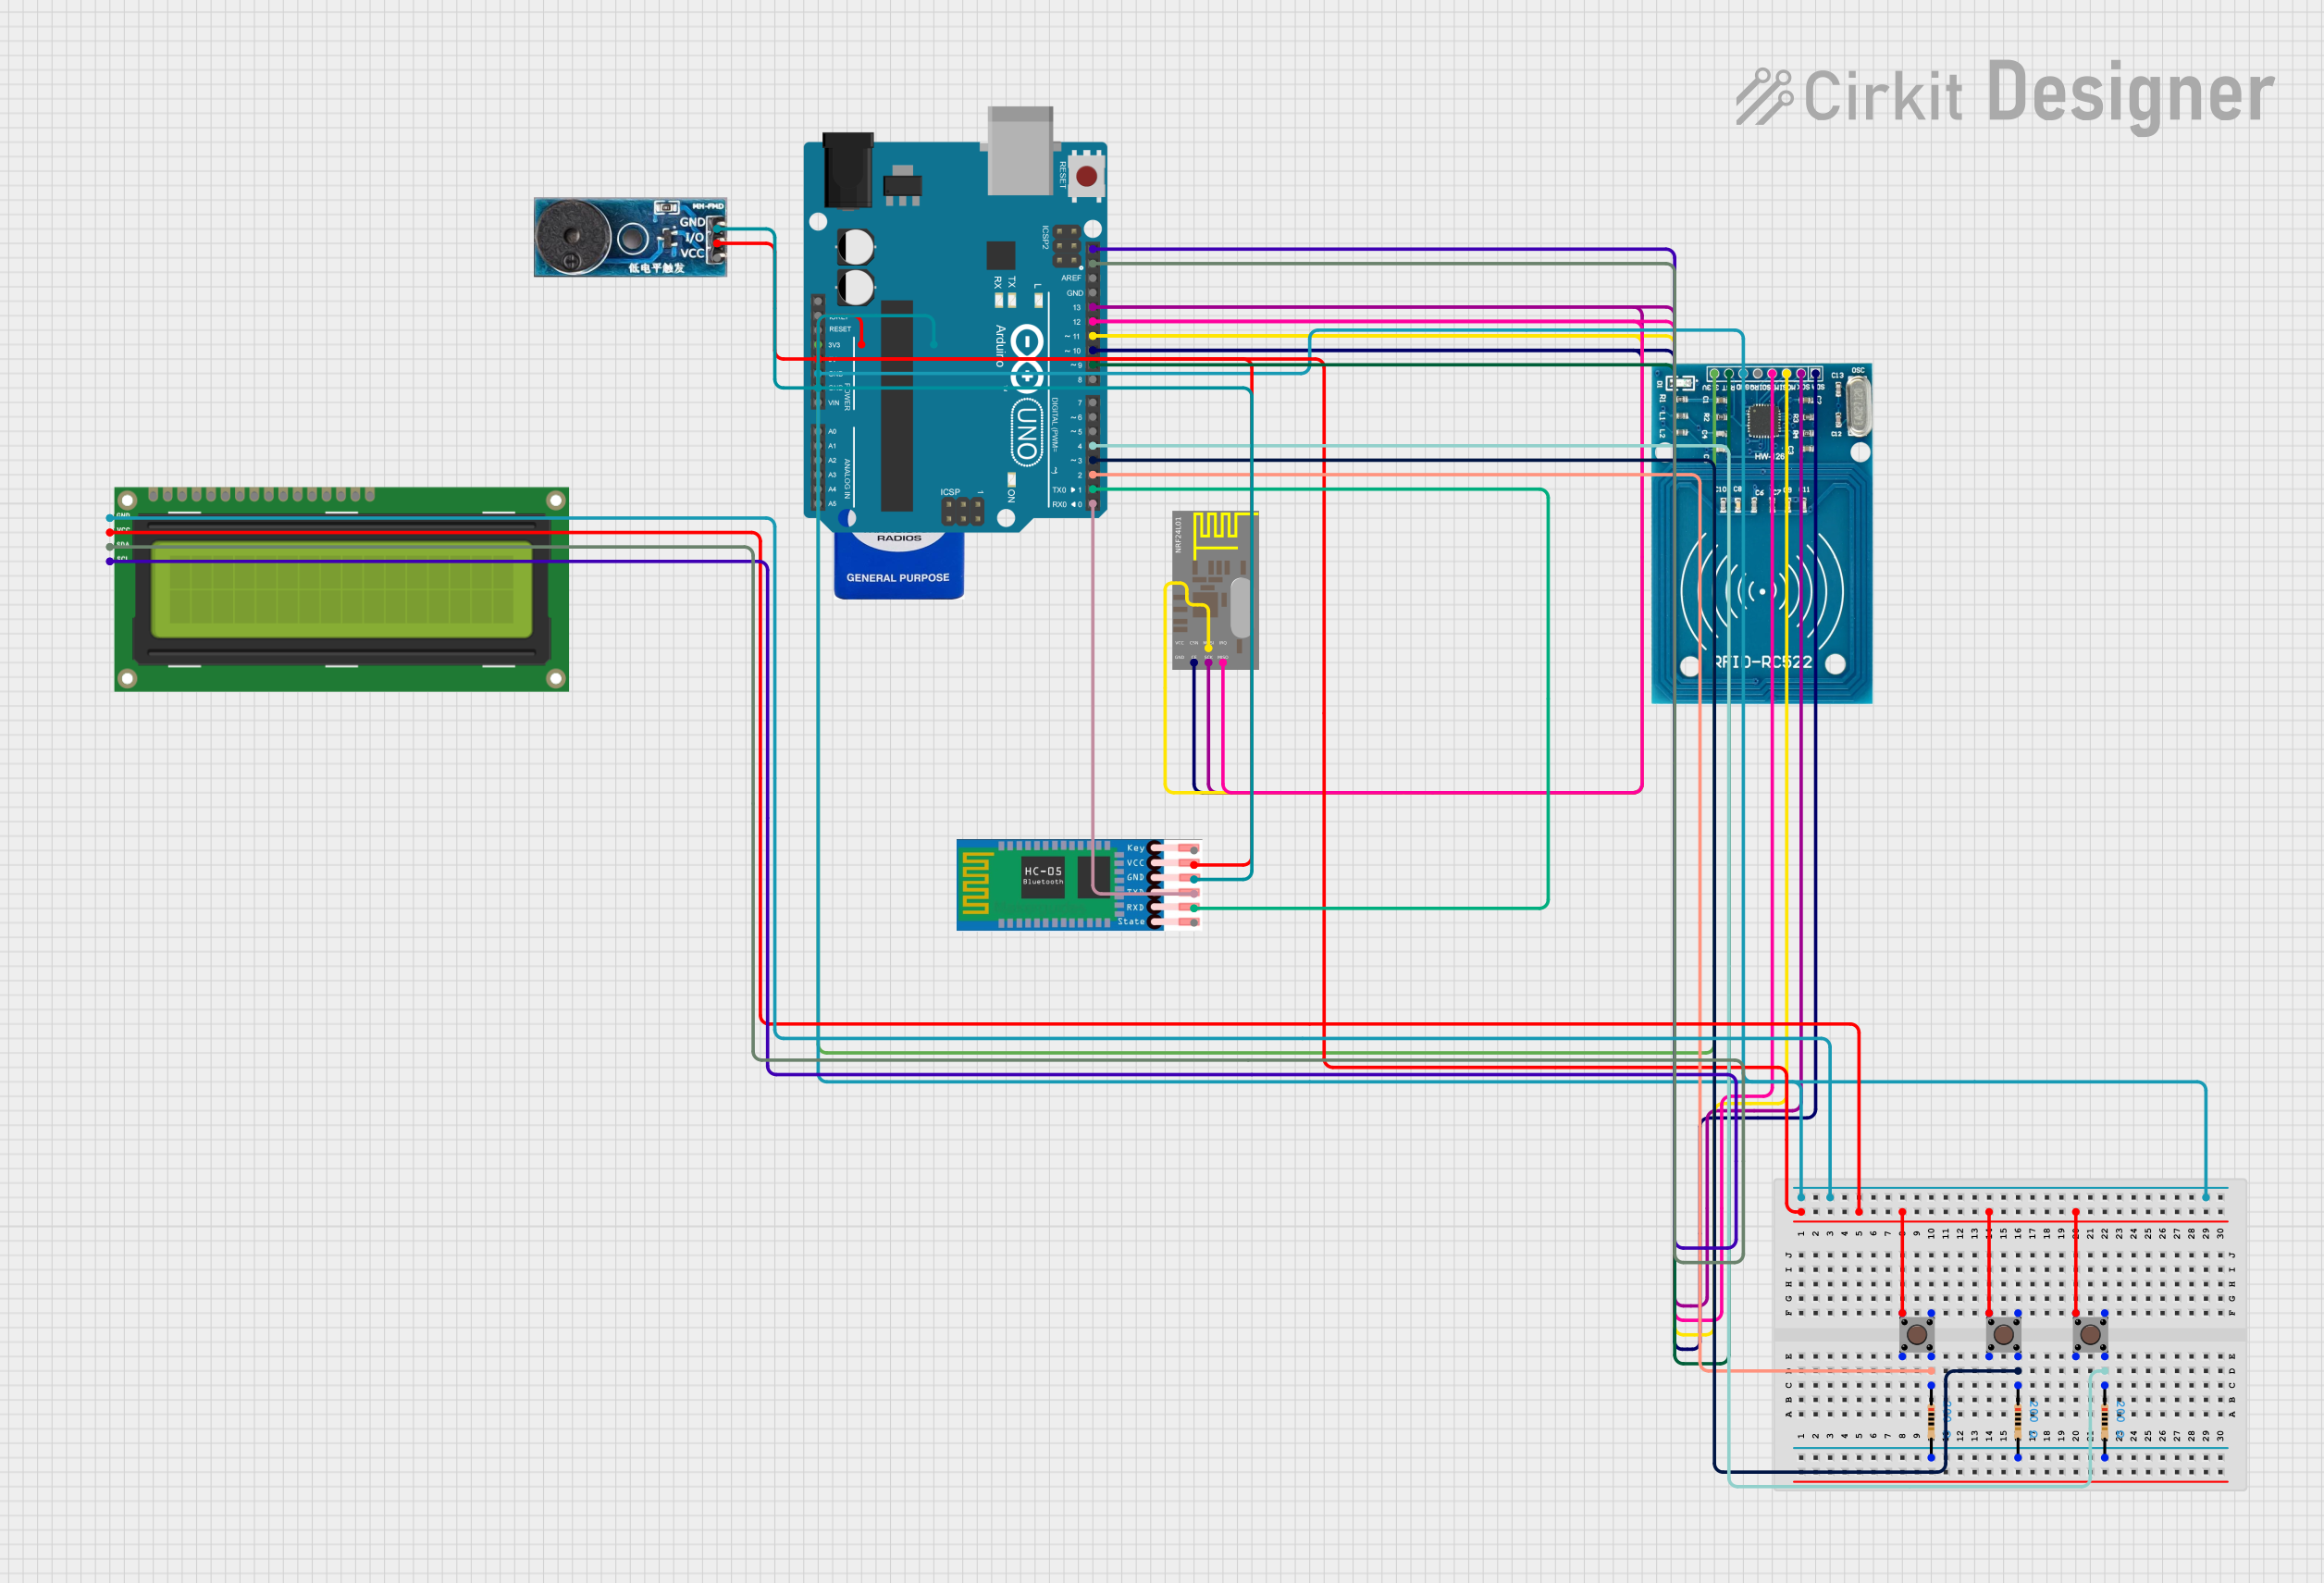
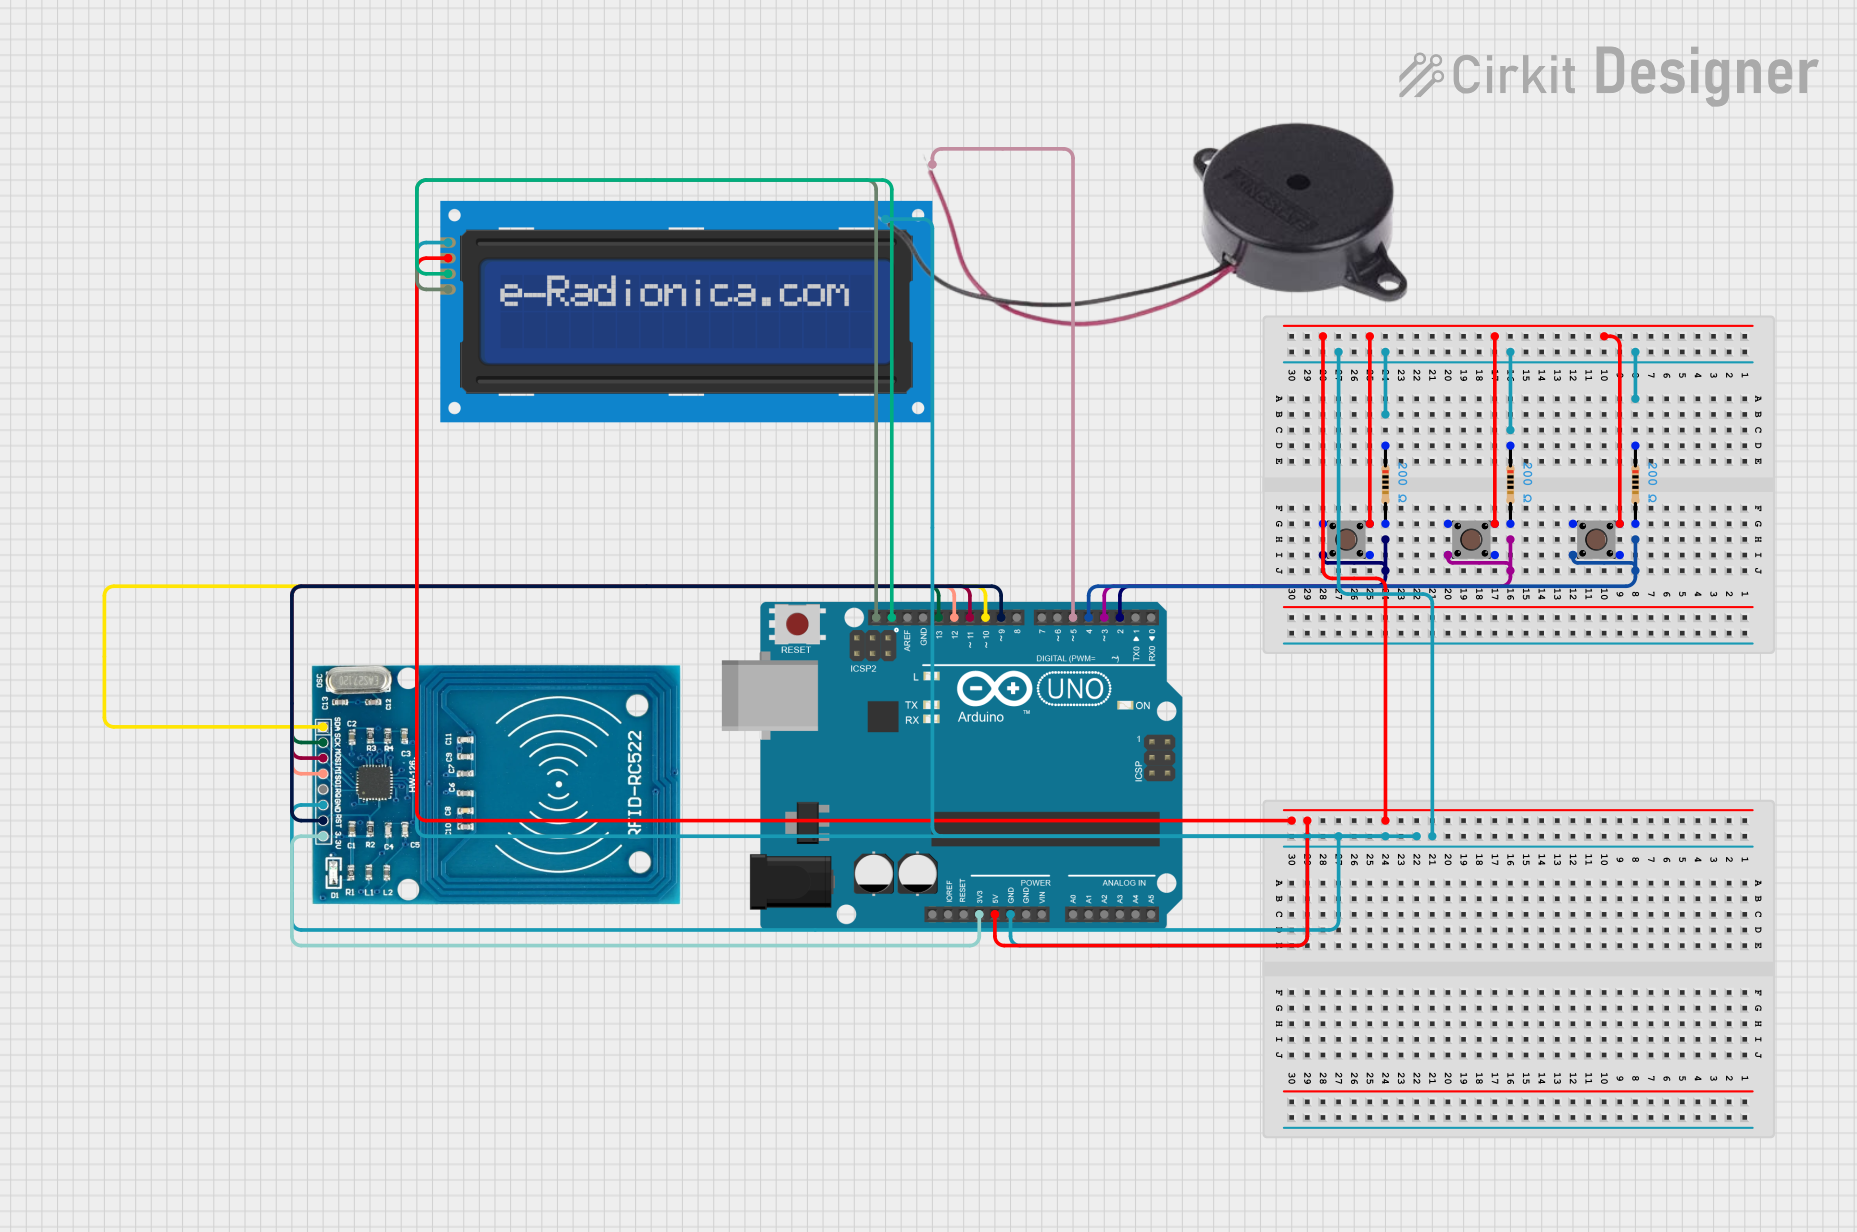
Explore Projects Built with TB74/TB74B Bill Acceptor
Common Applications and Use Cases
- Vending machines for snacks, beverages, and other products
- Parking payment systems
- Arcade and gaming machines
- Ticketing kiosks
- Automated toll collection systems
Technical Specifications
Key Technical Details
| Parameter | Specification |
|---|---|
| Model Number | TB74 / TB74B |
| Power Supply Voltage | 12V DC ± 10% |
| Operating Current | 500mA (typical), 1A (maximum) |
| Supported Banknote Width | 62mm to 77mm |
| Validation Speed | ~3 seconds per banknote |
| Communication Protocols | Pulse, RS232, MDB |
| Operating Temperature | 0°C to 50°C |
| Storage Temperature | -20°C to 70°C |
| Dimensions | 102mm x 85mm x 240mm |
| Weight | 1.2 kg |
Pin Configuration and Descriptions
The TB74/TB74B Bill Acceptor typically uses a 9-pin connector for power and communication. Below is the pinout description:
| Pin Number | Name | Description |
|---|---|---|
| 1 | VCC | Power supply input (12V DC) |
| 2 | GND | Ground connection |
| 3 | INHIBIT | Inhibit signal to enable/disable bill acceptance |
| 4 | PULSE OUT | Outputs pulses for accepted bills |
| 5 | RS232 TX | Transmit data for RS232 communication |
| 6 | RS232 RX | Receive data for RS232 communication |
| 7 | MDB DATA | Data line for MDB protocol |
| 8 | MDB CLOCK | Clock line for MDB protocol |
| 9 | MDB VEND | Vending signal for MDB protocol |
Usage Instructions
How to Use the Component in a Circuit
- Power Connection: Connect the
VCCpin to a regulated 12V DC power supply and theGNDpin to the ground of your circuit. - Communication Setup: Choose the desired communication protocol (Pulse, RS232, or MDB) and connect the corresponding pins to your microcontroller or vending machine controller.
- Enable Bill Acceptance: Use the
INHIBITpin to enable or disable bill acceptance. Pull the pin low (0V) to enable and high (5V) to disable. - Banknote Validation: Insert a banknote into the acceptor. The device will validate the note and output a signal (e.g., pulses or RS232 data) corresponding to the denomination.
- Output Handling: Process the output signal in your controller to register the payment and trigger the appropriate action (e.g., dispensing a product).
Important Considerations and Best Practices
- Ensure the power supply is stable and within the specified voltage range to avoid damage to the device.
- Regularly clean the bill path and sensors to maintain optimal performance and prevent misreads.
- Use proper shielding and grounding to minimize interference in communication lines.
- When using RS232 or MDB protocols, ensure the baud rate and other communication settings match between the bill acceptor and the controller.
- Test the system with various denominations to verify proper validation and output signals.
Example Code for Arduino UNO (Pulse Mode)
Below is an example of how to interface the TB74/TB74B Bill Acceptor with an Arduino UNO using the Pulse mode:
// TB74/TB74B Bill Acceptor - Pulse Mode Example
// Connect the PULSE OUT pin to Arduino digital pin 2
// Connect the INHIBIT pin to Arduino digital pin 3

#define PULSE_PIN 2  // Pin for receiving pulses
#define INHIBIT_PIN 3 // Pin to enable/disable bill acceptance

volatile int pulseCount = 0; // Variable to store pulse count

void setup() {
  pinMode(PULSE_PIN, INPUT_PULLUP); // Set PULSE_PIN as input with pull-up
  pinMode(INHIBIT_PIN, OUTPUT);    // Set INHIBIT_PIN as output
  digitalWrite(INHIBIT_PIN, LOW);  // Enable bill acceptance (LOW = enabled)

  attachInterrupt(digitalPinToInterrupt(PULSE_PIN), countPulse, FALLING);
  Serial.begin(9600); // Initialize serial communication
}

void loop() {
  // Print the pulse count every second
  Serial.print("Pulses received: ");
  Serial.println(pulseCount);
  delay(1000);
}

void countPulse() {
  // Interrupt service routine to count pulses
  pulseCount++;
}
Notes:
- Each pulse corresponds to a specific denomination. Refer to the manufacturer's documentation for the pulse-to-denomination mapping.
- Ensure the
INHIBIT_PINis set toLOWto enable bill acceptance.
Troubleshooting and FAQs
Common Issues and Solutions
The bill acceptor does not power on:
- Verify that the power supply is providing 12V DC and is properly connected to the
VCCandGNDpins. - Check for loose or damaged wires in the power connection.
- Verify that the power supply is providing 12V DC and is properly connected to the
The device does not accept banknotes:
- Ensure the
INHIBITpin is set toLOWto enable bill acceptance. - Clean the bill path and sensors to remove dust or debris.
- Verify that the banknote is within the supported width range (62mm to 77mm).
- Ensure the
Incorrect or no output signal:
- Check the communication protocol settings (Pulse, RS232, or MDB) and ensure they match between the bill acceptor and the controller.
- Inspect the wiring for loose connections or interference.
Frequent misreads or rejections:
- Clean the sensors and ensure the banknotes are not excessively wrinkled or damaged.
- Update the firmware if available to improve validation accuracy.
FAQs
Can the TB74/TB74B accept multiple currencies? Yes, the device can be programmed to recognize multiple currencies, but this requires specific configuration or firmware updates.
What happens if a counterfeit note is inserted? The bill acceptor will reject counterfeit or invalid notes and return them to the user.
Is the device compatible with Arduino? Yes, the TB74/TB74B can be interfaced with Arduino using Pulse or RS232 communication protocols.
How do I clean the bill acceptor? Use a soft, lint-free cloth and a mild cleaning solution to clean the bill path and sensors. Avoid using abrasive materials or liquids that could damage the device.
By following this documentation, you can effectively integrate and maintain the TB74/TB74B Bill Acceptor in your application.