
How to Use PICAXE-18A: Examples, Pinouts, and Specs
 Design with PICAXE-18A in Cirkit Designer
Introduction
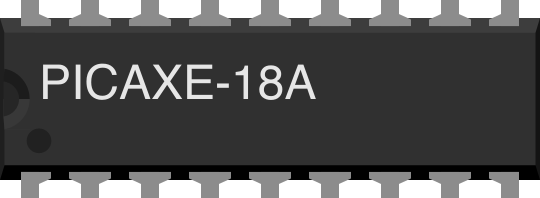
The PICAXE-18A is a versatile 8-bit microcontroller designed for educational and hobbyist applications. It is part of the PICAXE family, which is known for its ease of use and built-in programming capabilities. The PICAXE-18A is preloaded with a bootstrap program, allowing users to program it directly via a simple serial connection without requiring an external programmer.
This microcontroller features a variety of input/output pins, making it ideal for interfacing with sensors, actuators, and other electronic components. Its simplicity and flexibility make it a popular choice for beginners and experienced users alike.
Explore Projects Built with PICAXE-18A
 Open Project in Cirkit Designer
 Open Project in Cirkit Designer
 Open Project in Cirkit Designer
 Open Project in Cirkit Designer
Explore Projects Built with PICAXE-18A
Open Project in Cirkit DesignerOpen Project in Cirkit DesignerOpen Project in Cirkit DesignerOpen Project in Cirkit DesignerCommon Applications
- Robotics and automation projects
- Sensor-based systems
- Educational tools for learning microcontroller programming
- Home automation and IoT prototypes
- Hobbyist electronics projects
Technical Specifications
The following table outlines the key technical details of the PICAXE-18A microcontroller:
| Specification | Details |
|---|---|
| Architecture | 8-bit |
| Operating Voltage | 4.5V to 5.5V |
| Clock Speed | 4 MHz (internal resonator) |
| Programming Interface | Serial (RS232 or USB-to-serial) |
| Flash Memory | 256 bytes |
| RAM | 32 bytes |
| EEPROM | 256 bytes |
| Number of I/O Pins | 8 digital I/O, 5 analog inputs |
| Maximum Output Current | 20 mA per pin |
| Package Type | DIP-18 |
Pin Configuration and Descriptions
The PICAXE-18A has 18 pins, each with specific functions. The table below describes the pin configuration:
| Pin Number | Pin Name | Function |
|---|---|---|
| 1 | VSS | Ground (0V) |
| 2 | Serial In | Serial programming input |
| 3 | Serial Out | Serial programming output |
| 4 | Input 0 | Digital input / Analog input (ADC channel 0) |
| 5 | Input 1 | Digital input / Analog input (ADC channel 1) |
| 6 | Input 2 | Digital input / Analog input (ADC channel 2) |
| 7 | Input 3 | Digital input / Analog input (ADC channel 3) |
| 8 | Input 4 | Digital input / Analog input (ADC channel 4) |
| 9 | VDD | Positive power supply (4.5V to 5.5V) |
| 10 | Output 0 | Digital output |
| 11 | Output 1 | Digital output |
| 12 | Output 2 | Digital output |
| 13 | Output 3 | Digital output |
| 14 | Output 4 | Digital output |
| 15 | Output 5 | Digital output |
| 16 | Output 6 | Digital output |
| 17 | Output 7 | Digital output |
| 18 | Reset | Active-low reset input |
Usage Instructions
How to Use the PICAXE-18A in a Circuit
- Power Supply: Connect the VDD pin (pin 9) to a 5V power source and the VSS pin (pin 1) to ground.
- Programming: Use a serial cable (or USB-to-serial adapter) to connect the Serial In (pin 2) and Serial Out (pin 3) pins to your computer. The PICAXE Programming Editor software can be used to write and upload code.
- Input/Output Connections:
- Connect sensors to the input pins (pins 4–8). For analog sensors, ensure the input voltage is within the ADC range (0–5V).
- Connect actuators or other devices to the output pins (pins 10–17). Use current-limiting resistors if necessary to protect the pins.
- Reset: Optionally, connect a push-button to the Reset pin (pin 18) for manual resets.
Important Considerations
- Current Limitation: Each I/O pin can source or sink a maximum of 20 mA. Exceeding this limit may damage the microcontroller.
- Decoupling Capacitor: Place a 0.1 µF capacitor between VDD and VSS to stabilize the power supply.
- Programming Voltage: Ensure the programming voltage is within the specified range (4.5V to 5.5V) for reliable operation.
Example Code for Arduino UNO Integration
Although the PICAXE-18A is a standalone microcontroller, it can communicate with an Arduino UNO via serial communication. Below is an example of Arduino code to send data to the PICAXE-18A:
// Arduino code to send data to PICAXE-18A via serial communication
void setup() {
  Serial.begin(4800); // Set baud rate to 4800 for PICAXE communication
}

void loop() {
  Serial.println("Hello, PICAXE!"); // Send a message to the PICAXE
  delay(1000); // Wait for 1 second before sending the next message
}
On the PICAXE-18A, you can use the following BASIC code to receive and process the data:
' PICAXE-18A code to receive data from Arduino
main:
  serin 2, N4800, b0  ' Receive serial data on pin 2 at 4800 baud
  debug               ' Display the received data in the debug window
  goto main           ' Repeat the process
Troubleshooting and FAQs
Common Issues
The PICAXE-18A is not responding to programming commands.
- Solution: Check the serial connection and ensure the correct COM port is selected in the programming software. Verify that the power supply is stable and within the specified range.
Input pins are not reading sensor values correctly.
- Solution: Ensure the sensor output voltage is within the 0–5V range. For analog sensors, verify that the ADC channel is correctly configured in the code.
Output pins are not driving connected devices.
- Solution: Check the wiring and ensure the connected device does not exceed the 20 mA current limit. Use a transistor or relay for higher current loads.
The microcontroller resets unexpectedly.
- Solution: Add a decoupling capacitor (0.1 µF) between VDD and VSS to filter out power supply noise.
FAQs
Can the PICAXE-18A be powered by batteries? Yes, it can be powered by a 4.5V or 5V battery pack. Ensure the voltage remains stable during operation.
What programming languages are supported? The PICAXE-18A is programmed using a simplified version of BASIC, which is beginner-friendly and well-documented.
Can I use the PICAXE-18A with external oscillators? No, the PICAXE-18A uses an internal 4 MHz resonator and does not support external oscillators.
Is the PICAXE-18A compatible with I2C or SPI communication? The PICAXE-18A supports I2C communication but does not natively support SPI. Refer to the PICAXE manual for I2C implementation details.