How to Use DS18B20 1-Wire Temperature Sensor: Examples, Pinouts, and Specs
Introduction
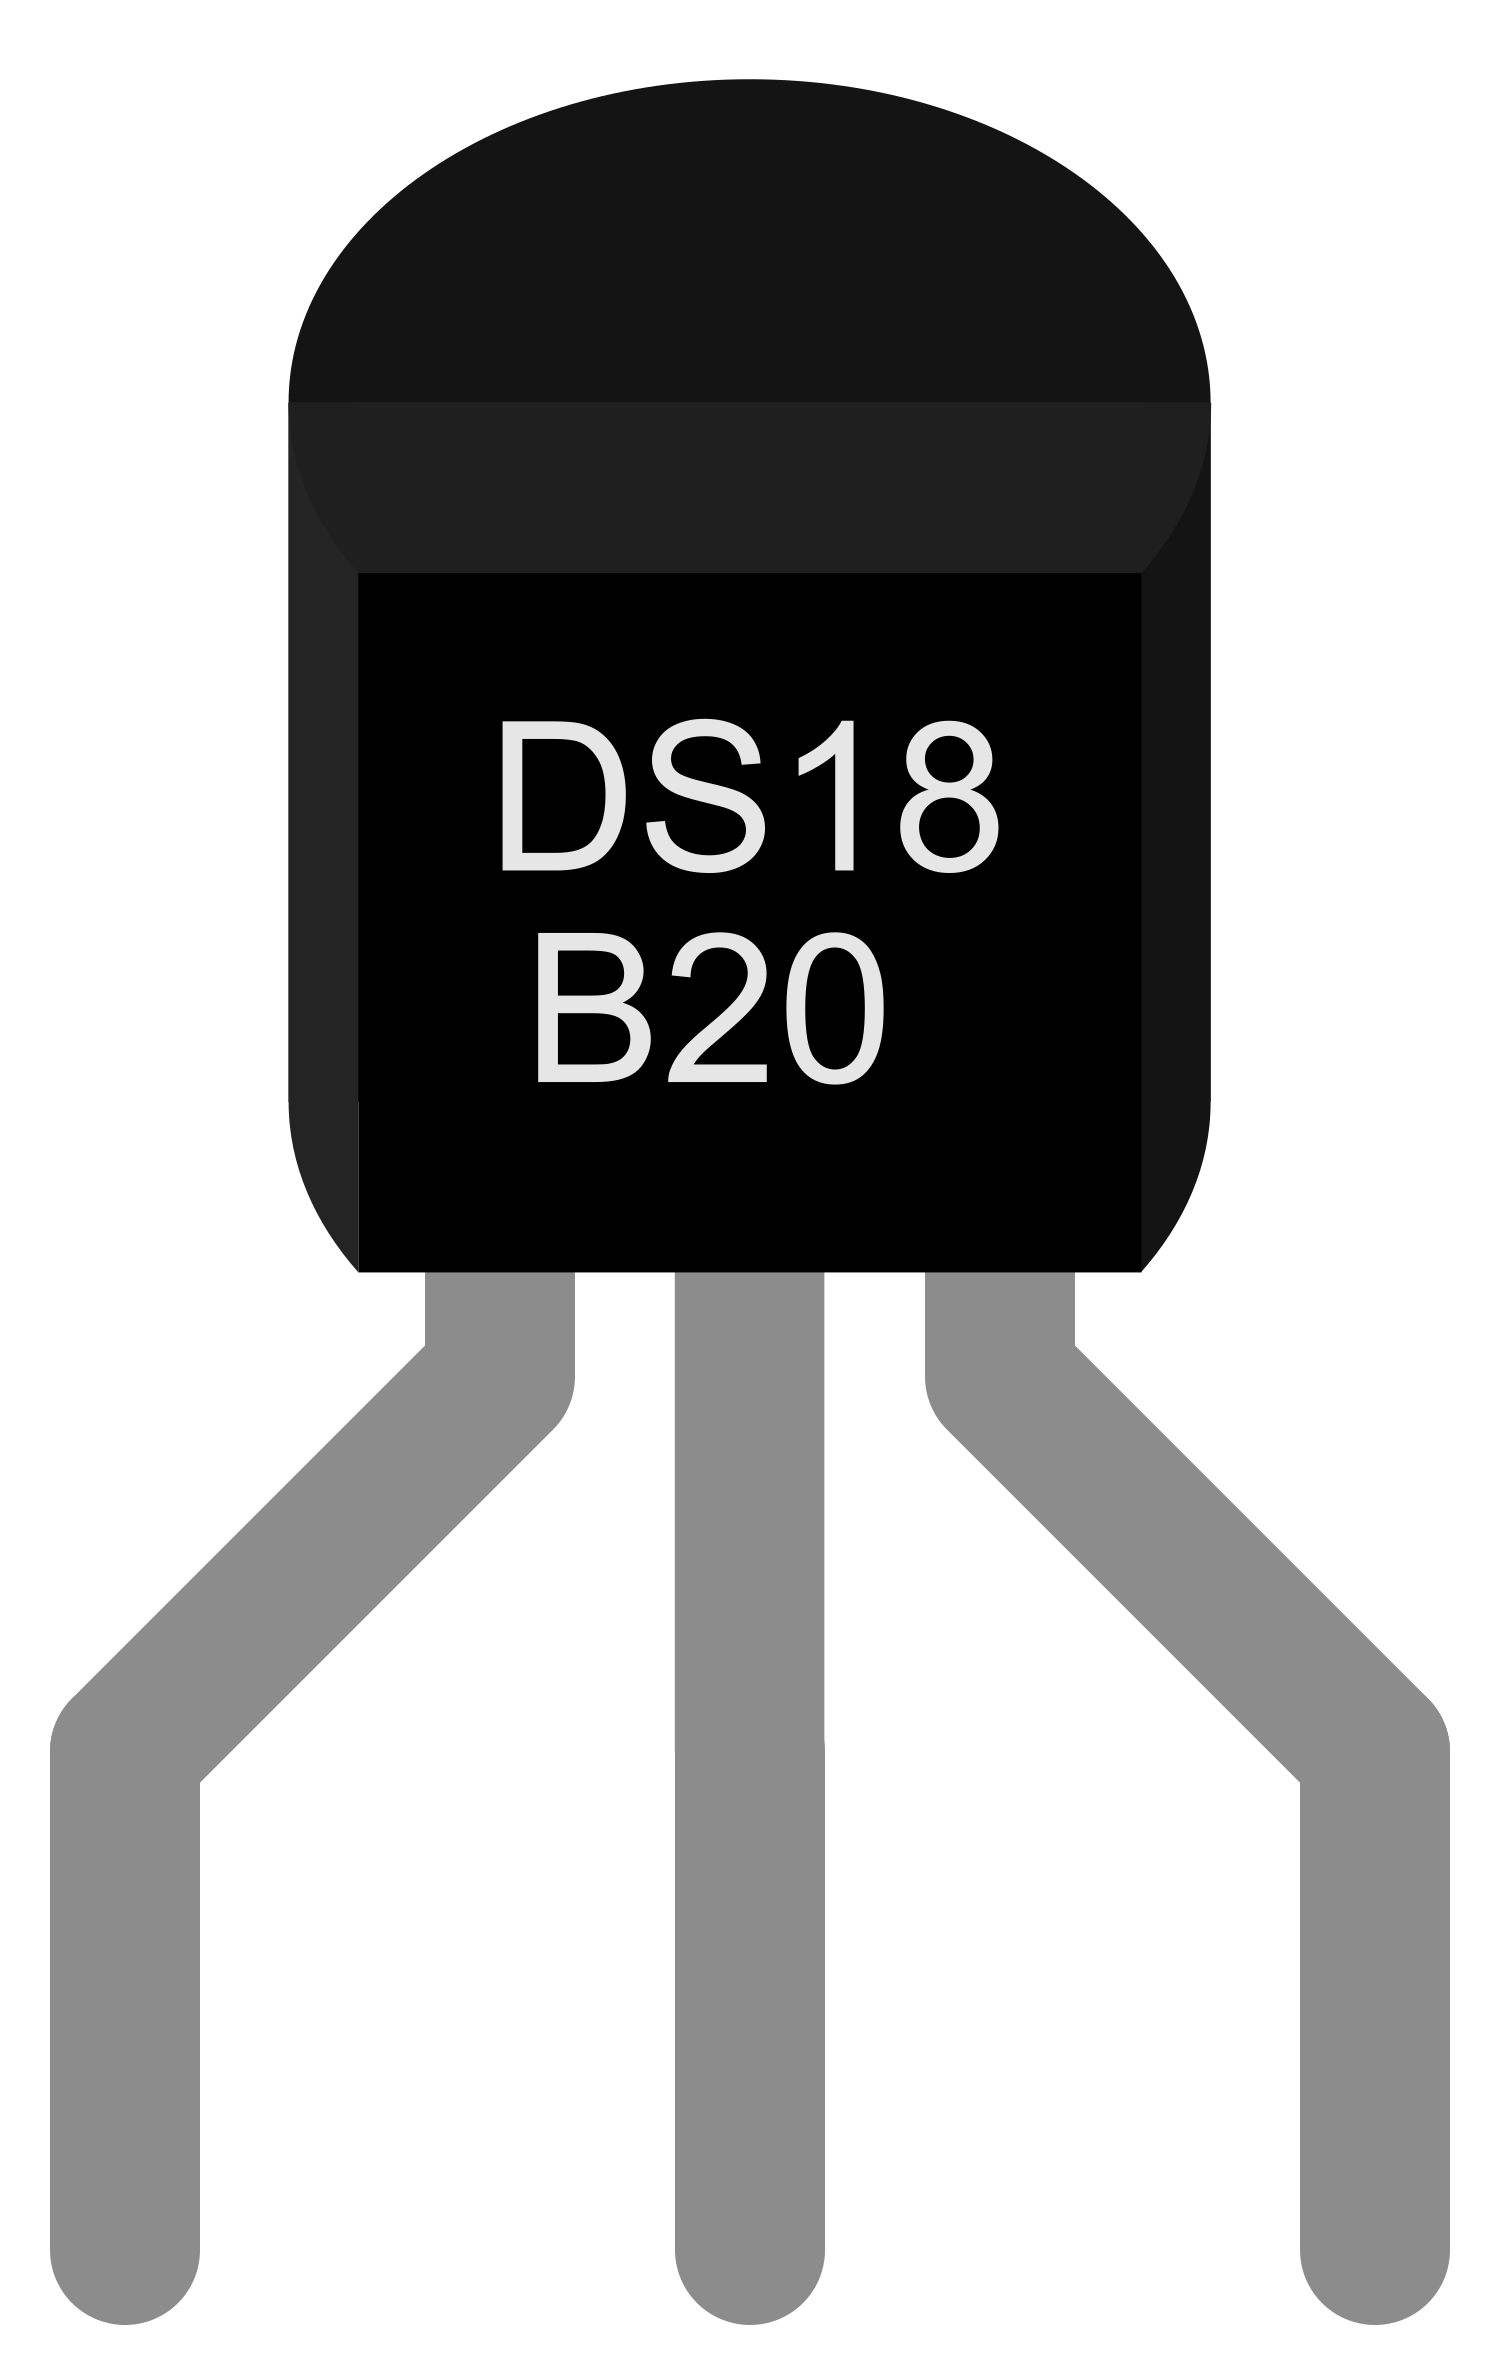
The DS18B20 1-Wire Temperature Sensor is a compact digital sensor that provides temperature measurements in a digital format over a 1-Wire interface. This sensor is widely used in a variety of applications, including HVAC environmental controls, temperature monitoring systems inside buildings, equipment or machinery, and process monitoring and control systems.
Explore Projects Built with DS18B20 1-Wire Temperature Sensor
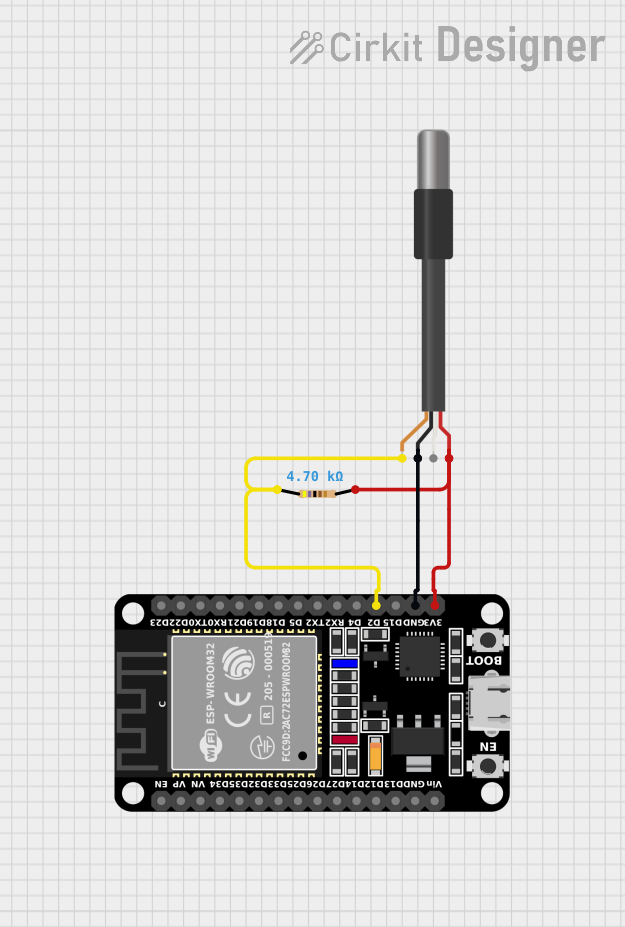
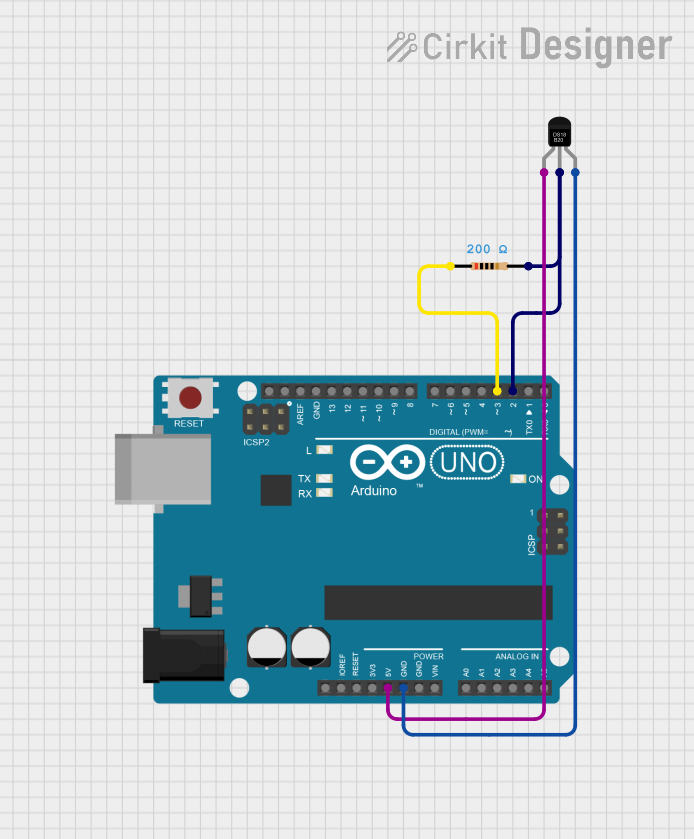
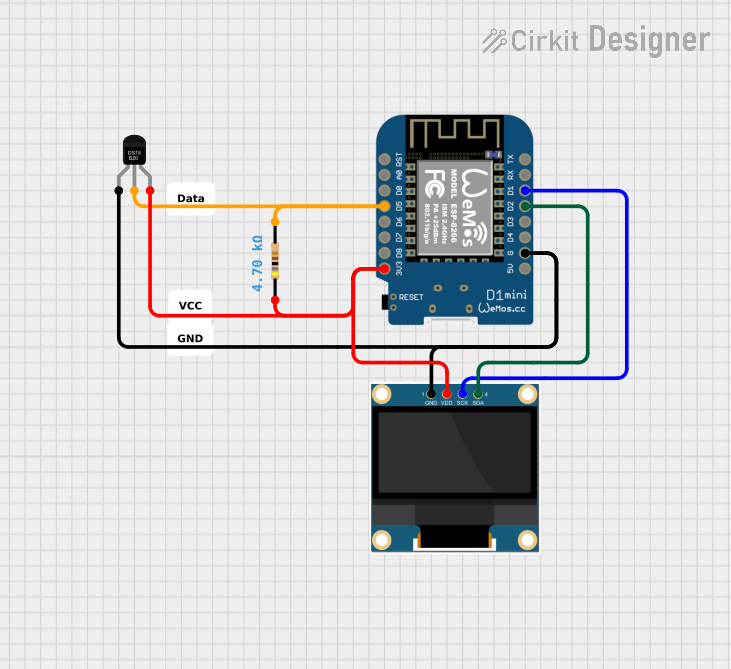
Explore Projects Built with DS18B20 1-Wire Temperature Sensor
Common Applications and Use Cases
- Home automation systems
- Weather stations
- Industrial temperature monitoring
- Aquarium or terrarium temperature control
- Food and beverage temperature tracking
Technical Specifications
Key Technical Details
- Supply Voltage: 3.0V to 5.5V
- Operating Temperature Range: -55°C to +125°C (-67°F to +257°F)
- Accuracy: ±0.5°C (from -10°C to +85°C)
- Resolution: Selectable from 9 to 12 bits
- Unique 64-bit Serial Code: For multi-sensor networks
- Conversion Time: 750ms at 12-bit resolution
Pin Configuration and Descriptions
| Pin Number | Name | Description |
|---|---|---|
| 1 | GND | Ground pin, connected to the system ground |
| 2 | DQ | Data pin, 1-Wire communication line |
| 3 | VDD | Power supply pin, 3.0V to 5.5V |
Usage Instructions
How to Use the Component in a Circuit
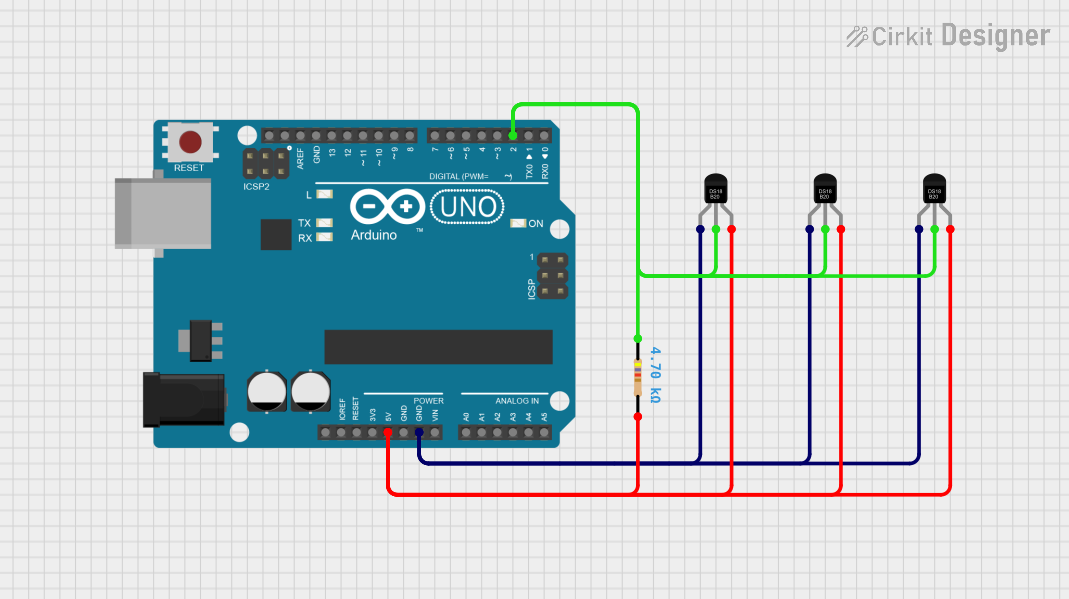
- Power Supply: Connect the VDD pin to a 3.0V to 5.5V power supply.
- Ground: Connect the GND pin to the ground of the power supply.
- Data Line: Connect the DQ pin to a digital input/output pin on your microcontroller.
- Pull-up Resistor: Attach a 4.7kΩ pull-up resistor between the DQ pin and the VDD pin to ensure proper communication on the 1-Wire bus.
Important Considerations and Best Practices
- Ensure that the power supply is stable and within the specified voltage range.
- Use a pull-up resistor on the DQ line to prevent data corruption.
- Avoid long wire runs to minimize resistance and potential communication errors.
- For multiple sensors on the same 1-Wire bus, ensure each sensor has a unique serial code.
Example Code for Arduino UNO
#include <OneWire.h>
#include <DallasTemperature.h>

// Data wire is connected to Arduino digital pin 2
#define ONE_WIRE_BUS 2

// Setup a oneWire instance to communicate with any OneWire device
OneWire oneWire(ONE_WIRE_BUS);

// Pass oneWire reference to DallasTemperature library
DallasTemperature sensors(&oneWire);

void setup() {
  Serial.begin(9600);
  sensors.begin(); // Start up the library
}

void loop() {
  sensors.requestTemperatures(); // Send command to get temperatures
  float temperatureC = sensors.getTempCByIndex(0);
  Serial.print("Temperature is: ");
  Serial.print(temperatureC);
  Serial.println(" °C");
  delay(1000); // Wait 1 second before next reading
}
Troubleshooting and FAQs
Common Issues
- Sensor not responding: Ensure the pull-up resistor is correctly placed and the power supply is within the specified range.
- Inaccurate readings: Check for proper grounding and stable power supply. Ensure the sensor is not placed near heat sources that could affect its readings.
- Multiple sensors interference: Verify that each sensor has a unique serial code and that the 1-Wire bus is properly configured.
Solutions and Tips for Troubleshooting
- Double-check wiring, especially the pull-up resistor on the DQ pin.
- Use the
search()function from the OneWire library to confirm the presence and addresses of all DS18B20 sensors on the bus. - Ensure that the Arduino library versions for OneWire and DallasTemperature are up to date.
FAQs
Q: Can I use the DS18B20 sensor without an external power supply?
A: Yes, the DS18B20 can operate in "parasite power" mode, where it draws power from the data line. This requires only two wires: the DQ and GND pins.
Q: How many DS18B20 sensors can I connect to a single microcontroller pin?
A: You can connect many sensors to a single pin, but the exact number depends on the quality of your wiring and the pull-up resistor. It's important to ensure that each sensor has a unique address.
Q: How do I set the resolution of the DS18B20 sensor?
A: The resolution can be set using the setResolution() function provided by the DallasTemperature library. The resolution can be set from 9 to 12 bits, with higher resolution providing greater accuracy but slower response times.